MDU (Multi-dwelling Units)– Defined as one ONT/ONU/AP serving to multiple locations
The general idea of your MDU build is to look at the network device at the MDU as a core network element. We can’t simply turn it off because someone doesn’t pay their bill or cancels services. We have to account for all subscribers serviced from the MDU before taking action on it.
It is imperative that steps 1, 2, and 3 come prior to the tenant subscriber service workflow. Therefore, an MDU Account must be established first. Otherwise, the incorrect workflows could be launched or completed in it's place. The ONT and circuit need to be attached to the MDU.
MDU Procedure Order of Operation Check List:
1- Establish MDU Shape
2- Add MDU Account with $ MDU – DATA service as main placeholder for the ONT/Circuit
3- Launch MDU main account workflow to establish network device handoff for the building. All Subscribers’ services will be built through this network device.
4- Tenant Subscriber – Launch service workflow to hook up port 1 and add CPE
5- Tenant Subscriber – Launch service workflow to hook up port 2 and add CPE
6- Repeat Port 3
7- Repeat Port 4
How to Establish an MDU Shape
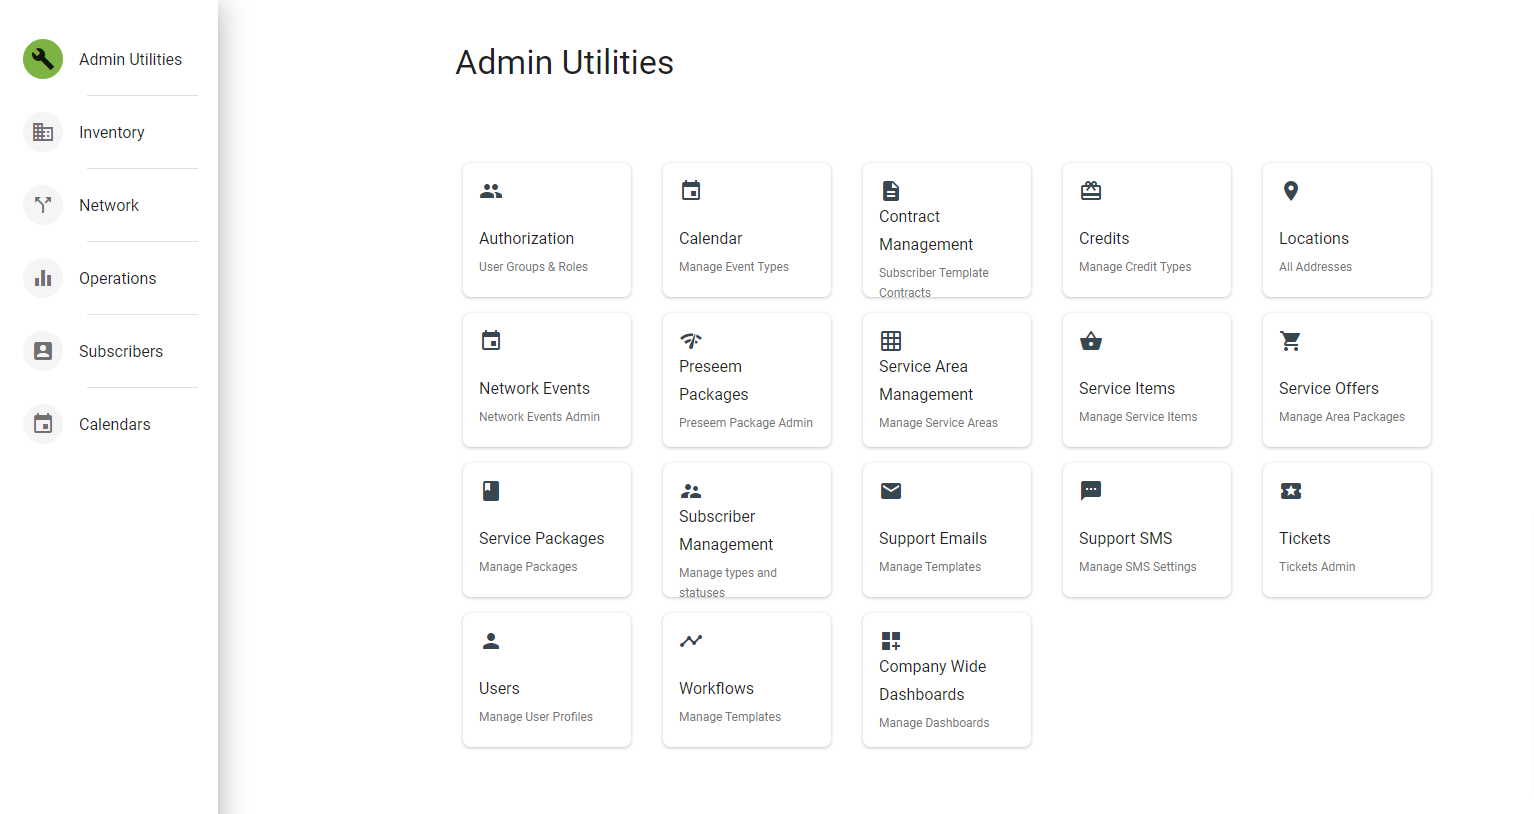
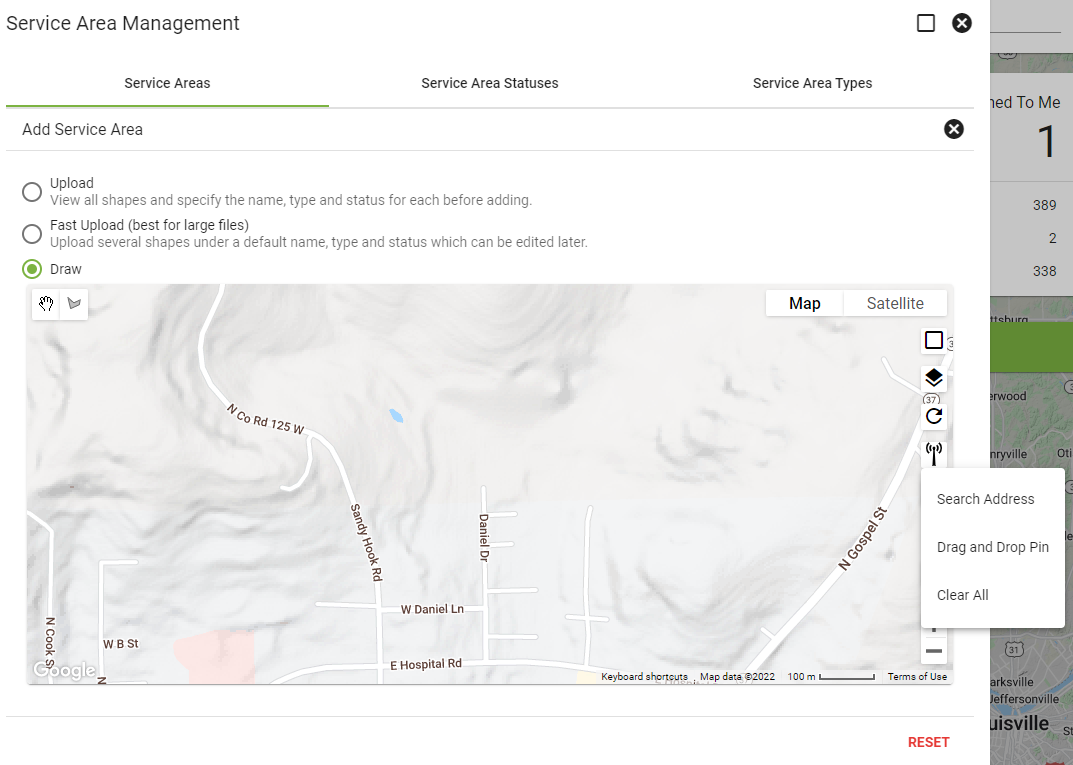
1. Select Admin Utilities under the menu icon in the upper lefthand corner. Select Service Area Management.
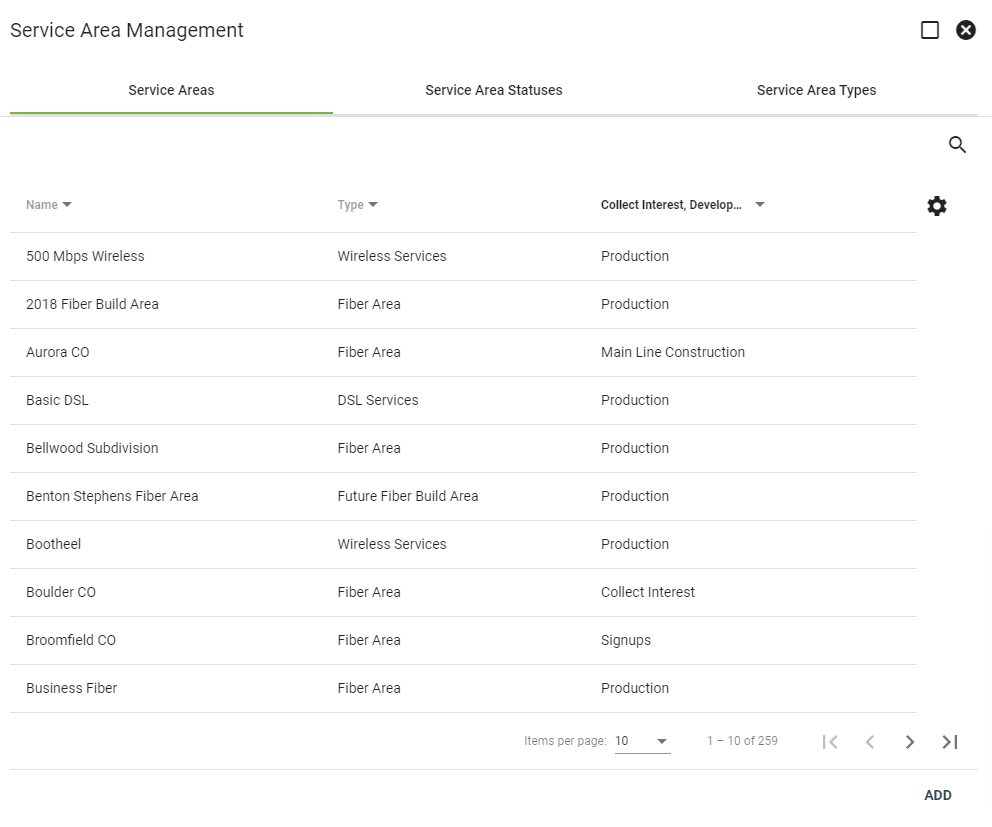
2. Under Service Area Management select ADD.
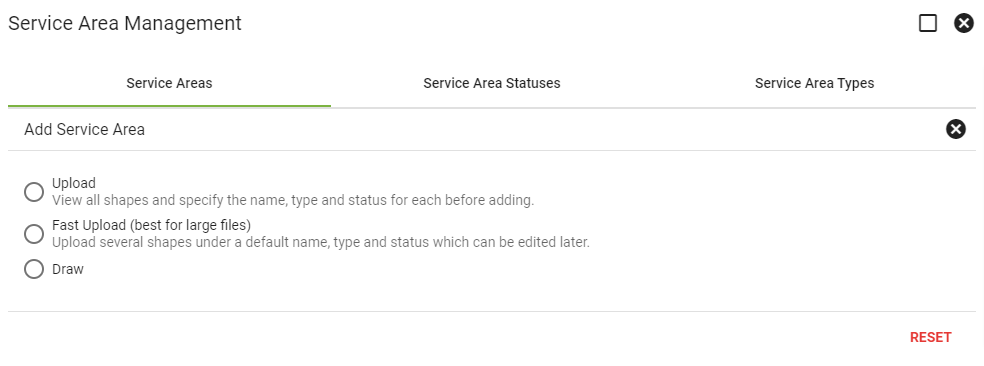
3. Select Draw.
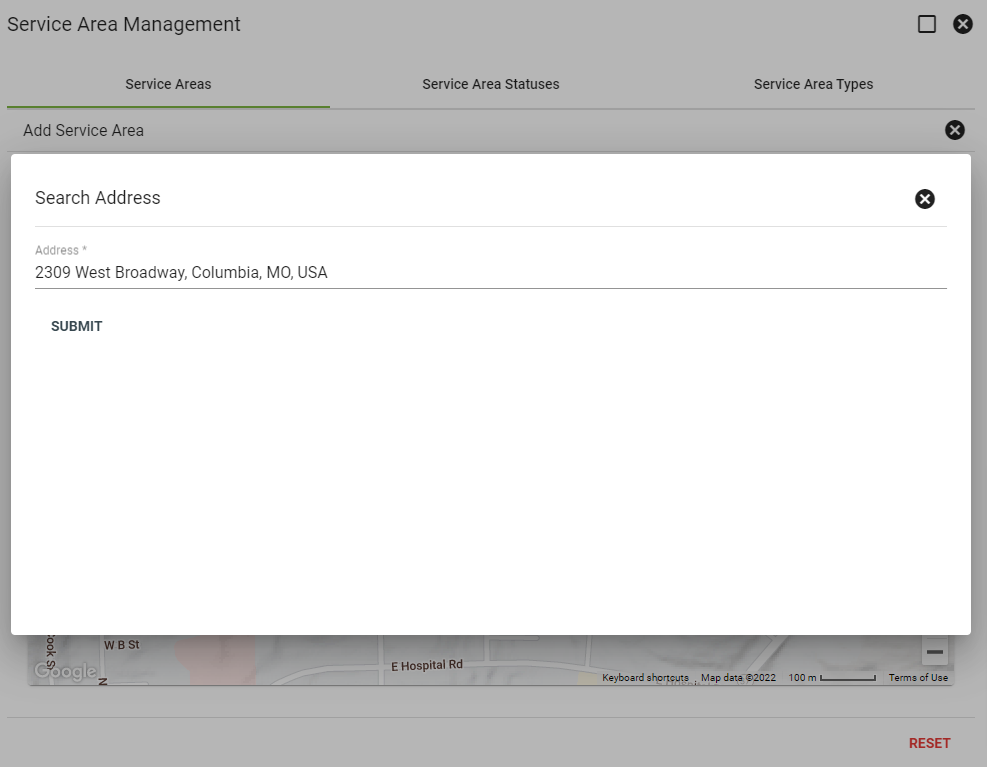
4. Select the Line of Sight Tool. Select Search Address.
5. Type in the Address and click SUBMIT.
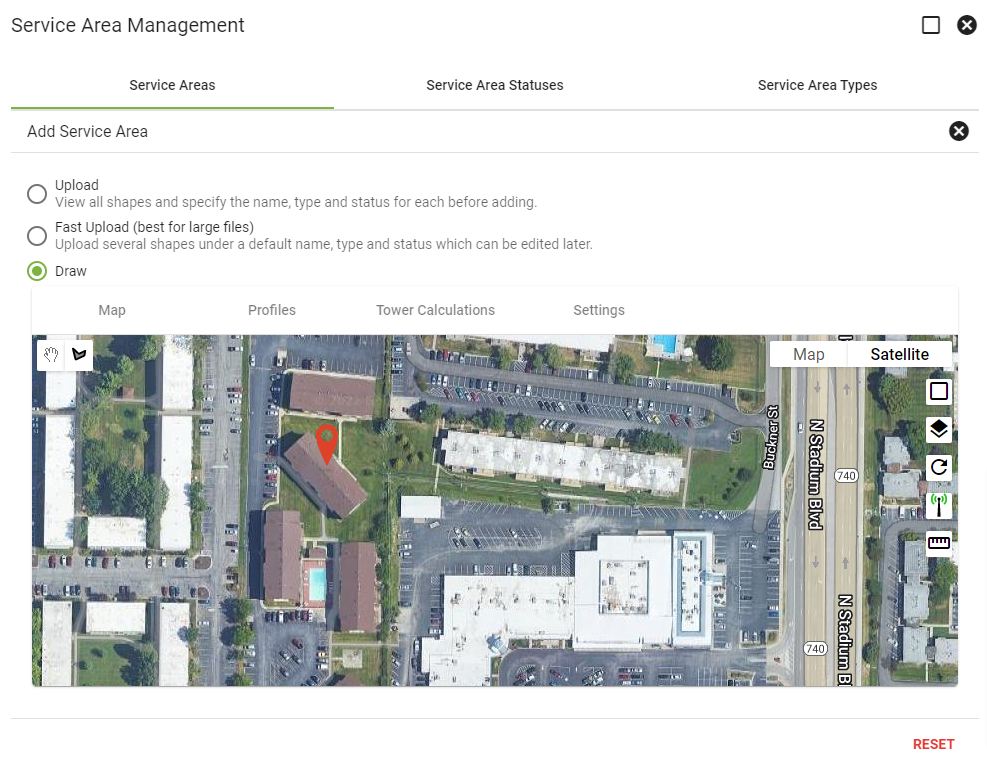
6. Select Satellite view and zoom in on the pin. Select the Draw a Shape icon. Click all the points around the shape and end at the first point.
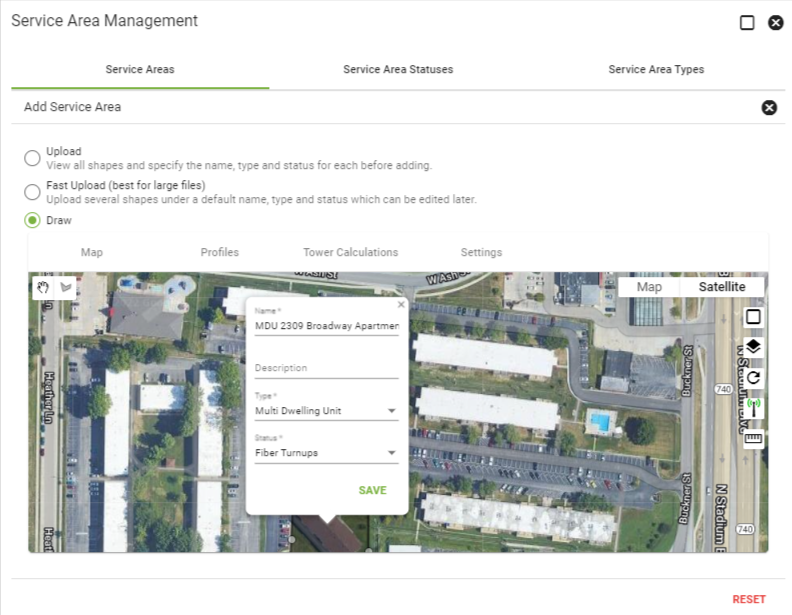
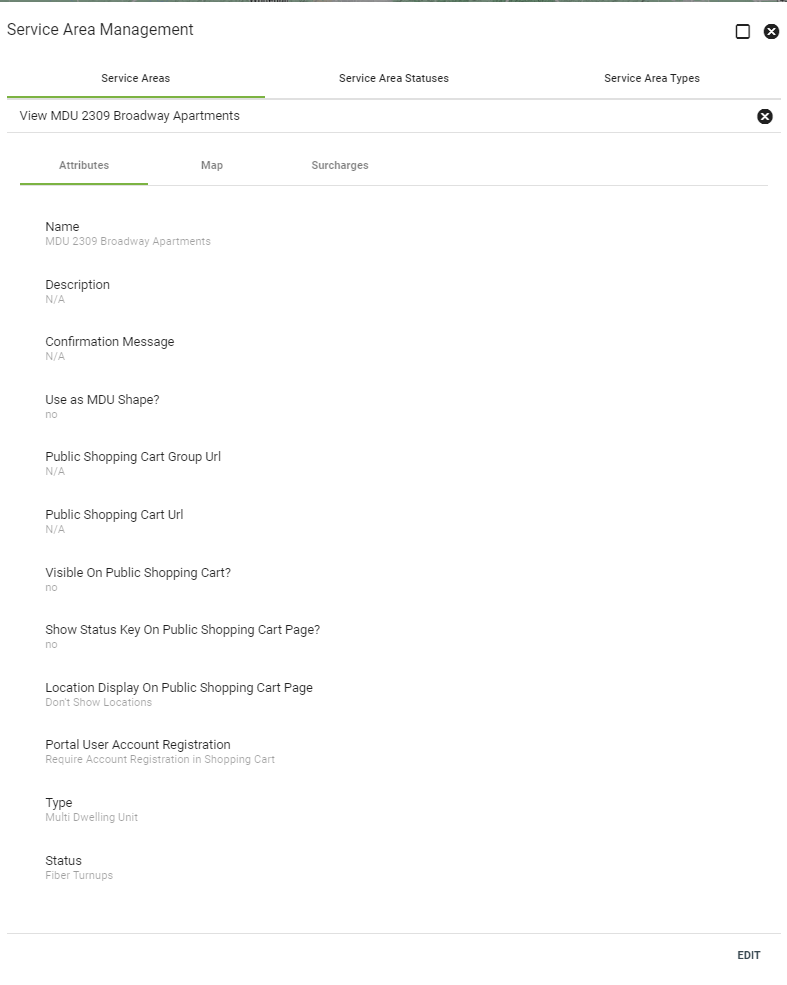
7. Name the shape, “MDU- addresses, business name.” Be sure to select Multi Dwelling Unit in the Type drop-down menu. Select a status from the Status drop-down menu and select SAVE.
8. You will be brought to the Service Area Management menu.
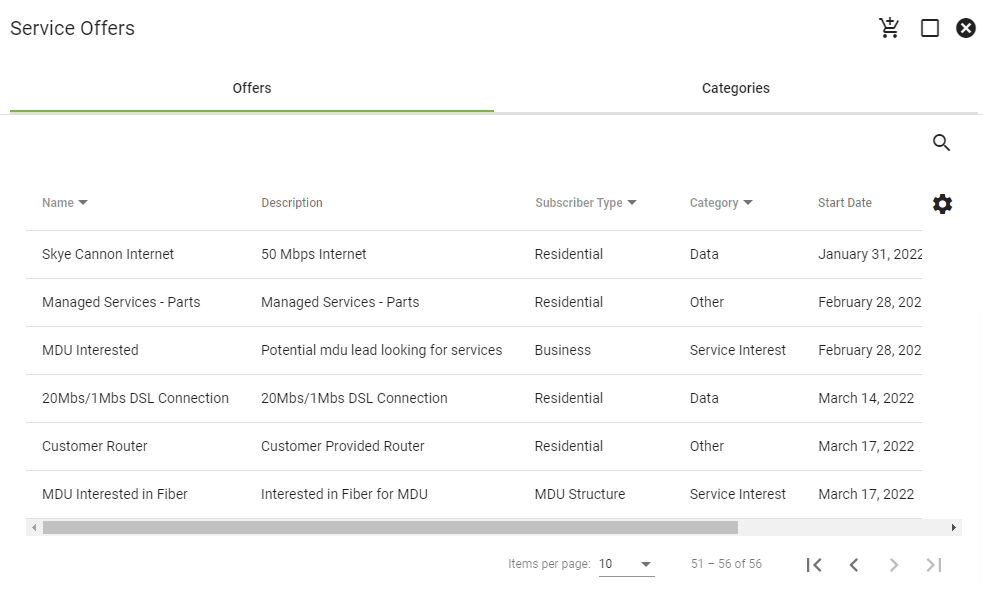
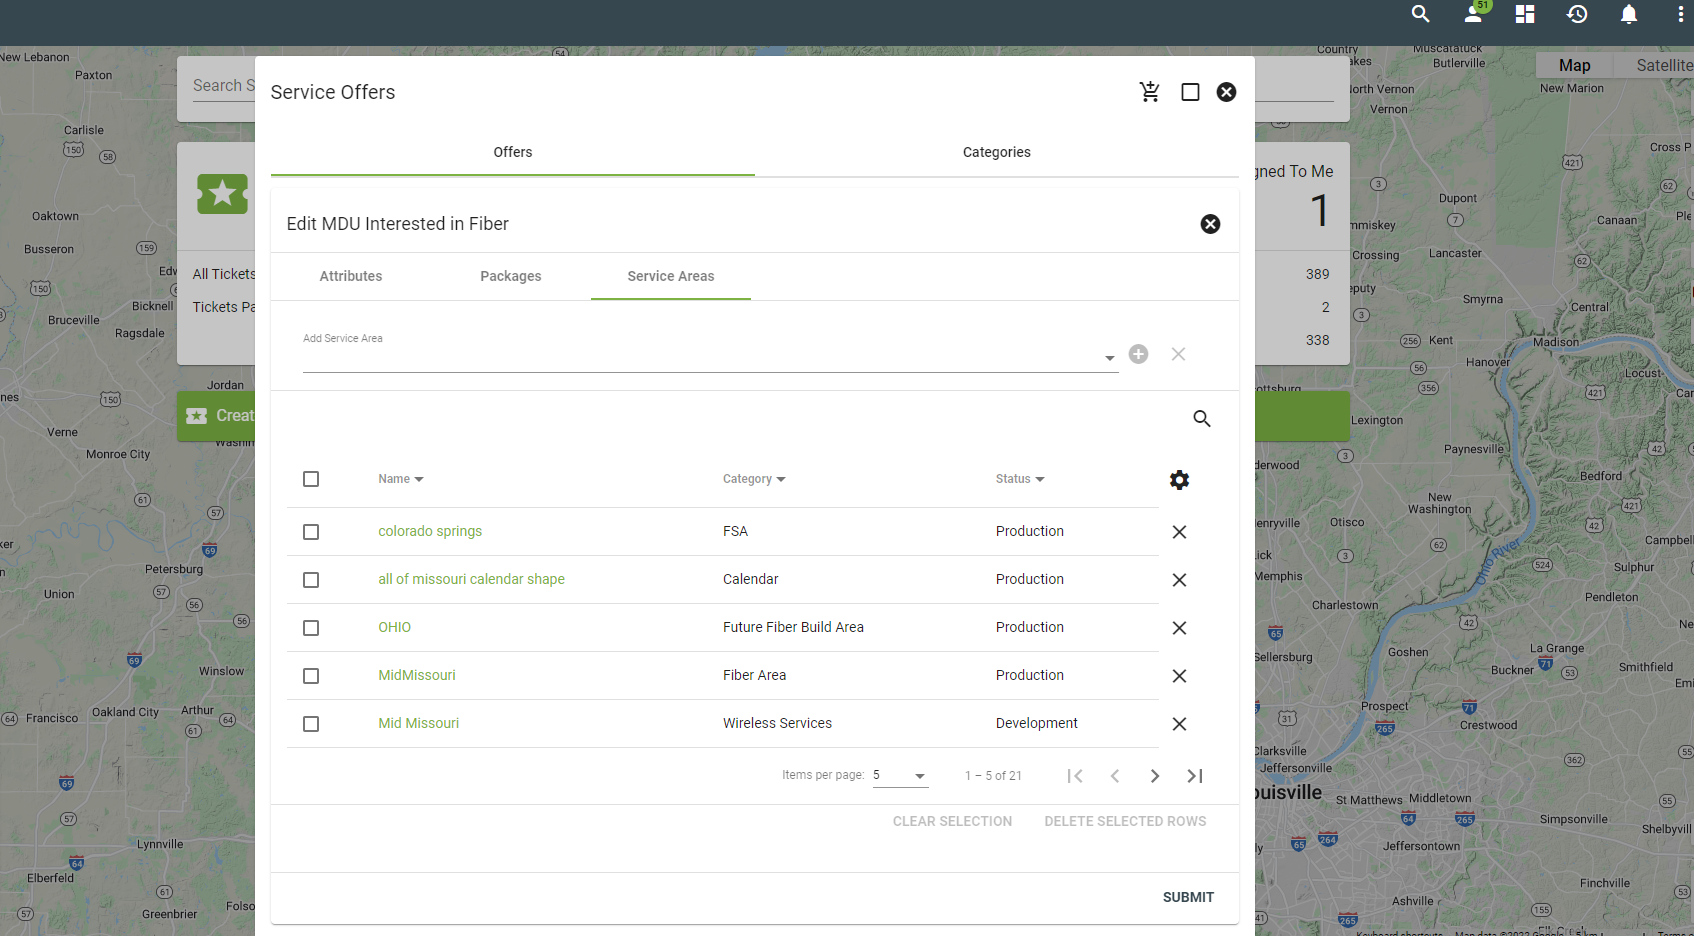
9. Go back to the Admin Utilities. Select Service Offers.
10. Select the MDU service offer you are working with. If you do not see the offer you are looking for, be sure to click through the pages with the arrows on the bottom right.
11. Select Service Areas and then select EDIT.
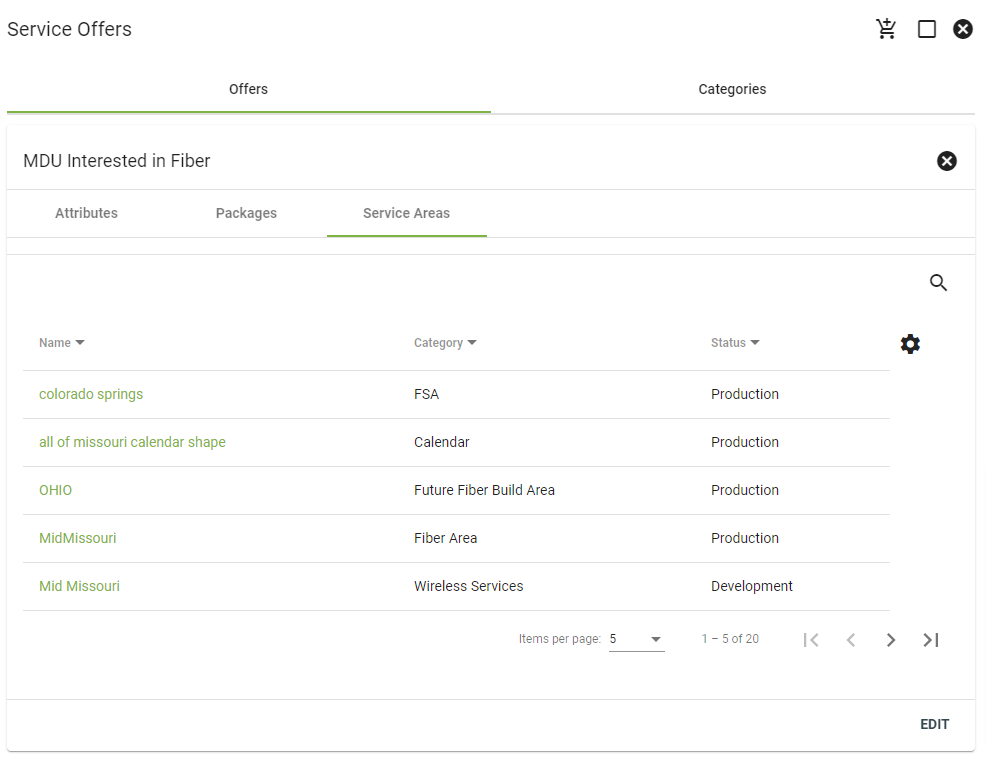
12. Select Service Areas.
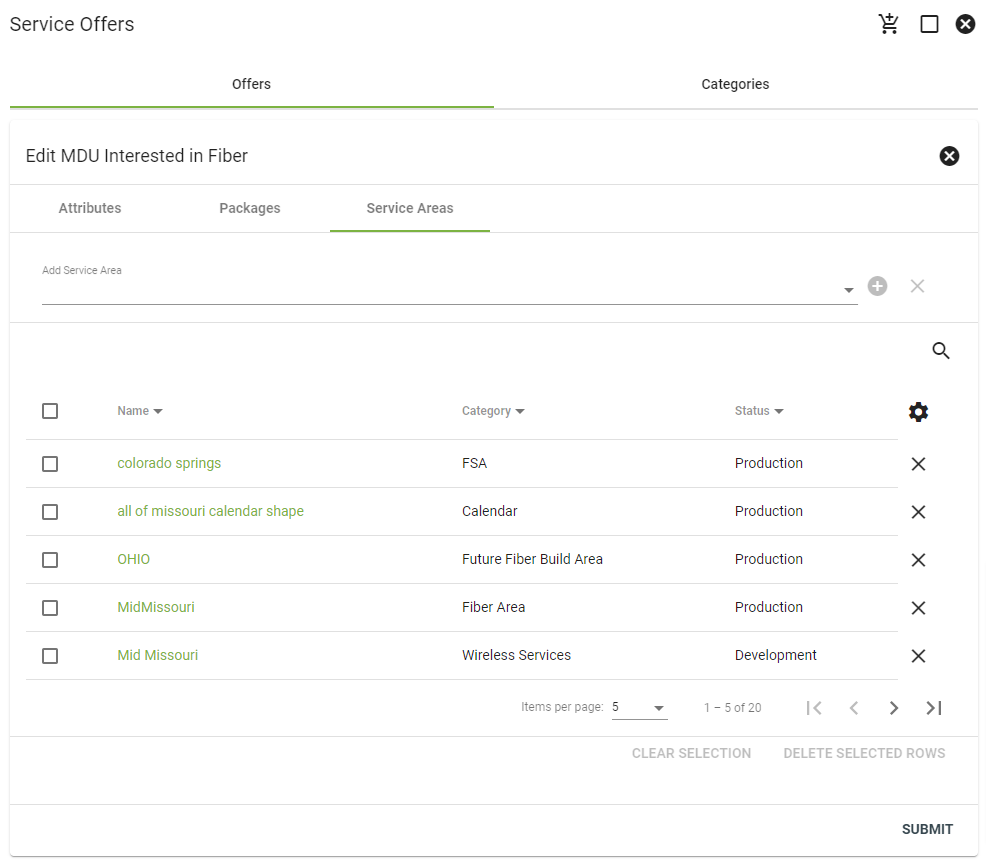
13. Click the drop-down menu and scroll until you see the MDU you created. Check the box next to your selection.
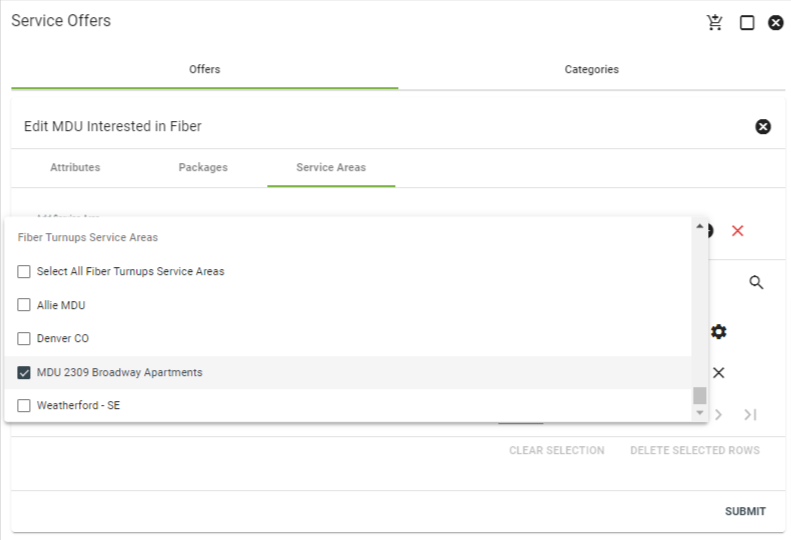
14. Click the Add icon and SUBMIT.
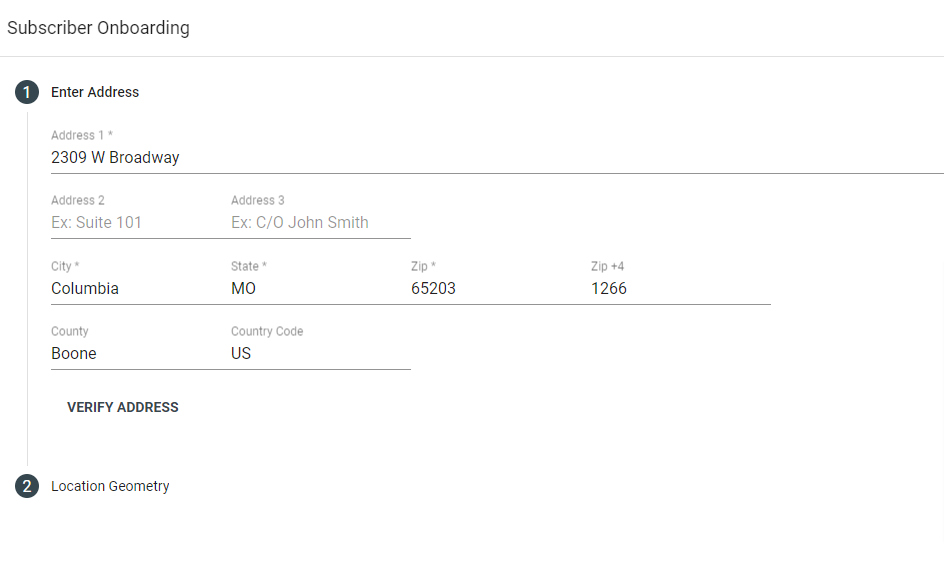
15. Go back to the Dashboard, and from there select Add a Subscriber.
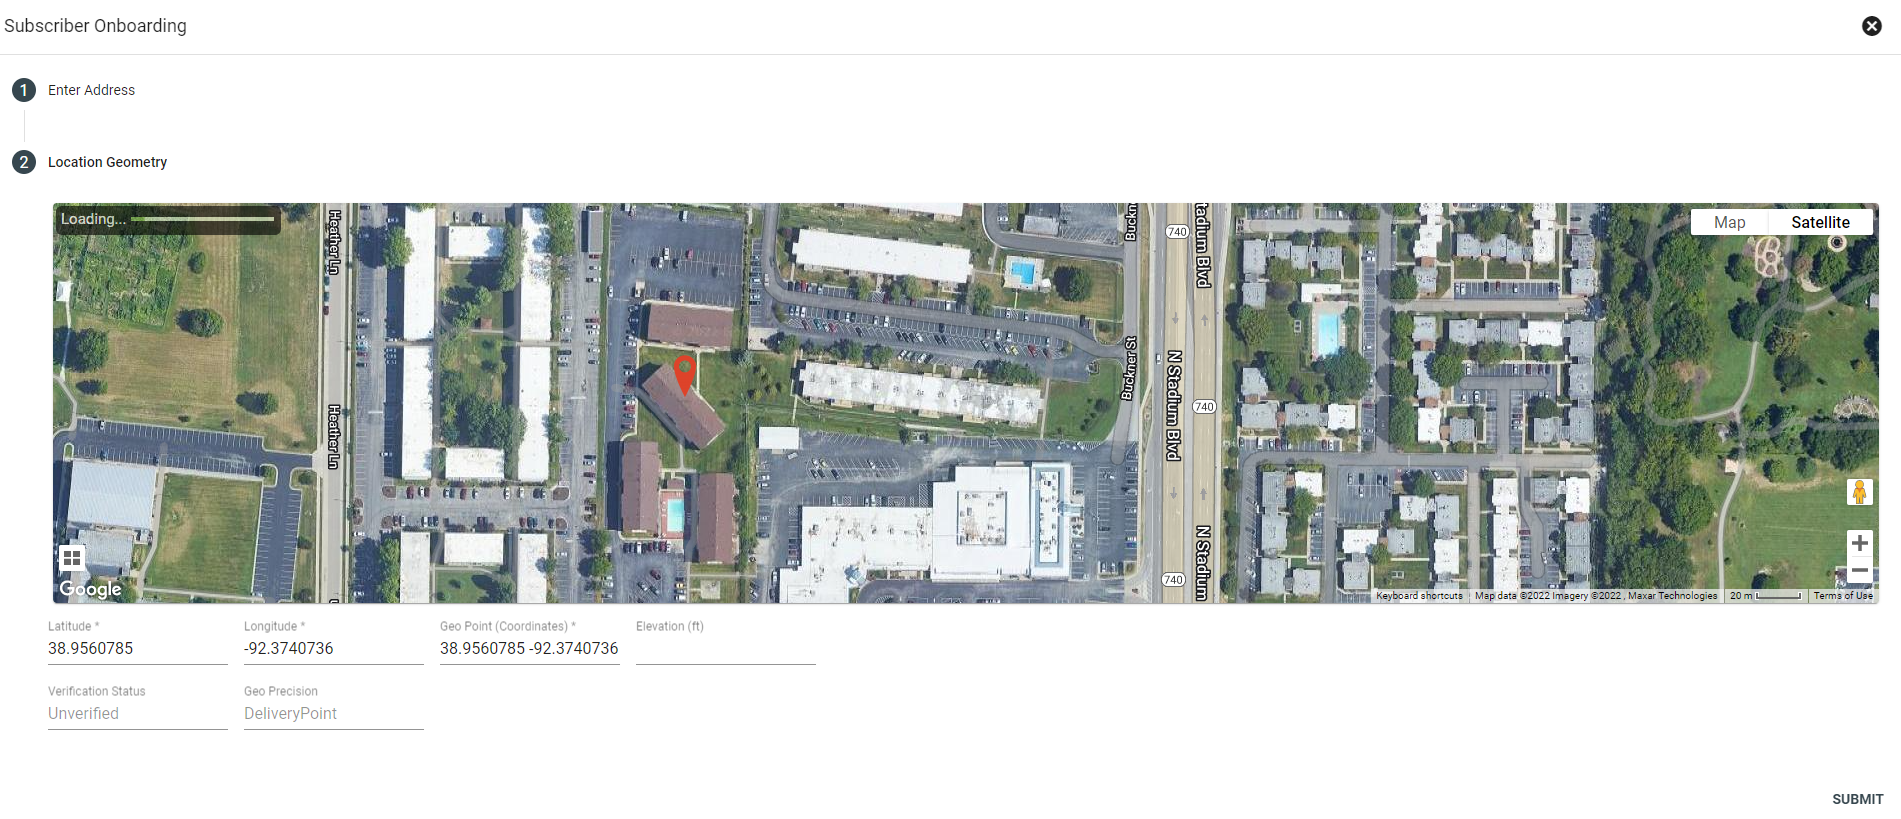
16. Type in the address of the MDU, then click Location Geometry.
17. Change the map to Satellite view.
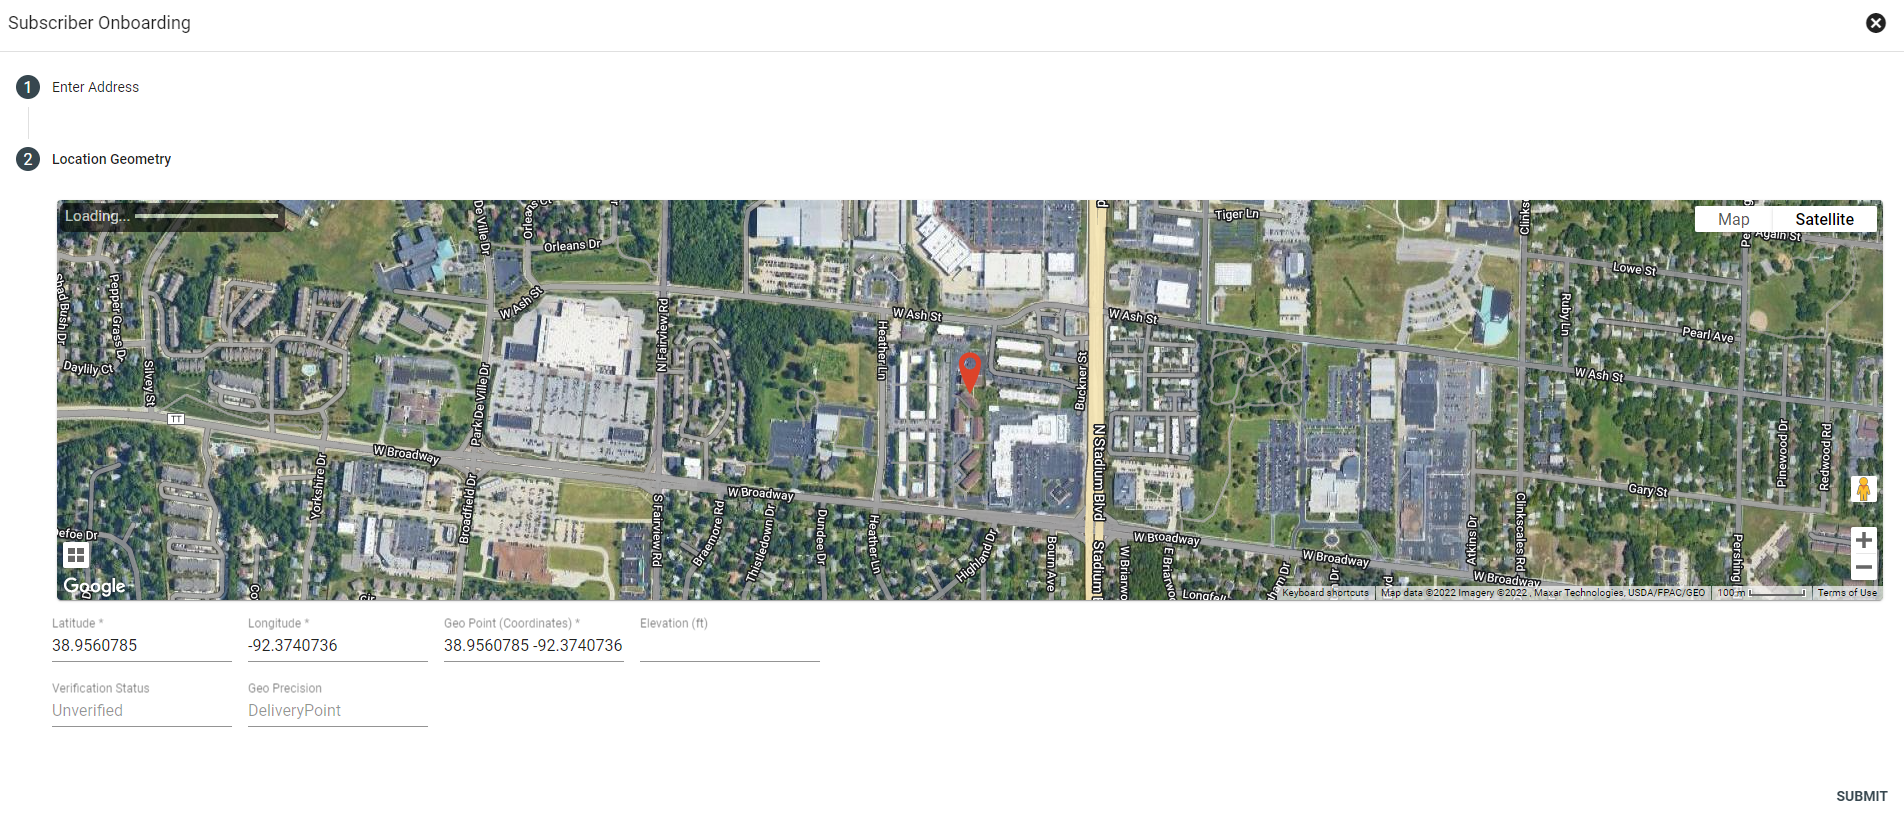
18. Zoom in on the MDU. If needed, click and hold the pin to drag it to the rooftop point. Then click SUBMIT.
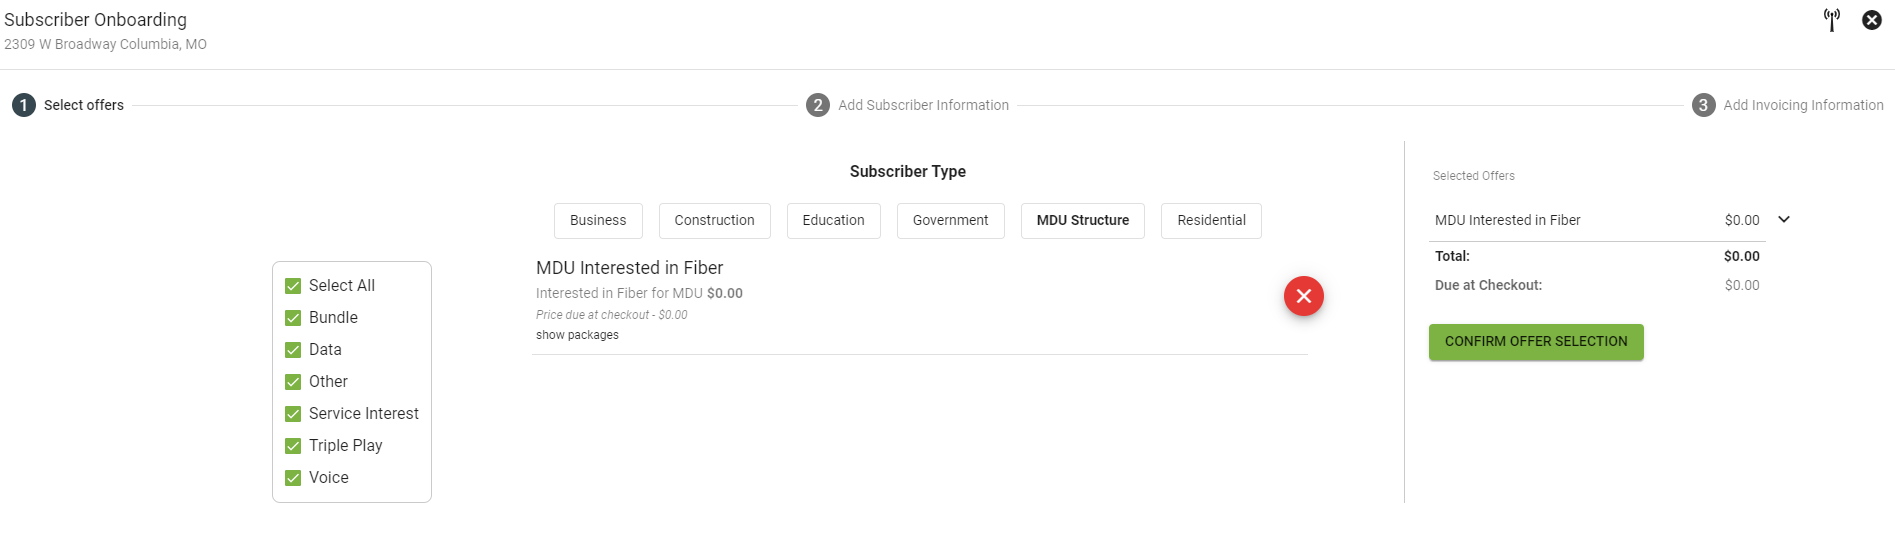
19. Select MDU Structure and the Add icon.
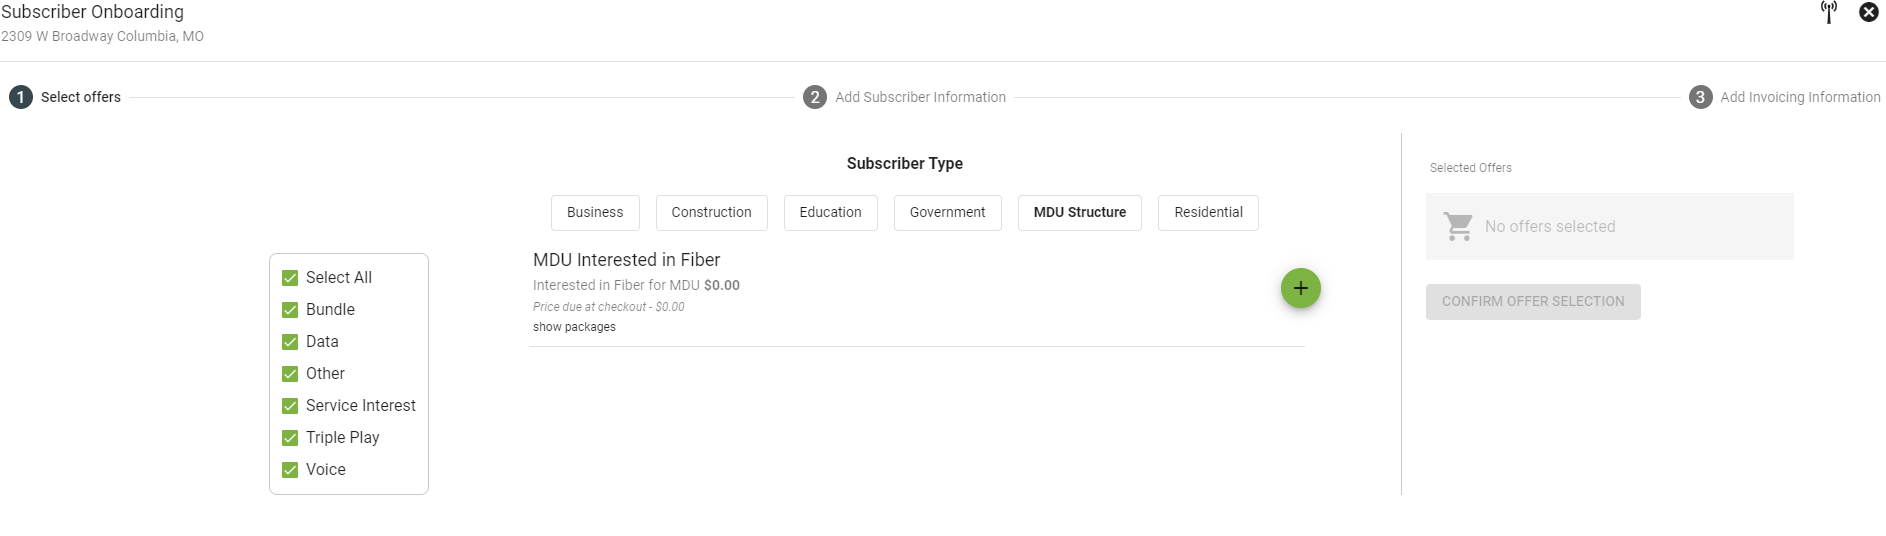
20. Select Confirm Offer Selection.
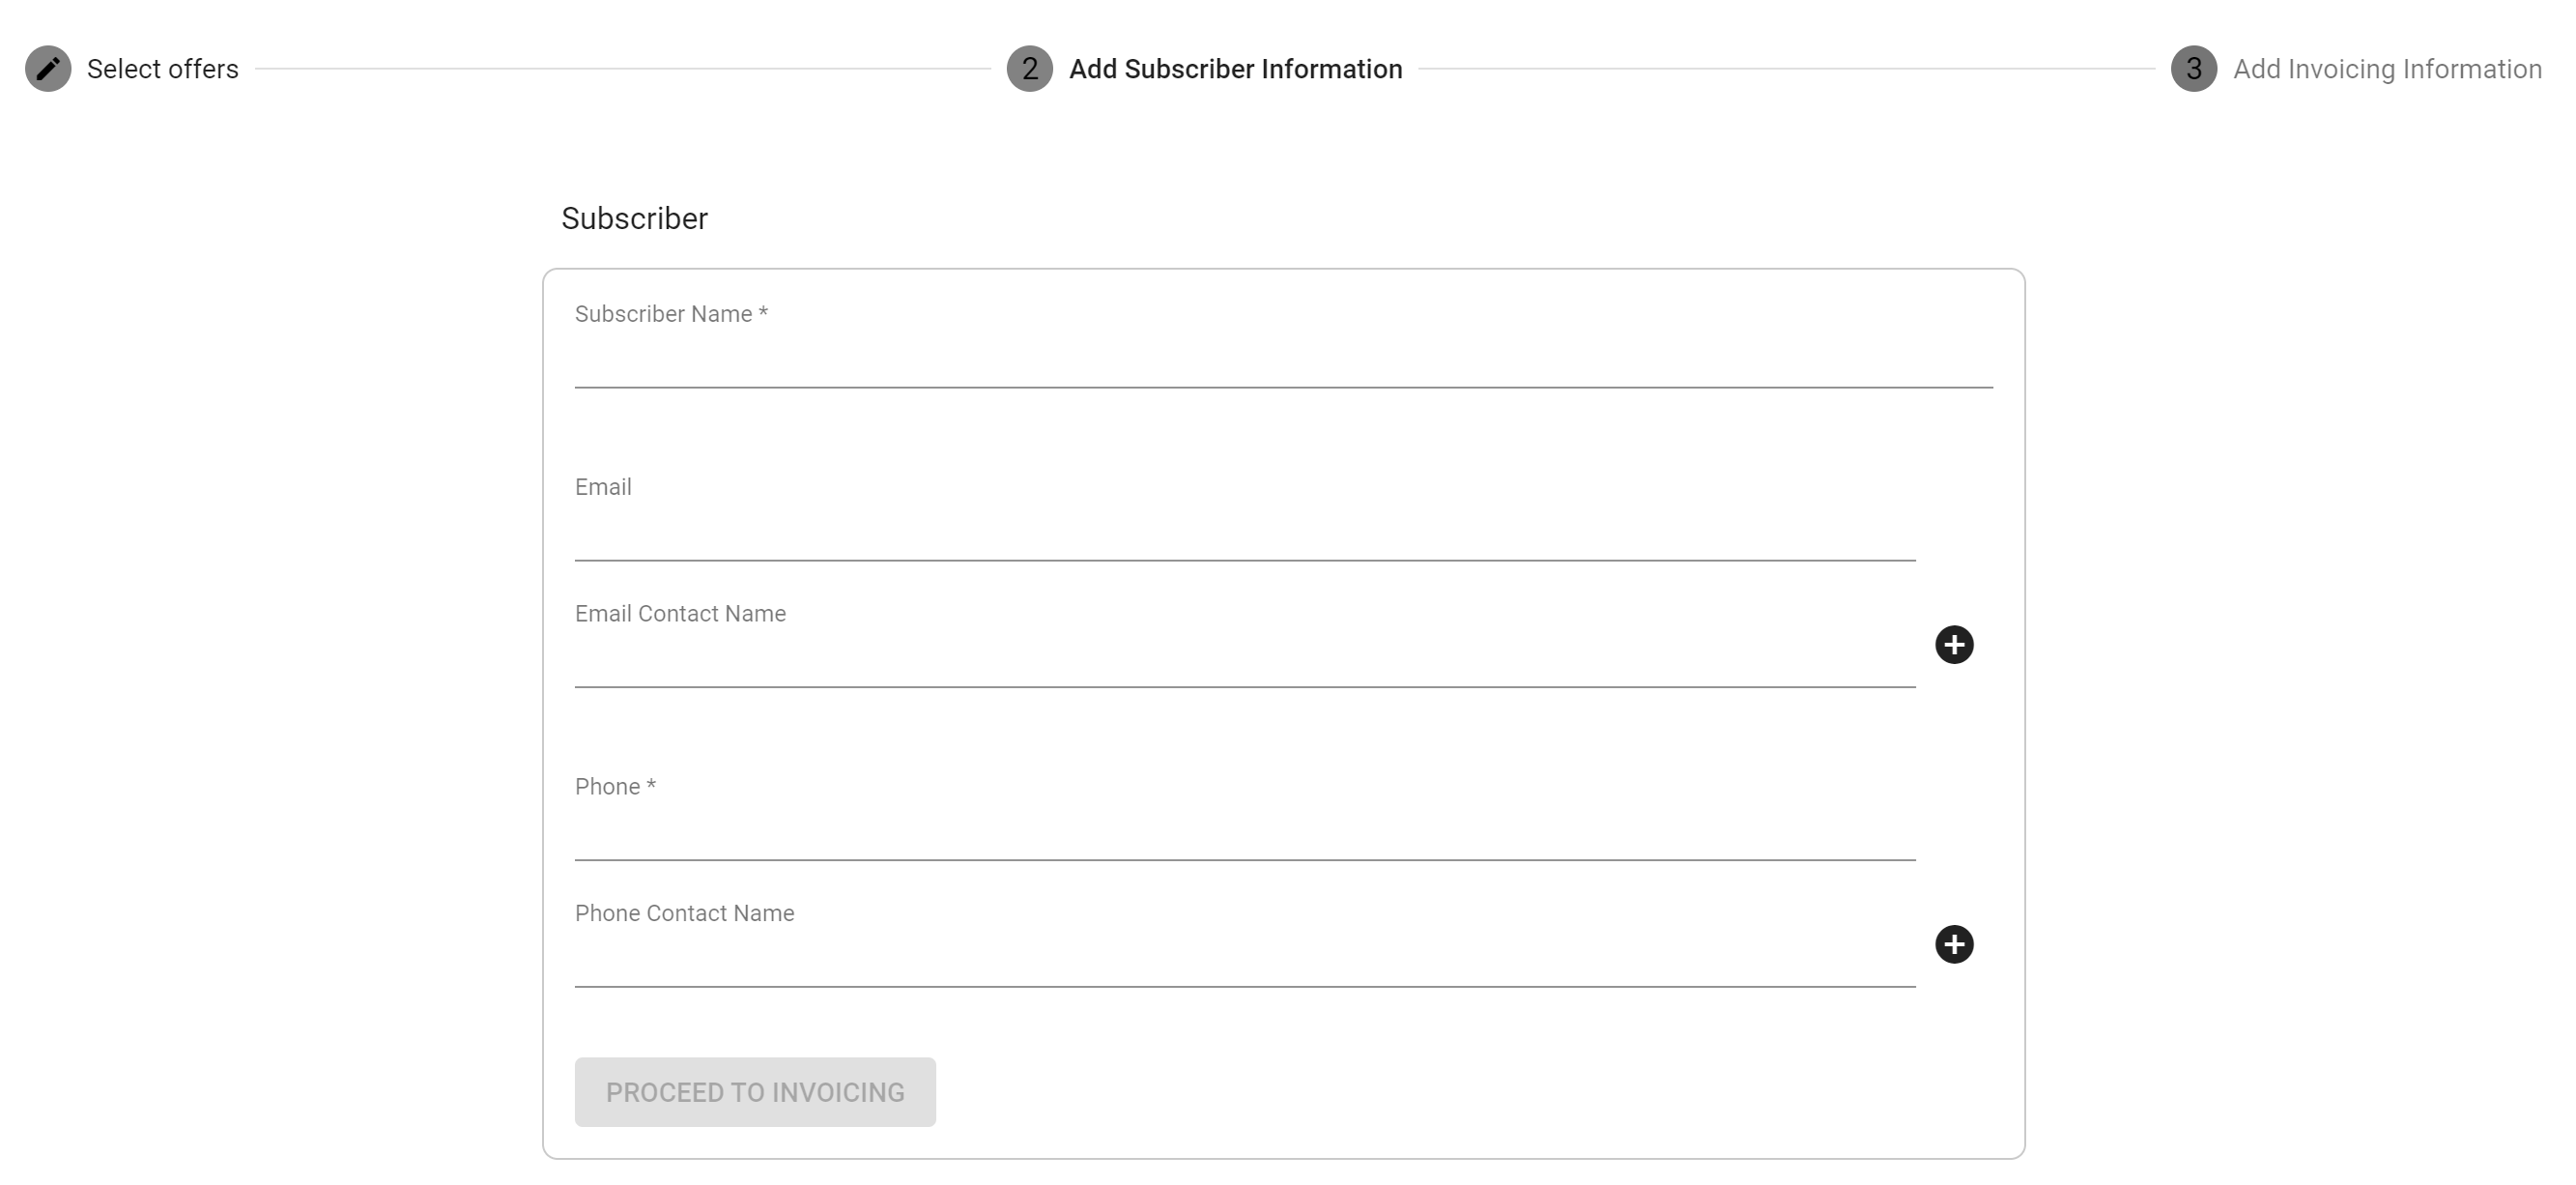
21. Add the MDU Shape Name and contact information. Then select Proceed to Invoicing. Be sure to select Emailed Invoicing. Lastly, select CHECK OUT. From there your new MDU account set up and searchable in the system.