Calendars
The Calendars page is where users can view the company wide calendar set by administrators. Creating schedules and time slots allows your company to easily schedule install times, construction, meetings, and more. Users can view their schedule and filter the calendar by month, week, or day. Users can view the track your trucks map and view drive times. By clicking the floating action button in the lower right-hand corner, you can schedule a new calendar event.
- View Company Calendar
- Get Directions/Drive Time
- Filter Types
- Schedule Events
- Edit Events
- Remove Time Slot
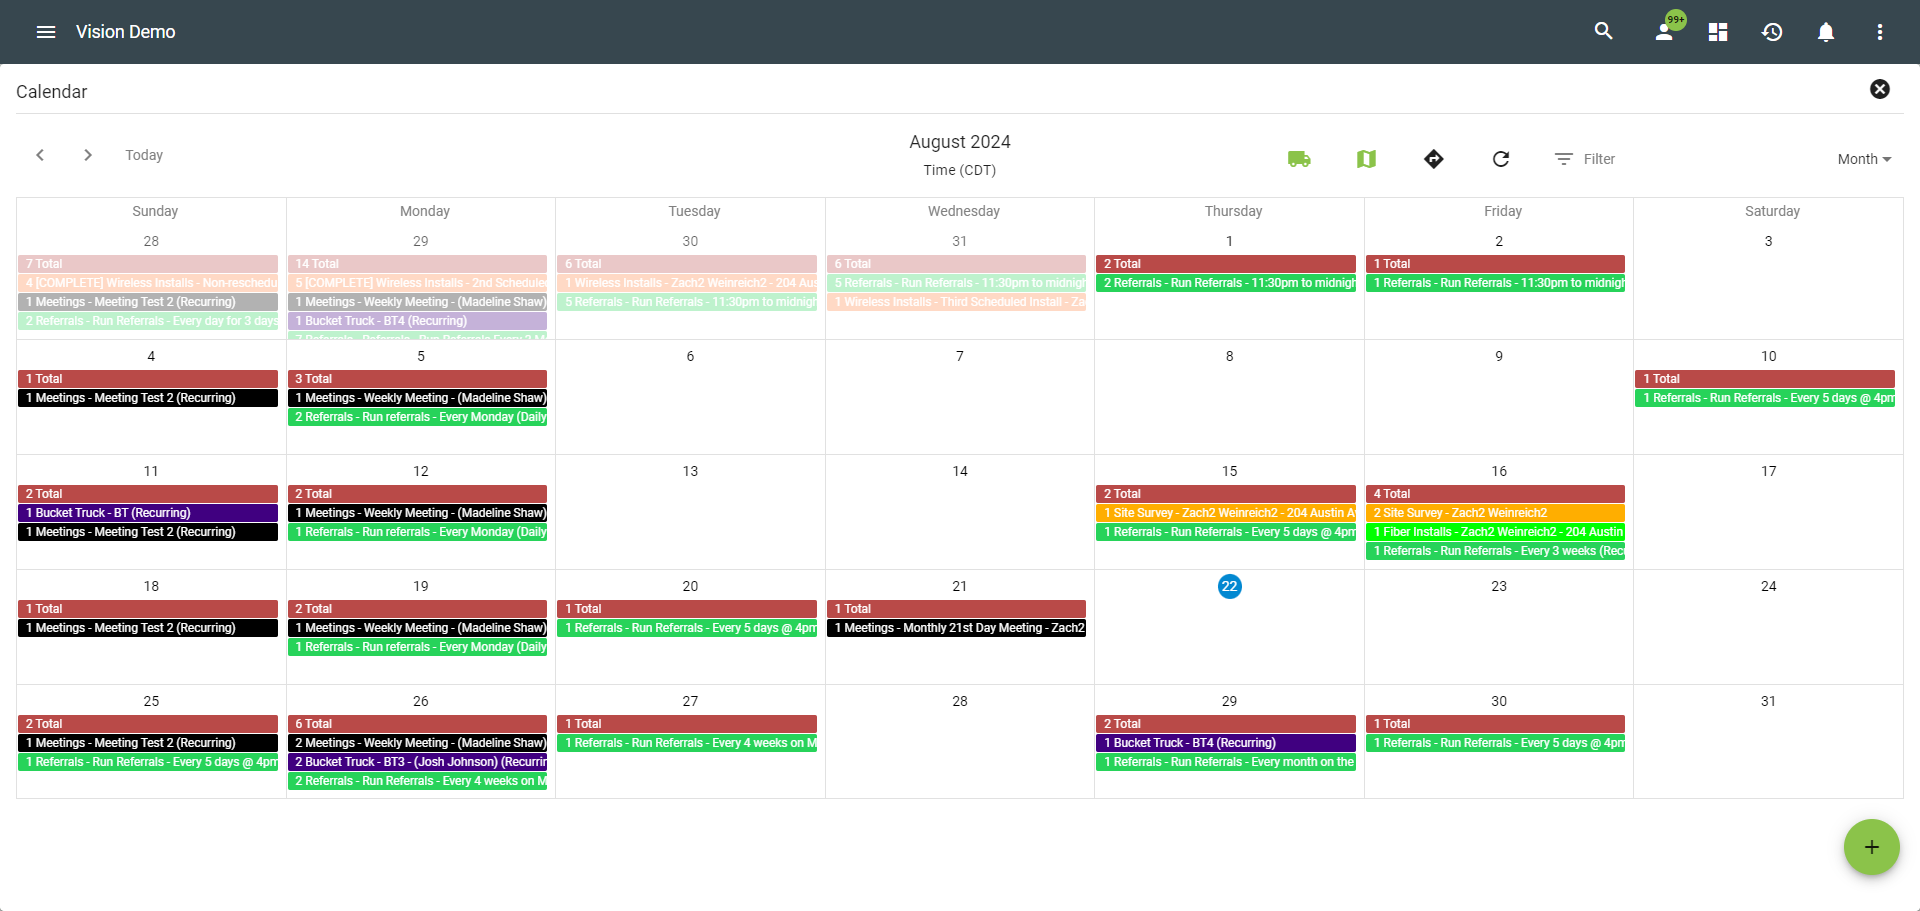
View Company Calendar
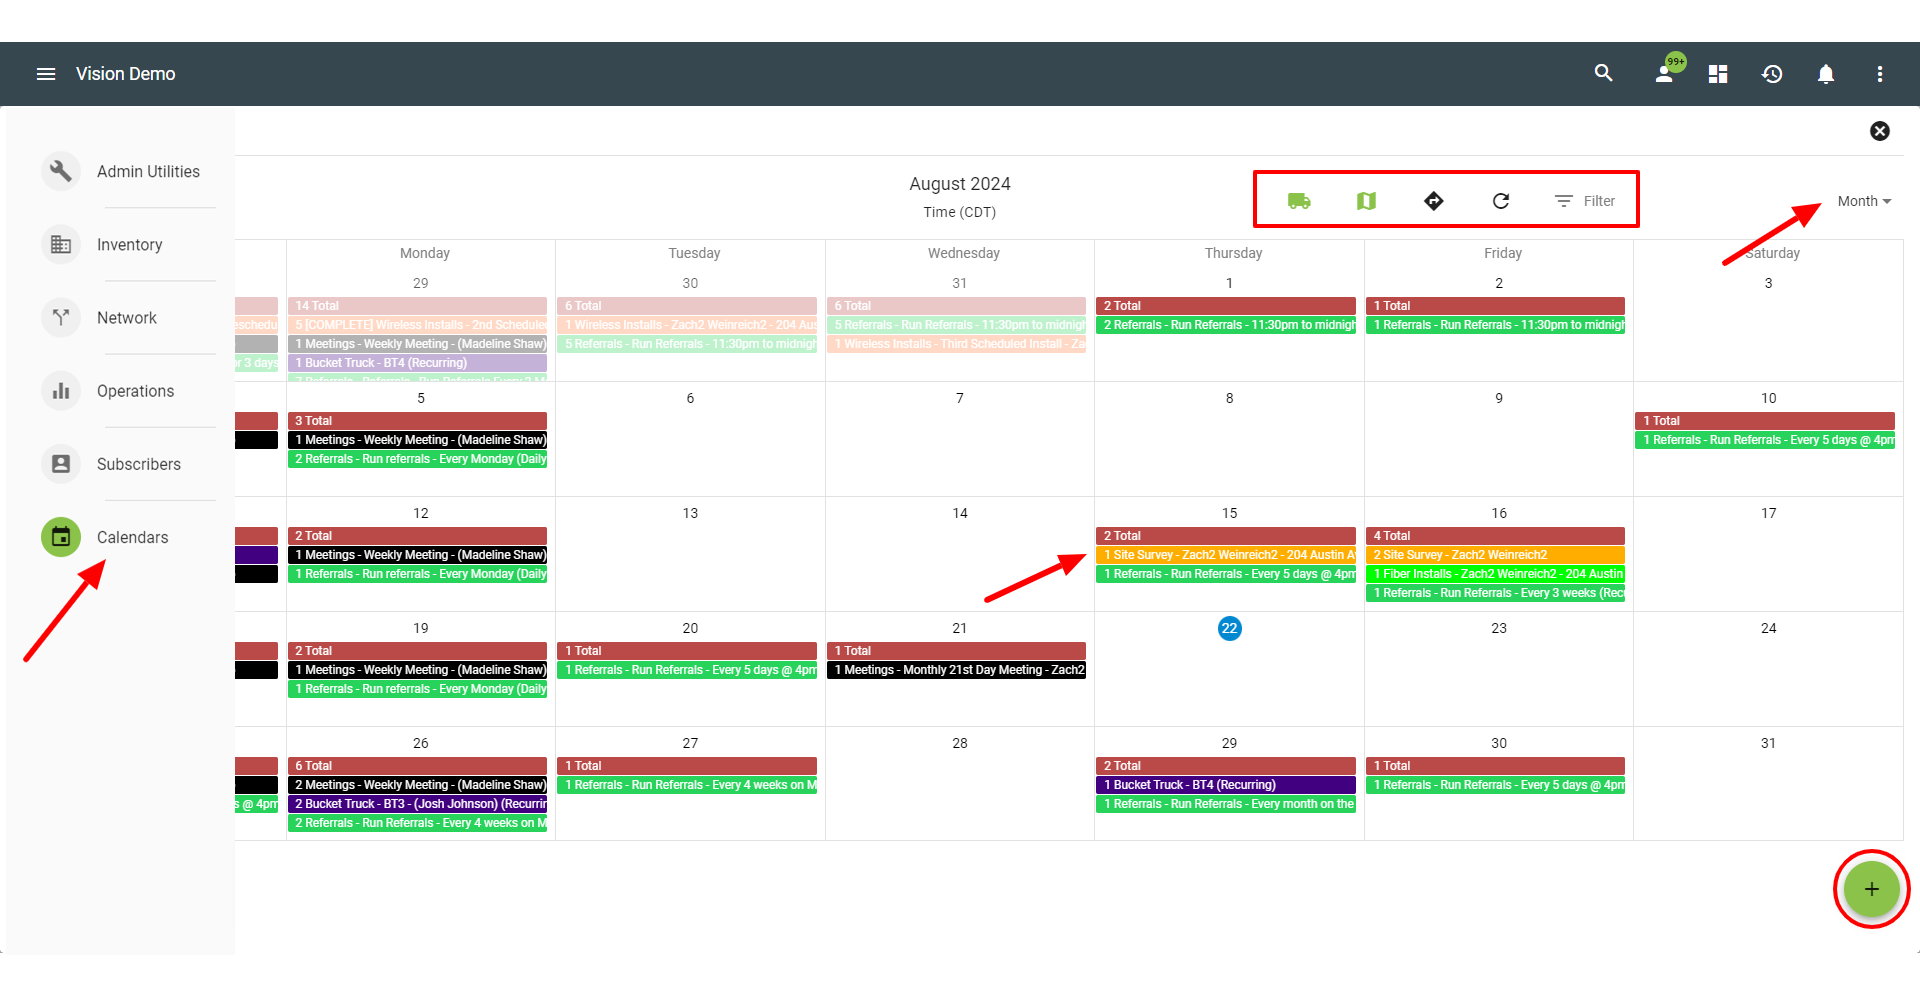
Under the menu click on 
In the upper right of the Calendar you'll see a menu where you can use the Track Your Trucks map 
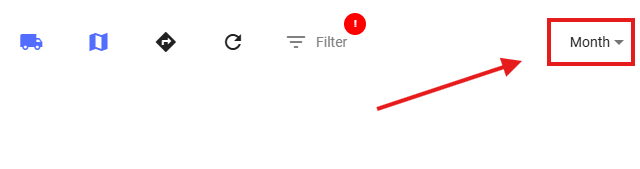
![]() , view drive time, refresh events, filter event type, and change the calendar view (month, week, etc.). The calendar will automatically default to the user’s current time of day.
, view drive time, refresh events, filter event type, and change the calendar view (month, week, etc.). The calendar will automatically default to the user’s current time of day.
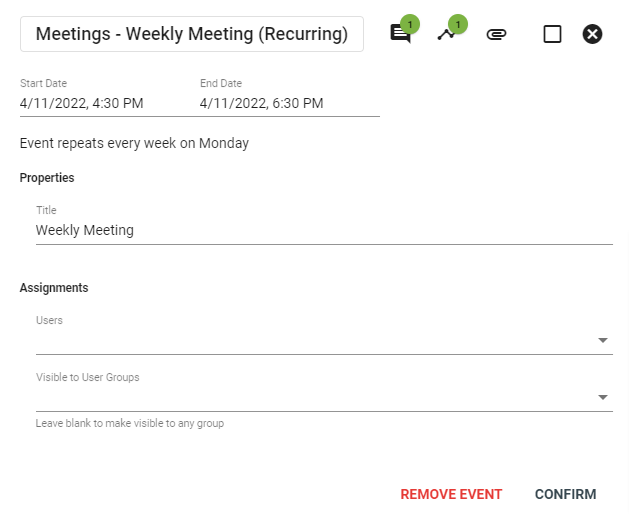
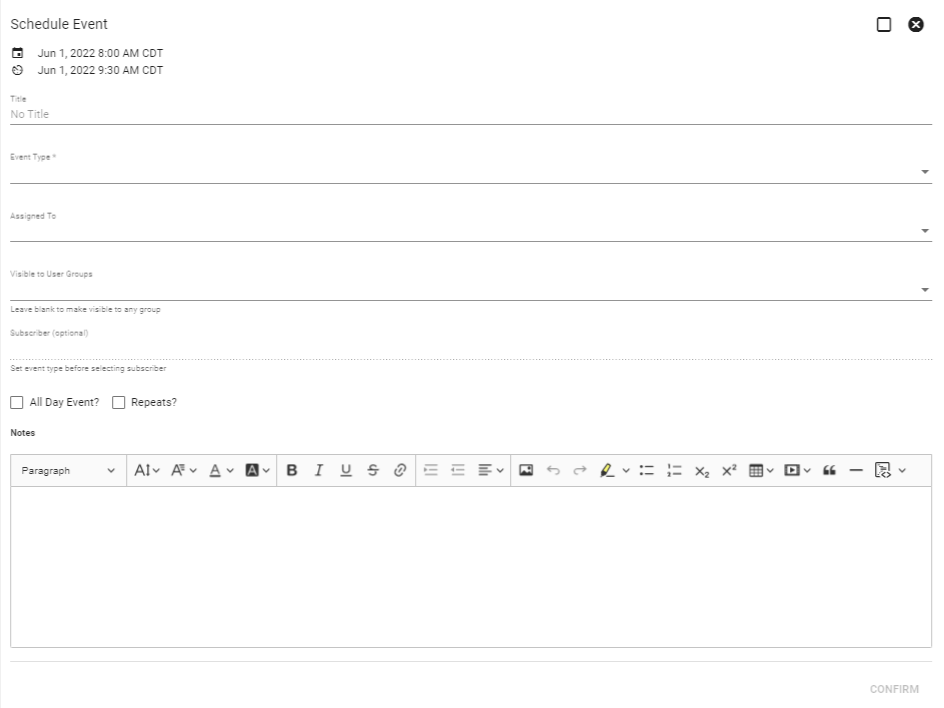
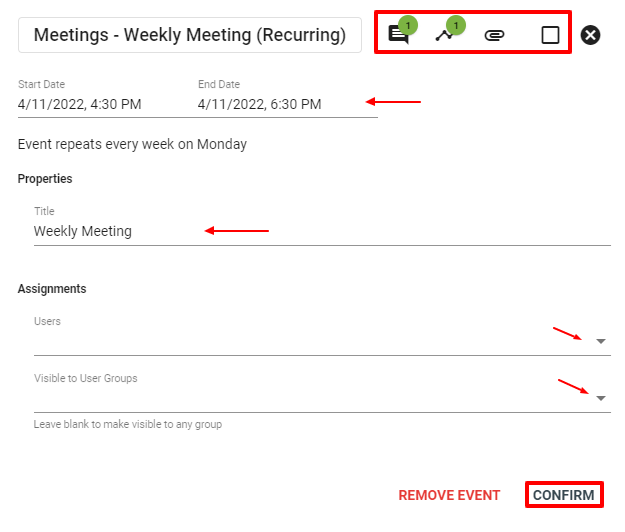
Click into the individual events on the calendar to view more details, such as start and end times, meeting or event title, assigned users and groups. From this view you can also view and add notes, view dynamic workflows associated, and view and add attachments. A dispatch event will also display the subscriber, location, and driving options. If you add or make changes, be sure to click CONFIRM. You can also select REMOVE EVENT.

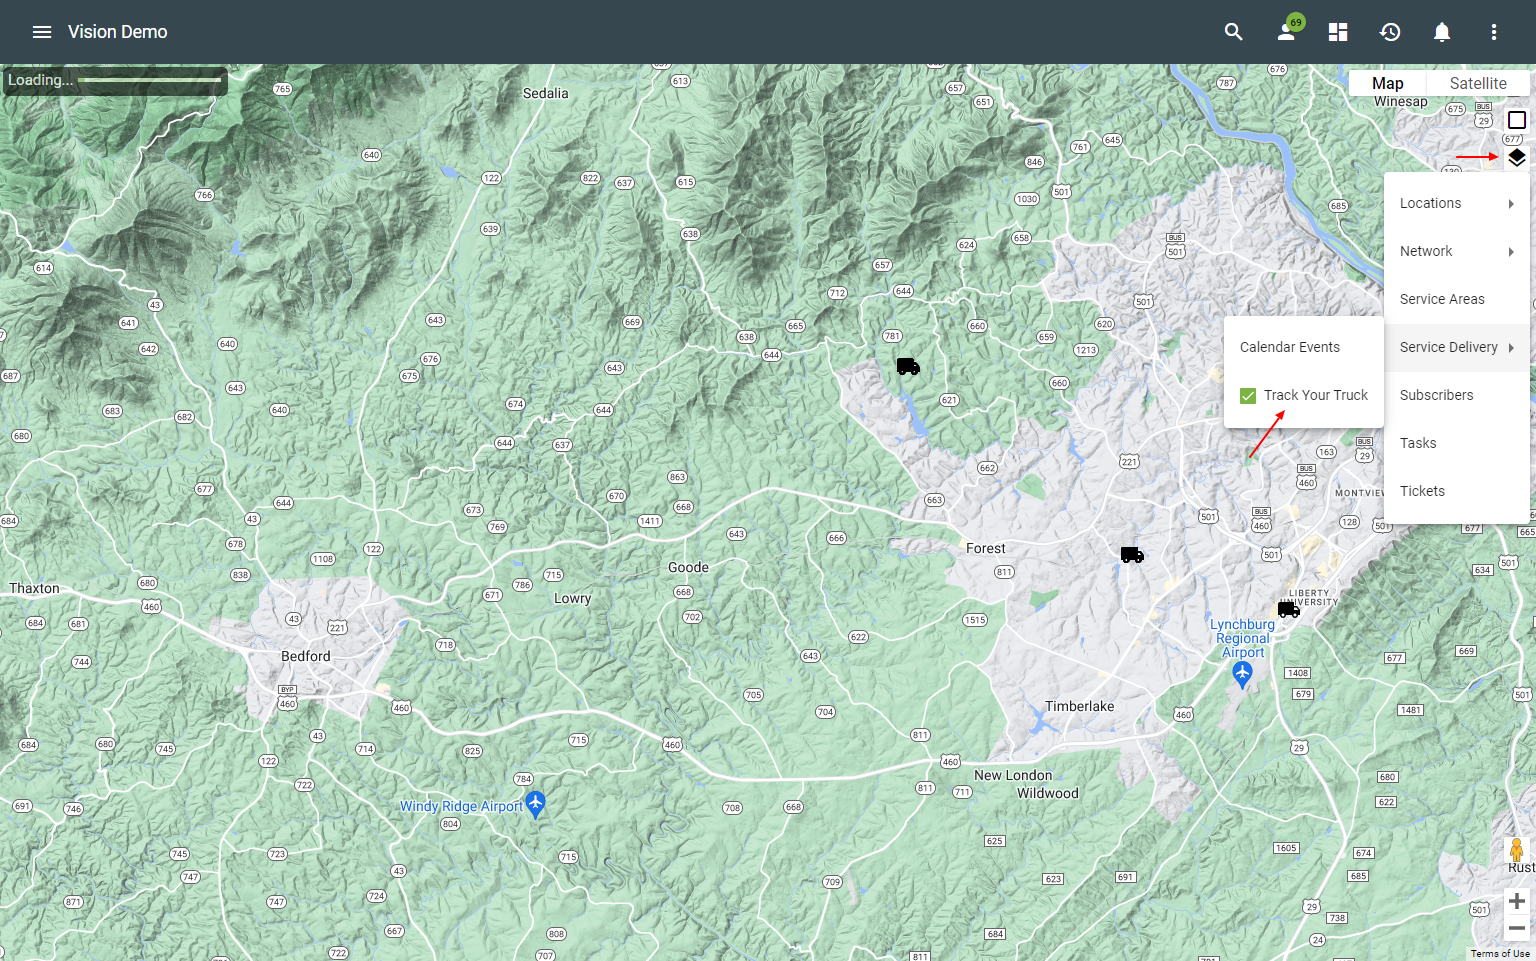
View Track Your Trucks Map
To track your company’s trucks out on the road, simply click the

Open Calendar Event Map
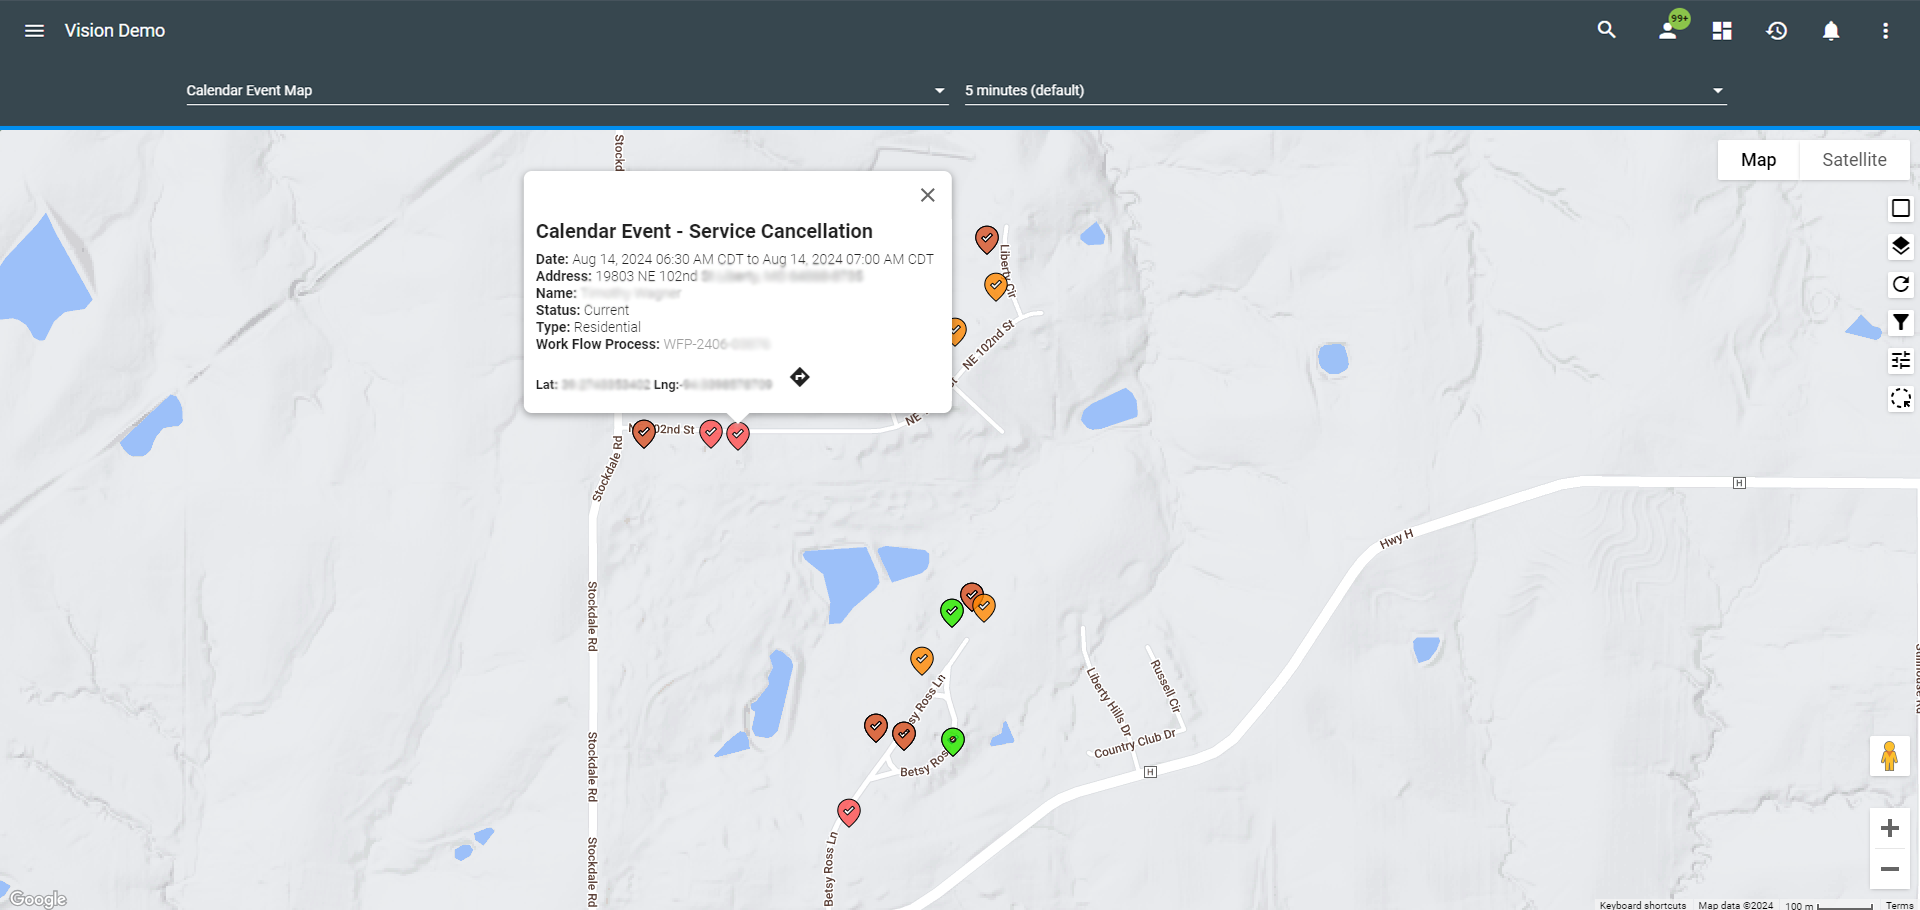
To view calendar events on the map click on the ![]() icon to display completed and in progress events that are on the calendar. This map is permission-based and deliberately separated from the company wide dashboard so that you can grant map access without exposing higher level information like financials.
icon to display completed and in progress events that are on the calendar. This map is permission-based and deliberately separated from the company wide dashboard so that you can grant map access without exposing higher level information like financials.


The icons on the map can be set up to show whether a event is complete or incomplete.


Service Areas can be filter by clicking the ![]() Icon and selecting the Service Area Type and Services Areas
Icon and selecting the Service Area Type and Services Areas

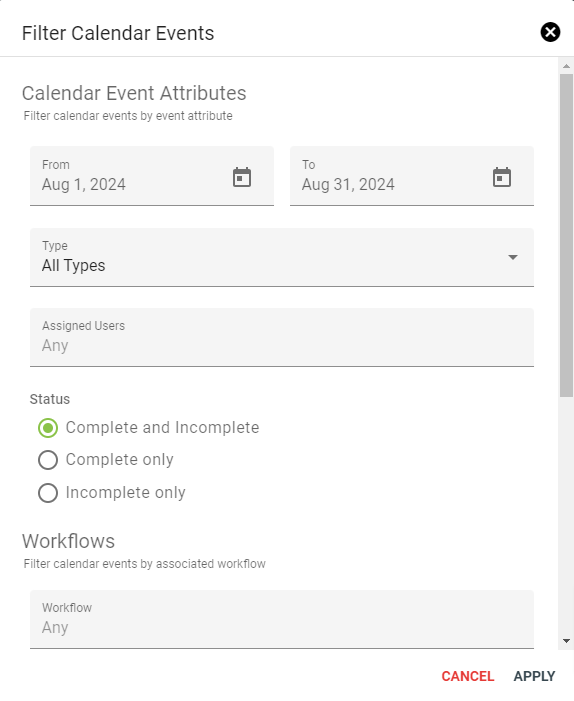
Calendar events can be filtered by clicking on the ![]() Icon. This will allow the events to filtered; by date, type, Assigned Users, status, and associated workflows.
Icon. This will allow the events to filtered; by date, type, Assigned Users, status, and associated workflows.
Calendar Event icons can be customized to display the event type or Assigned User on the map. For event types the markers are associated with a color for each event type. Map markers use colors associated with each event's assigned users. Events with no assigned user will appear grey, and events with multiple assigned users will appear black.

By clicking on an icon on the map will pull up the event information that is connected to location. The name of the event, date, address, Subscriber name, and workflow process will be the information that can be viewed at a quick glance to see what type of event is scheduled.

Other Calendars
There are a few other versions of the calendar available from its main page. By going to the drop down in the top right of the calendar page, you can change the calendar to view employee scheduled events or scheduled workflow processes.
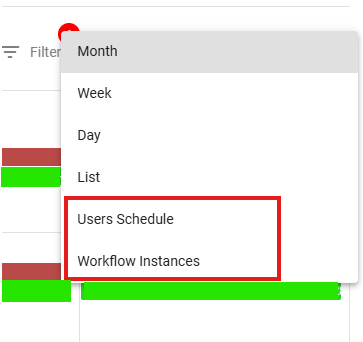
Users Schedule Calendar
The Users Schedule calendar view displays scheduled events by employee, making it easier to see when each user is assigned to work throughout the day. This view is helpful for reviewing employee availability, identifying scheduling conflicts, and confirming where events are placed across the schedule.

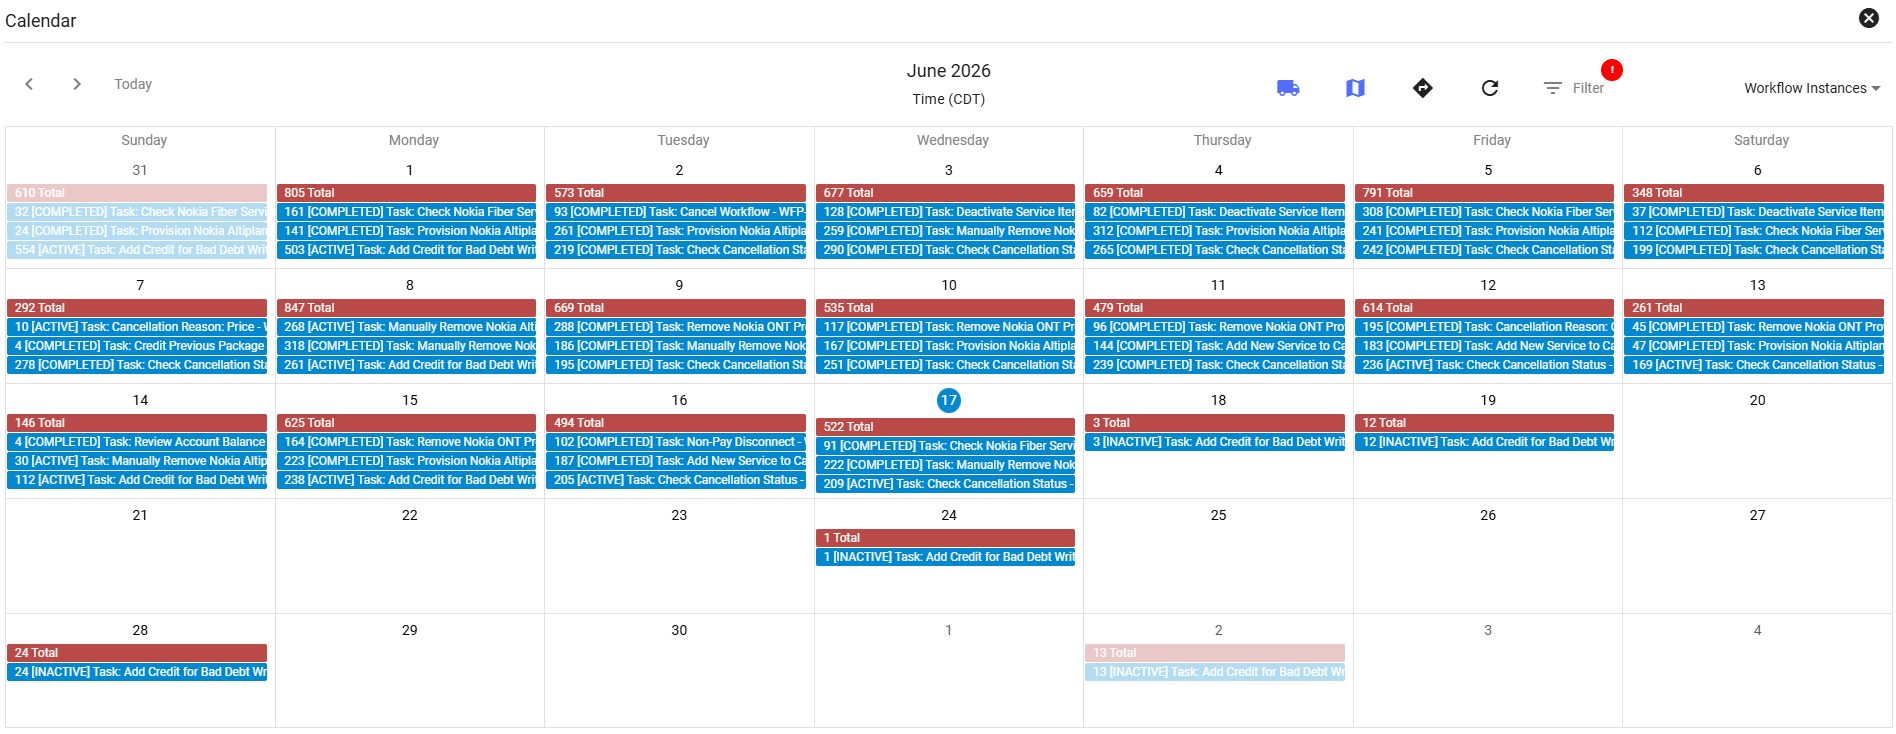
Workflow Instances Calendar
The Workflow Instances calendar provides a day-by-day view of workflow tasks, helping users see what has been completed and what is still pending at a glance. This view makes it easier to track workflow activity over time by placing task instances directly on the calendar based on their scheduled or completed timing.
Use this calendar to review recent workflow progress, monitor upcoming tasks, and quickly understand what happened on a given day and what still needs attention. Completed and pending tasks can be viewed in a timed layout, giving teams a clearer picture of workflow activity across the schedule.
Get Directions/Drive Time
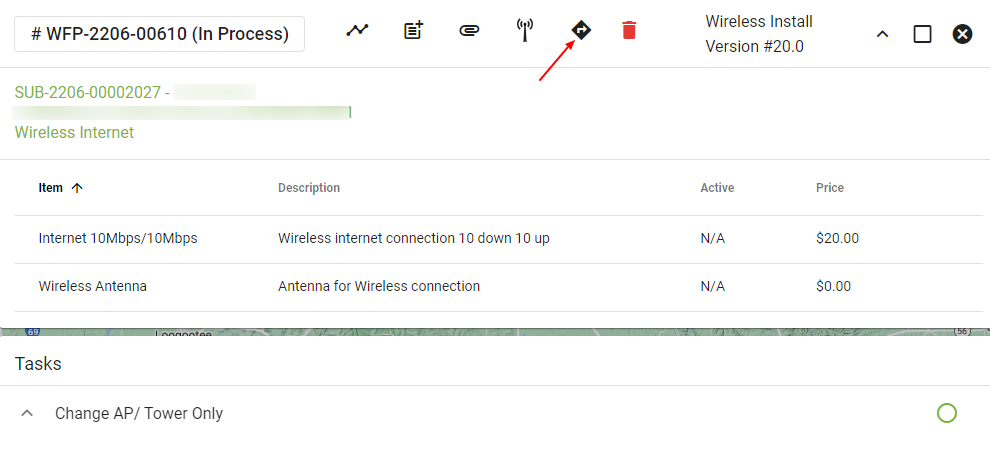
Getting your day started and finding your tasks easily is important. It is also convenient to have ‘drive time and directions’ at your fingertips. There is a couple of ways to easily do that. If you are viewing the calendar dispatch event you can click on the icon to view directions.

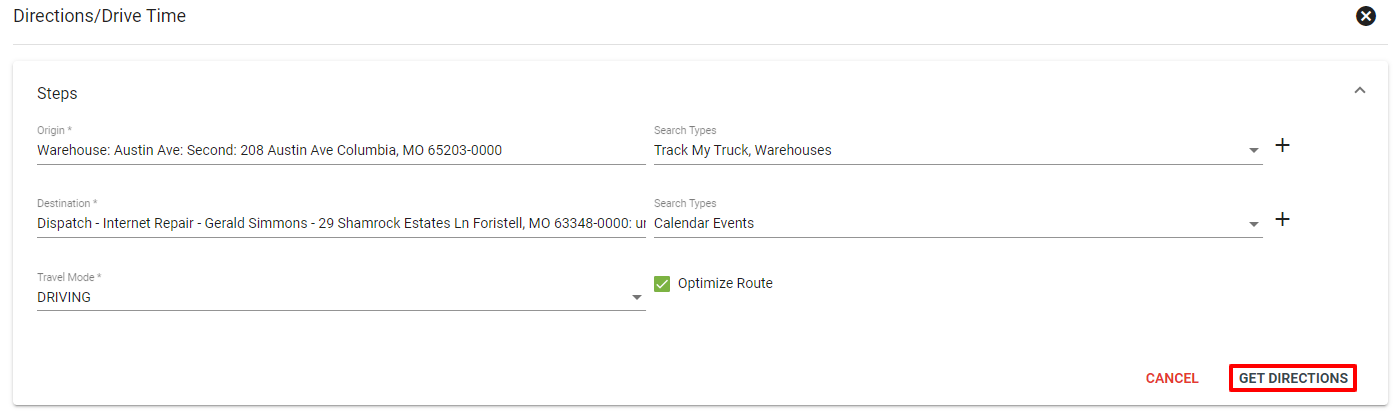
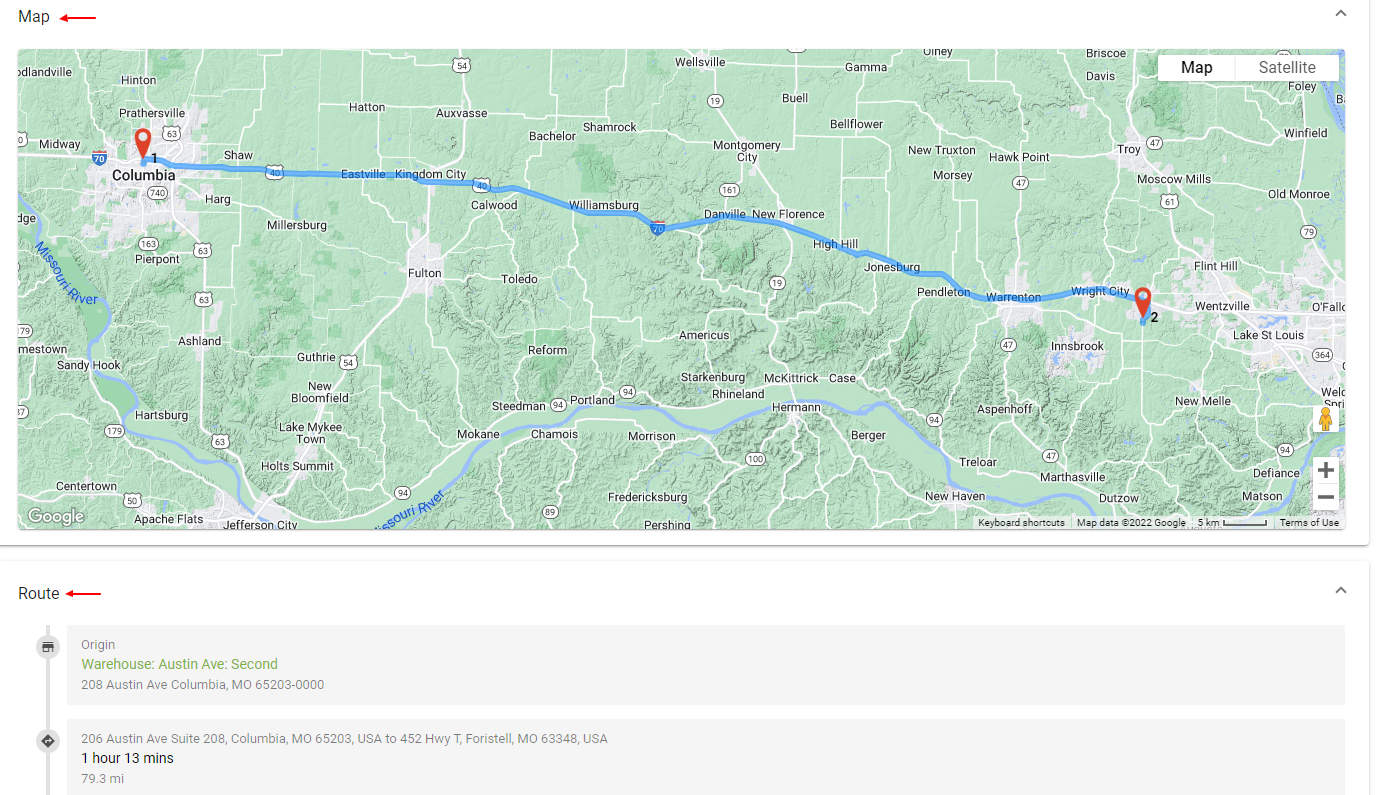
Or you can click into a task and view driving directions. Click the 
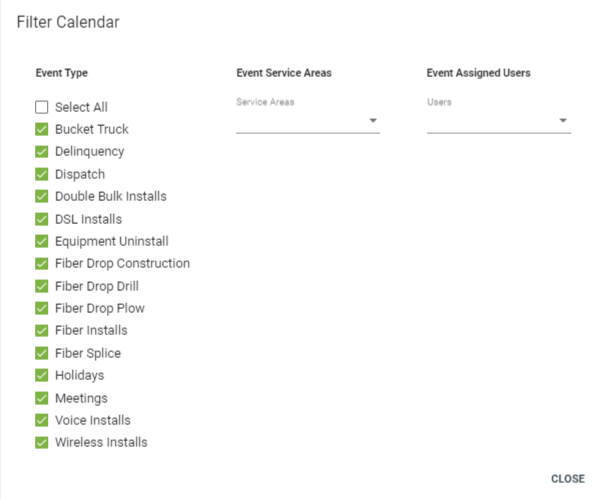
Filter Types
Click 
Schedule Events
To create a new time slot, first make sure you have the correct event type selected in the Filters menu.
There are two ways to create a time slot:
1- In the week or day calendar view, click and drag on a specific day at a specific time. If required, choose the Service Area to apply the Time Slot to.
2 - Or click 
Reschedule Event
Take note that there are a few options in regard to rescheduling an event on the calendar such as an install or dispatch.
1. Tools for rescheduling will be built into a task in a workflow.
2. Tools for rescheduling will be built into a dispatch workflow through a troubleshooting ticket.
3. Manually from the calendar you can adjust the event date. This will be the least common option, as most rescheduling events will be driven in the workflows.
Edit Events
You can add and edit the event by clicking on the calendar event. You can edit the start and end dates, the title, users, and the groups the event is visible to. At the top of the event, you can see notes or add additional notes, see workflows, and add attachments.
Remove Time Slot
To remove Time Slots from the Calendar. First, click on the event and then click REMOVE EVENT. It will then ask you to confirm, yes or no.
