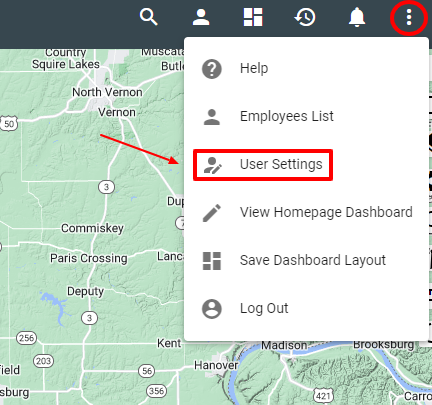
User Settings
User Settings allow the user to take action on their account such as making changes to your password, dashboard layout, notification preferences, or search preferences.
Click on the
User Data
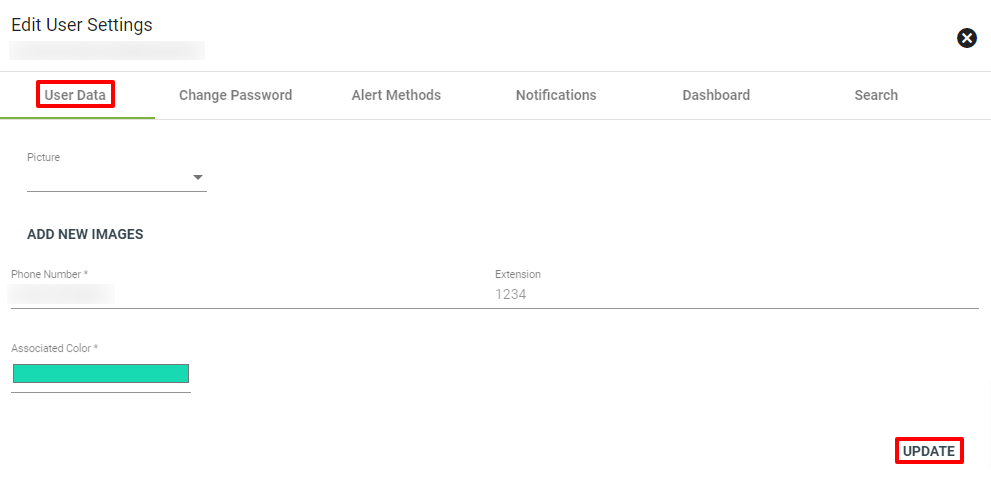
The User Data tab under User Settings allows you to change your photo, phone number and add an associated account color.
Click UPDATE in the bottom righthand corner to save changes.
Change Password
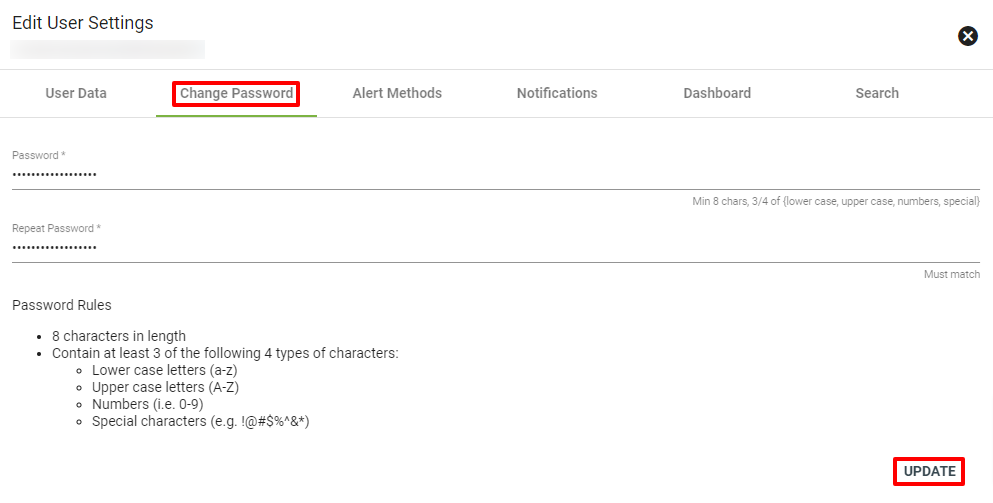
Make password changes under the Change Password tab.
Click UPDATE in the bottom righthand corner to save changes.
Alert Methods
View an Alert Method under the Alert Methods tab. Click on the
Add Alert Method
To add an Alert Method, click on the
Select a preferred contact method and input the contact method details. Click ADD to add the new Alert Method.
Notifications
An email and/or browser notification triggers when updates occur on a ticket, marketing campaign, or network event that does not originate from the assigned user. For example, if someone adds notes or updates a ticket assigned to you, you will receive a notification.
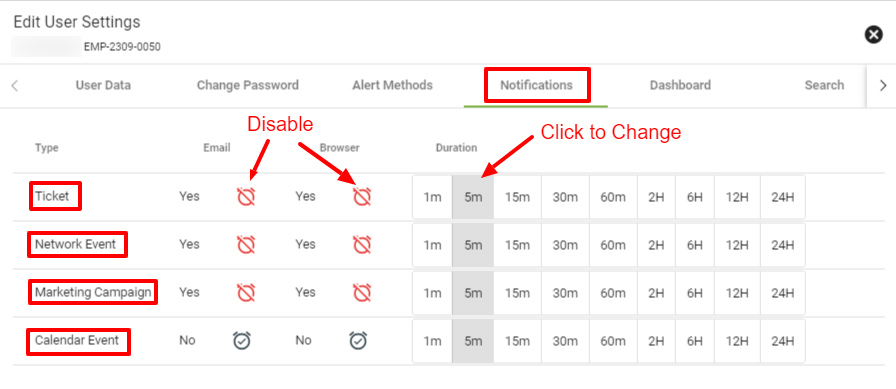
You can choose to receive email and/or browser notifications for tickets, network events, and marketing campaigns.
By default settings the notification will happen after the 5 minute duration mark. The user can choose to change that by clicking the preferred duration box. The duration times vary from 1 minute to 24 hours.
You can click to enable or disable email and browser notifications.
Be sure to enable alert methods under the Alert Methods tab.
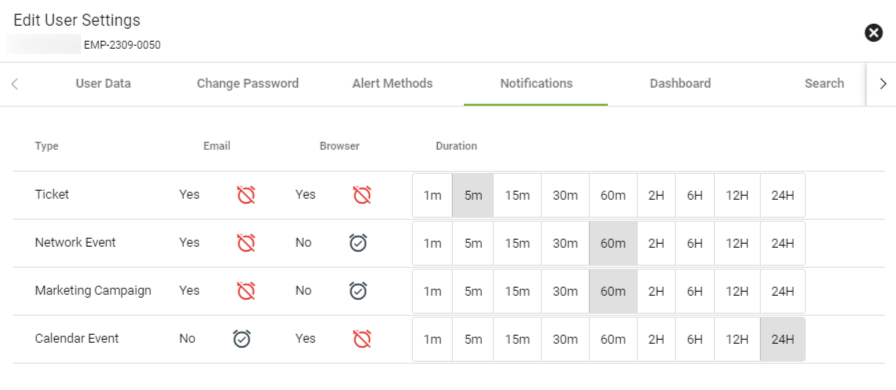
Example of notification preferences.
Dashboard
The Dashboard tab controls the displayed dashboard cards on your homepage.
From here you can search for available dashboards, Select All or Select None to be displayed.
If you don't want to display all dashboard cards, you can individually select the applicable dashboard card options.
To save dashboard selection, click UPDATE DASHBOARD SELECTION. Click on RESET to remove any selected dashboard cards.
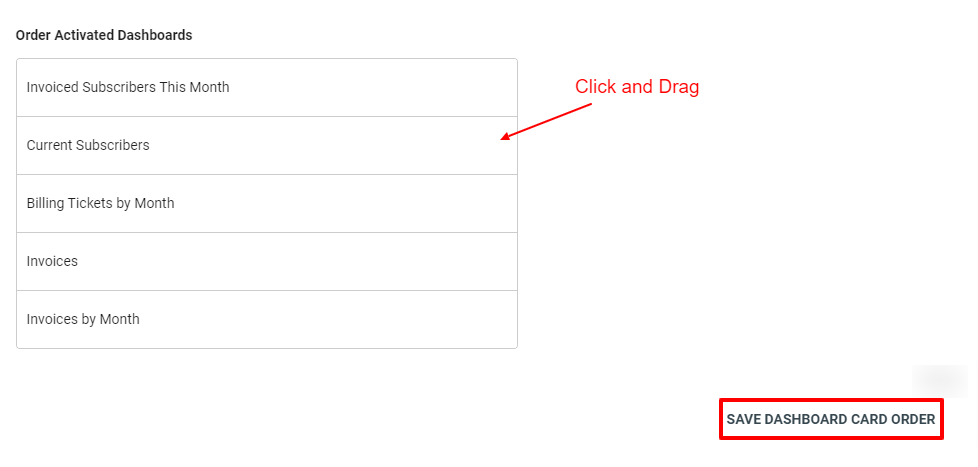
Make changes to the display order of the dashboard cards under Order Activated Dashboards. Click and drag to rearrange the displayed order of active dashboard cards.
Then click SAVE DASHBOARD CARD ORDER.
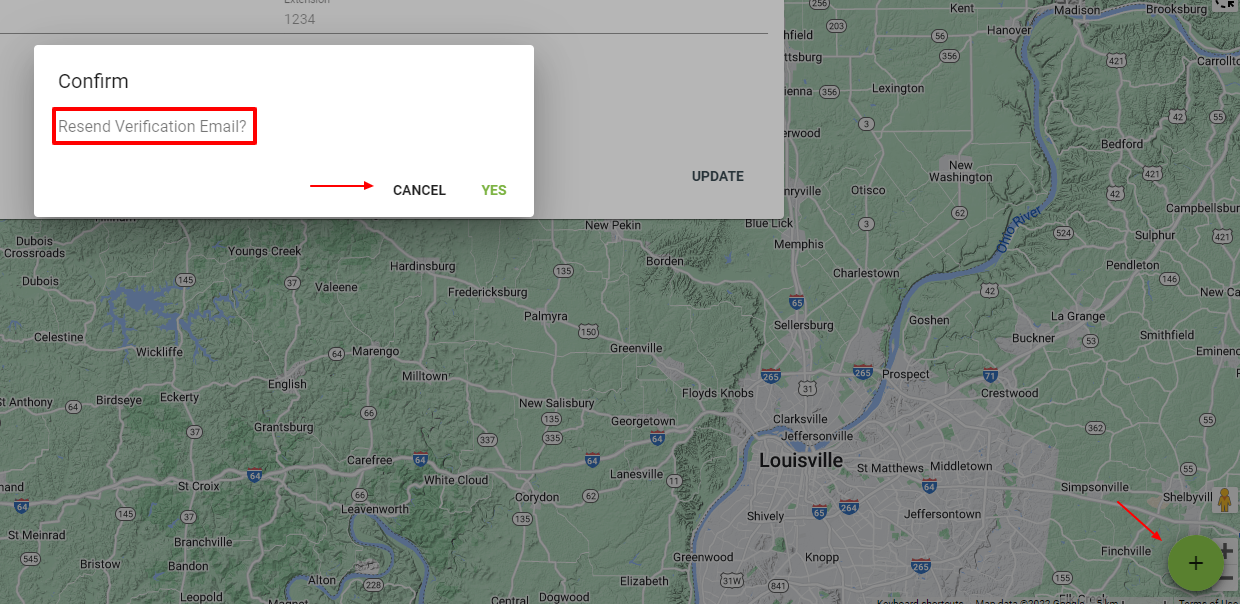
Resend Verification Email
Click on the
Confirm your selection by clicking either YES or CANCEL.
Search
To customize your search results, Vision lets you edit your personal search standards in User Settings. To edit your search settings, click on the Search Tab. Then you can select or de-select from the search types. Once you select your search preferences be sure to save your preferences. Those settings will be saved going forward unless you updated your selections. These settings will improve your Super Search results.
Email Settings
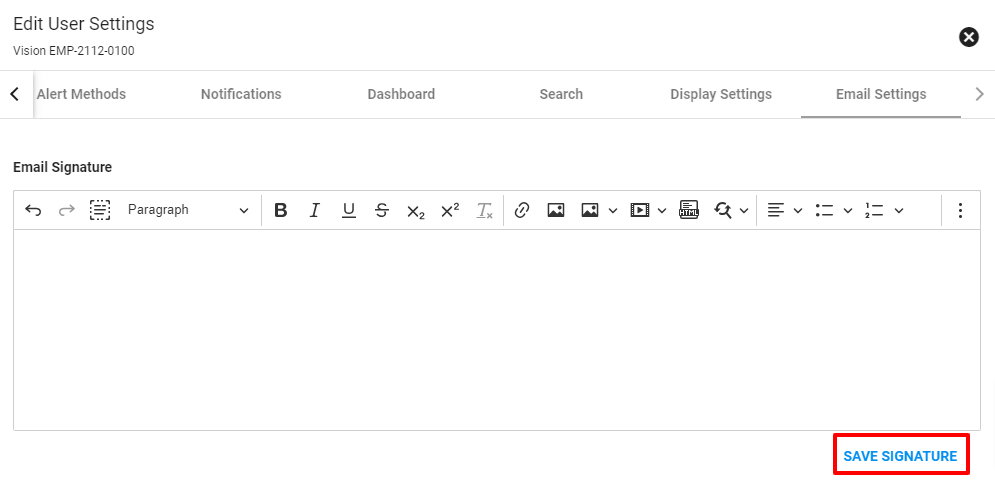
In the User Settings, a user can now set up an email signature that will be able to be used when sending an email through Vision. The signature can be changed at any time if necessary. Once the user is done with writing their signature click SAVE SIGNATURE to confirm the change in Vision. To set this ability up for a User it requires a Permission role titled 'Email Signature' to be assisgned to a Group.
