Tower activation, adding towers into a new system, understanding where to begin, it can all be confusing and seem like a hefty lift. Let’s plainly talk about what is going to happen. First of all, these are things that your company is likely already doing, like purchasing hardware, assigning IP addresses, and so forth. Once your tower is in the system, Vision will make monitoring the towers and hardware more efficient. The process will happen step by step. You may be using this guide to begin adding towers yourself, or just getting a better understanding. Below will be the basic language that you can use to explain the process. Either way the Support Team will be here to guide you through the process.
Vision treats towers as warehouses, so you will start by adding a new warehouse.
Inventory > Warehouse > FAB to Add a new Warehouse
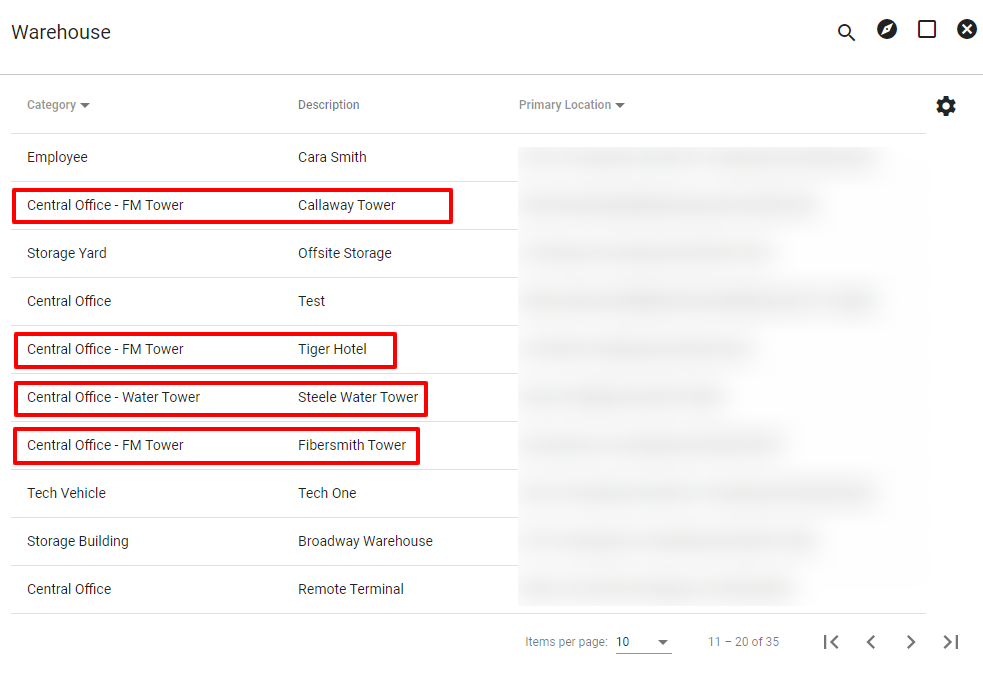
Here you will see the list of Warehouses. The category and description will display which line items are towers.
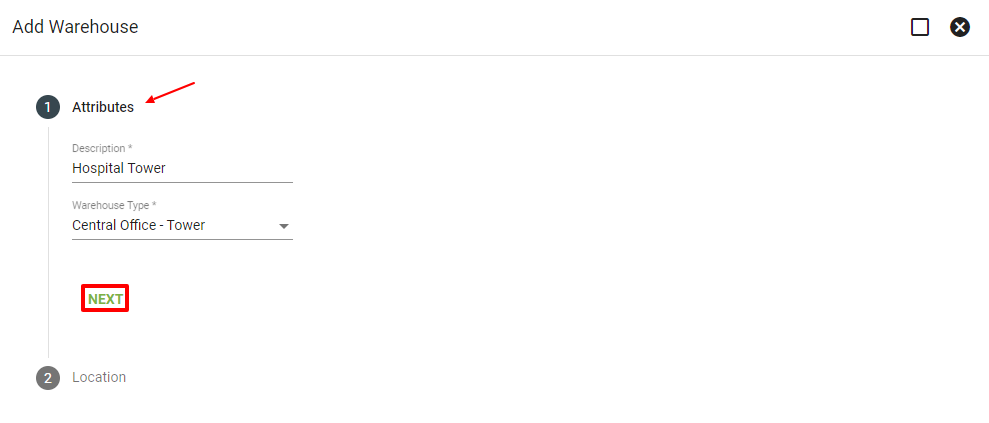
Add the Description and Warehouse Type > NEXT
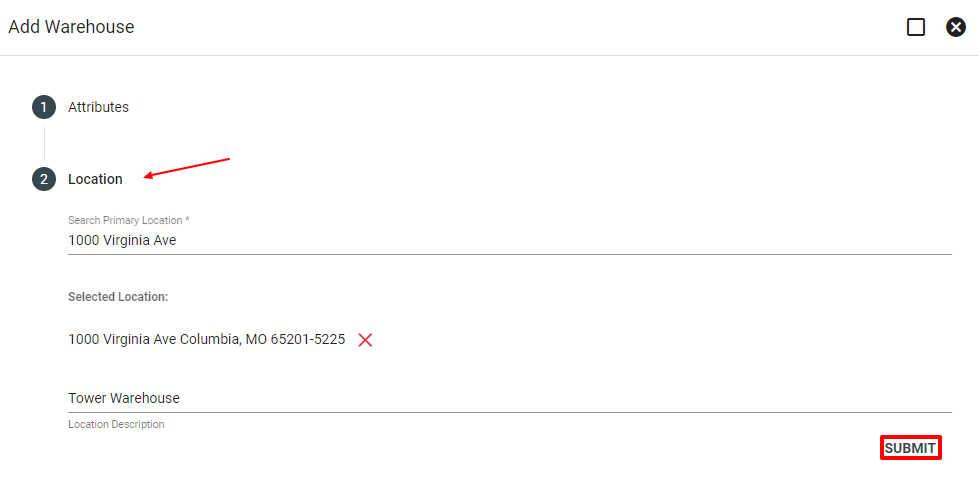
Add Location details > SUBMIT
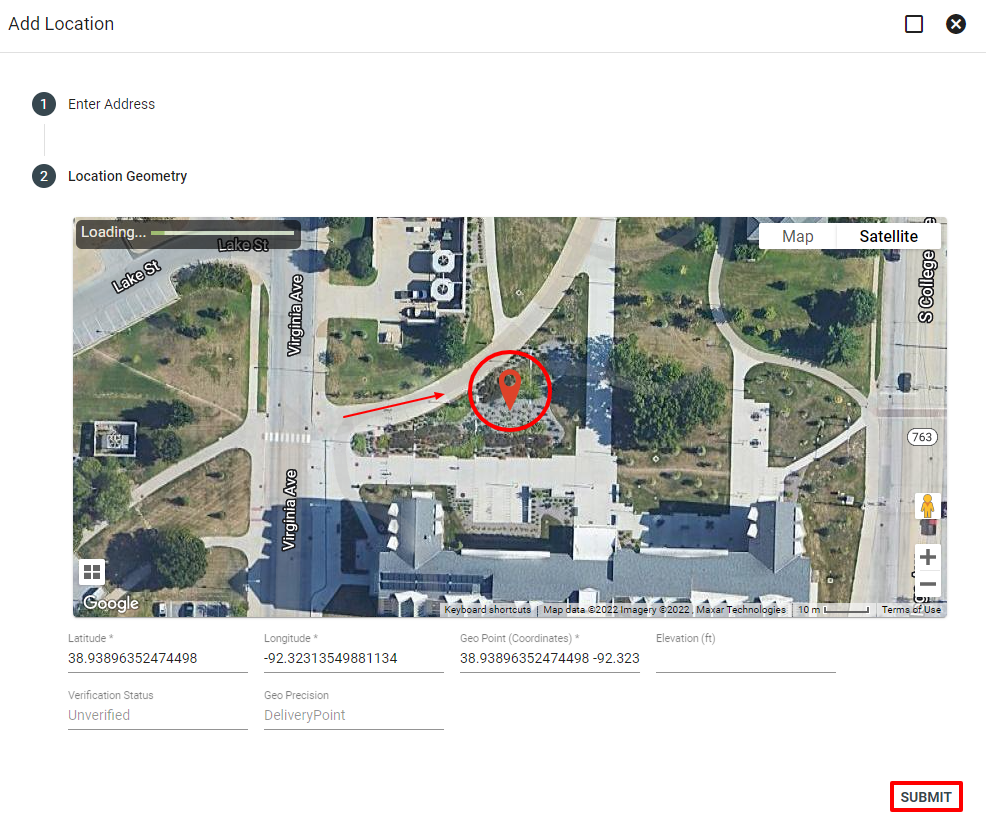
Remember, location comes first! If the tower location is not in Vision, first add it through Admin Utilities.
Admin Utilities > Location > FAB
Make sure you add the word TOWER in the 2nd line of the address details, this will give the tower a unique address and it will easily be identified as a tower.
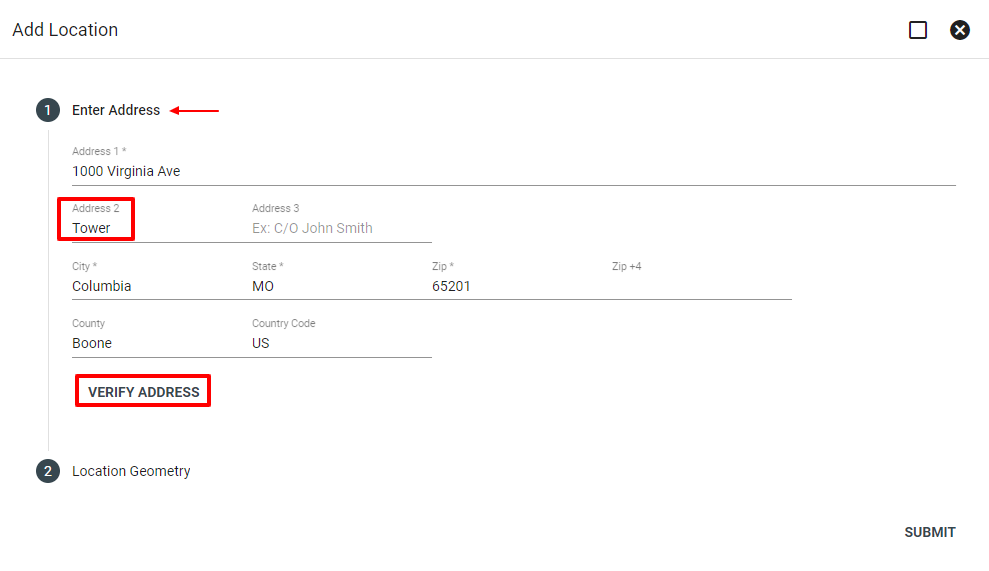
Use the satellite view to confirm the tower’s location. Move the pin drop to the exact tower location. Then click SUBMIT.
Then go back to adding a New Warehouse under the Inventory section from the main menu.
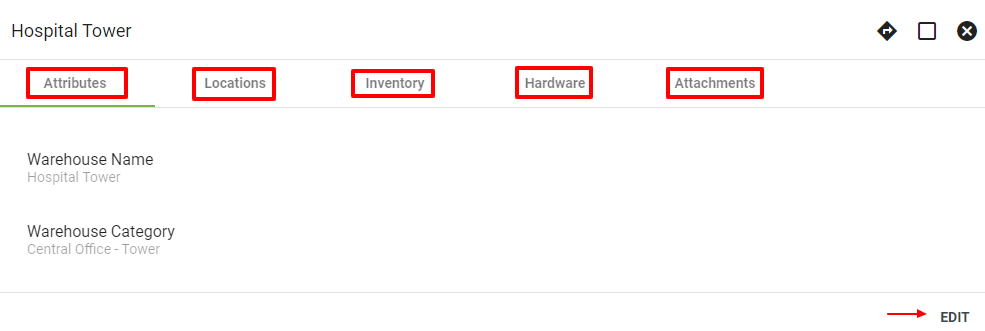
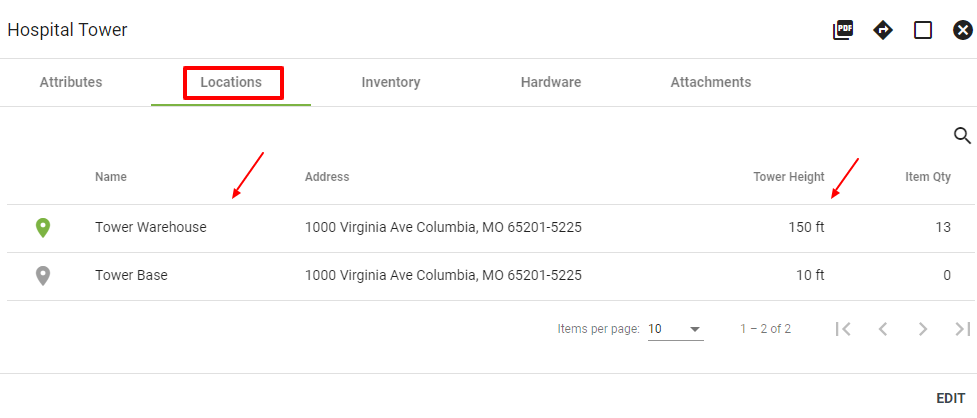
After you submit the new tower information, you will see the New Tower details. Such as it's attributes, locations, inventory, ect. You can click edit in the bottom right-hand corner and edit the tower description and warehouse type if needed.
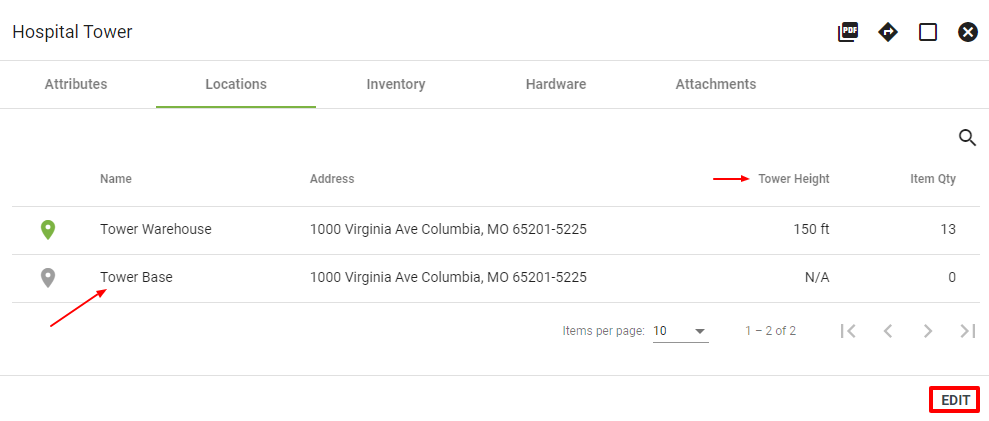
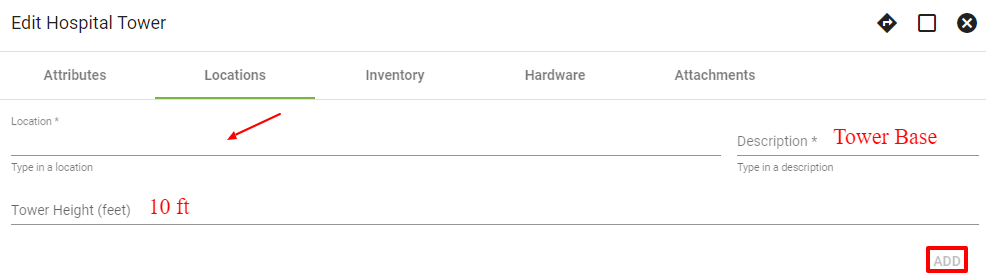
Be sure to add the height of the tower and if there is a base of the tower add that as well. To do that select EDIT > Locations Tab > Add Base Location. Use the same address, just change the description. This will allow Vision to decipher between the top and the base of the tower and give accurate locations for the hardware associated there.
Essentially, you will then need to add hardware to the tower. You may already have that hardware purchased and it’s being stored in a current warehouse. If that is the case, it would just need to be moved to the tower location. Or you may need to place a Purchase Order through the PO system in Vision.
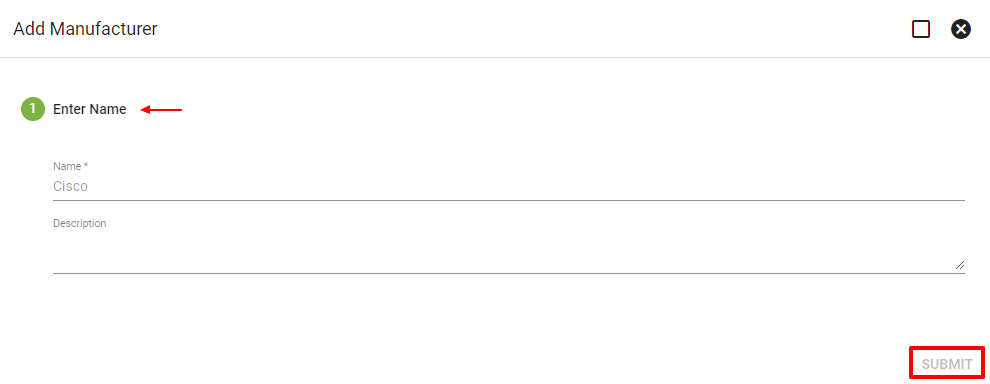
You need to add the Manufacturer if it is not in the system.
Inventory > Manufacturers > FAB
When adding the Manufacturer Attributes include the name and description and click SUBMIT.
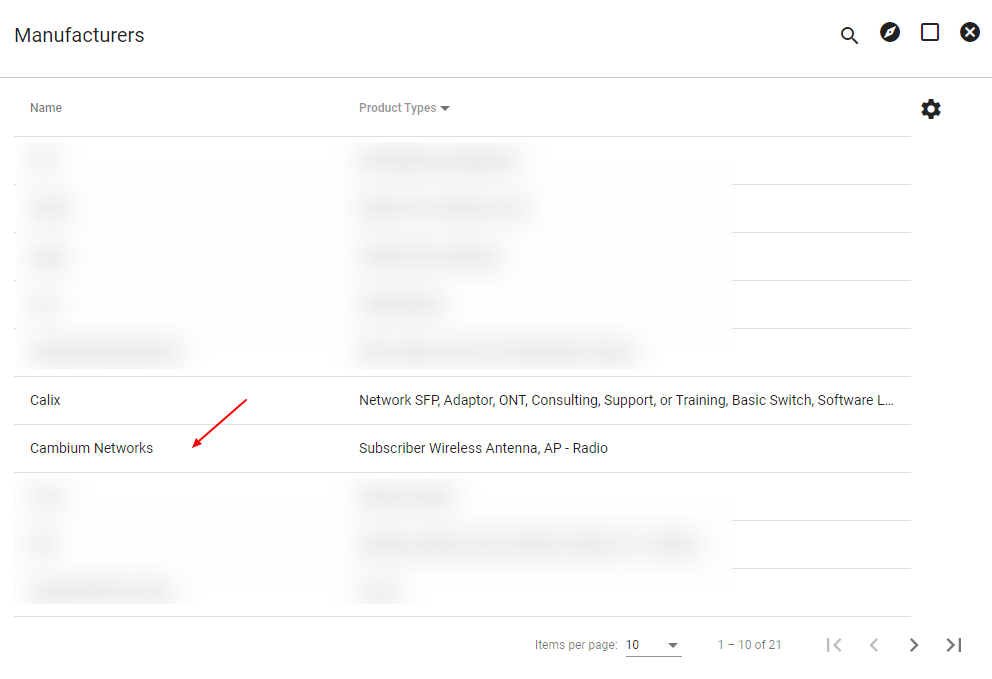
Then click into the name of the new manufacturer you created.
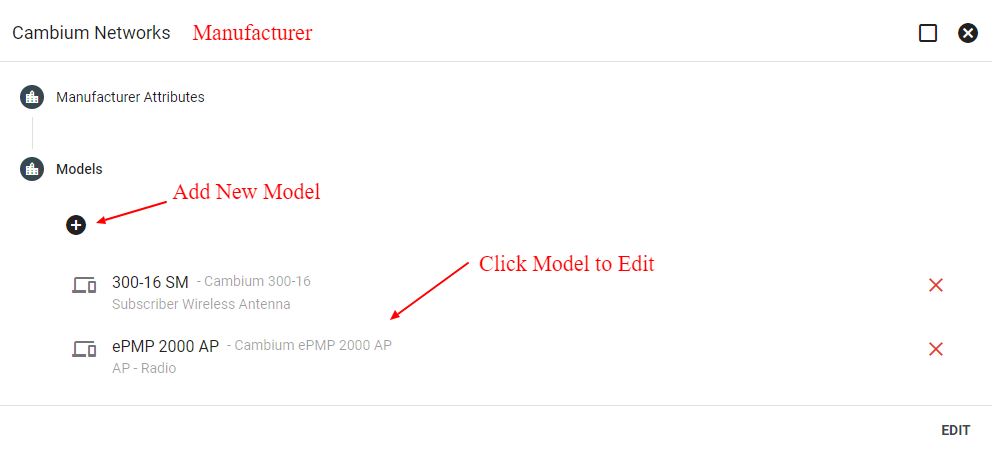
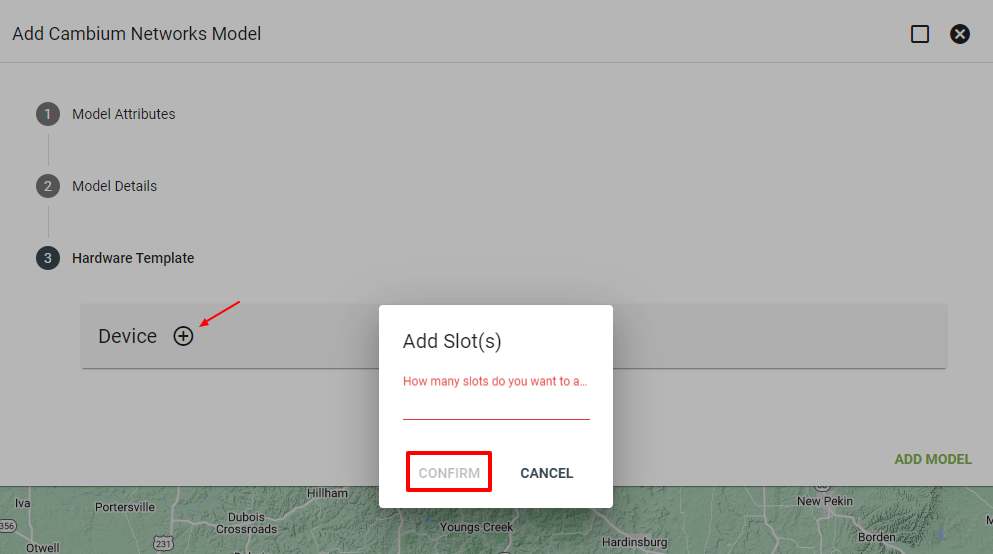
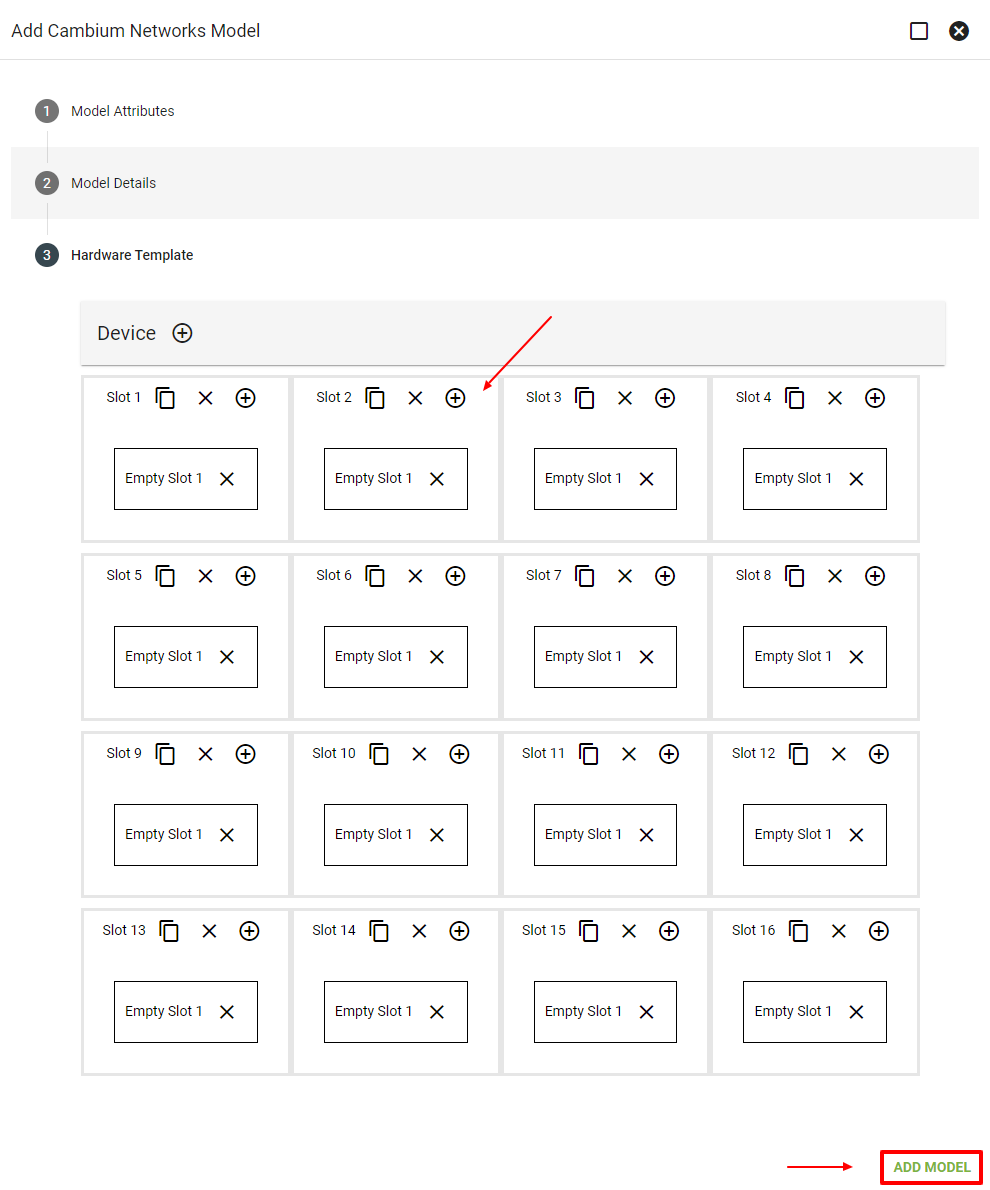
Click the plus icon under Models to add new Model Attributes, Details, and Hardware Templates. Under Hardware Template, add a device. Add Slots. Then click ADD MODEL.
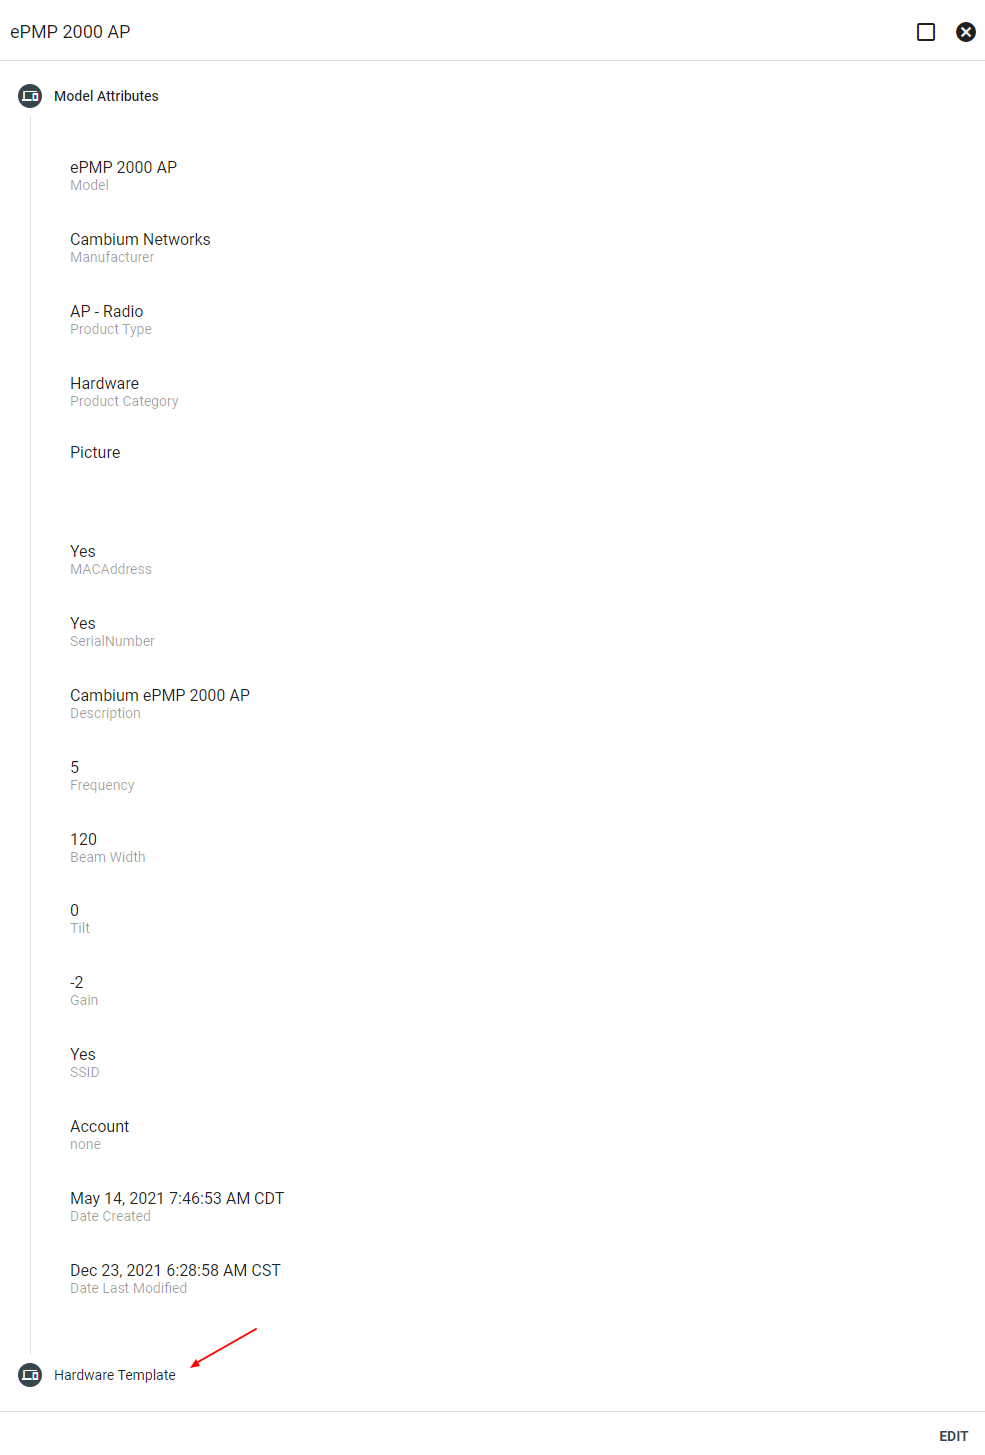
Example Model Attributes. You can click EDIT in the lower right-hand to make changes.
Example Hardware Template with the ethernet and wireless circuit ports modeled.

Be sure to have the spec sheets or datasheets ready. Vision’s network needs to know the ports and slots to tie back to subscribers. The Support Team will also ask for those spec sheets to help aid in the onboarding process. Be sure to model the ports accurately.
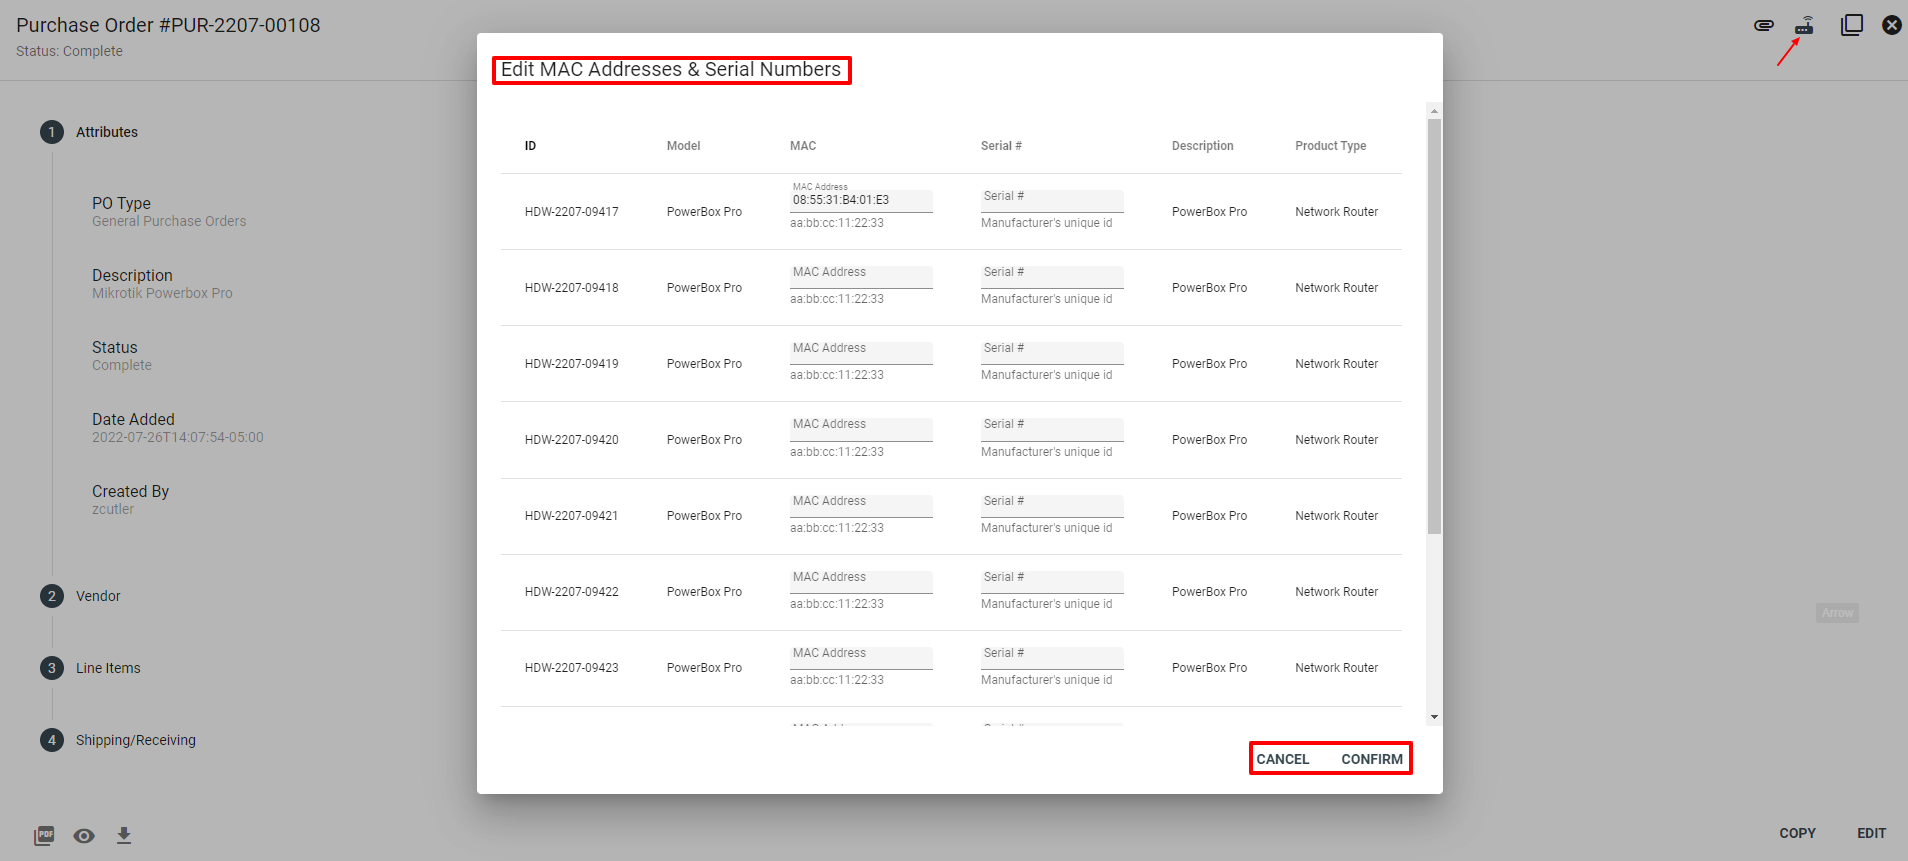
Import hardware using the purchase order system, then associate any MAC addresses with imported devices.
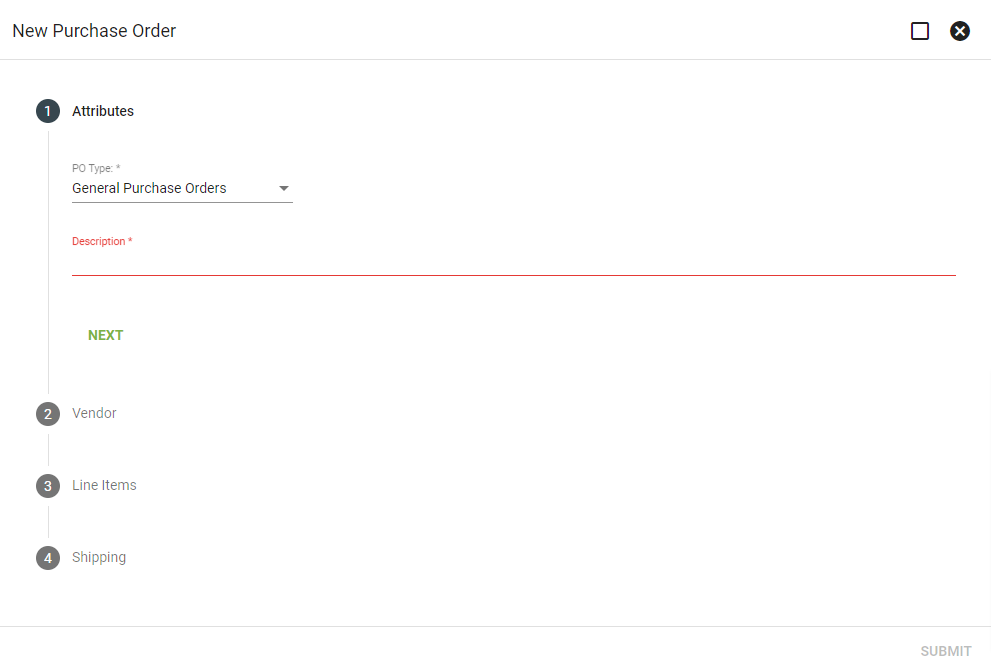
Inventory > Purchase Orders > FAB New Purchase Order
Choose a PO type from the drop-down menu and input a description of the purchase order. Click NEXT.
Select a vendor from the drop-down menu and the vendor address. Add a new vendor and vendor address if the vendor is new. Choose a term duration from the drop-down menu. Click NEXT.

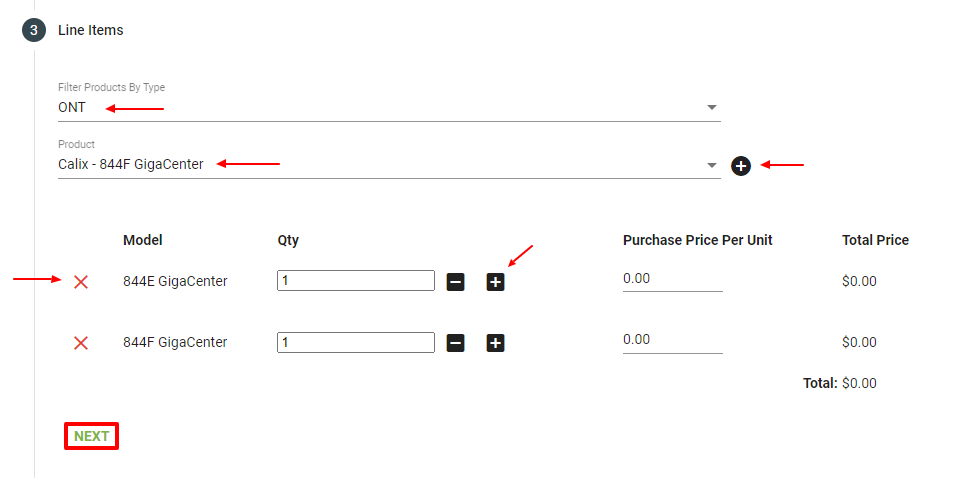
Choose the Line Items. Select the product from the drop-down menu. Filter the displayed products by choosing from the Filter Products by Type drop-down menu. Add a new product if necessary. Click the + icon next to the product line item to add the product to the purchase order. Click NEXT.
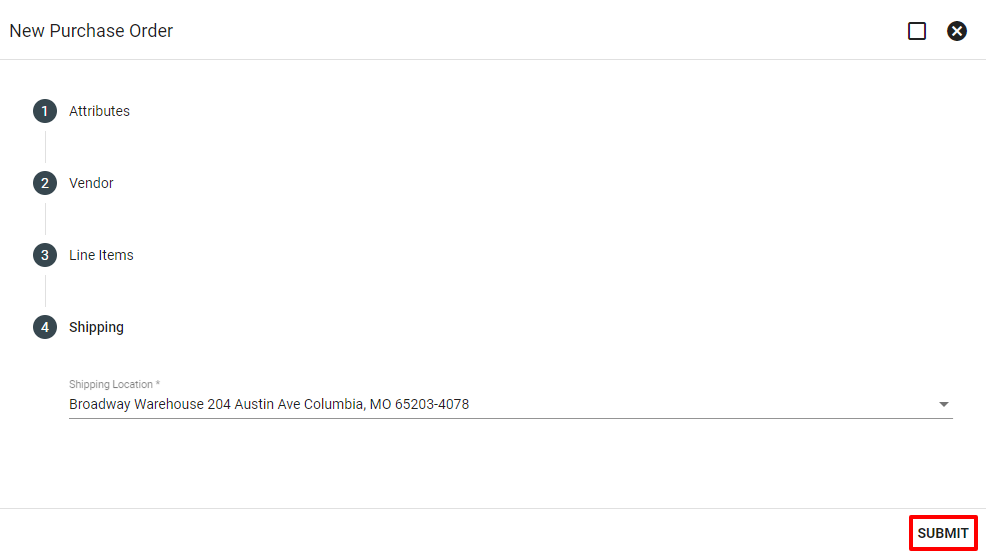
Select shipping information. Choose an existing warehouse or add a new warehouse. Click SUBMIT.
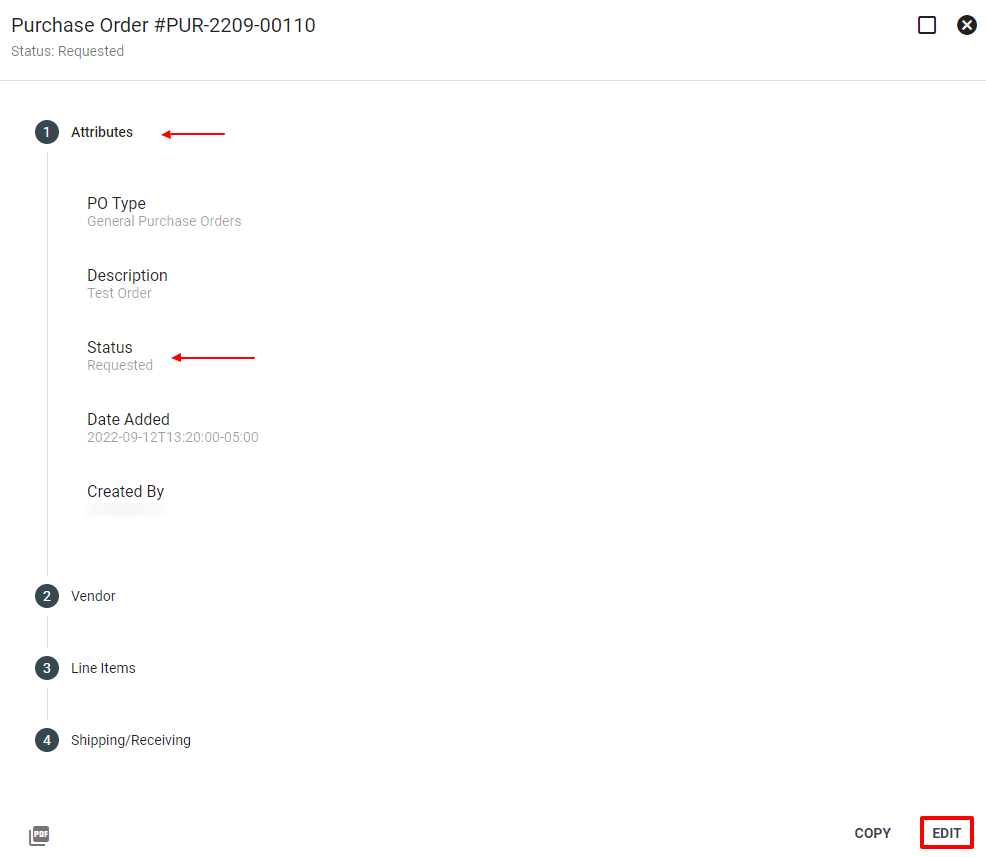
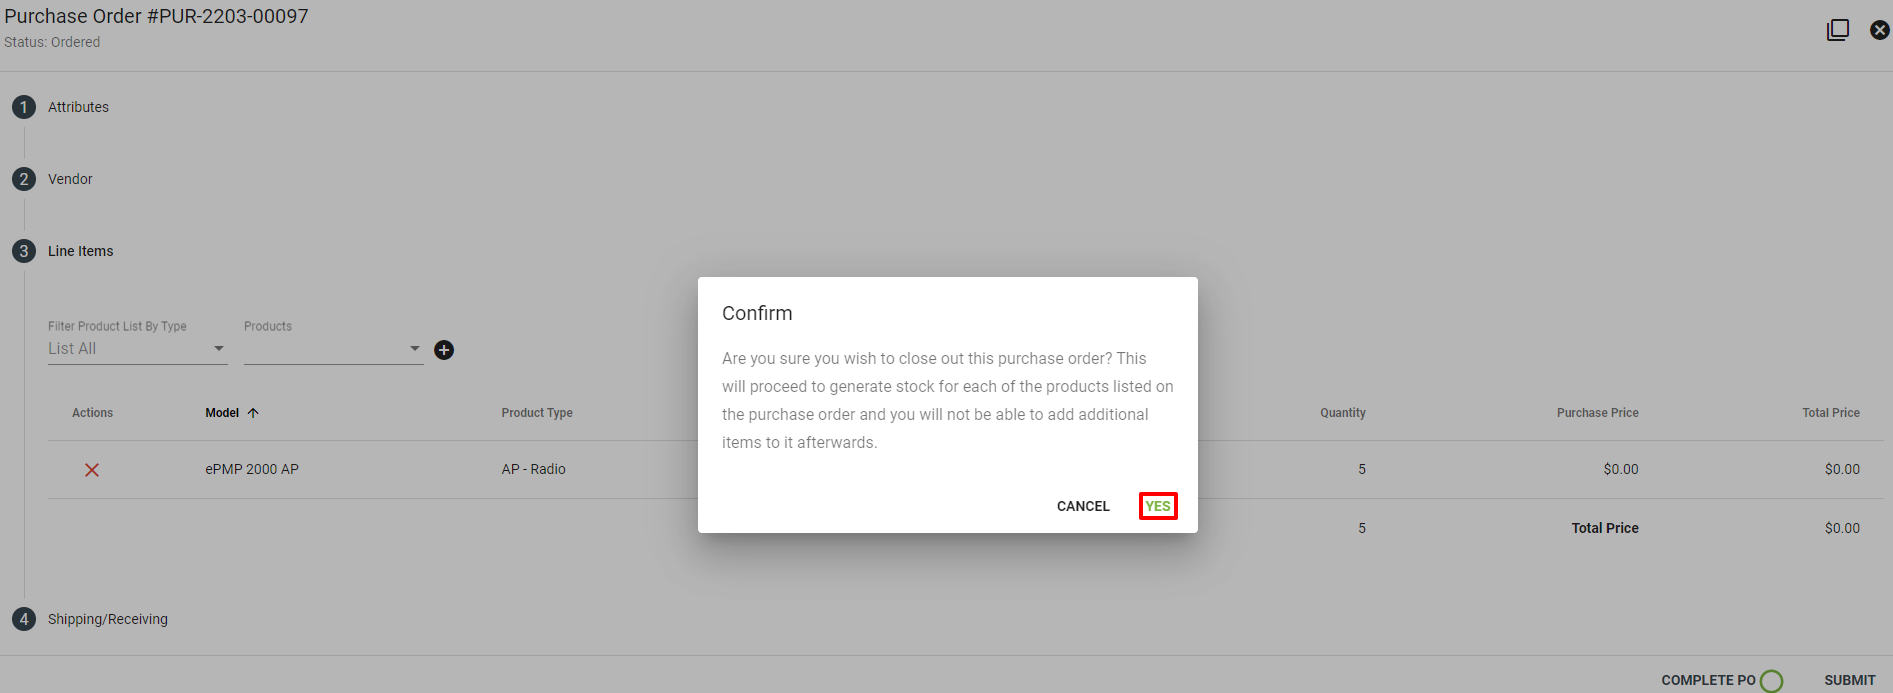
Select EDIT in the bottom right hand corner to make changes to the purchase order. Once the inventory is shipped and received, mark the status as received to make the hardware visible in the assigned warehouse. (Which this step can be made part of a Workflow.) Selecting Complete PO will complete the purchase order and remove the ability to add to or edit the purchase order. Once the inventory is shipped and received, mark the status as received.
Once you receive the order, click the 
Now you need to move the hardware from the warehouse to the tower location.
Inventory > Warehouse > Click the Storage Warehouse > Inventory Tab
From there check the boxes next to all of the Product Types you need to move to the Tower Base for example. Click the 
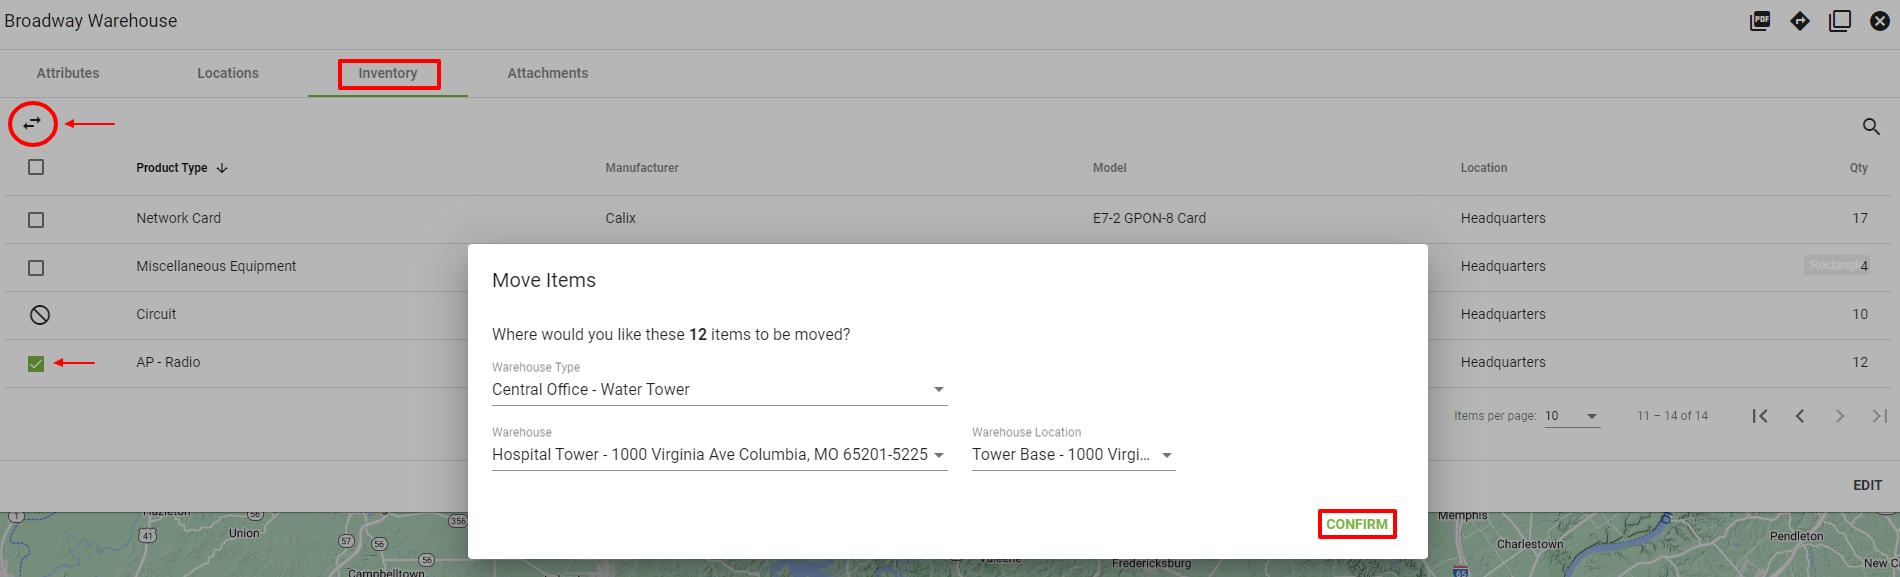
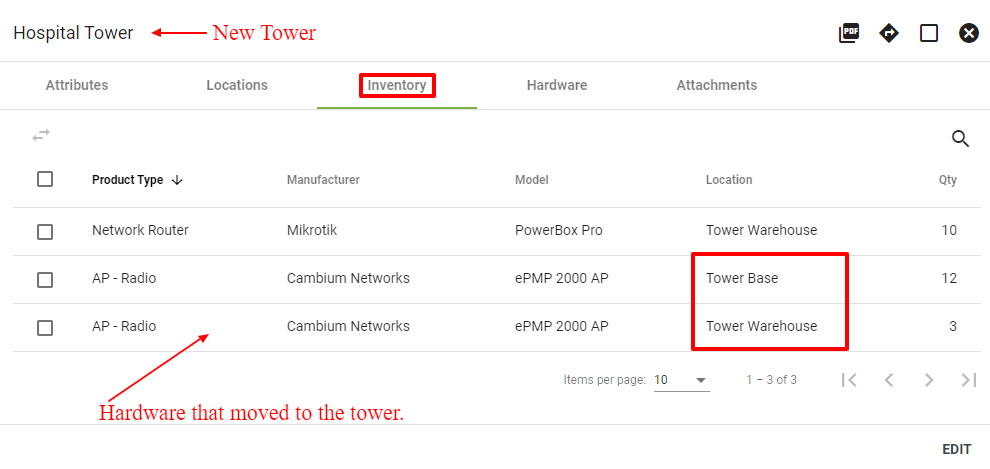
You can go to your new tower under Inventory > Warehouses. Click on your new tower, then click the Inventory tab and you will see the hardware you moved to the tower.
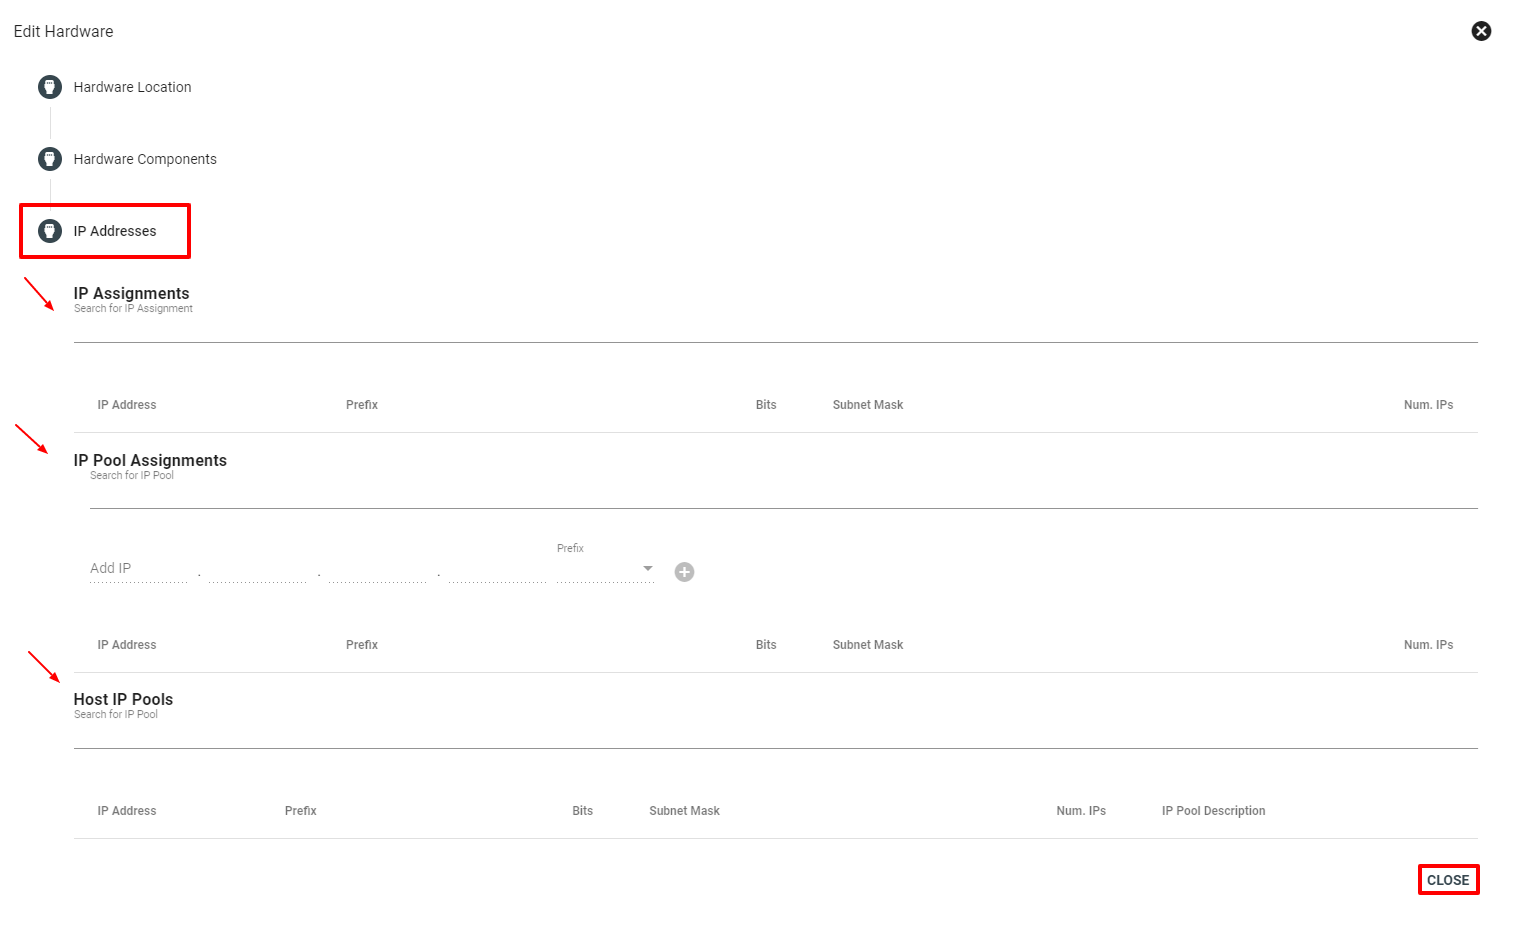
Then click on the Hardware tab to edit specific hardware. Click on the hardware line you want to edit. There you can add Hardware Components and IP Address details.

Click the 
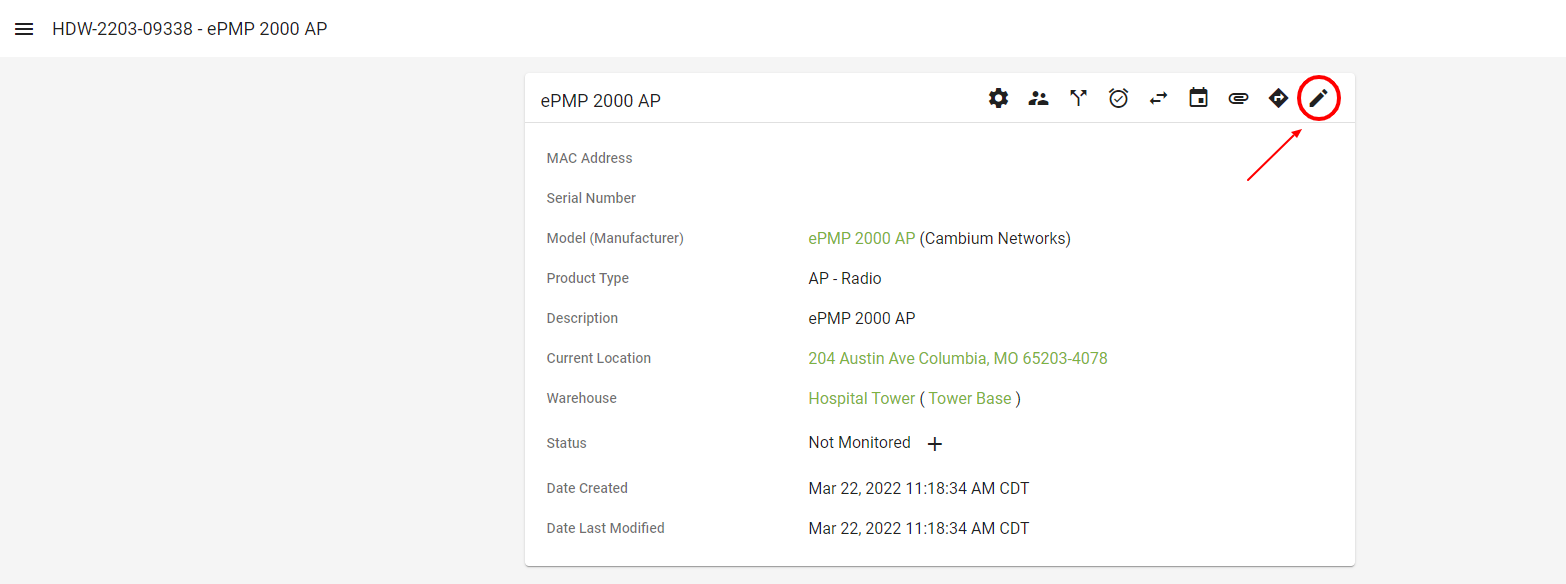
Add the IP Assignments here. Then click CLOSE.
From the hardware page click a specific piece of hardware to view the Monitoring Status.
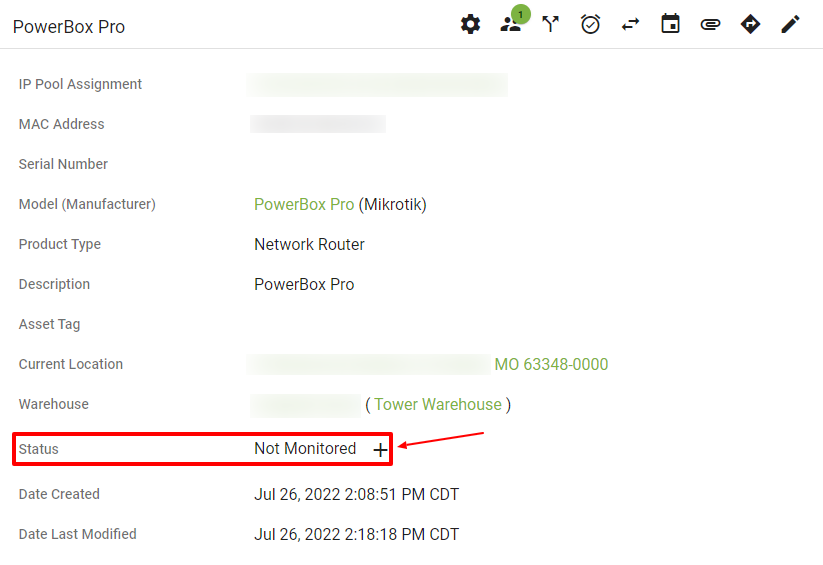
The status will indicate whether the Hardware is Monitored. Click the 
Select an existing Monitoring host (if applicable) from the dropdown menu. Click TIE HARDWARE TO HOST to create a connection between that piece of Hardware and the host.
To add a new host, input a description, monitoring type and the IP or DNS name to Monitor. Select a template from the dropdown menu and enter the SNMP Community String.
When finished, click ADD NEW HOST to save the details.

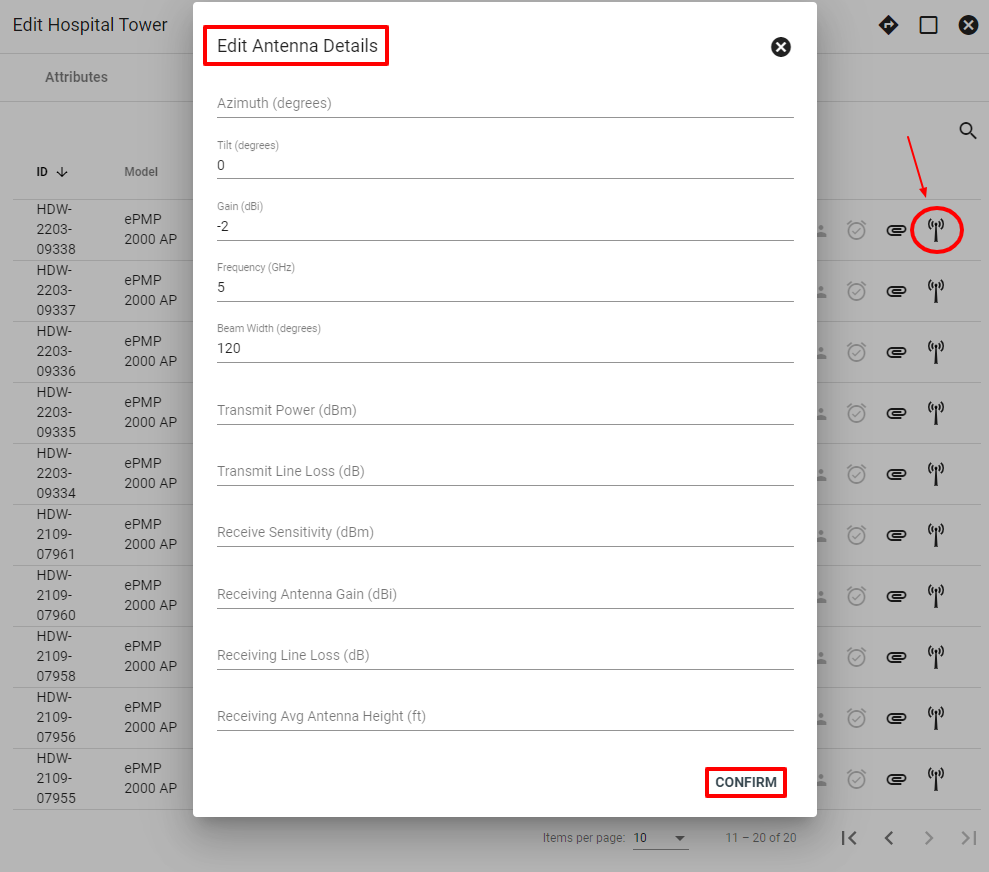
On the hardware details page click the 
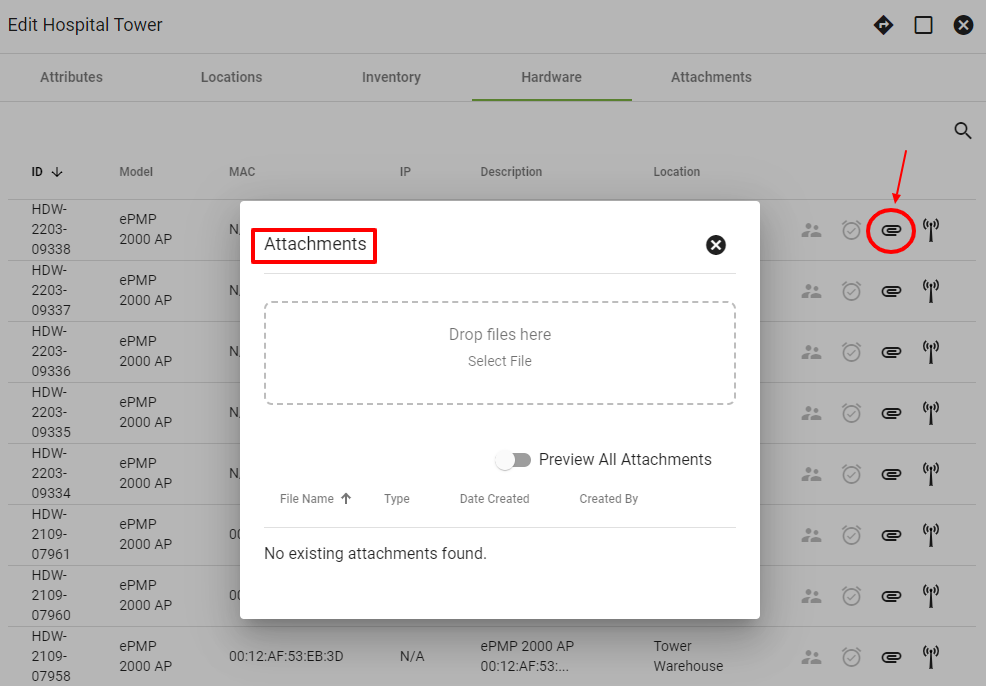
Back on the Hardware details page, your installers can add attachments to specific hardware. Having photos attached to the hardware will provide visual data, or anything else that needs to be tracked saved in one convenient place.
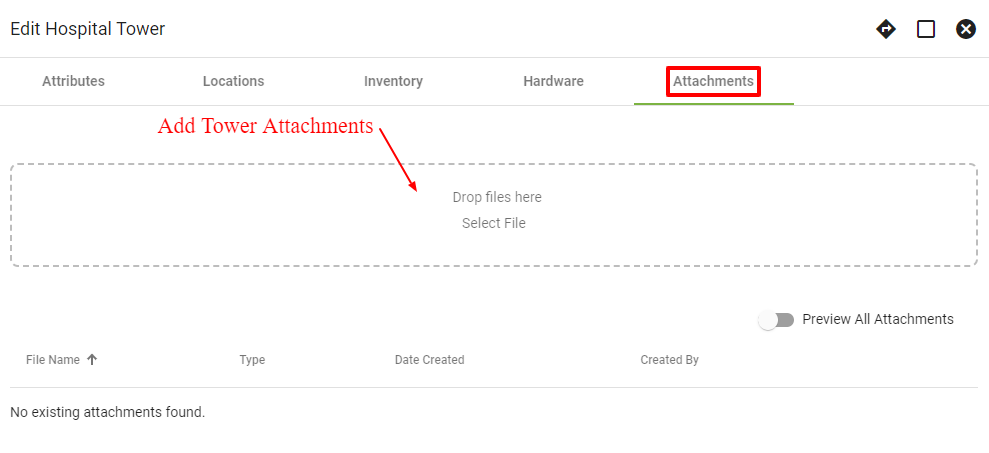
Back on the Hardware details page, your installers can add attachments for specific towers by clicking on the Attachments tab. Having photos attached to the tower will provide visual data, or attach lease documents, or anything that needs to be tracked. This comes in handy during sight surveys and is overall a best practice.
Now you have a newly named tower with inventory and hardware tied to it.
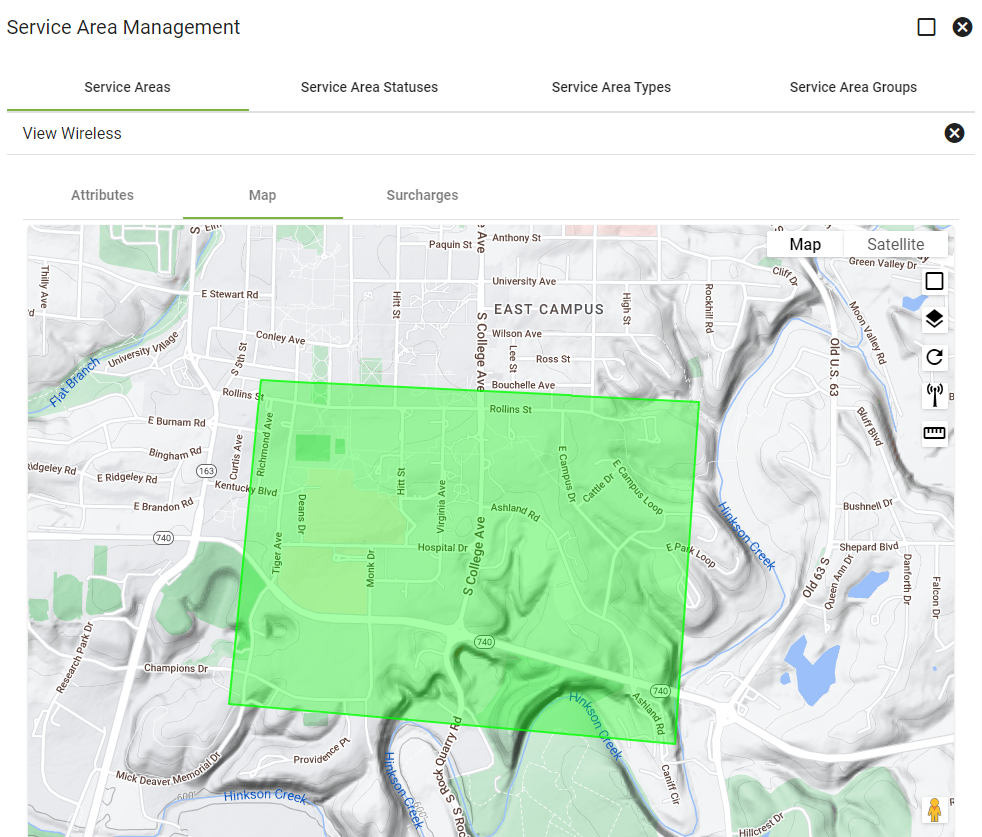
The next step would be to set up an approximate service area that the tower will service. Or it most cases, it will be time to alert a wireless service interest area. Ideally, a service interest package is already set up and you have been collecting leads in anticipation of the new tower activation. Start sending out communication to those leads letting them know that wireless is now available for install! This can be done through workflows, marketing campaigns, and batch notifications. These are tactics the Support Team can help you set up and work through.
Go to Admin Utilities and click Service Area Management. Then select the service area and update the status accordingly (such as from Collecting Intertest to Service Available or Production).
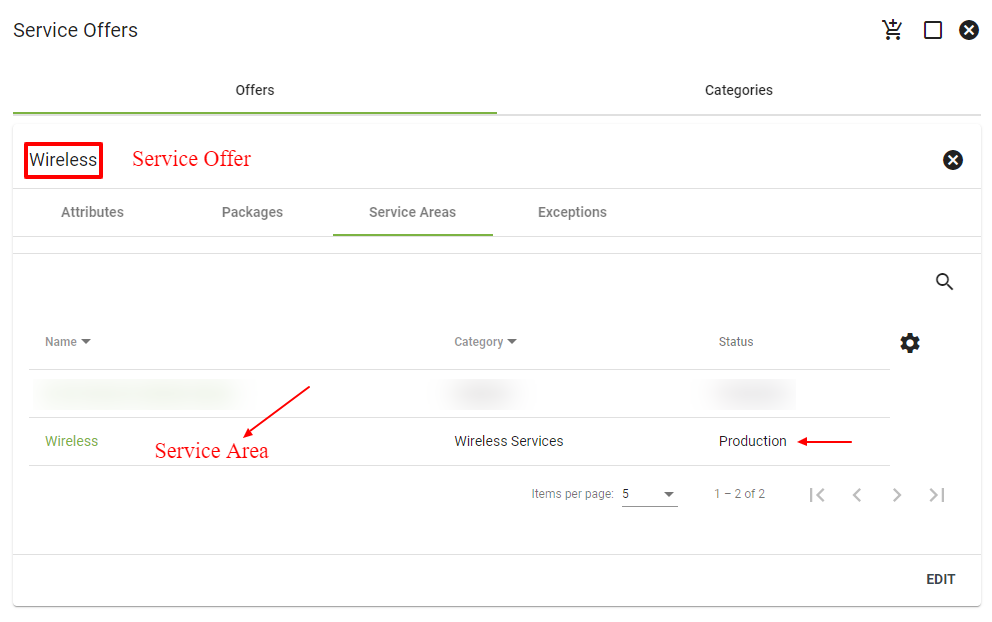
To sell speed packages, go to Service Offers and tie the wireless offer you will be selling in that area to the sellable package.
Contact your Vision Support Team once your tower is activated and up and going. It will be added to the map view in Vision.
Remember from the map view a “Green” tower means everything is good and running correctly. A “Red” tower means your tower is down. A “Yellow” tower means there is potentially a slowdown. And a “Black” tower means that the tower is not being monitored.
Shaping the subscriber's wireless speeds based on their purchased speed plan can be automatically managed through one of the available integrations.
Again, if questions come up about tower activation, your team’s Vision Point-of-Contact can reach out to the Support Team for assistance.