Onboarding simply means adding a new lead or a new subscriber into the system.
Wait, I do not want to add a new subscriber into the system, I am trying to add a lead. I don’t want a lead to get charged for a service offer. Do I really need to verify the subscriber’s address? These are some common misconceptions and questions the Support Team notices. With a quick mindset change, you’ll be a Vision expert in no time!
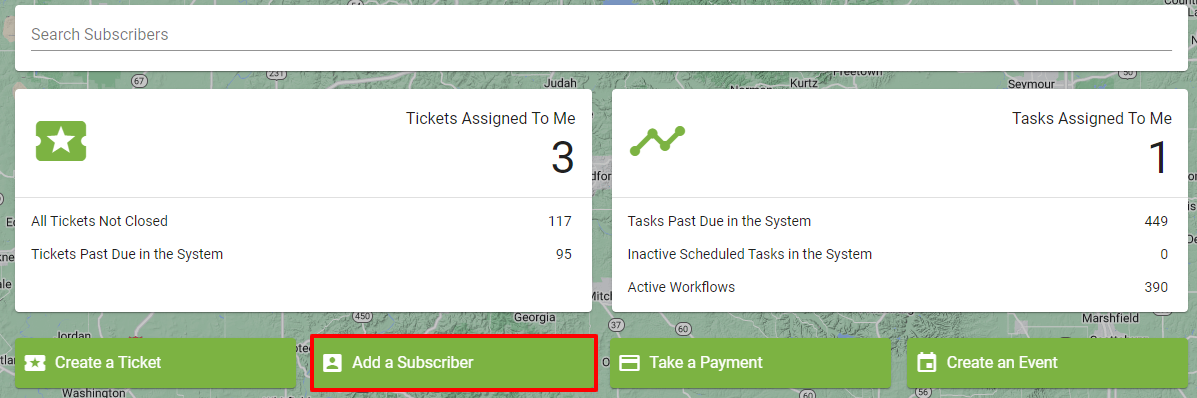
Add a Subscriber from the Dashboard.

Add a Subscriber with the Line of Sight Tool.
First thing, adding a new lead into the system is similar to adding a new subscriber. You will either enter the lead by selecting the Add a Subscriber button on the dashboard or via the map from the Line of Sight Tool. You will still verify the address and enter the lead’s information. The first difference between a current subscriber and a lead, is the service package they are signed up for in the shopping cart. You will have interest packages set up and leads will be signed up for packages such as, “interested in fiber” packages. The other different between a current subscriber and lead is the subscriber status. The status for a lead will be displayed as LEAD at the top of their account page. There are multiple status choices that can label an account and they are built into the system to describe the subscriber. (Examples: LEAD, CURRENT, DELINQUENT, PAST, ERROR) The system automatically flips the status depending on the situation, for example if they become a current customer with an active service their status will change to CURRENT. You can flip statuses manually if needed. So a SUBSCRIBER is used to describe a lead or a current customer.
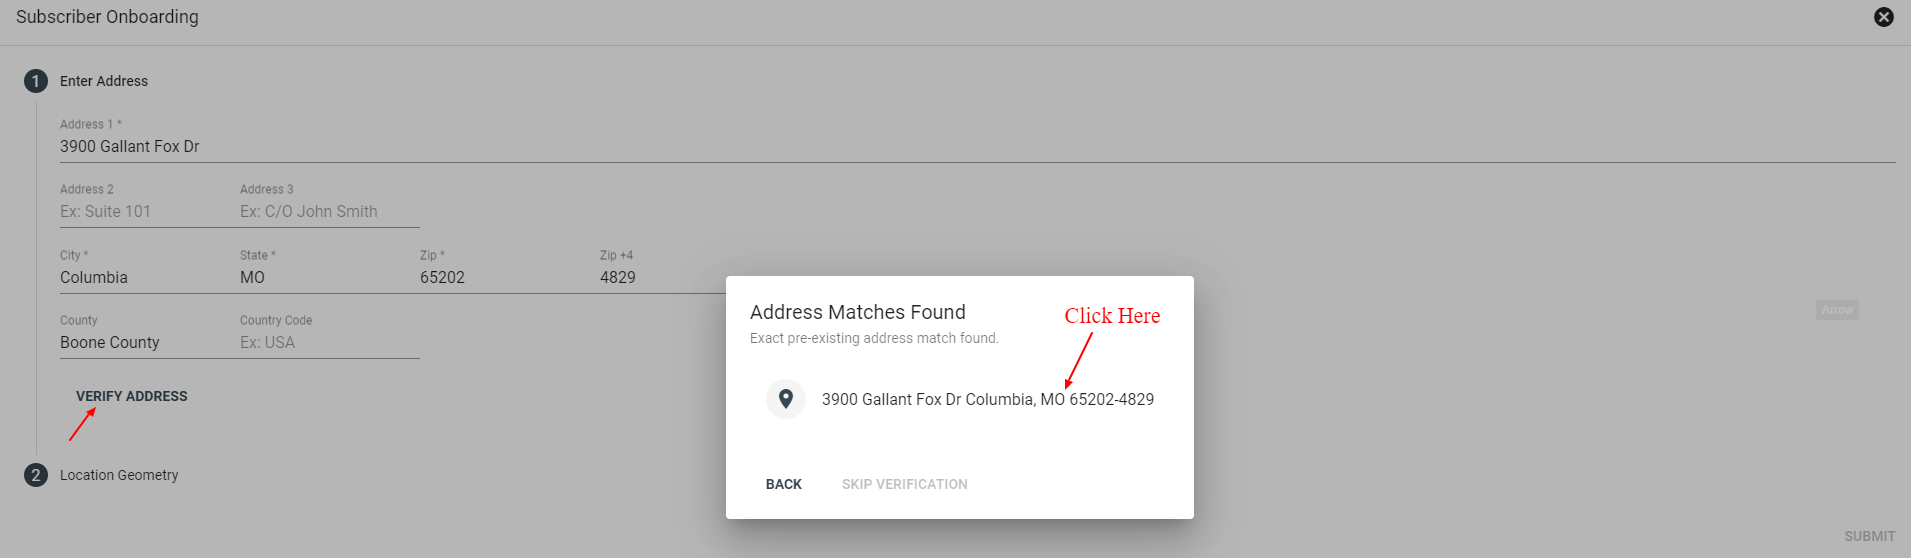
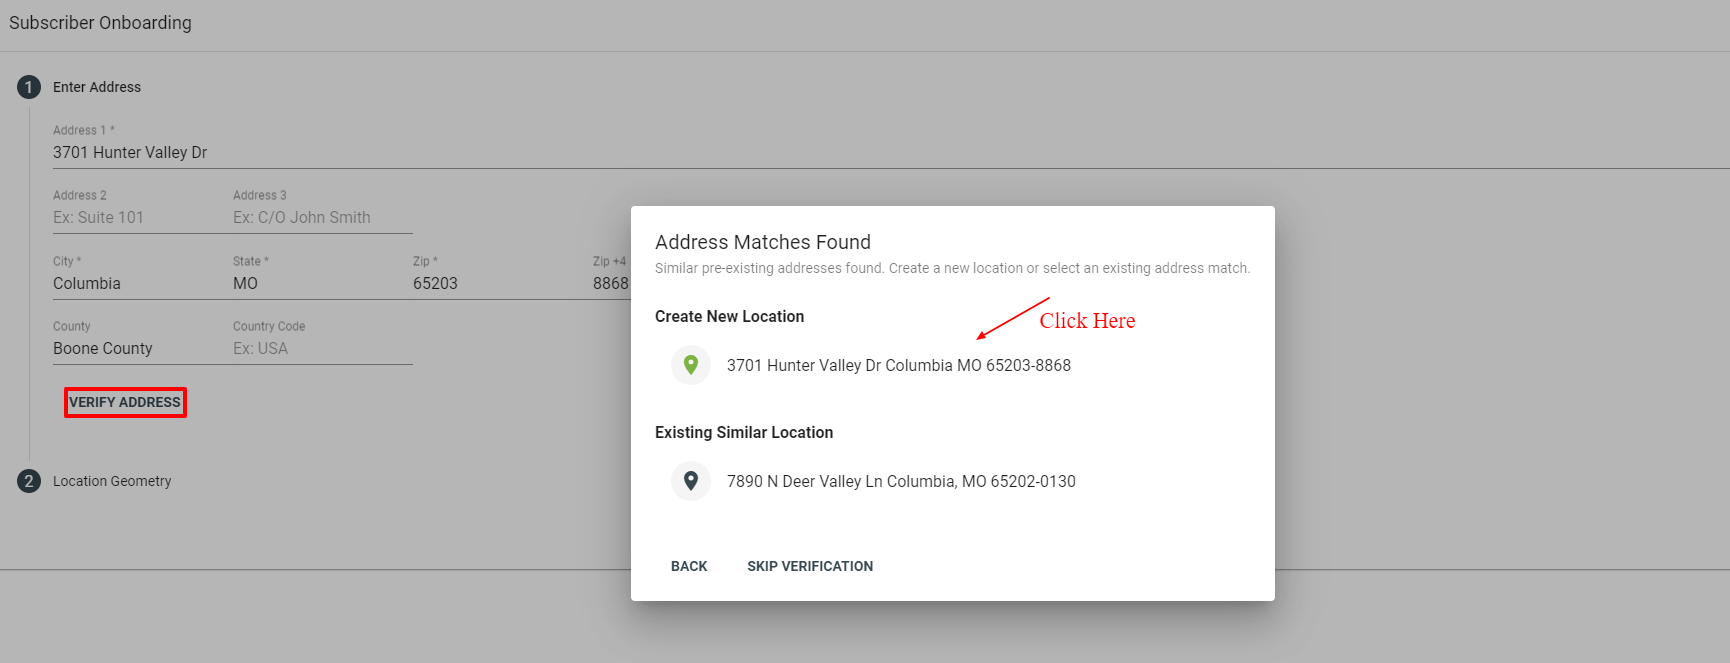
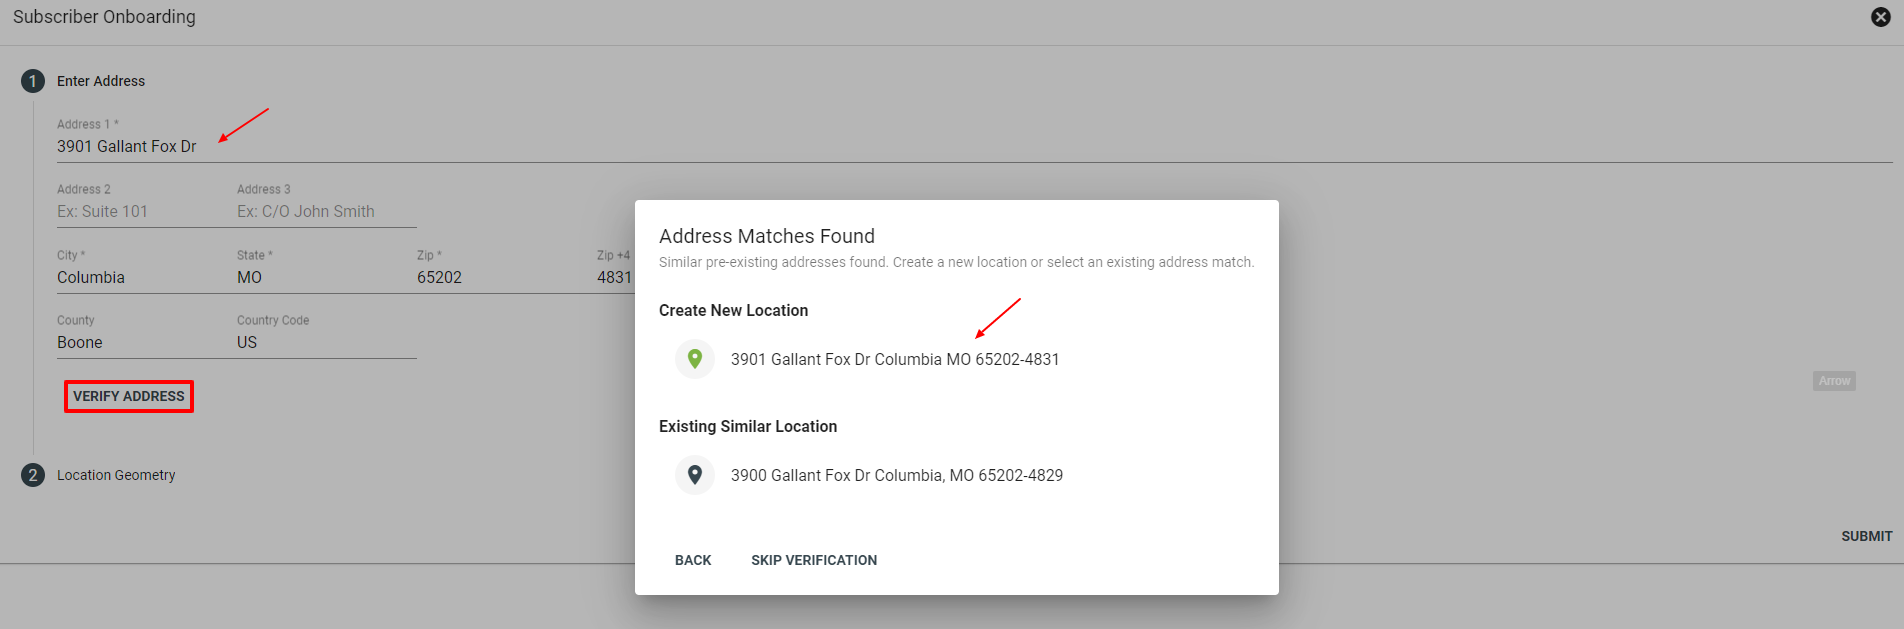
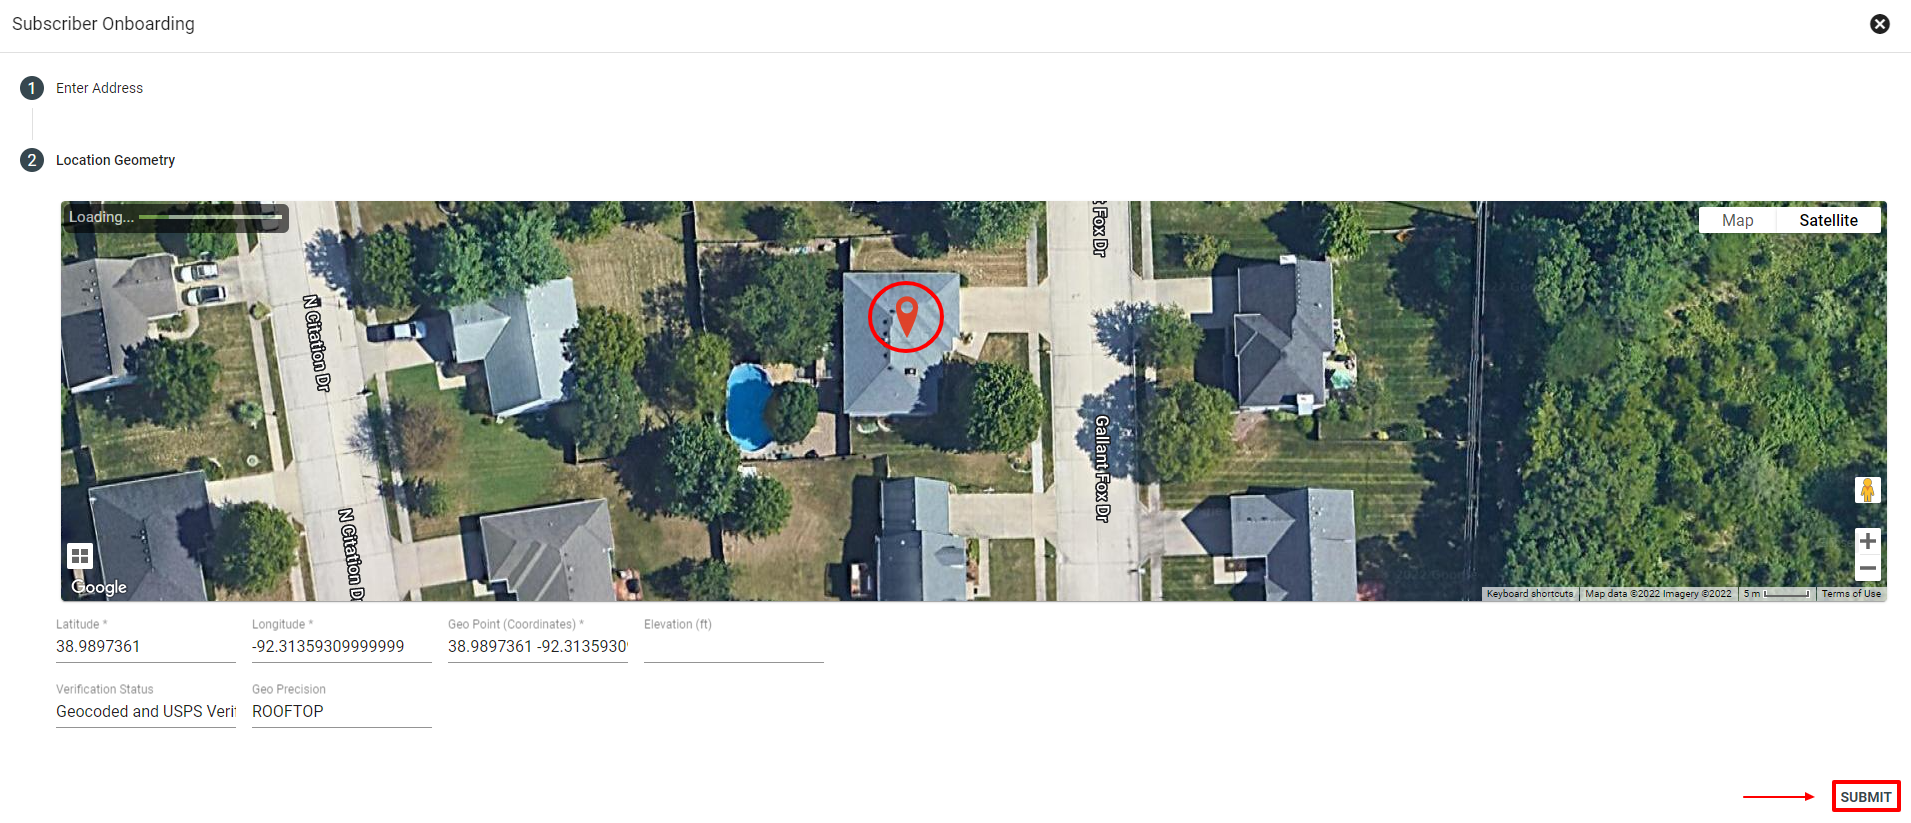
Remember, location rules everything in Vision! You are first adding a location into the system when you add a new subscriber, not the other way around. Enter the address, then select verify address. The system uses Google and USPS to find the address. It is working to scrub the address and get the best possible match. If the location is not in the system, you can create the new location and add the new subscriber. If you verify an address and receive an exact address match back, click on that match to continue in the onboarding process.
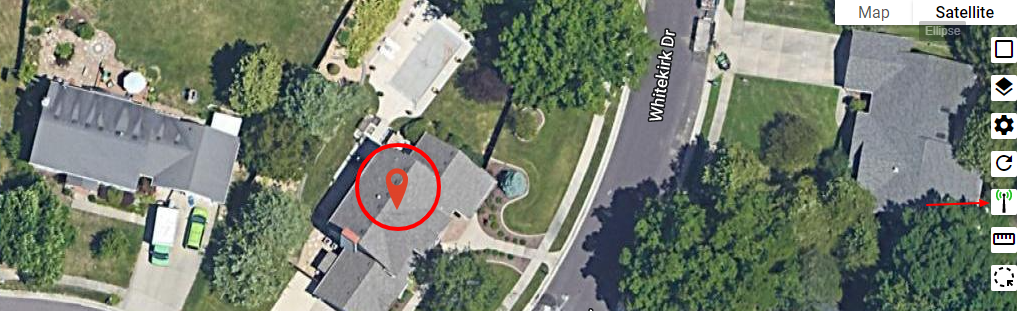
1. Use the Line of Sight tool to drop a pin. Move the pin onto the correct rooftop address. Click 
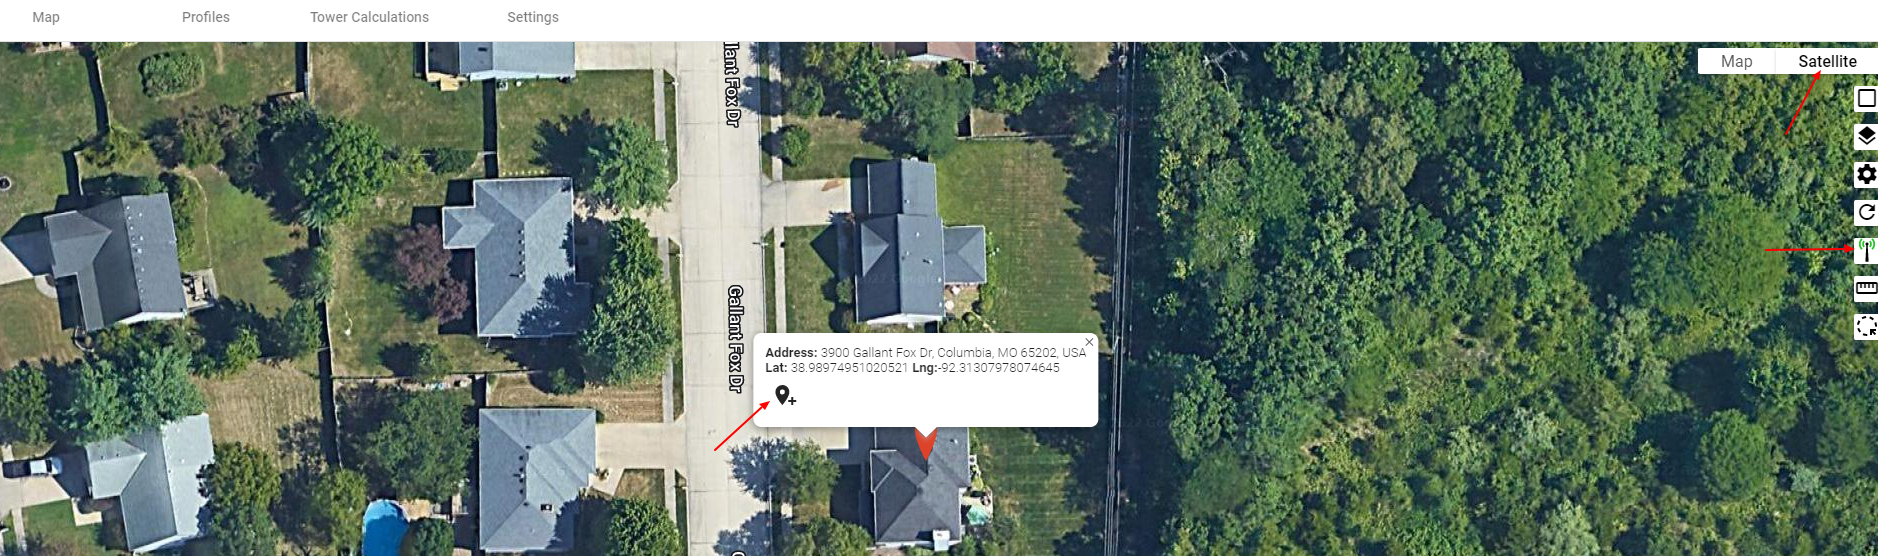
2. Click VERIFY ADDRESS. If there is a match found, click on that match.
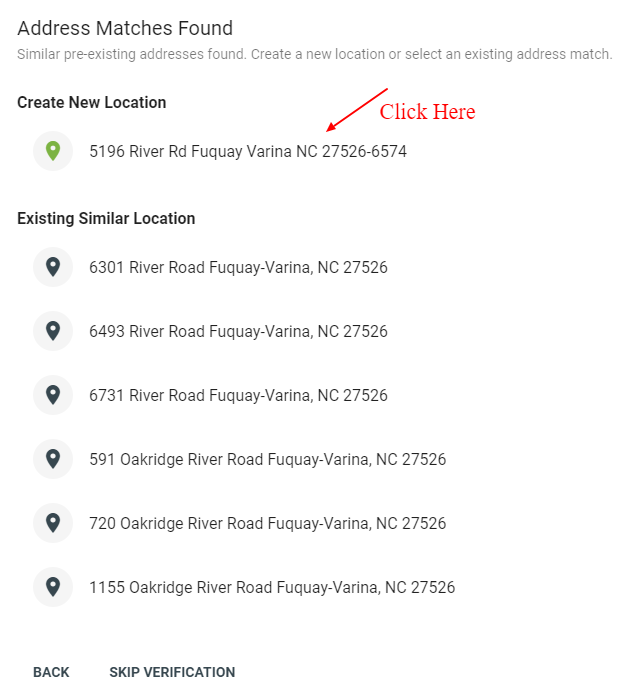
The address may bring up similar matches, but you can click and create a new location. Examples below.
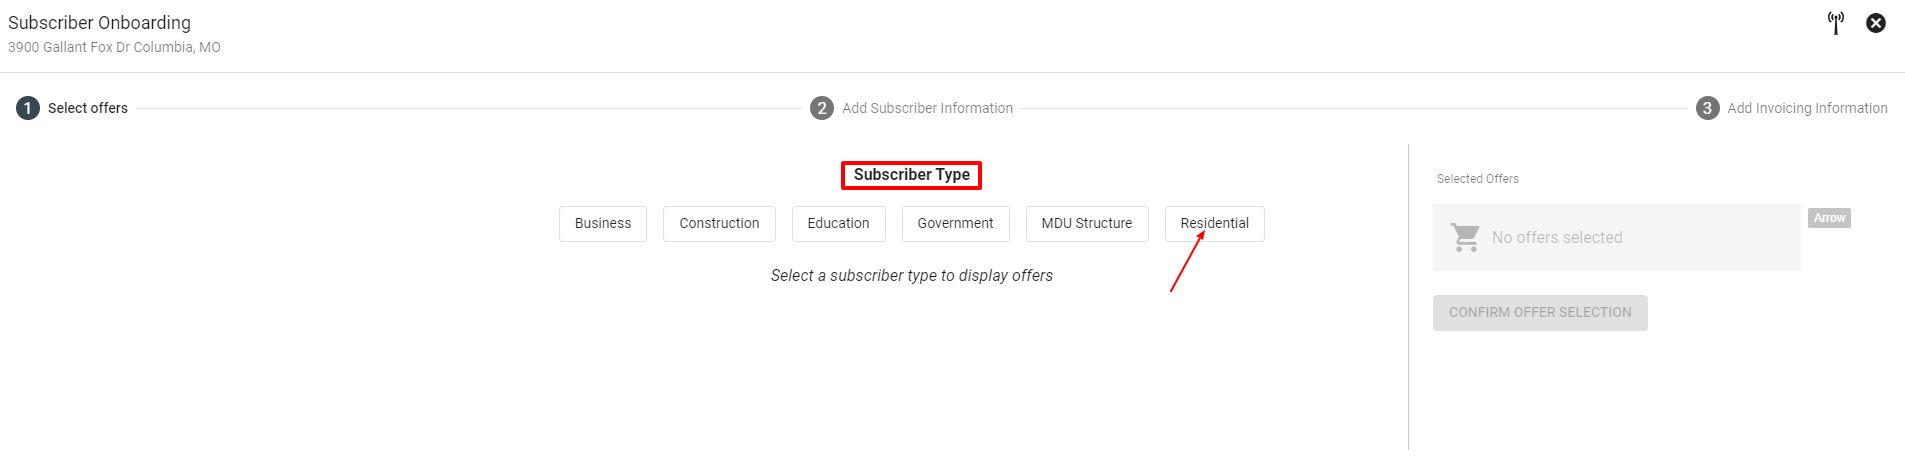
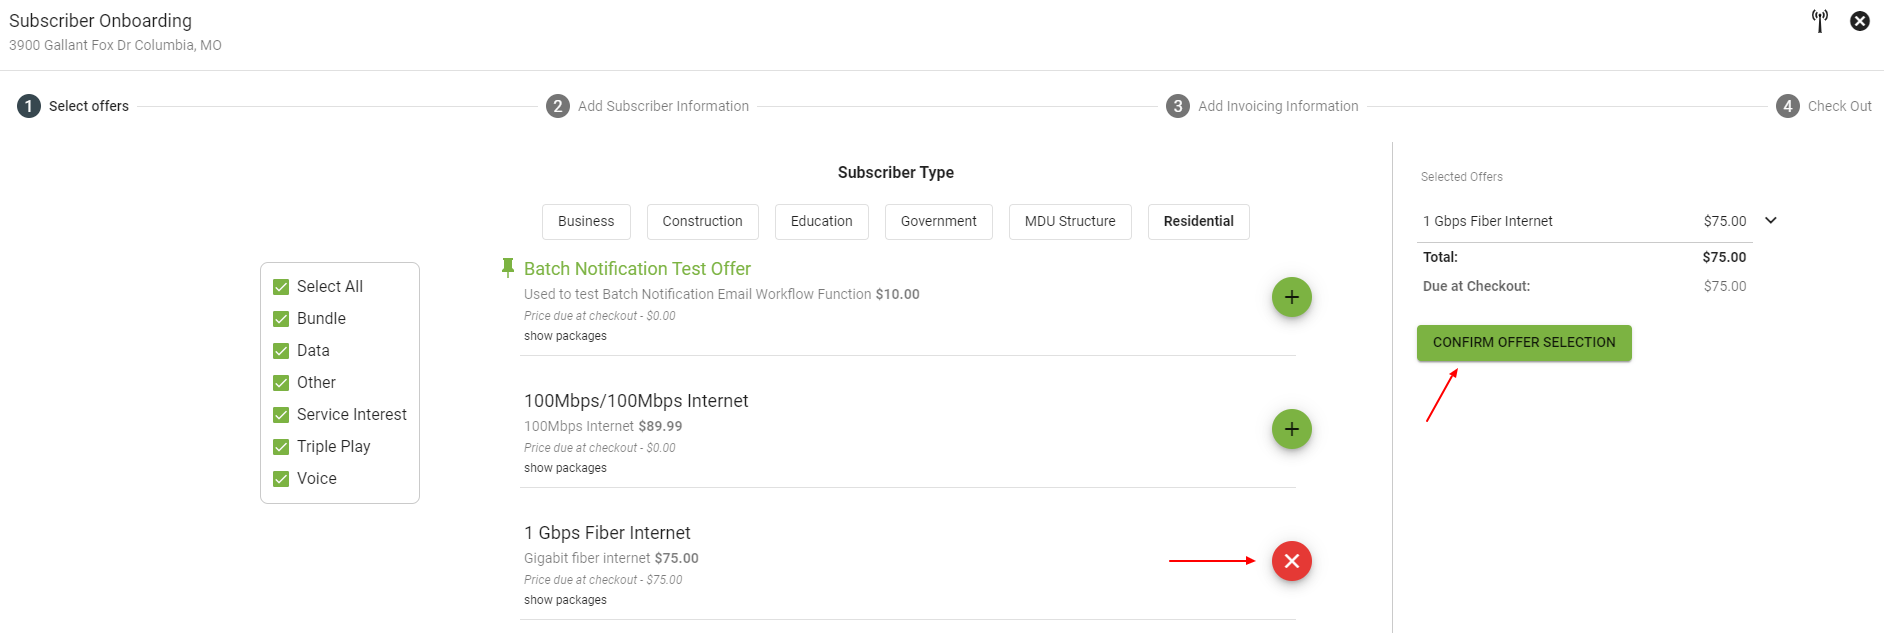
3. Select the subscriber type.
4. Click 
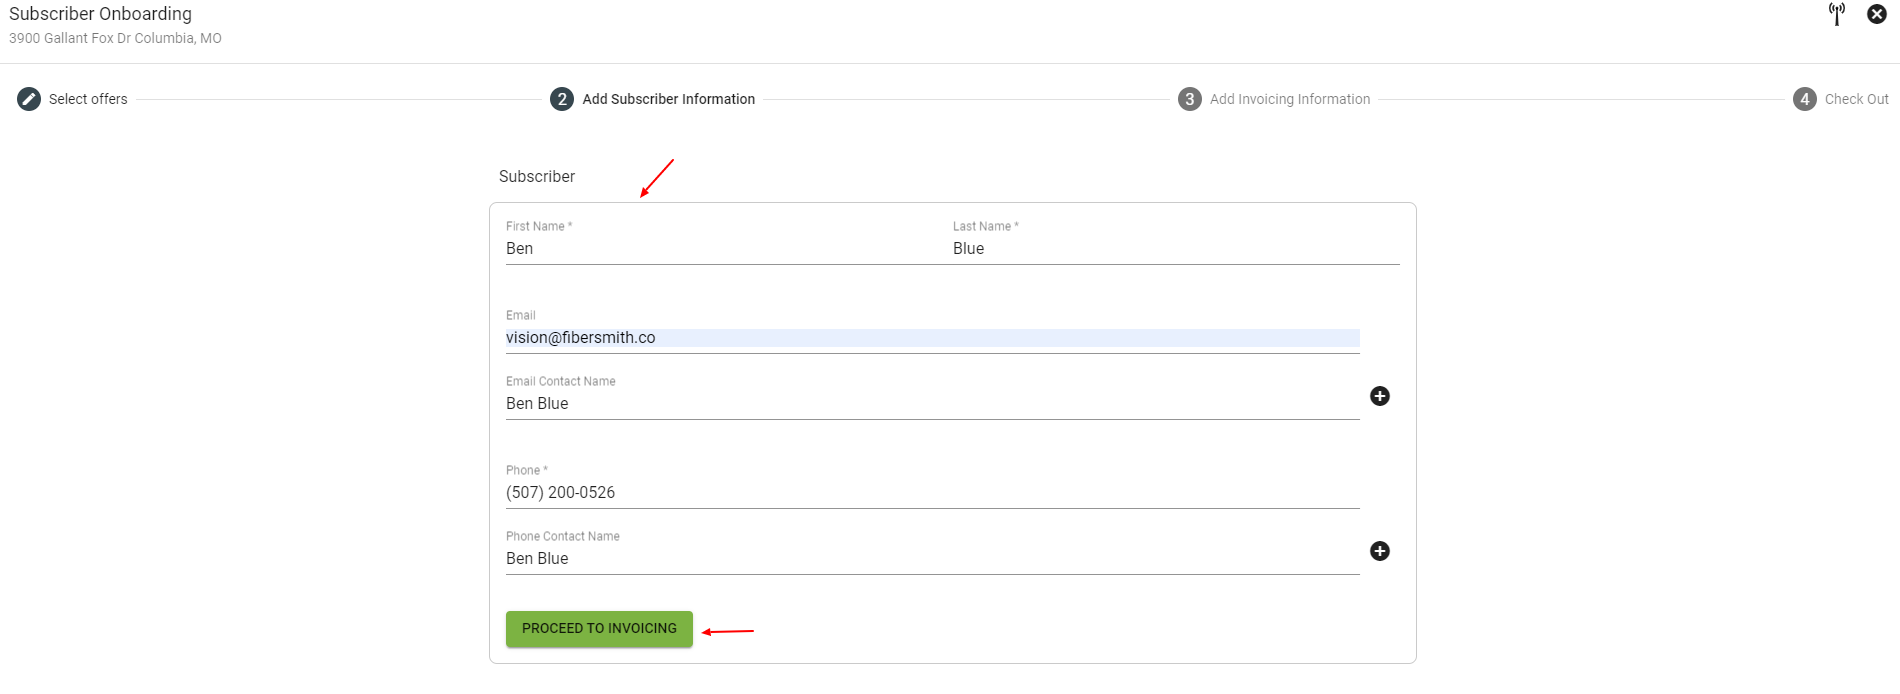
5. Fill in Subscriber information and click PROCEED TO INVOICING.
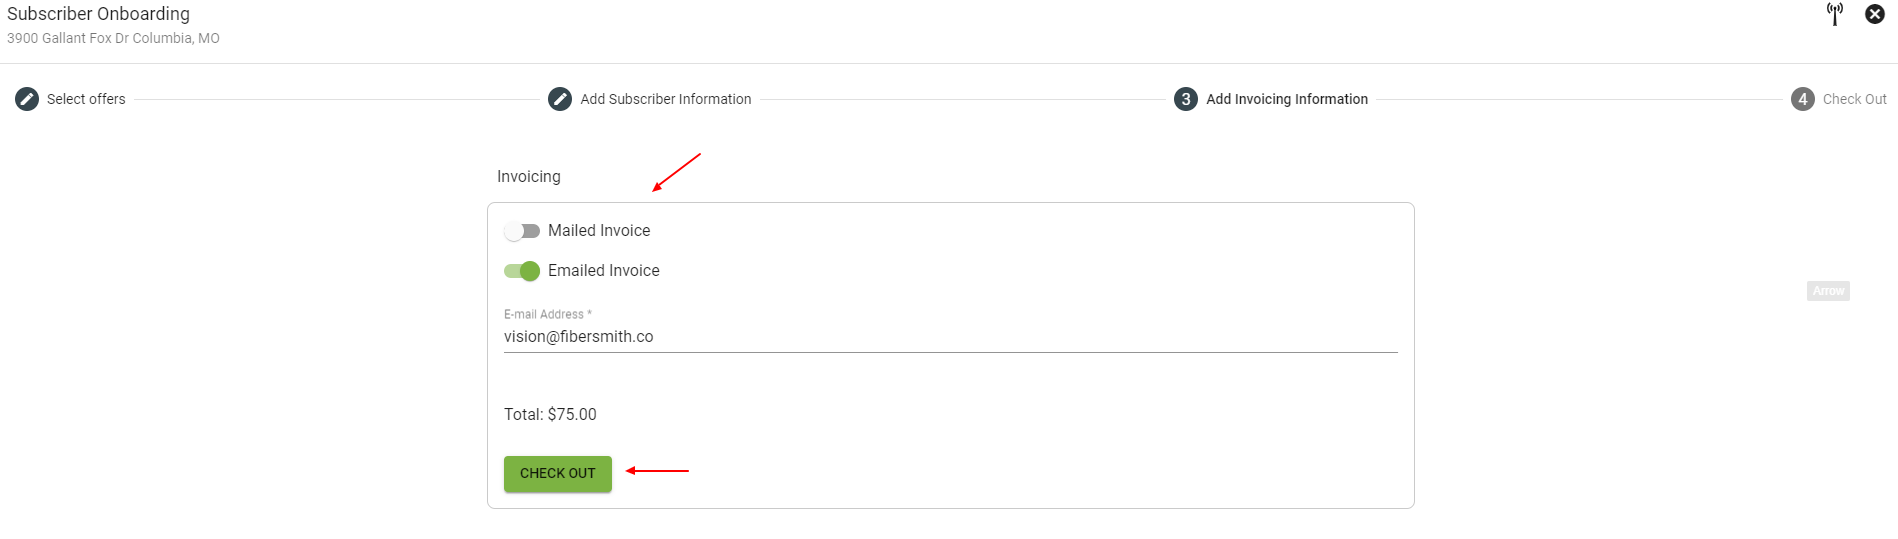
6. Confirm Invoicing and click CHECK OUT.
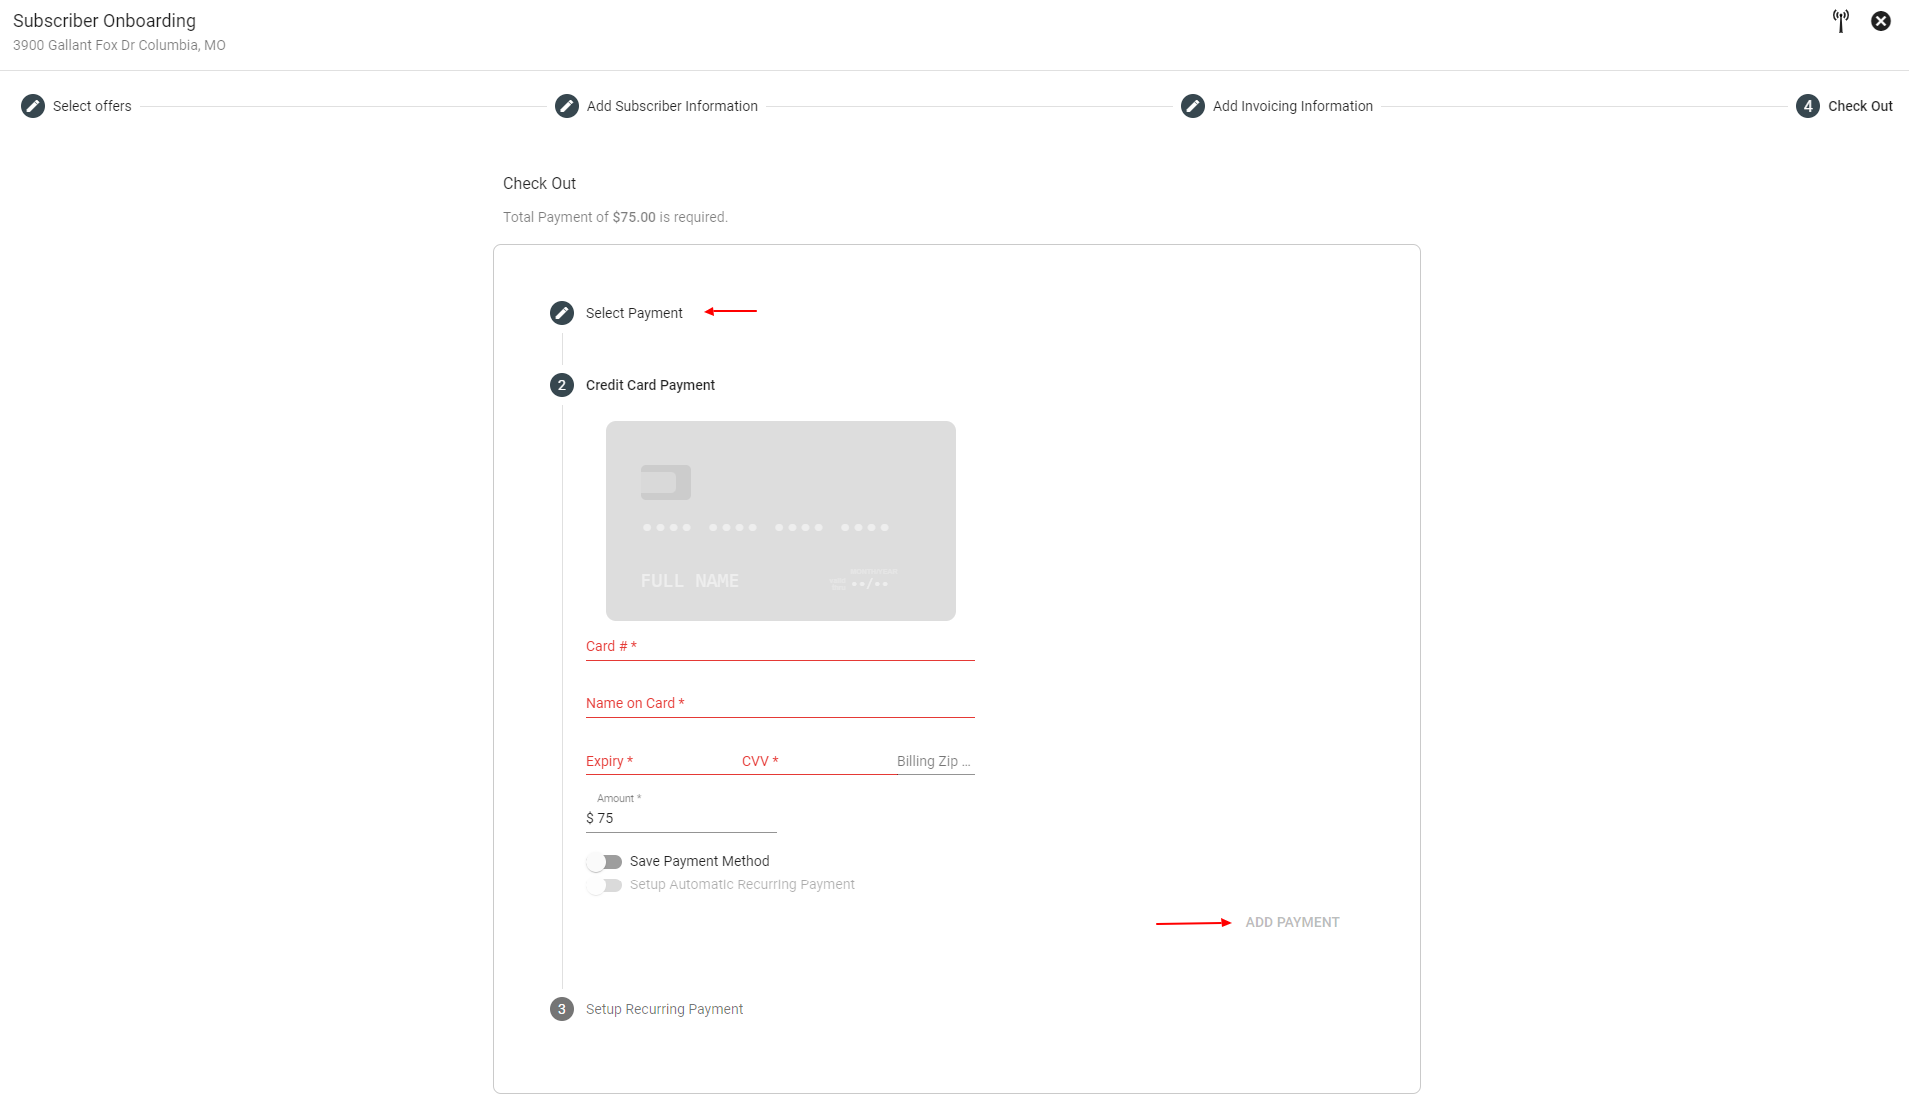
7. Select a payment option and fill in payment information. You can save the payment method and setup automatic recurring payments. Then click ADD PAYMENT.
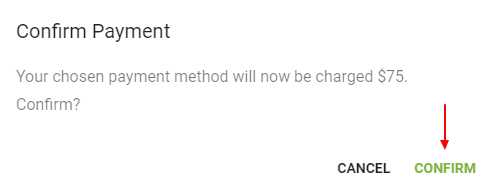
8. Click CONFIRM to confirm payment.
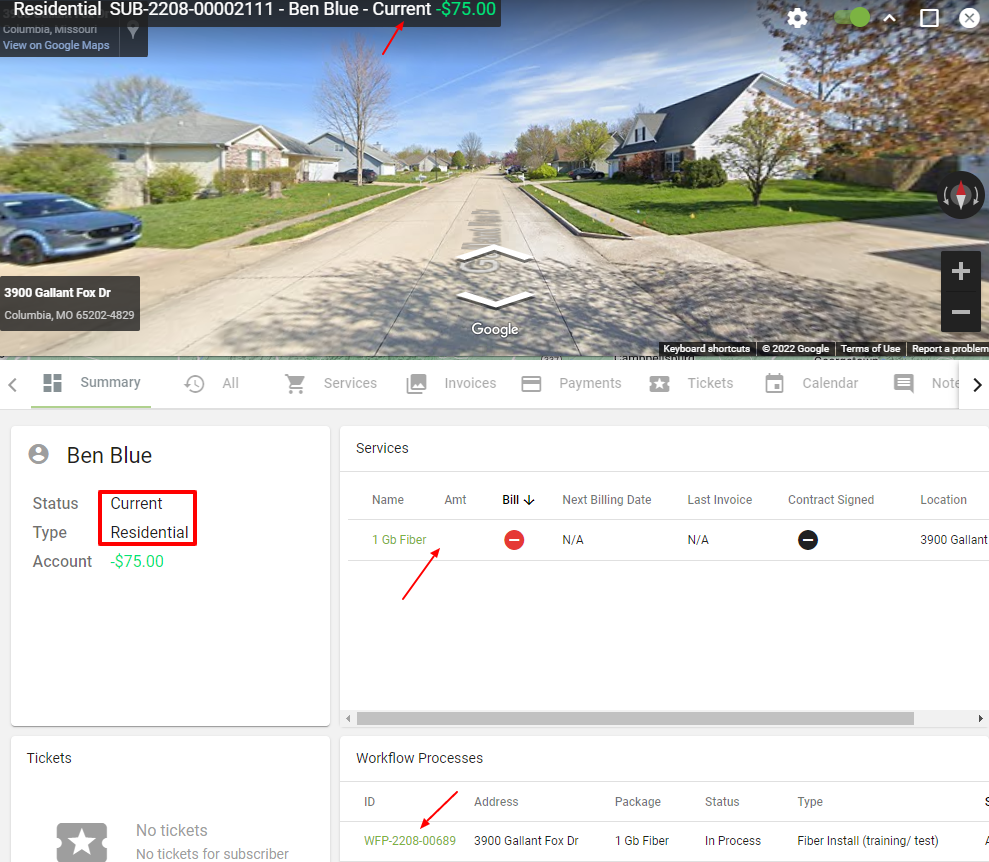
9. Then you will be able to view the new Subscriber Account page. Remember to make sure the workflow is launched if needed and the subscriber status will automatically flip.
Or you can add a subscriber from the Add a Subscriber button on the dashboard. The only difference in the process is that you will enter the address first and then click VERIFY ADDRESS. Then you will confirm the rooftop pin location and click SUBMIT.
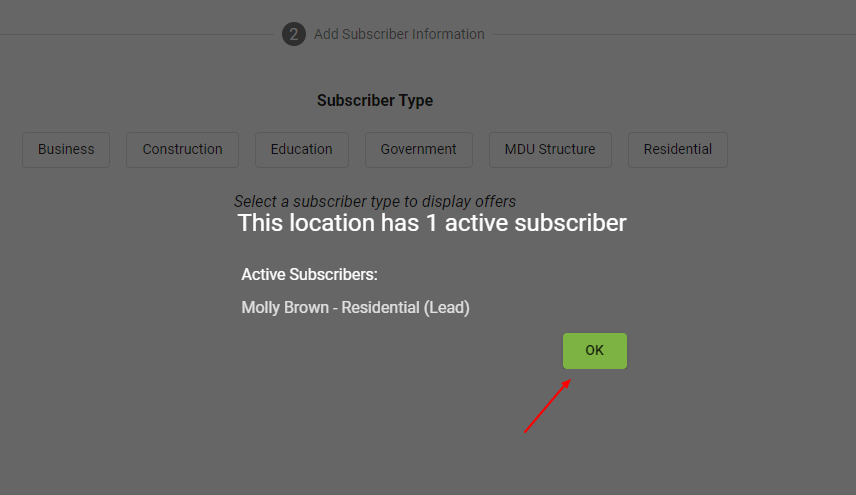
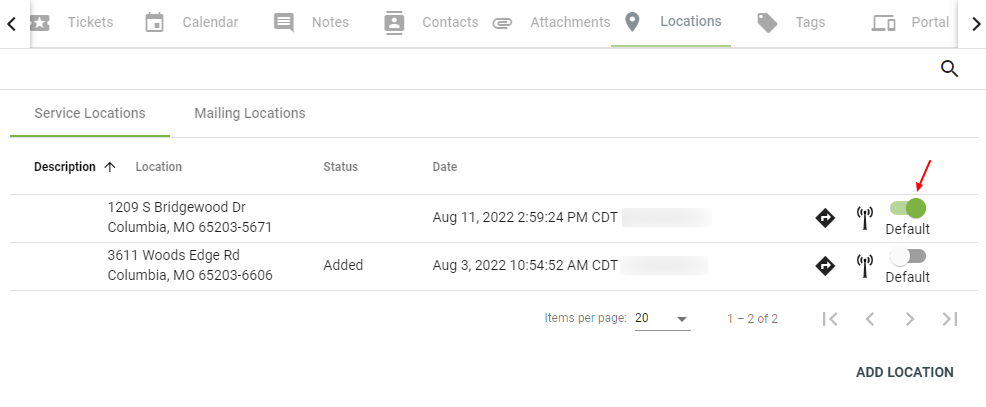
If there is a current subscriber associated with a location, there will be an overlay displayed to alert you before you enter a new subscriber's information. Subscribers can move but that subscriber stays associated with the old location. Their new address should be set as their default location. Learn more about this topic in FAQs and Subscriber Services.