Calendar
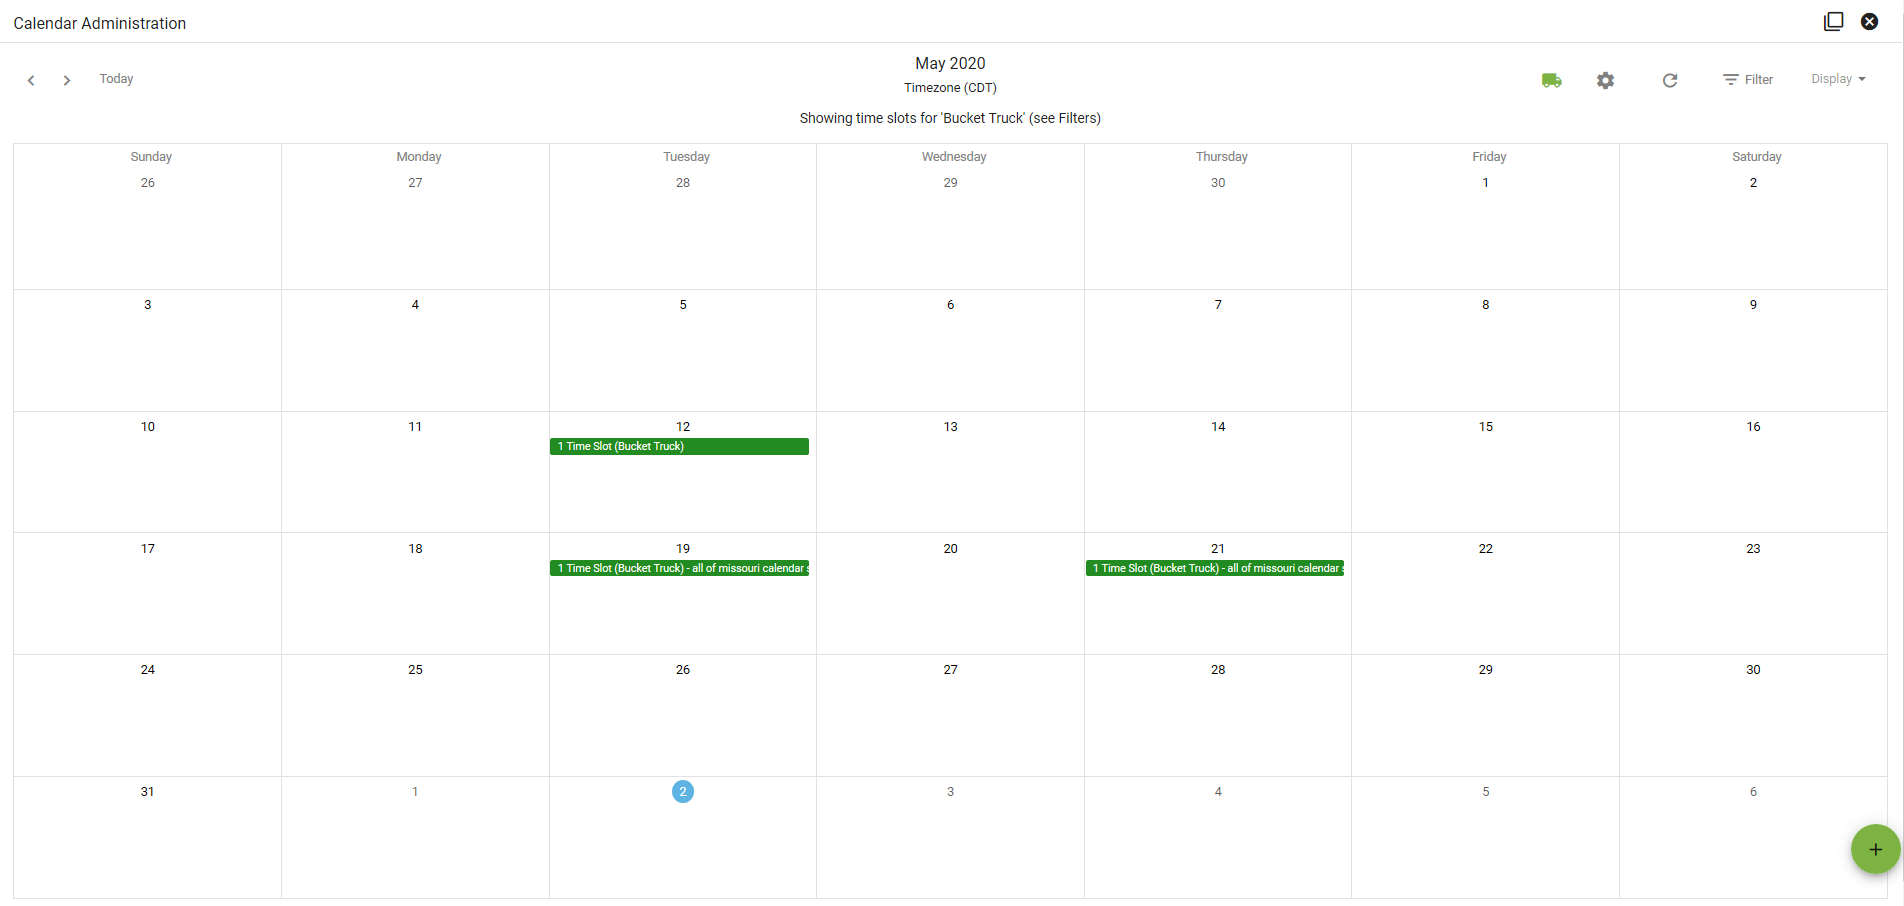
The Calendar Administration page is where administrators are able to create a resource-based, geospatially aware, company-wide calendar within Vision. Creating schedules and time slots allows your company to easily schedule subscriber install and dispatch appointment times, construction work, meetings, and more.
Filter Event Types
In the upper right of the Calendar you'll see a menu where you can use the Track Your Trucks map 
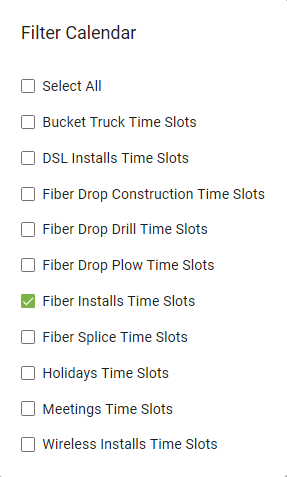
Click in the upper right to choose between different Event Types. Click the check box next to the Event Type you'd like to view or add.
Create Time Slots
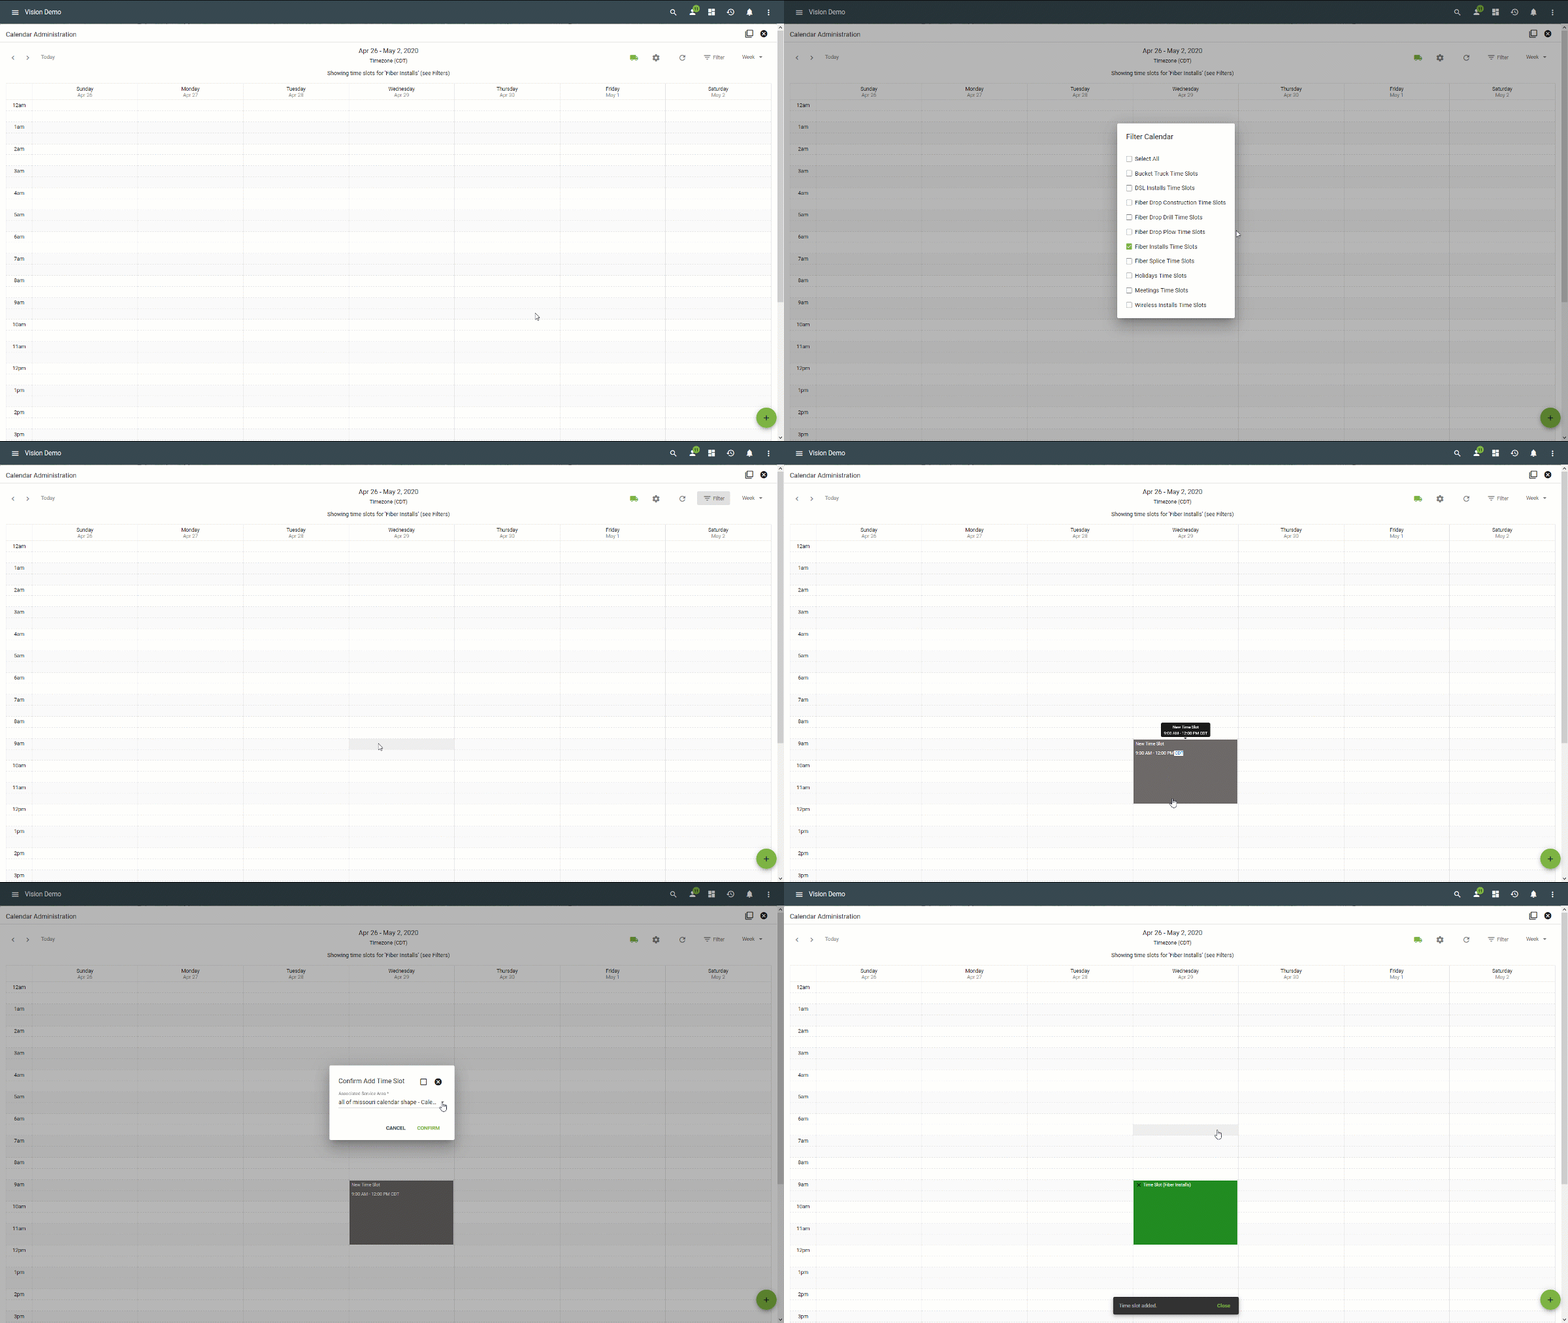
To create a new time slot, first make sure you have the correct event type selected in the Filters menu.
There are two ways to create a time slot:
1- In the week or day calendar view, click and drag on a specific day at a specific time. If required, choose the Service Area to apply the Time Slot to.
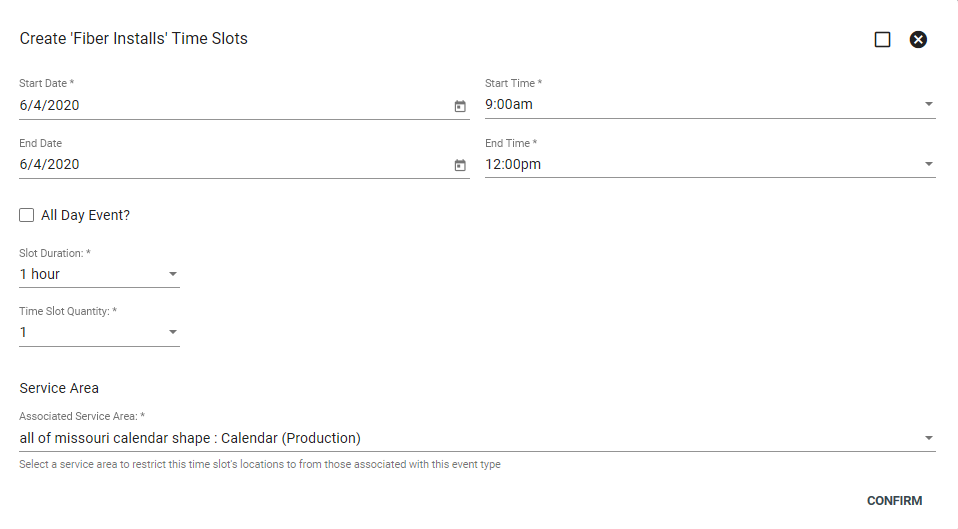
2 - Or click
Using this method, you can create multiple slots during this one period of time using the Slot Duration and Slot Quantity drop downs. For instance, the example below will create three separate Fiber Install slots that last an hour each from 9 a.m. to 12 p.m. (9-10 a.m. / 10-11 a.m. / 11-12 p.m.)
When there is more than one tech doing Fiber Installs during this time, add more Time Slot Quantities.
Choose the associated Service Area if necessary, then click CONFIRM.
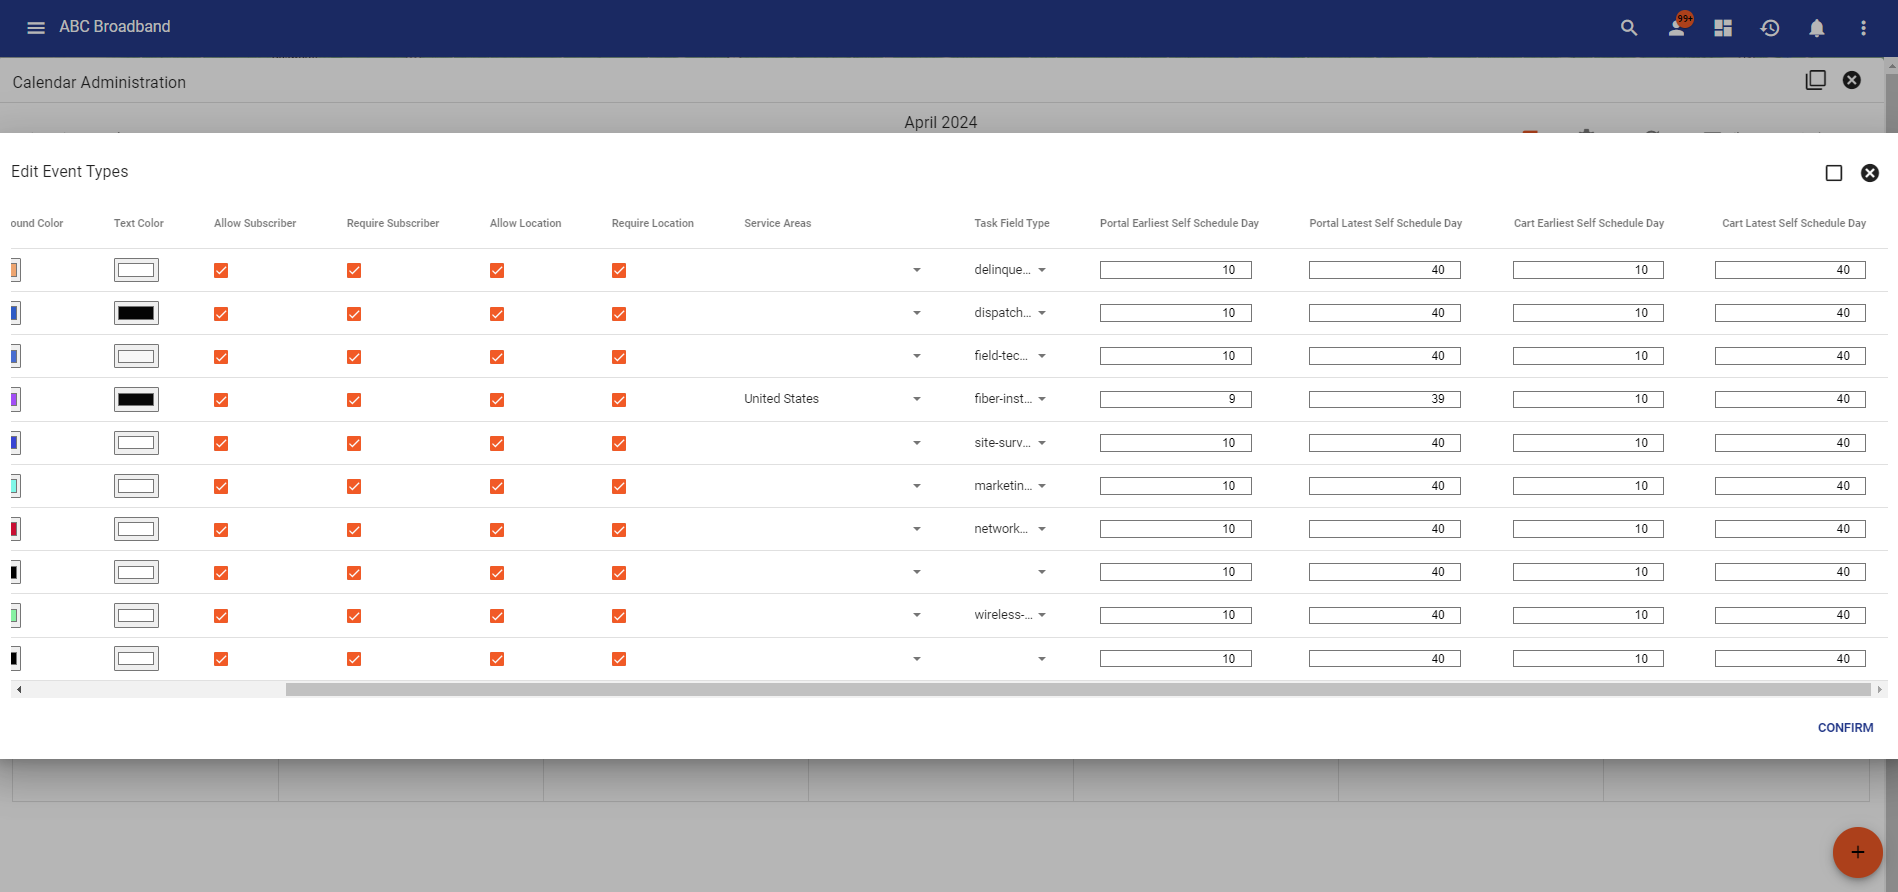
Edit Event Types
Click 
Add a new Event Type at the bottom of the list. Enter the name, choose a background color, text color.
Choose whether to allow or require subscribers or locations. If applicable, select what Service Area to associate. When finished, click CONFIRM.
Subscriber Event Reminders
It's common knowledge that today's homeowners and business owners are very busy people. It's important to send timely reminders for important appointments like service installations or service call events were a person needs to be present on site for the installer or as a heads up about a company technician being on property doing authorized work. Vision gives providers an easy way to set up flexible reminders through Email, SMS or both to help reduce no-shows and to provid a high level of customer service.
Follow these simple steps within two parts of the system to get started with Subscriber Event Reminders -
Part 1 - Batch Notifications
Write out the reminders in Batch Notifications (Admin Utilities - Email Templates and Drafts - Notification Templates).
Click on the Pencil icon to update the Description and Content. Use any of the “Calendar Event Reminder” templates.
There are sections in each of the batch notification templates for email and SMS. Either one or both of those can be used.
Dynamic variables in the batch notifications include the following data points for the event or subscriber account information

#calendareventstartdateshort = numeric date format - ex: 9/20/2024
#calendareventstartdatelong = words - ex: September 17, 2024

An example reminder might be as simple as - 'Your installation is scheduled for #calendareventstartdatelong at #calendareventstarttime.'
Tips:
- Multiple reminders can be configured (i.e. if you want to send a notification one week out and then again one day out).
- Multiple reminders can use the same batch notification or different ones.
- It's best to the shorter date variable for SMS.
Part 2: Calendar Admin
Once the new Batch Notification(s) are built out, the calendar reminders can be set to schedule in the Calendar Admin interface under “Edit Event Types”

Scroll over to the event type you want to add reminders for, then click the Bell icon to open the Reminder set up interface.
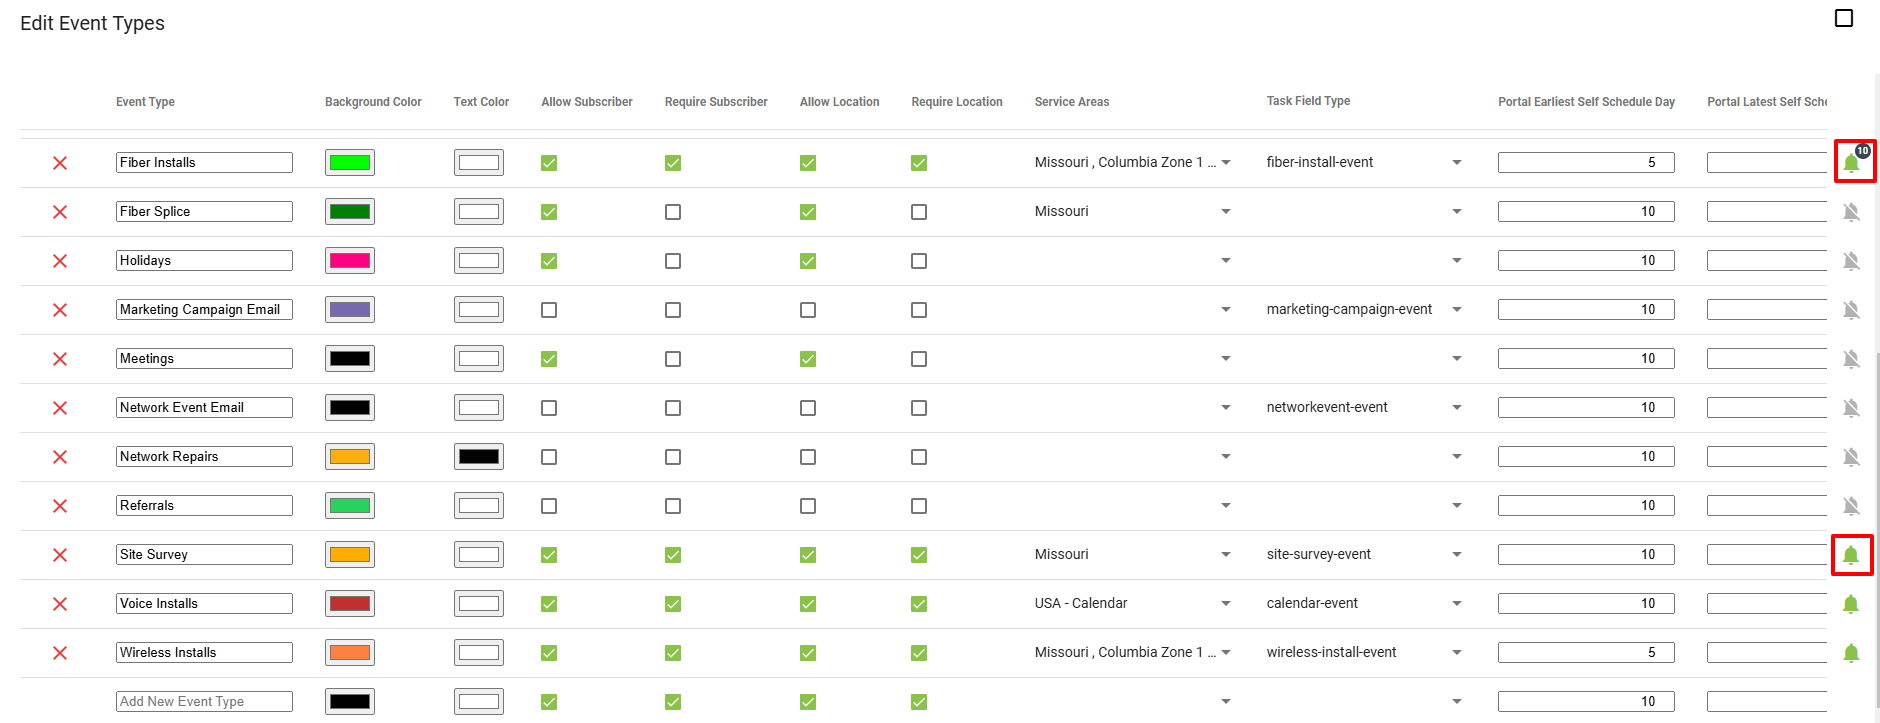
Add a New Reminder
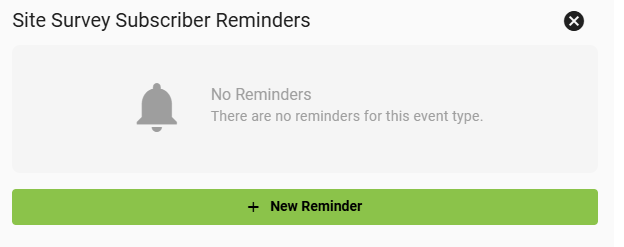
Specify whether it's email or SMS and which batch notification you want to use.

Set how far in advance of the event start time you want the reminder to go out.
Toggle the “Active” to turn on and then click “Add Reminder”
That's it! Now your field techs can look forward to reduced no-shows and busy subscribers who are thankful for the reminder so they can be ready for your arrival!
View Reminder Logs
These communications are tracked and can be found in two sections of the system.
Under the All tab on the Subscribers account.

Under the Notes section of the Event on the Calendar

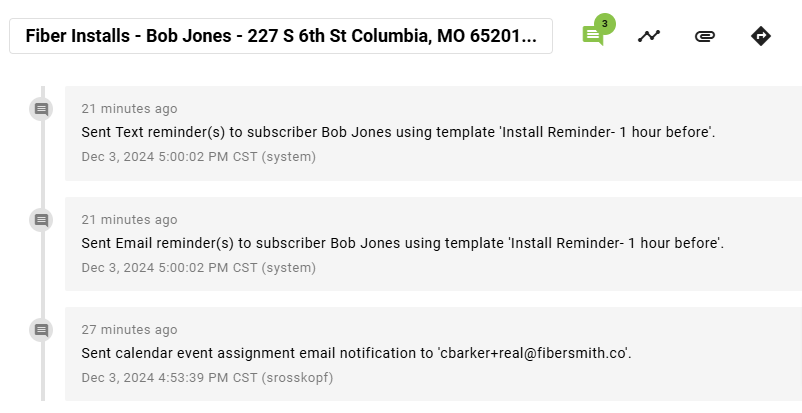
Edit Subscriber Event Reminders
Click on the Bell icon to open the Event Reminder for the options to Delete, Activate/Deactivate or Edit.

Copy a Time Slot
First make sure the desired Event Type is selected under the Filters menu. Click
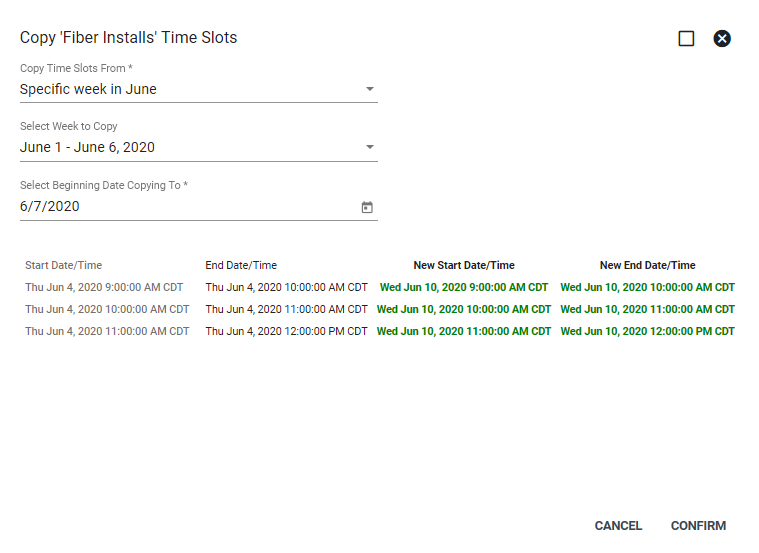
Choose where to copy the time slots from. Select the beginning date copying to. For instance, in the example below we are copying Fiber Install time slots from the first week in June to the second week in June. When finished, click CONFIRM.
Remove Time Slot
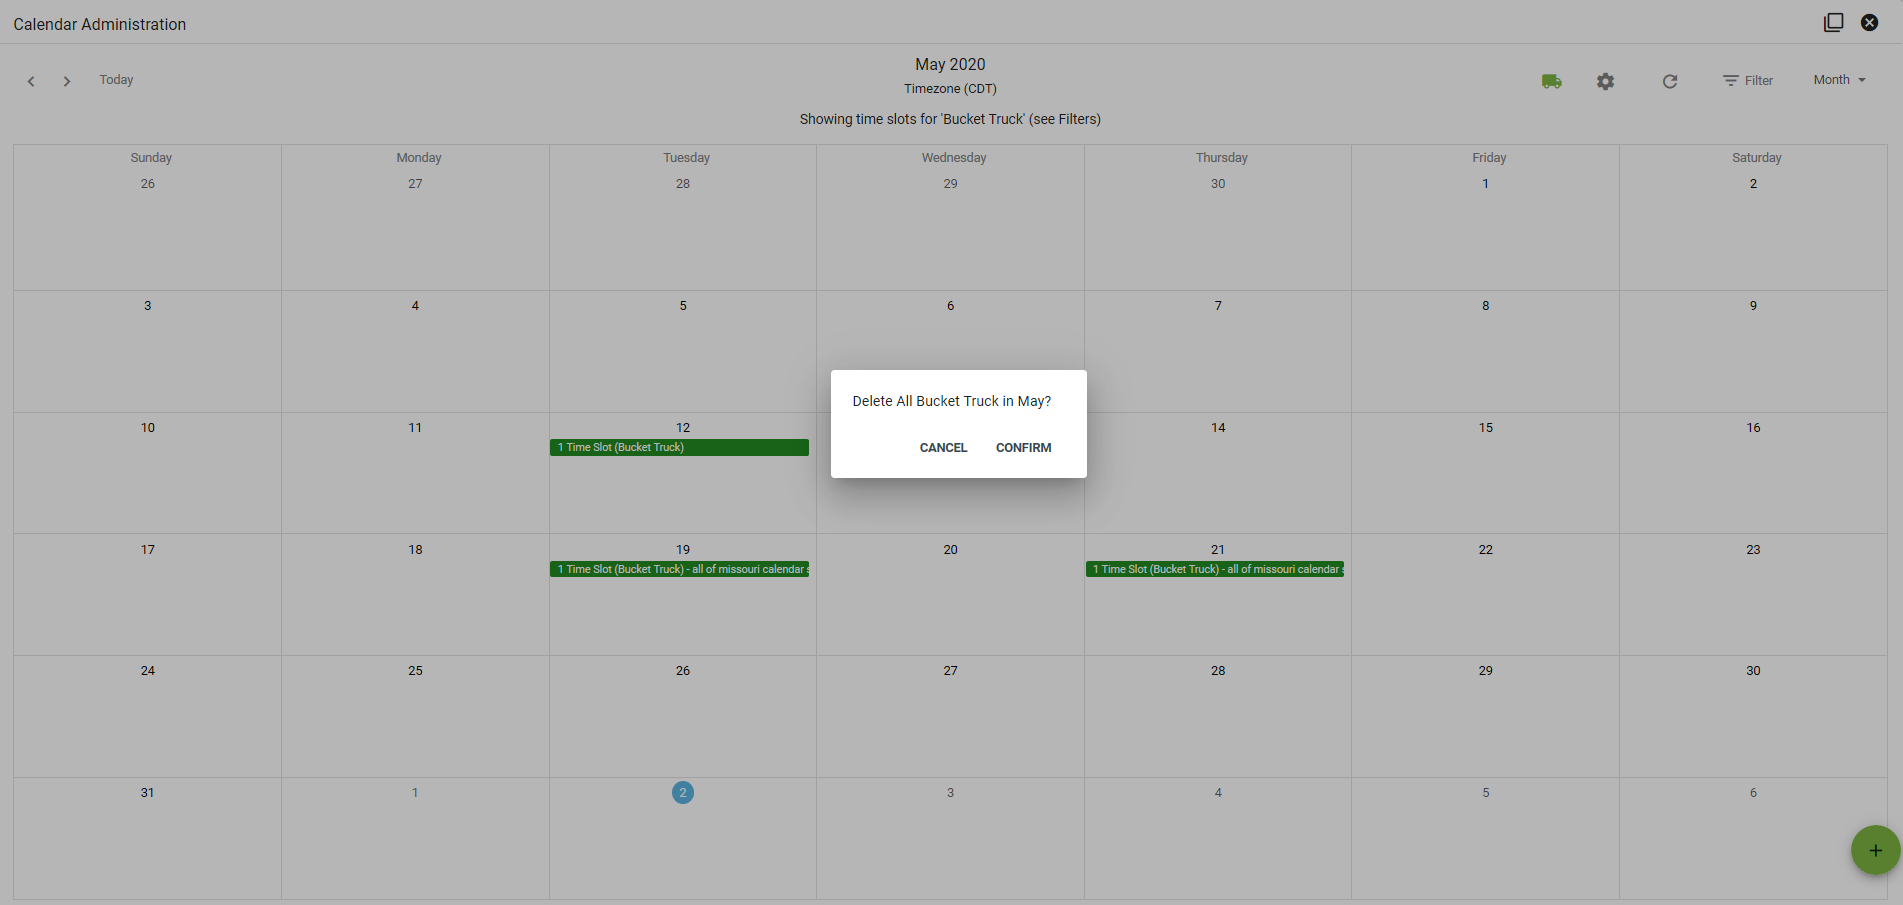
There are two ways to remove Time Slots from the Calendar. First, when in the day or week view, click the X next to a slot to delete.
You may also remove slots by clicking
Self Scheduling
Vision offers subscriber to scheduling their own installations, with the two options a subscriber can choose to schedule their installation through the signup process in the Shopping Cart or at a later time in the Subscriber Portal. Hardware installations, Fiber drops, site surveys and more tasks can be schedule by the subscriber. If there is any task that requires a technician to go on the subscribers property its recommended that you give the option to the subscriber to schedule the tasks in case they would like to be there while the technician is on site. Self scheduling needs a workflow to run properly, this can be set up on your own however there is astep that the support team will need to activate before the public shopping cart and subscriber portal can use self subscribering for customers. If you would like to set up self scheduling for your subscribers you will need to contact our support team to get the correct settings activated.
Shopping Cart
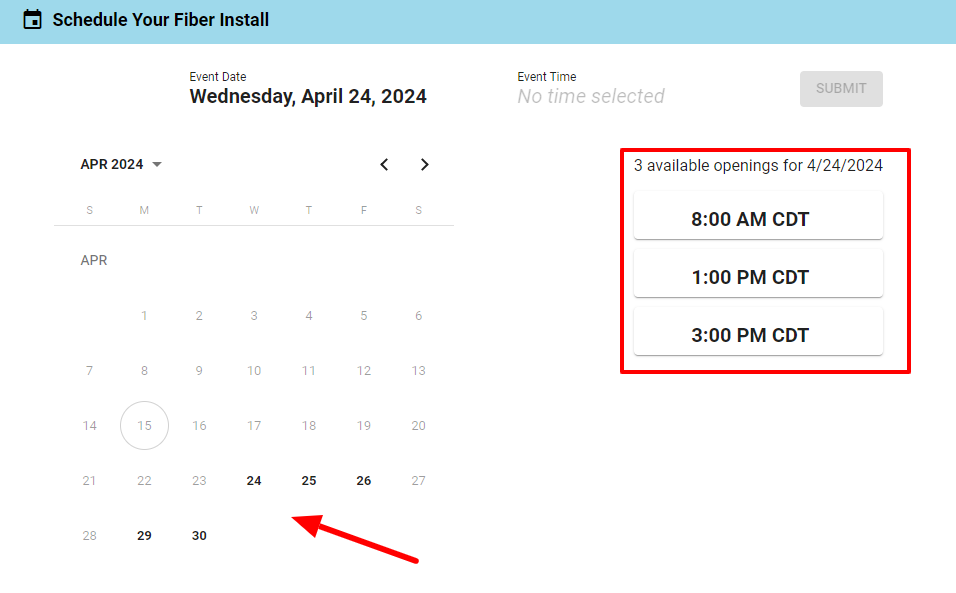
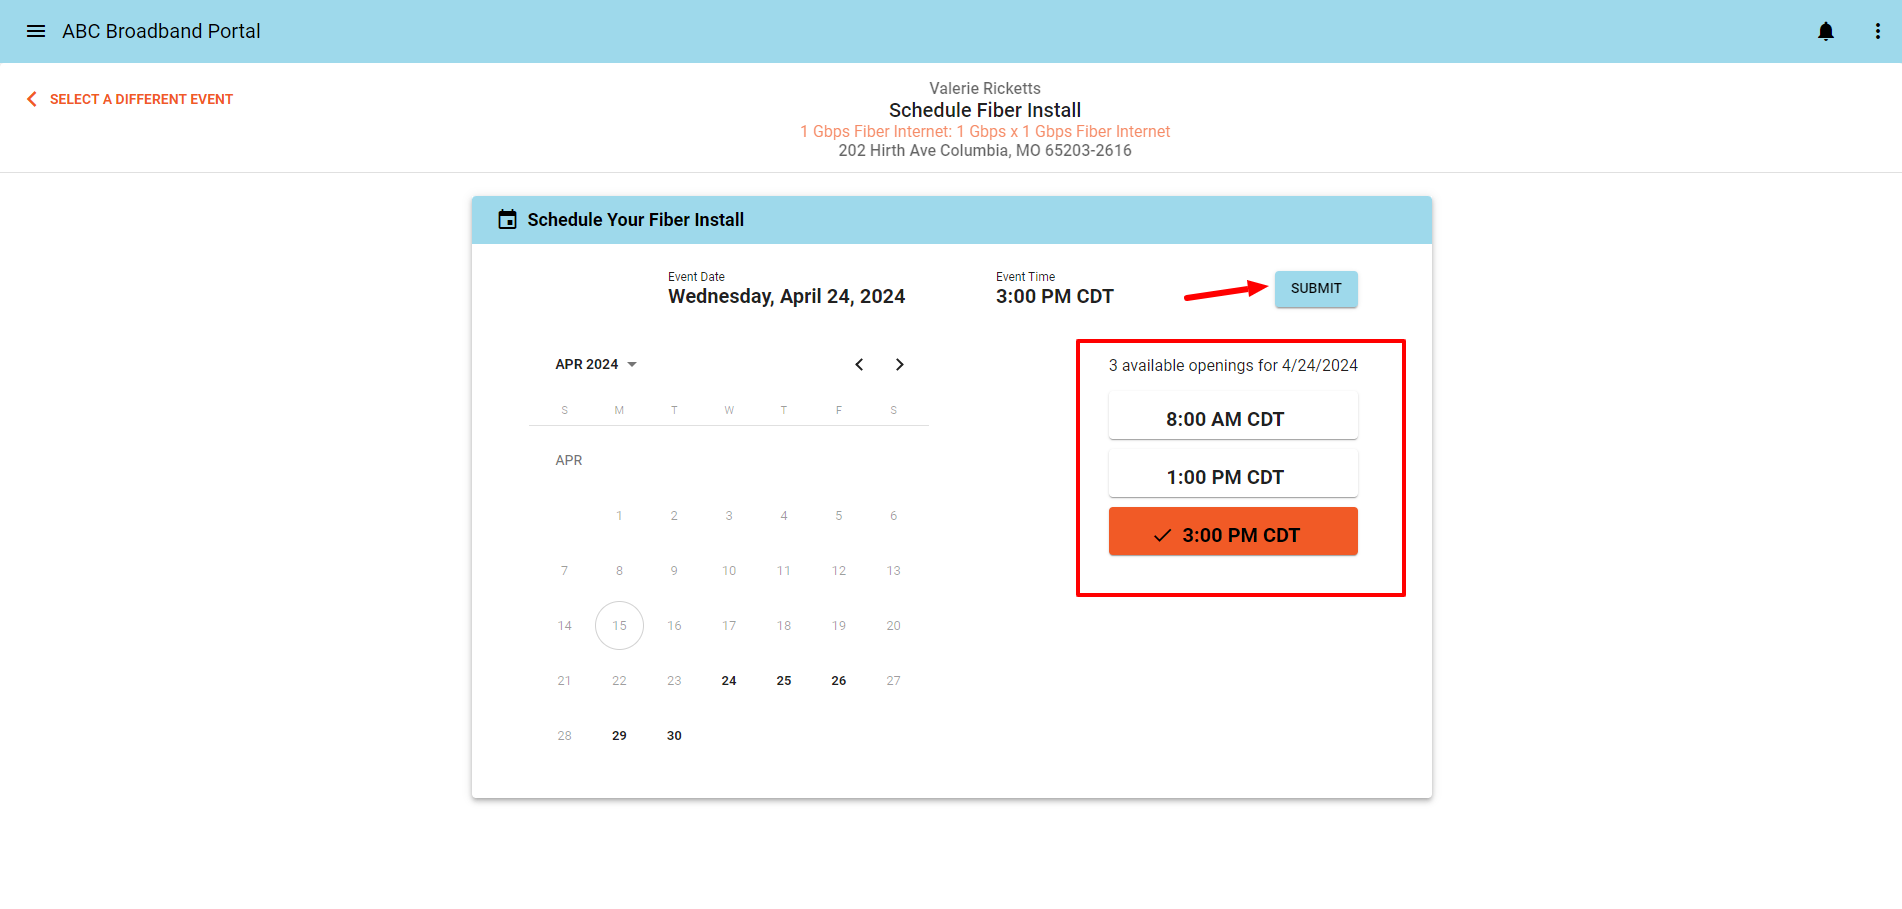
In the shopping cart after a subscriber has selected their service and filled out their contact information, the option to schedule events like installation, can be done through the shopping cart. The calendar will display available days and times for the subscriber to choose from that will best suit them for installations and events to get their services turned up.
Subscriber Portal
The Portal is another place a subscriber can schedule an event. If the subscriber didn't schedule their installation through the online shopping cart, when they sign into the portal a pop up will appear to remind them that their installation is ready to be scheduled. If the subscriber clicks on SCHEDULE it will direct them to the calendar to select the date and time of the installation. Once the subscriber selects the date and time for their installation to confirm the installation with the system the subscriber will need to click SUBMIT. If a subscriber has an event that requires them to schedule it themselves this pop up will show up each time the subscriber signs into the portal. If the subscriber decides to wait to schedule the event they can click on SKIP FOR NOW this will close the pop up for the subscriber to use the portal.
The option to schedule the installation is still available if the subscriber closes the pop up. They can go through the ![]() main menu and select
main menu and select ![]() Scheduling this will show the events the subscriber needs to schedule. This will direct the subscriber to the calendar to select the time and date for their event. The portal will display a pop up when the subscriber logs in if they have an event or notification that is important to their services.
Scheduling this will show the events the subscriber needs to schedule. This will direct the subscriber to the calendar to select the time and date for their event. The portal will display a pop up when the subscriber logs in if they have an event or notification that is important to their services.
