Credits
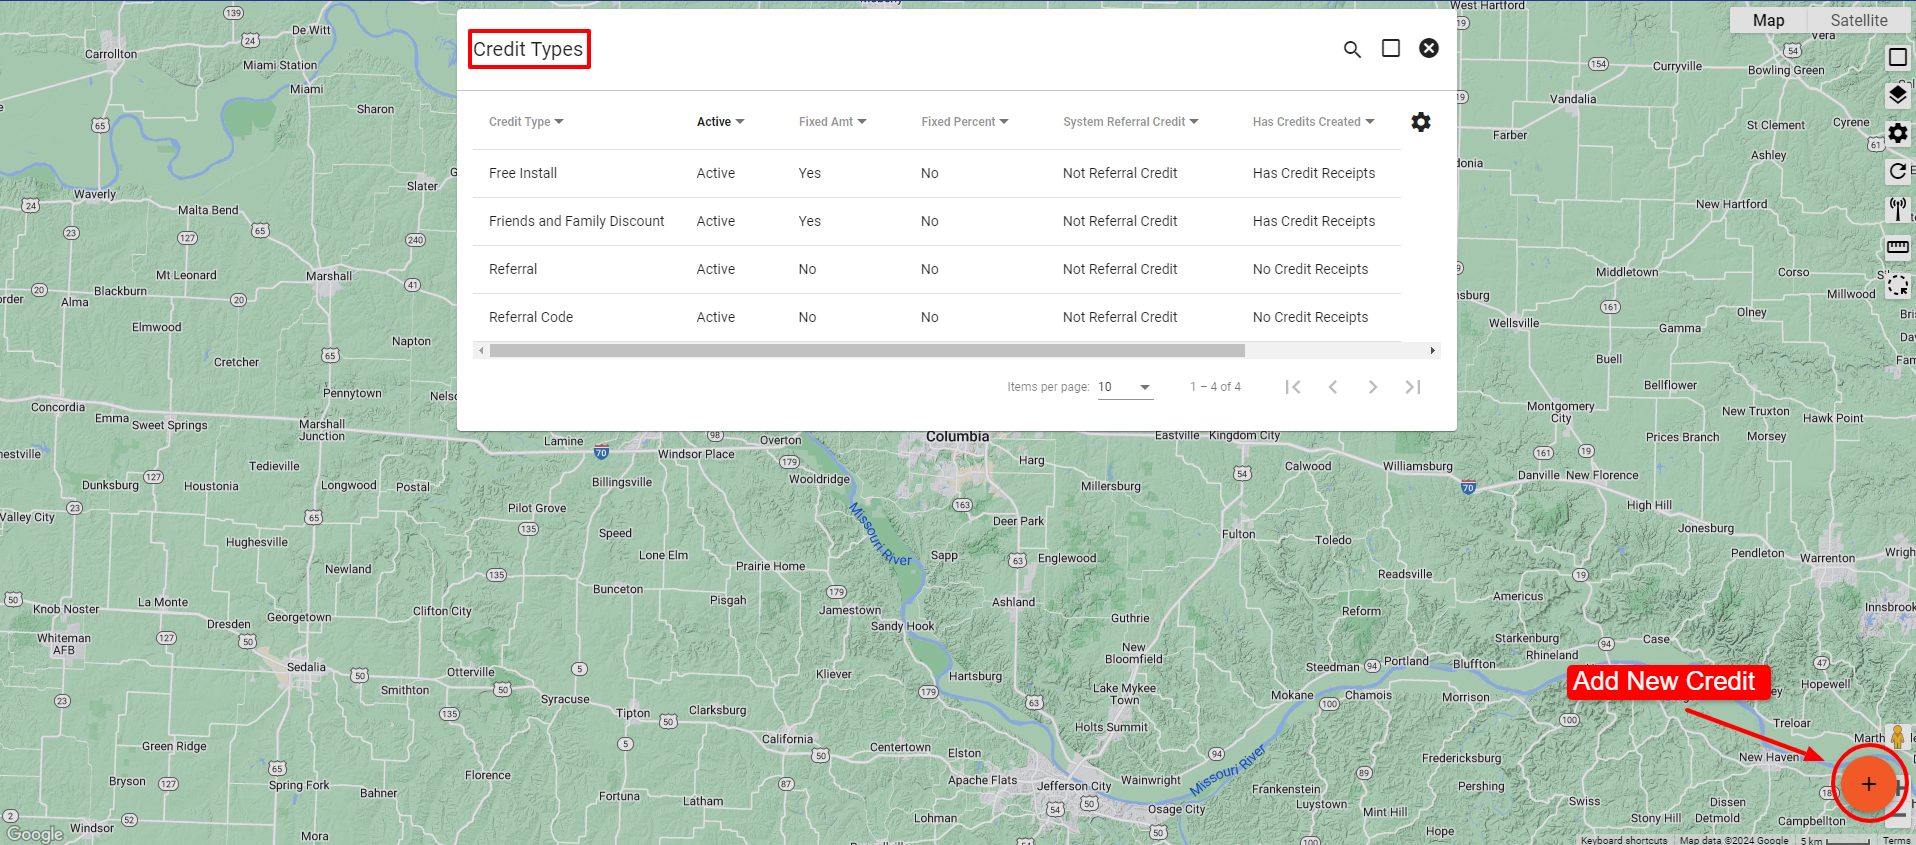
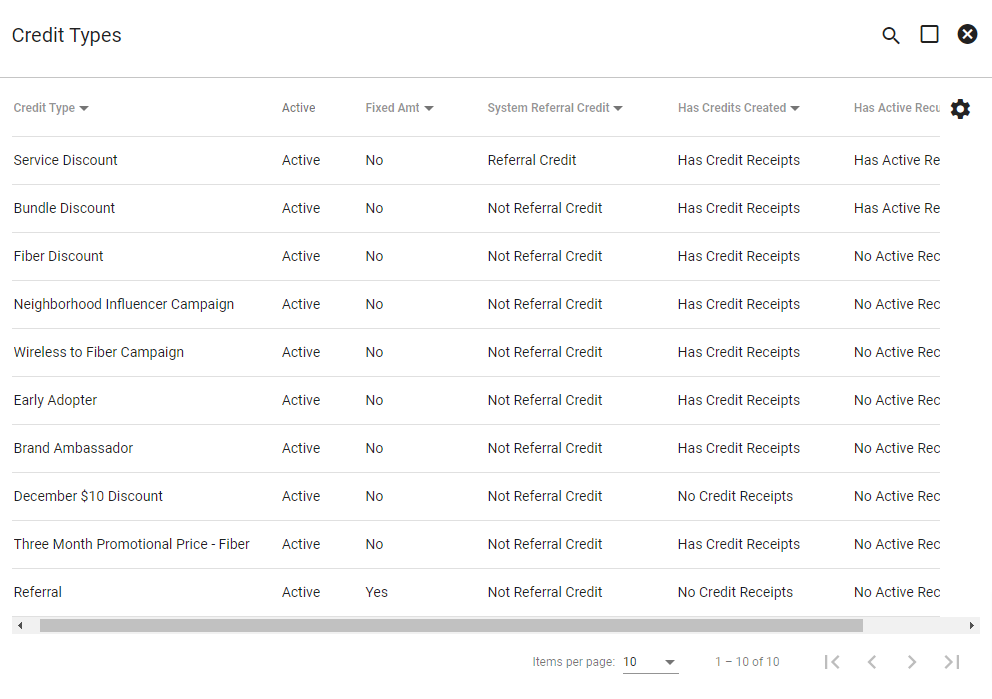
The Credit admin page allows administrators to add, edit, and delete credit types to be used within Vision. Credits can be an ongoing discount or a one-time refund or a temporary promotional price rate. Here you can sort through credit types using the heading row or the 

TIP: To help track the true costs of credits, it is important for providers to always charge the full price for a service or item and then apply a credit that is tied to the service or item instead of charging a lower rate.
View Credit Type
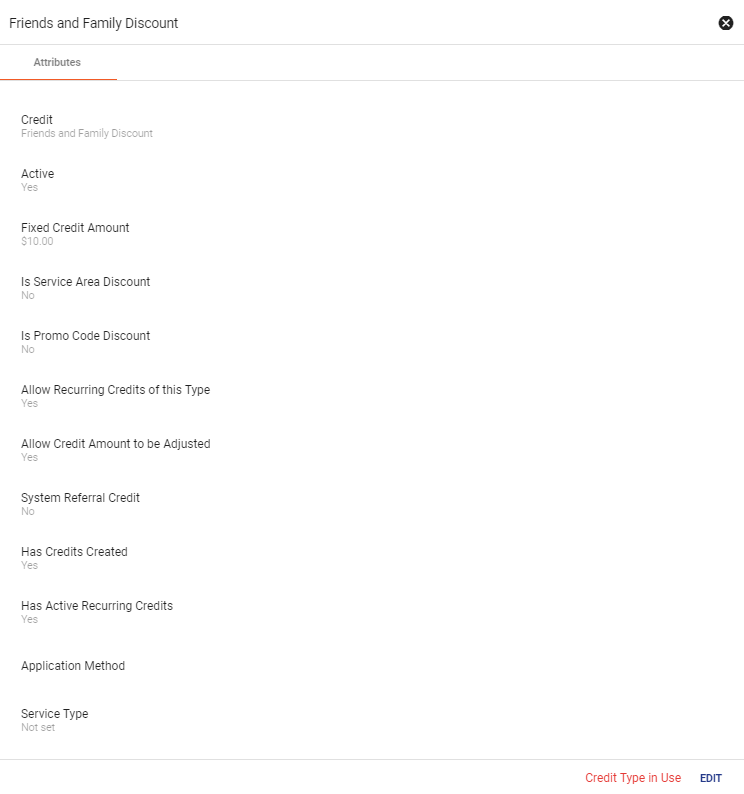
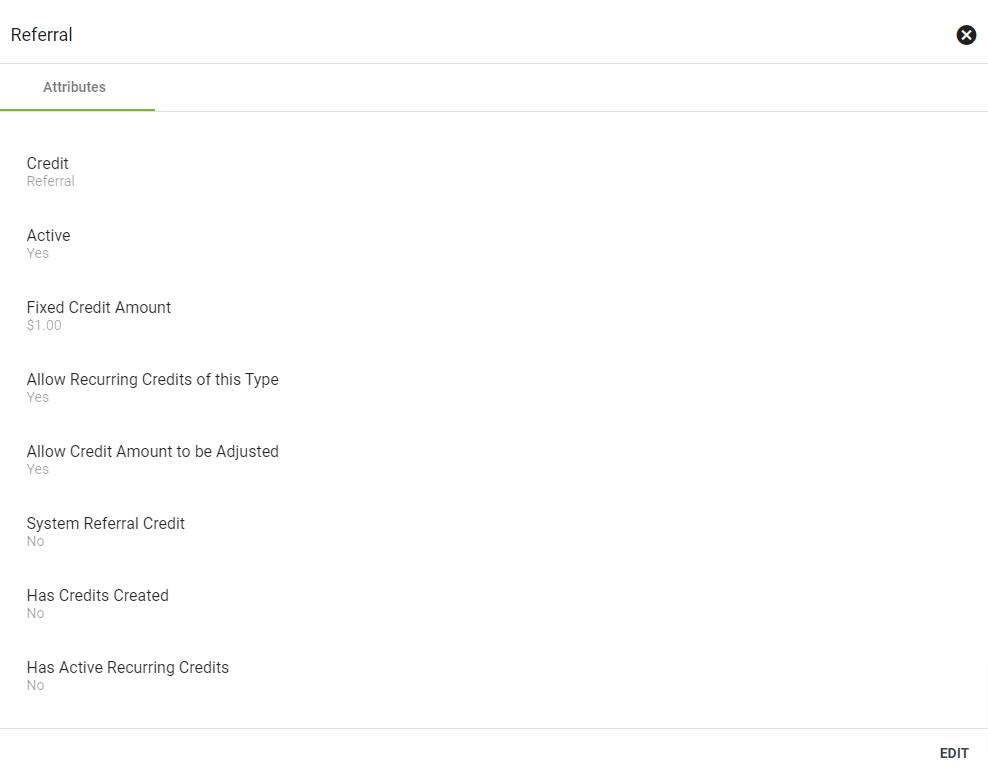
Click on a Credit Type to view attributes. Some of the attributes include an active status, fixed credit rates, and allowing recurring credits.
Example of a Credit Type in use.
Example of a Credit Type with no active credit receipts or active recurring credits.
Edit or Delete Credit Type
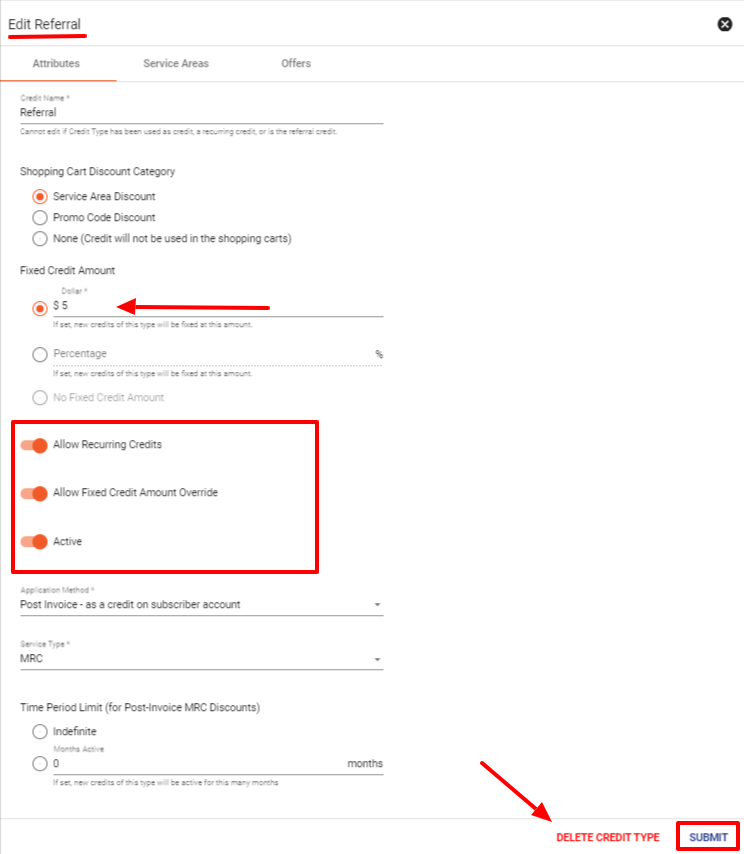
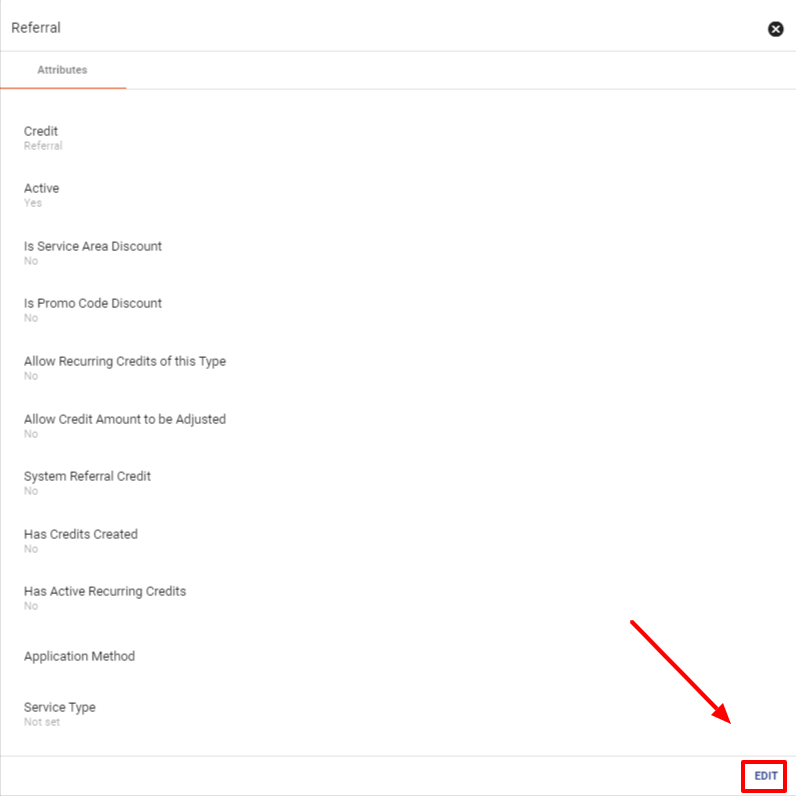
Click on a Credit Type from the list of credit types. Then click EDIT in the lower right-hand corner to make changes or delete the Credit Type.
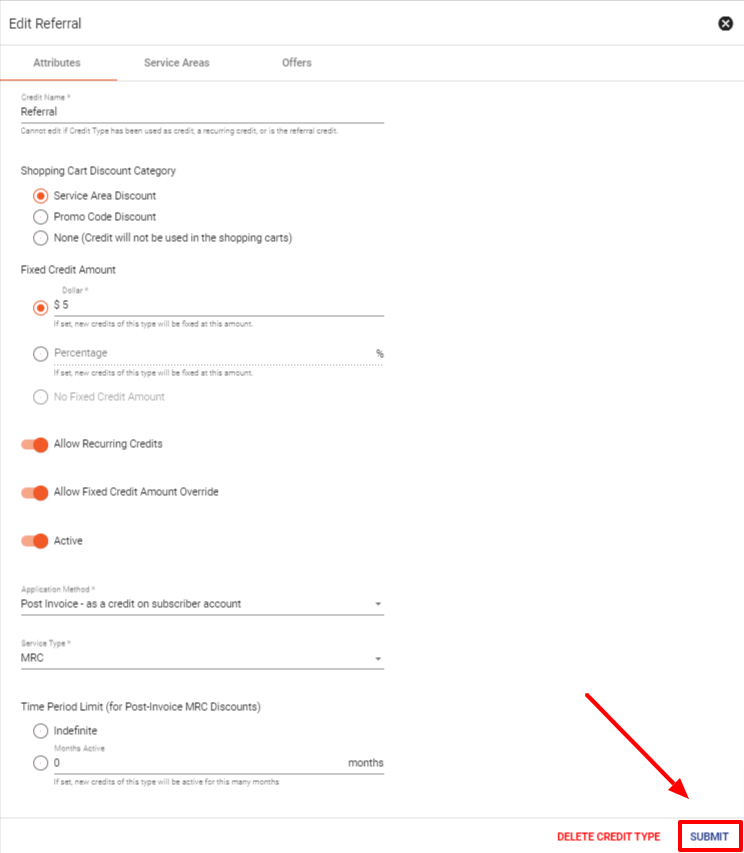
Here you can change the name of the Credit Type, allow Recurring Credits, or change it to inactive.
You can DELETE the Credit Type only if does not have active Recurring Credits. See the below example of what you can edit on an active Recurring Credit type.
Once done editing, click SUMBIT.
If you click DELETE OFFER, the system will ask you to confirm by clicking YES.
For a credit type in use, click EDIT in the lower right-hand corner to make limited changes.
You can edit the recurring option and the fixed credit amount.
Once done editing, click SUBMIT.
Add Credit Type
Click
Enter a customized name, then click ADD.
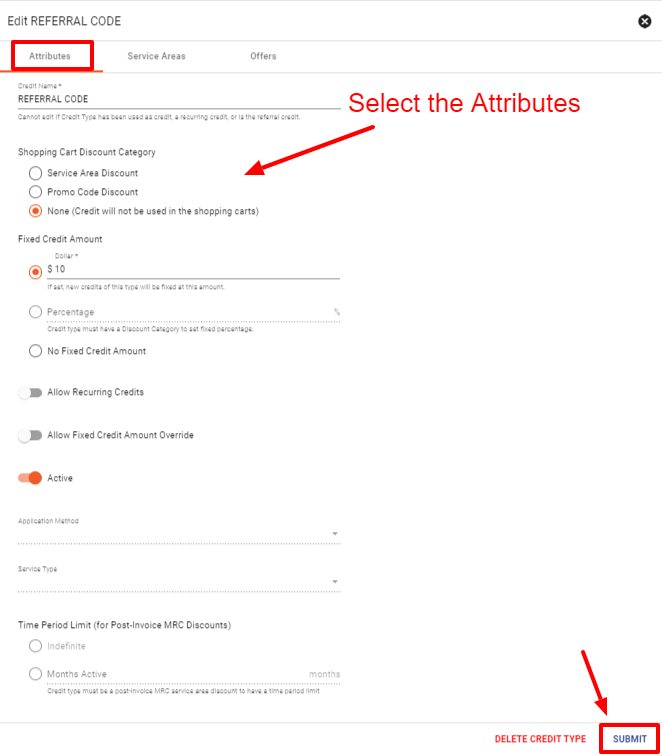
Select the attributes that you would like to be associated with the new Credit Type. Be sure to select Active if you want this credit to be live.
Once done, click SUBMIT.
Attributes
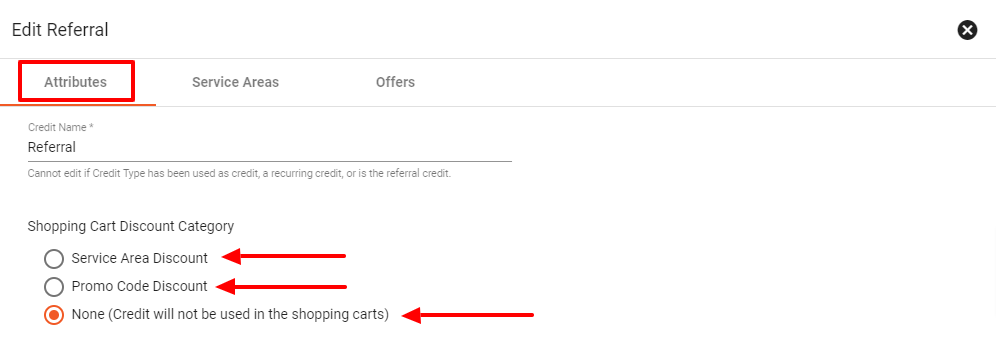
In the attributes section of the credit is where you will need to fill out some information regarding the Credits and how it will be used by subscribers. When filling out the attributes section the first step is a name for the credit, if you are setting up a Promo code credit the name needs to be the same as the promo code. The next section of the Attributes is the Shopping Cart Discount Category, this section is to define how the credit will be available to subscribers and how they will be able to use it through the shopping cart. The Service Area Discount is set up by defining a service area that has been previously set up and assign the Credit it to an area. There is an option to add an offer to the service area if there is more discounts that you want to apply based on a certain service. Another category available is a Promo code discount, this set will be slightly different than the other options as this setup will need to make sure the name of the Credit is the Promo code that will be used for the discount.
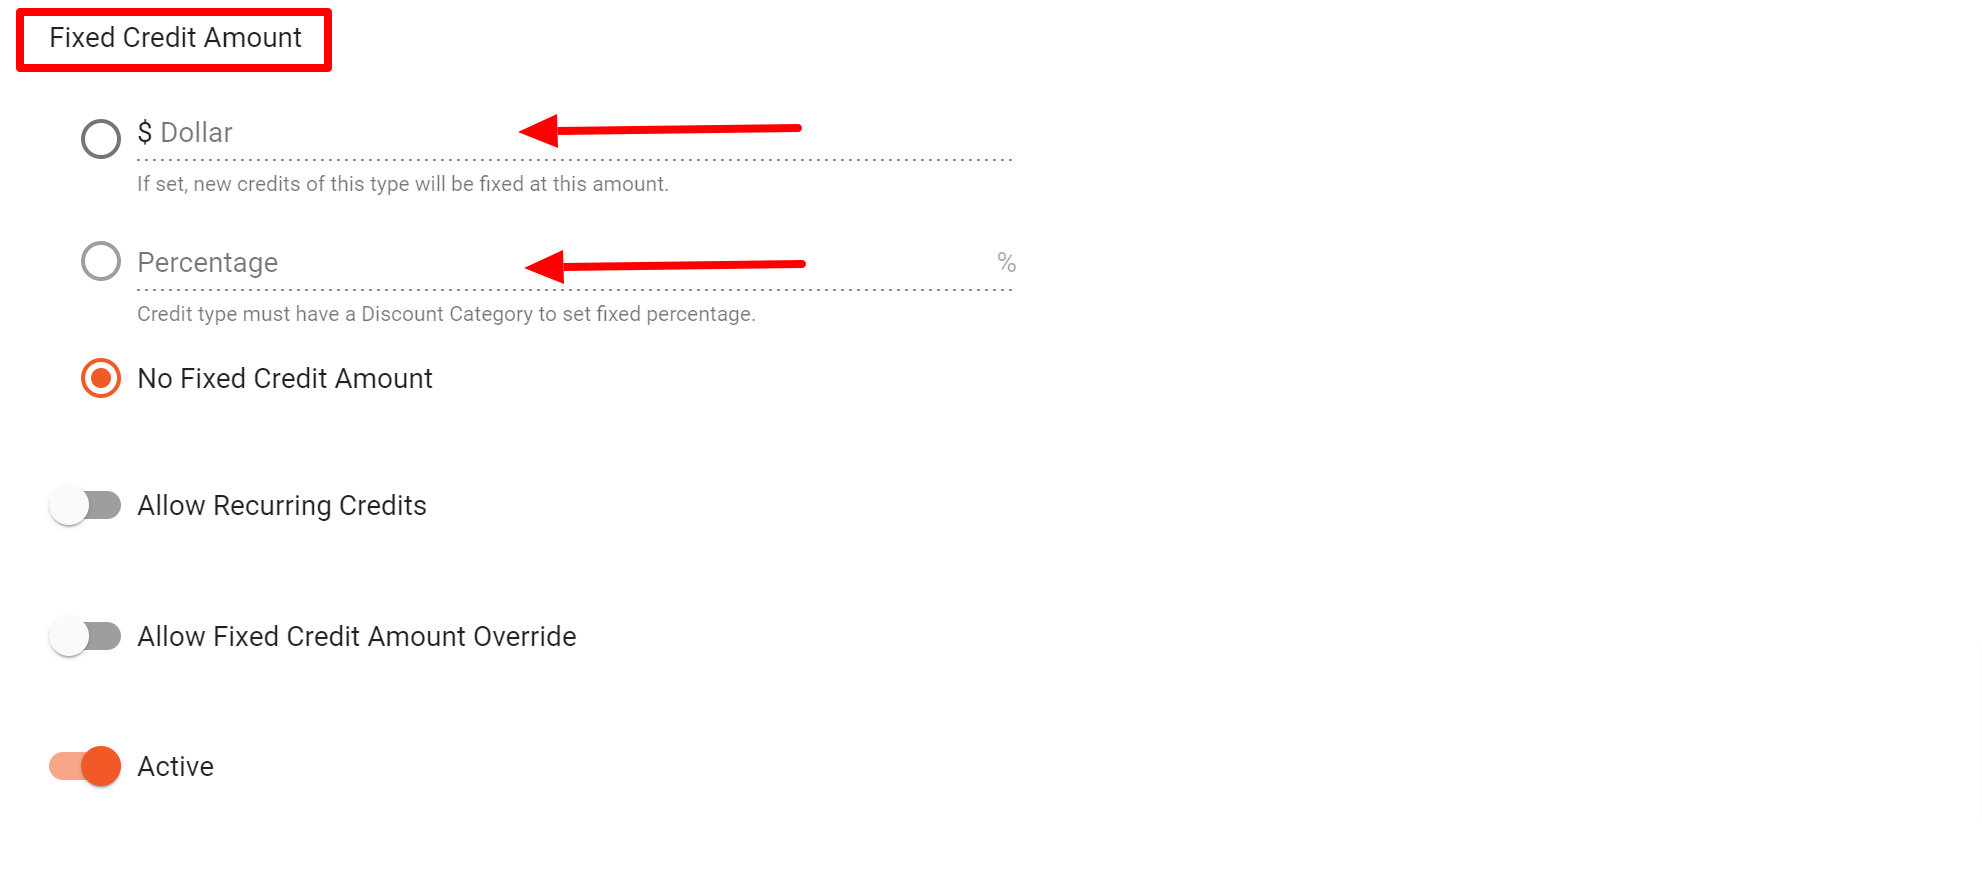
The next section of the attributes is the Fixed Credit Amount, this part of the attributes is to allocate a dollar amount or a percentage for the credit. The choice is up to you when it comes to using a dollar amount or percentage. After filling out the amount of the credit the next step is to set the filters of the Fixed credit amount. If the credit will occur more than once is to
After filling out the amount of the credit the next step is to set the filters of the Fixed credit amount. If the credit will occur more than once the slider will need to be toggle on. If the credit amount may change over time the next toggle "Allow Fixed Credit Amount Override" will need to be turned on to have the ability to edit the credit amount after activating the credit.
The next section of credit attributes allows you to have a credit only apply to specific service items like if for example you were doing a phone only promotion. There is also an option to set a start and end time of the credit.
The last part of setting up a Credits attributes is to define when the credit will take place, pre-invoice or post-invoice, and the service type, MRC (monthly recurring charge) or one time charge. Time period limit is to define how long the credit will be applied to a subscribers account whether its for an indefinite time period or a specific amount of months once the the credit is applied to a subscriber account.
- Monthly Recurring Credit – This type of credit will be applied to monthly recurring charges (for example, a promotional discount such as $10 off for the first 3 months)
- One-time – A One-time credit will be applied to one-time charges (for example, free installation)
- One-time Monthly Recurring Credit – This credit will be applied one time to monthly recurring charges (for example, this is the one you’d pick for $20 off your first bill)
To set up when a credit will run for a subscriber can be set to a number of months or indefinite. A time period limit will only be applicable to MRC credit types.
Service Areas
If a credit is available to a service area you can associate the credit to the area when adding the credit into Vision. To add the service area to the credit, select the ervice area(s) that will be offered the credit, the system will filter by Service Area Type then specific Service Areas. In the attributes section of the Credit the Shopping Cart Discount Category "Service Area Discount" button needs to be selected to add a service area.
Once the Service Areas are selected to add the area to the Credit is to click on the ![]() to confirm the Service Area to the Credit.
to confirm the Service Area to the Credit.
Offers
There is an option to add Credits to a Service offer(s) to add the offer to a credit is similiar to adding a service area. First select the offer that will be associated with the Credit, there is the ability to add multiple offers to a credit. After selecting the offer to confirm the offer to the Credit is to click the ![]() to add the offer to the Credit. To add more offers to a credit repeat the process for the number of offers that will be added to the Credit.
to add the offer to the Credit. To add more offers to a credit repeat the process for the number of offers that will be added to the Credit.
