Check Processing
The Check Processing tab on the Billing page allows users to process check payments.
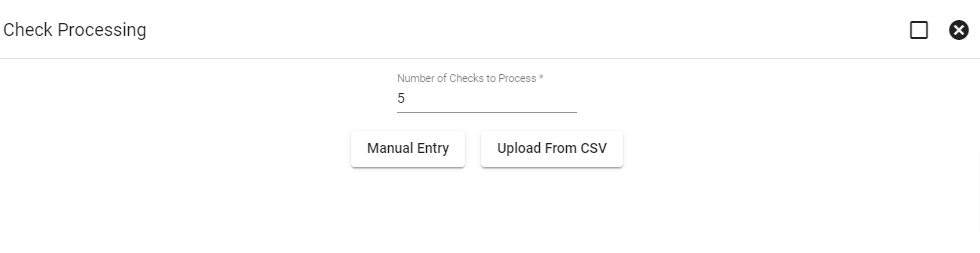
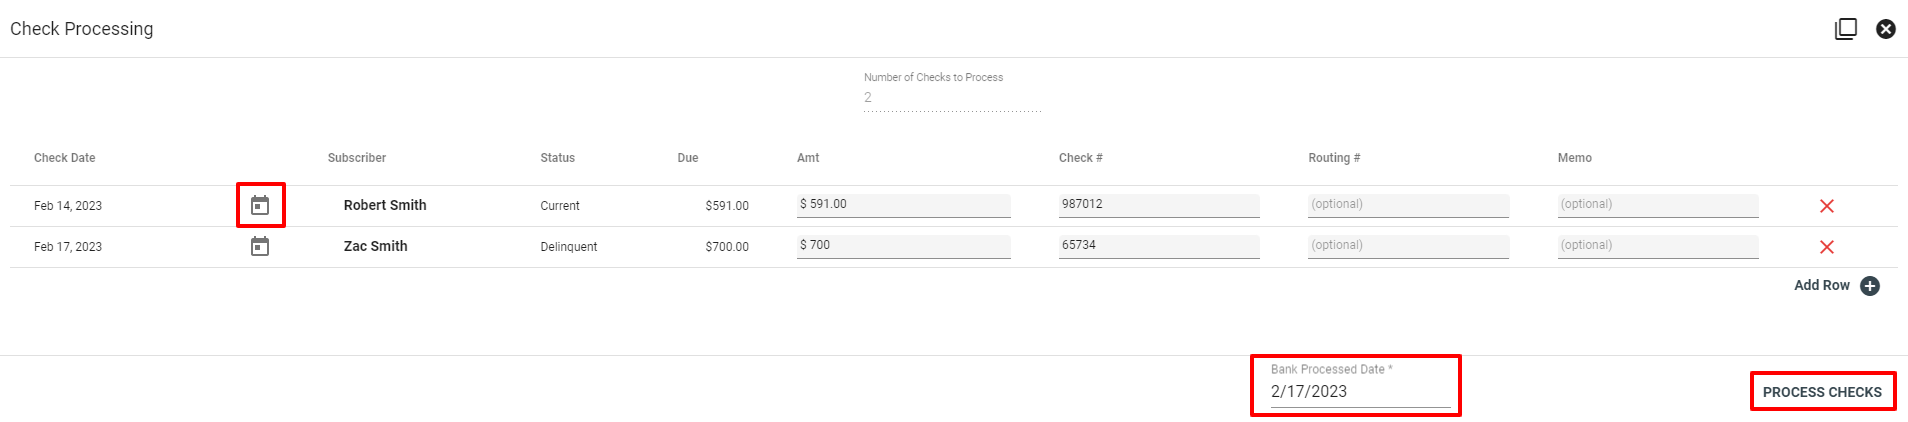
First enter the number of checks to process then click SUBMIT. Now choose a Subscriber by clicking Add Subscriber.
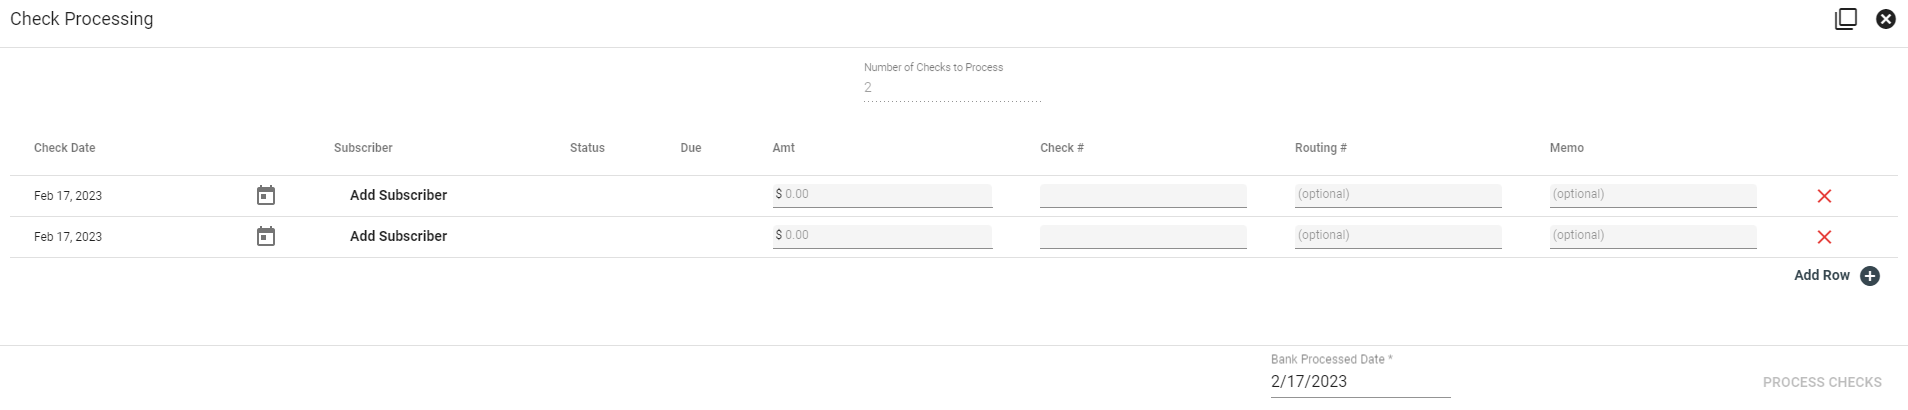
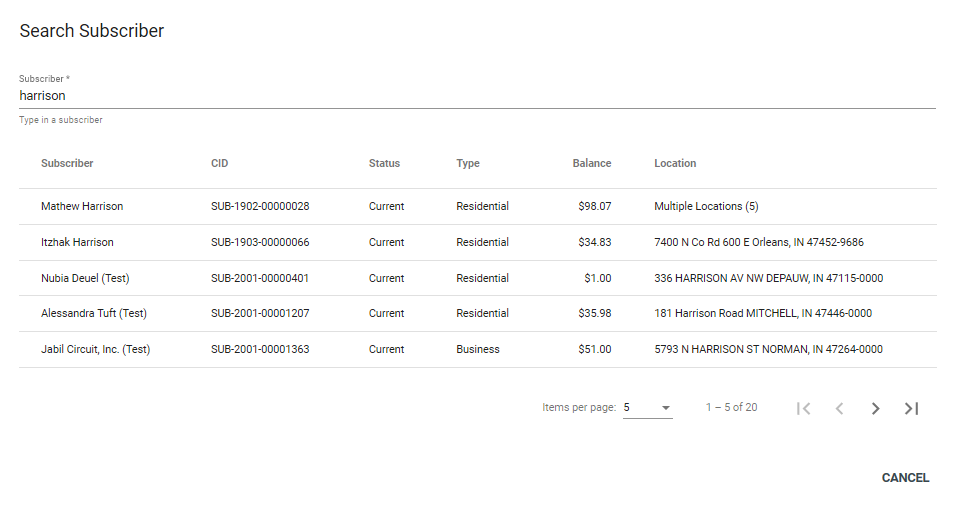
Search for a Subscriber then select from the list.
You'll now see the amount due on the Subscriber's account. Enter the amount of the check, the check number, routing number, and memo. Click the 

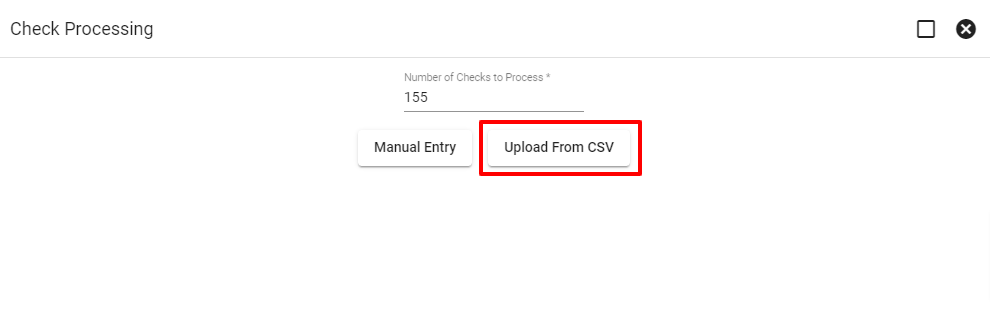
Import Checks from CSV File
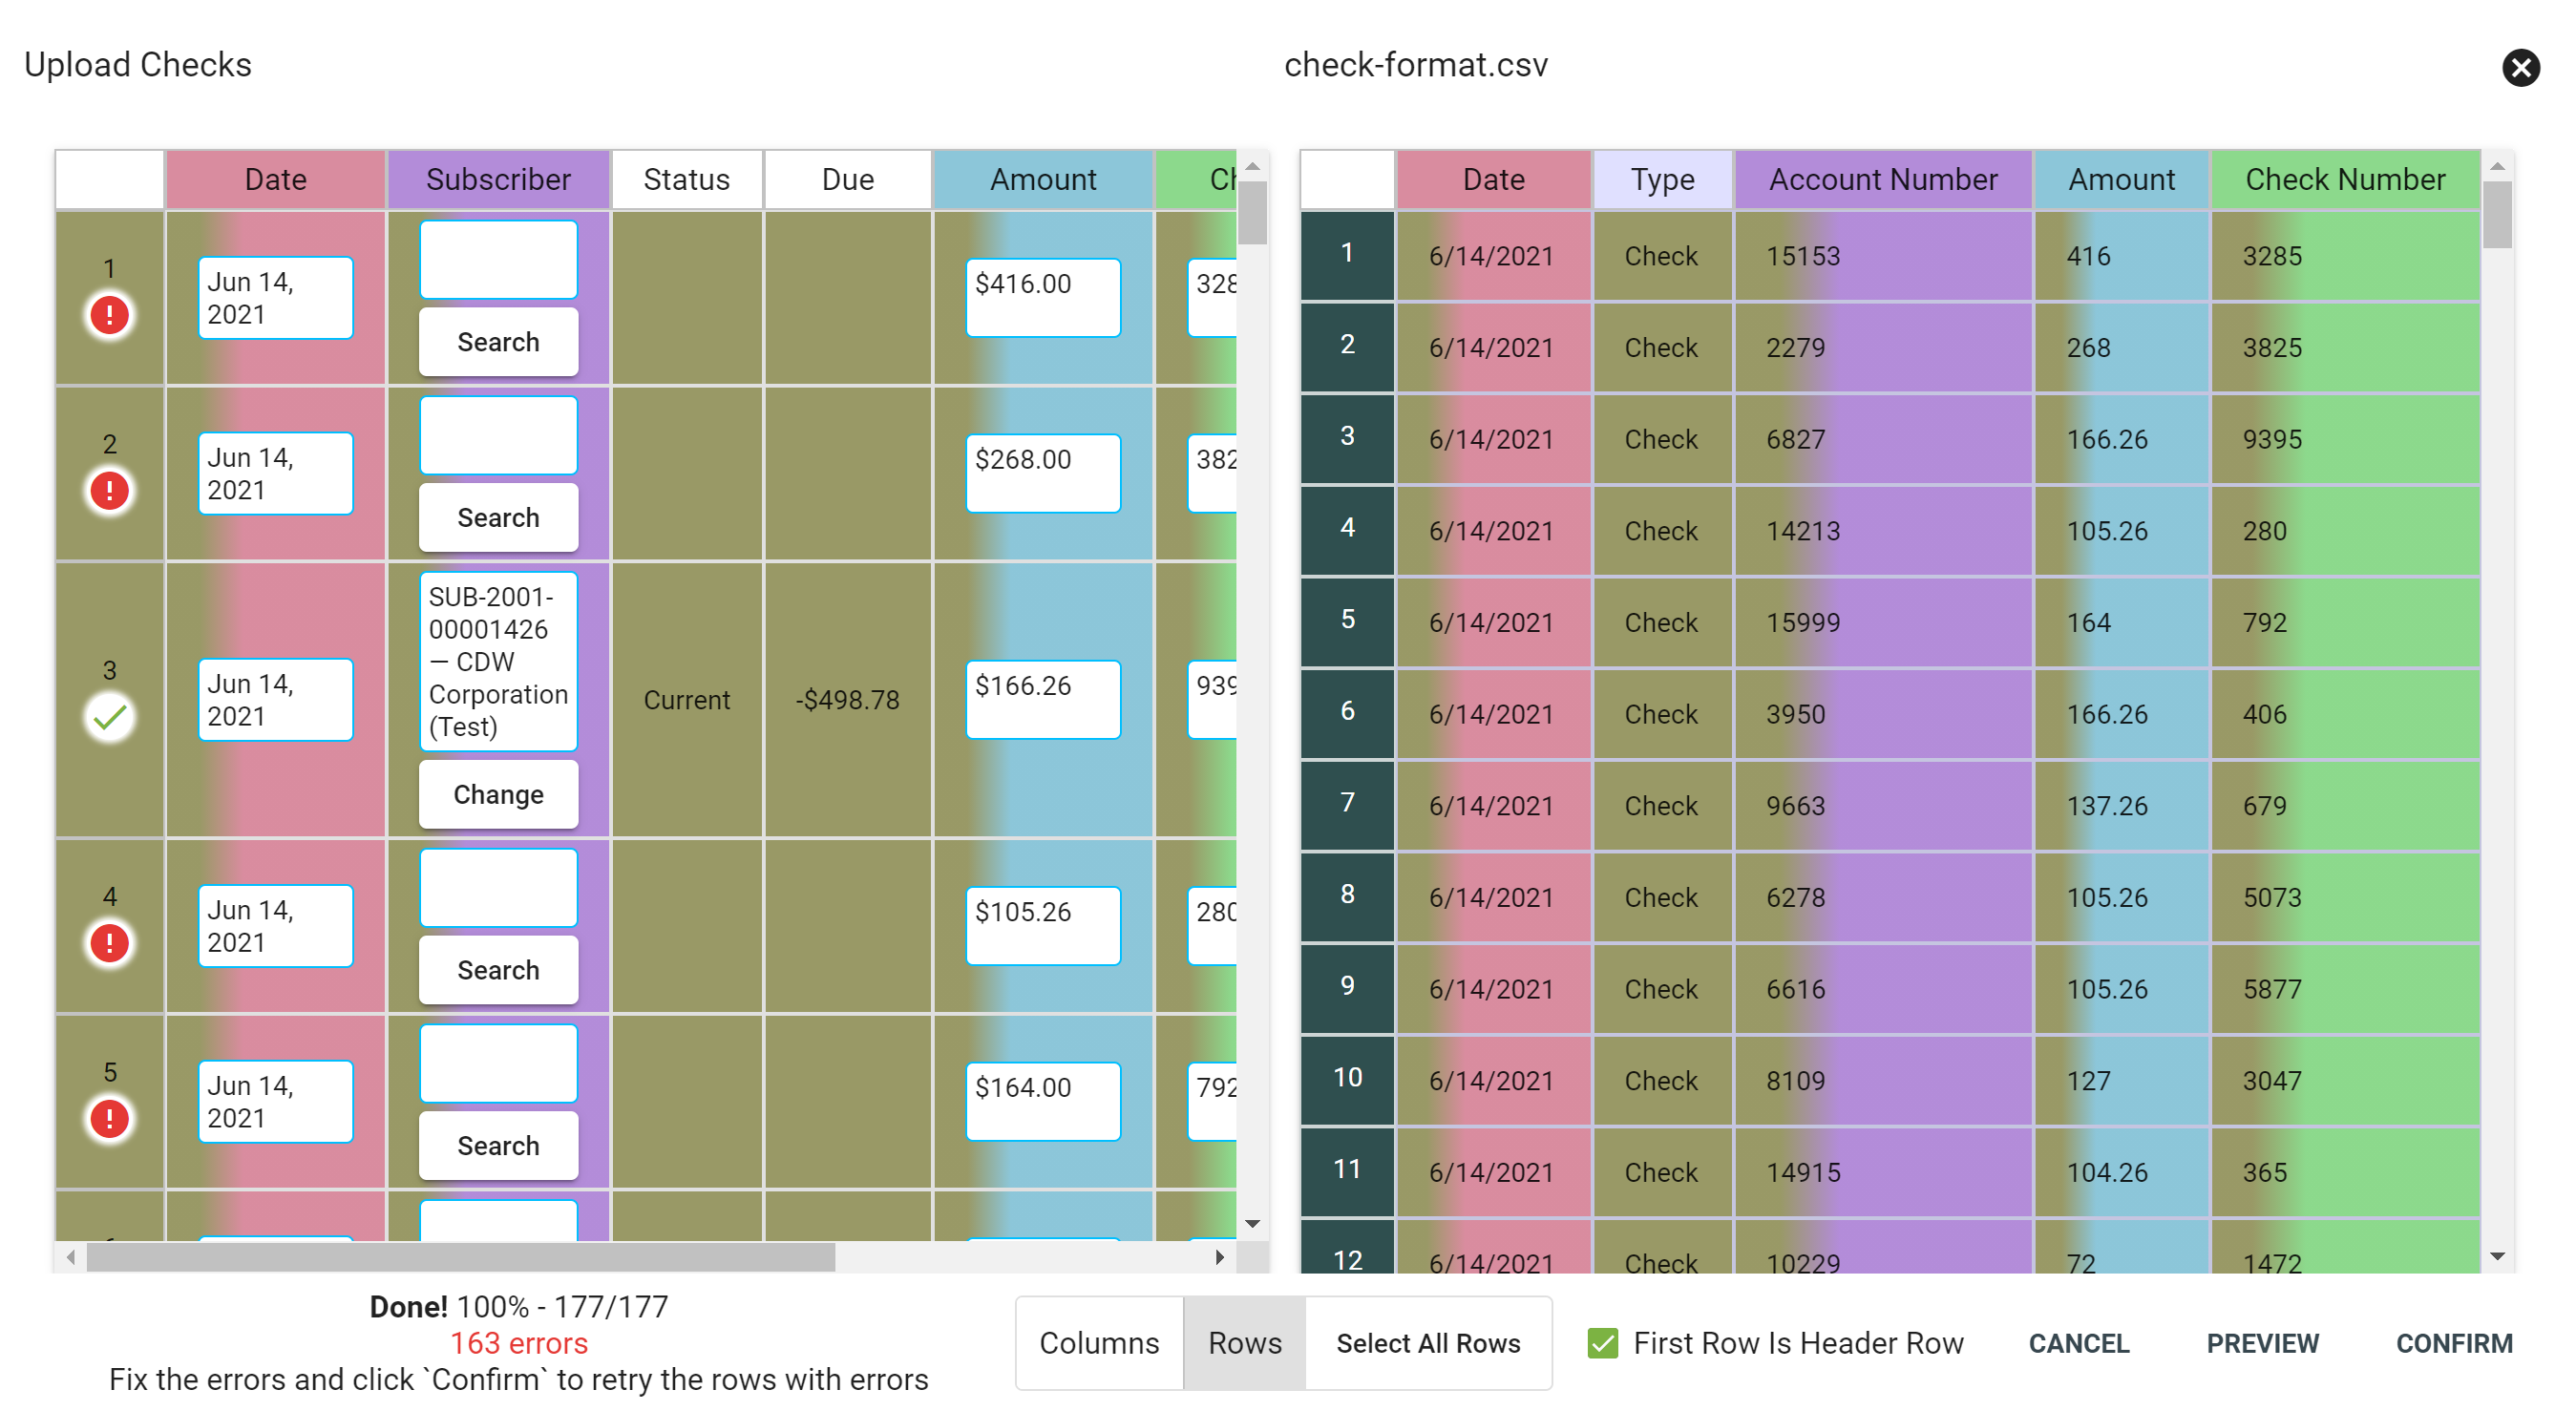
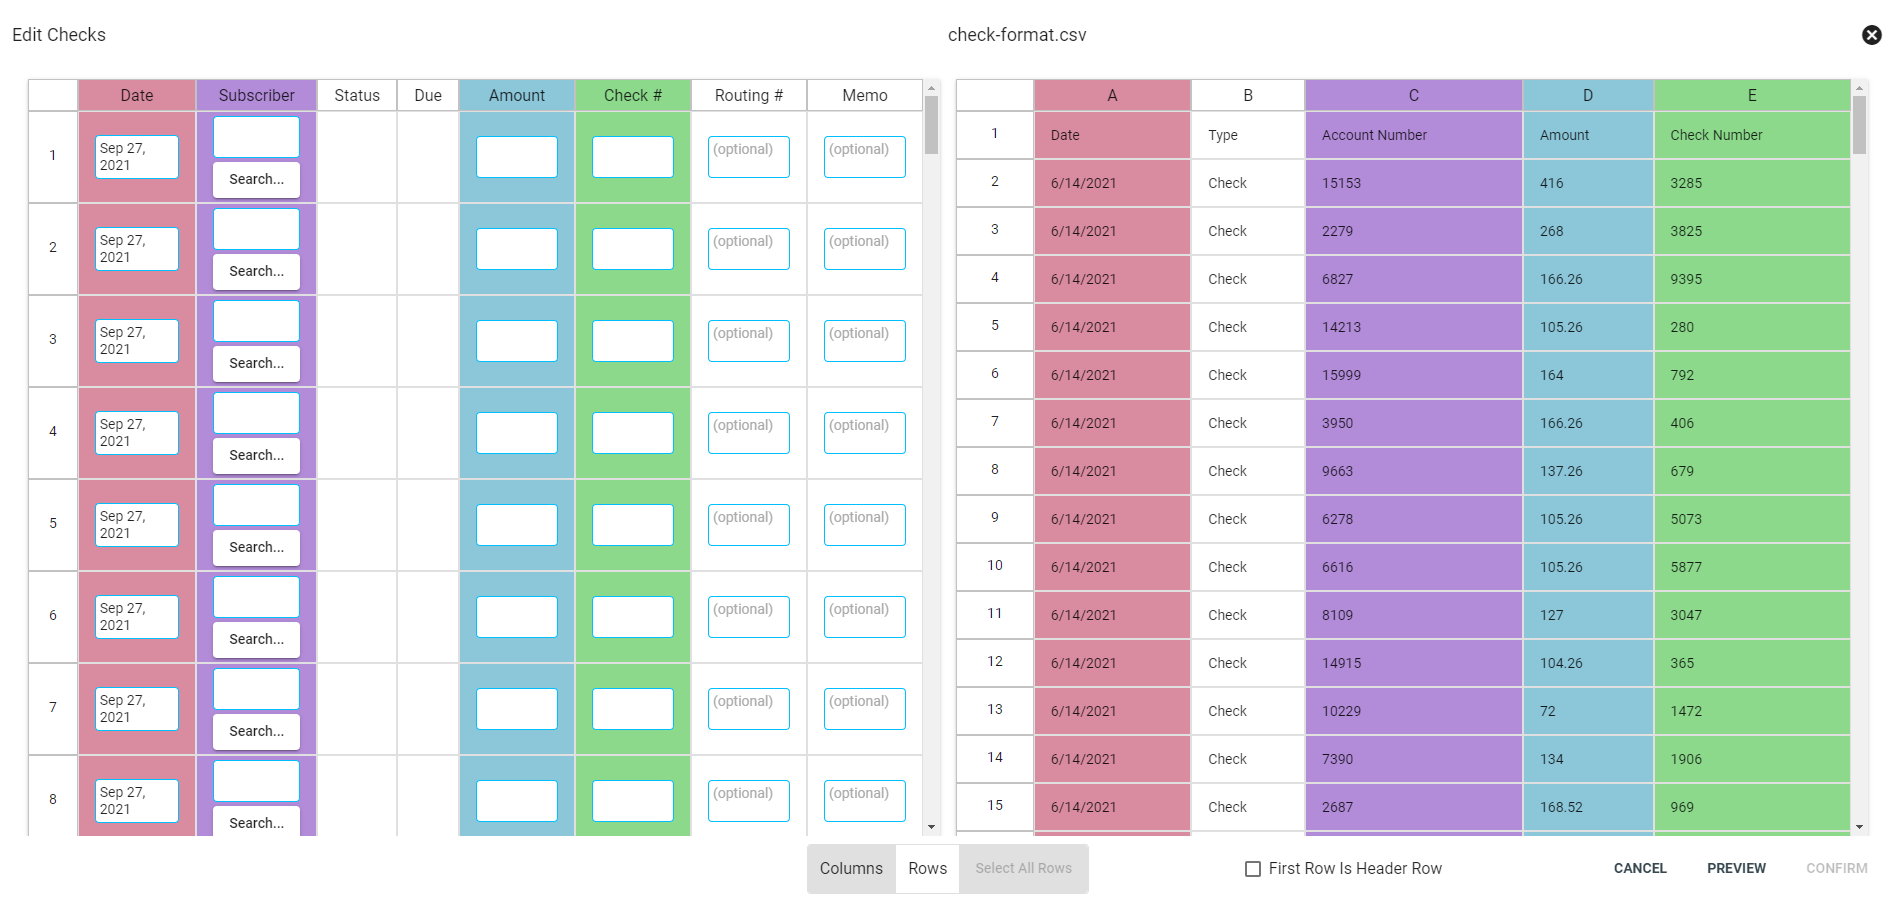
Choose Upload From CSV to bulk import checks from a CSV.
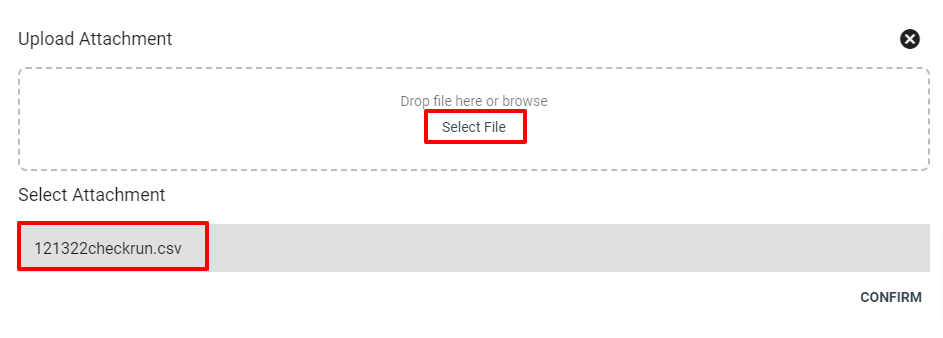
TIP: CSV file name cannot include a period. (ie. 121322checkrun.cvs; not 121322.checkrun.cvs )
Click on the uploaded file and hit CONFIRM.
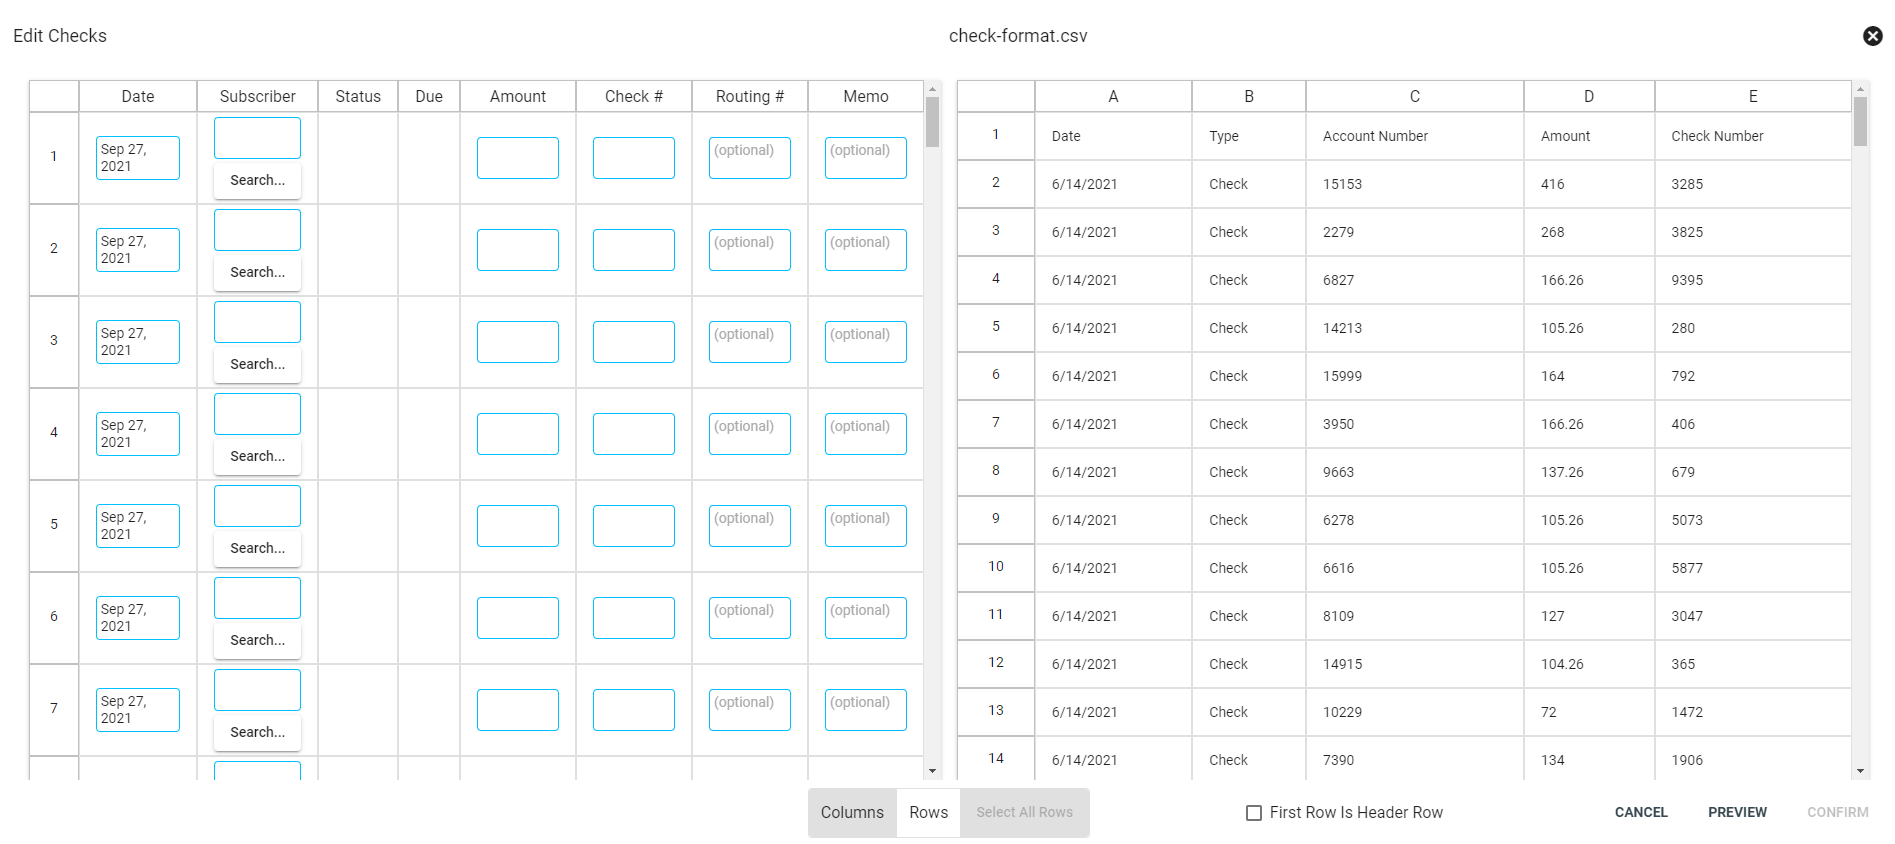
The information on the righthand side is the data being imported from the CSV file, while the information on the lefthand side is the existing data.
Only columns with a blue border around the data boxes are able to have CSV data imported.
Tip: The dollar amount and check number colums do not include $ or # symbols in the data set.
Select the Bank Processed Date calendar to select the accurate bank processing date - this records a different process date from the Check Date, if needed.
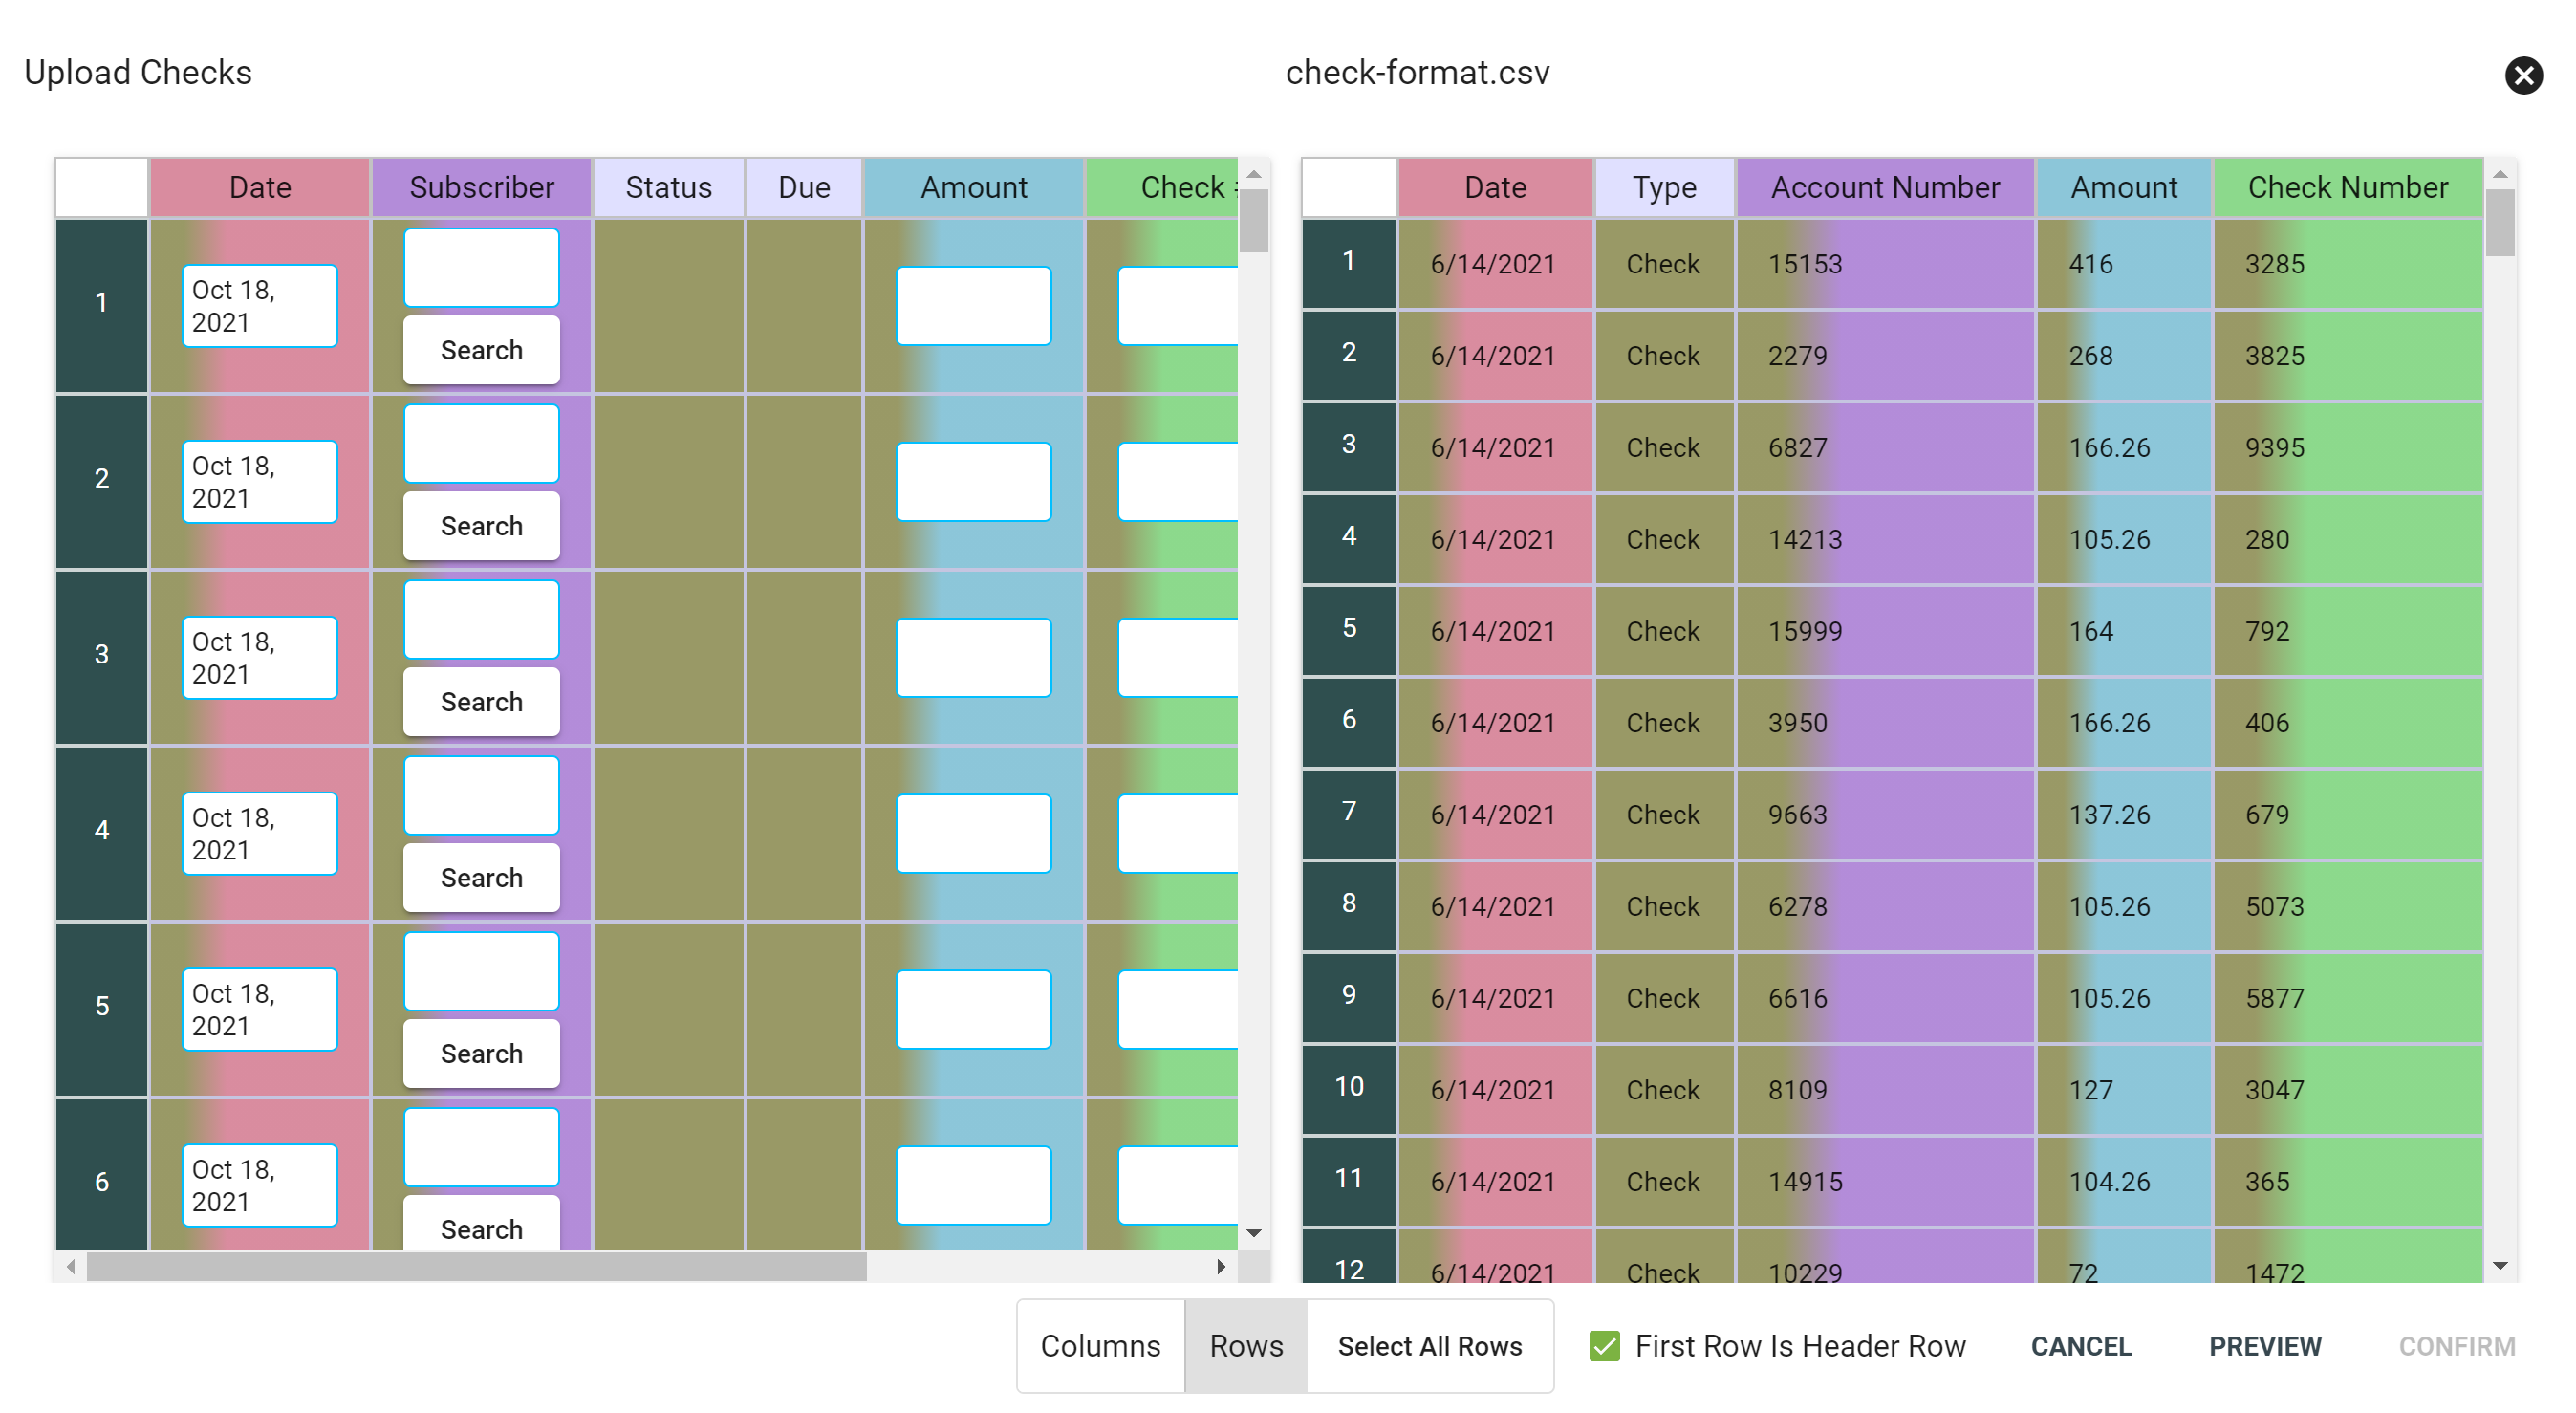
Select the First Row Is Header Row checkbox, if there are headers to the CSV data.
Then click on a column on the lefthand side and then select the corresponding column on the righthand side. For example, click on the date column on the left, then select the date column on the right. Paired columns will display in the same color to indicate a match.
Only columns with blue boxes are required to be paired with a corresponding column for a successful import.
Change the data being selected by clicking on the column or row button at the bottom of the page.
Click Rows, to select individual rows only. If importing entire list, then click Select All Rows to select all of the rows.
Again, be sure to select the First Row Is Header Row option if the first row of the CSV is a header.
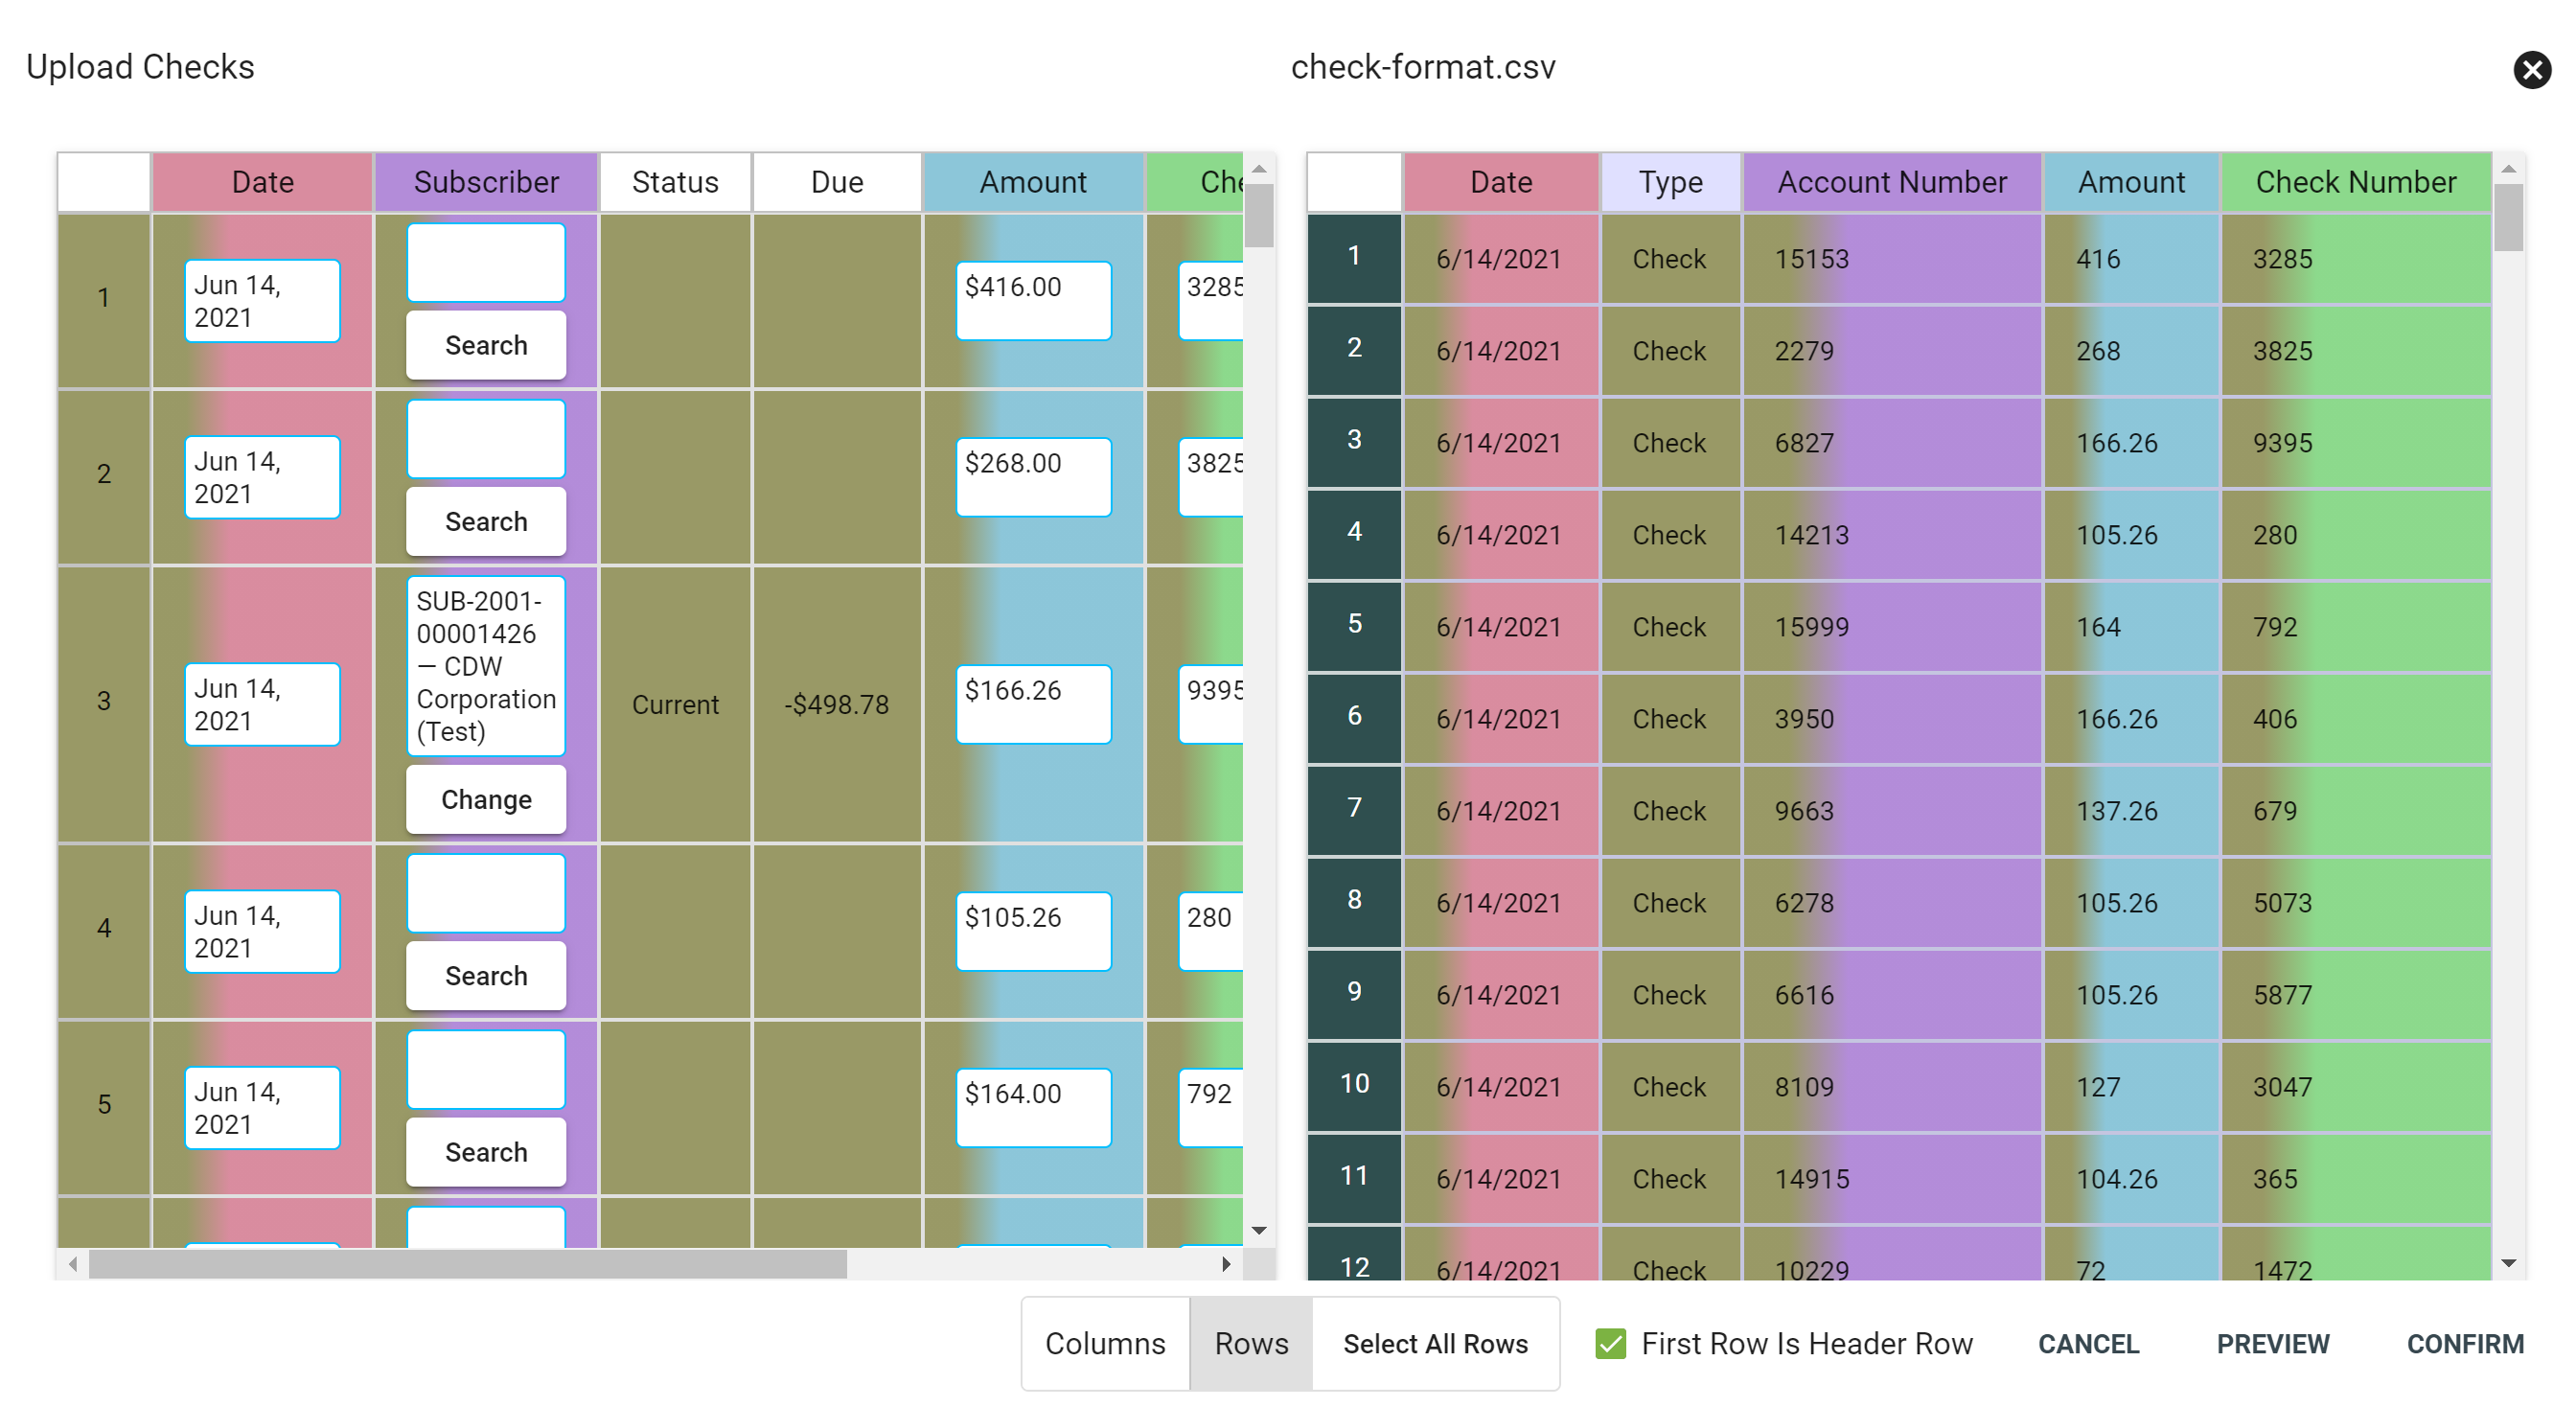
Choose to preview the import by selecting the PREVIEW option in the bottom righthand corner.
The tool will begin matching up the data and pulling in the Subscriber Name, Status, Due information.
If the system cannot find a match to the Subscriber Number, it will display a red boarder around the mismatch.
Click the SEARCH button to manually match the customer record by looking up the name or the subscriber number.
Click CONFIRM in the lower righthand corner to save and process the checks.
The following error message will result from an upload that does not have matching account numbers and subscribers. Select Search under the Sunscriber column to manually search for and select the correct subscriber.