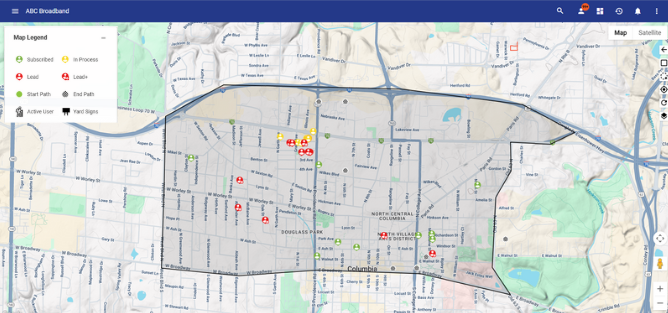
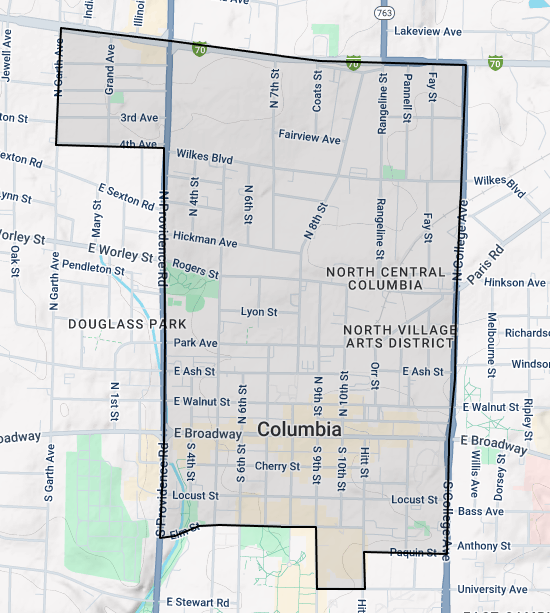
Door to Door Map
The Door to Door Map is the central hub for managing all door-to-door activity. It allows you to view, track, and add subscribers at various stages—from initial leads to active customers—directly on the map. As sales representatives (either internal or external) move through neighborhoods, their paths are recorded in real time, helping you monitor coverage and efficiency.
This tool seamlessly integrates existing subscriber data from your Vision system, so reps can quickly see active customers and orders in progress and better target the right homes. It's also easy to capture new information during in-person conversations or trigger additional follow-up actions. The goal is to streamline the sales process, simplify purchases, and provide clear visibility into lead progress and rep performance.
Quick Links
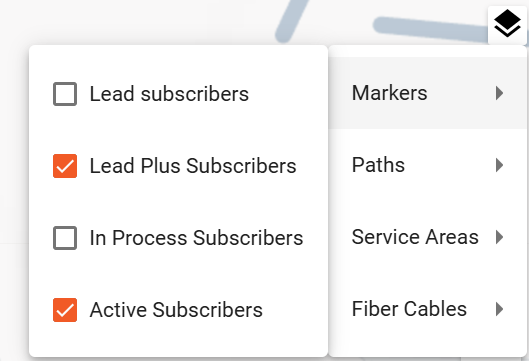
Map Layers
- Lead subscribers
- These represent interactions where a door-to-door (D2D) rep did not collect any personal or demographic information. For example, a customer may not have been home or refused to engage in conversation with the rep. ** Lead subscribers do not have a Lead+ package and are not in an active workflow (unless it’s a Lead-specific workflow). Their status will appear as “Lead” or “Lead - Door to Door.”

- Lead+ subscribers
- These are leads where some demographic information was gathered—such as a name, phone number, or email. Additional followup is likely in order. Lead+ subscribers do not have a Lead package and are not in an active workflow (unless it’s a Lead+ workflow). They also appear with a “Lead” or “Lead - Door to Door” status.

- In process subscribers
- These subscribers are currently in an active workflow and are in the process of obtaining a billable package (not a D2D Lead or Lead+ package). Their status remains “Lead” or “Lead - Door to Door” until their order is complete and services are activated.

- Active subscribers
- These accounts have either a “Current” or “Delinquent” status, indicating they have active services at the location.

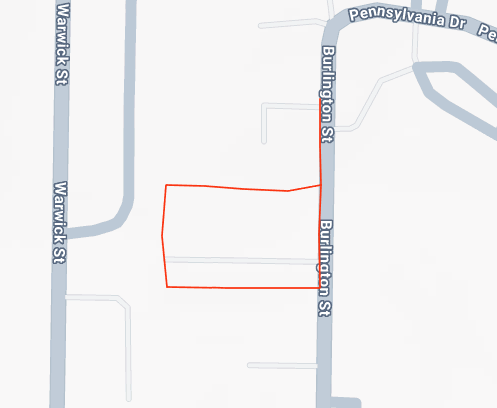
- Paths
- Displays the walking paths taken by D2D reps during the campaign. Each rep’s path is shown in a different color for easy differentiation. If a user has a designated color in their user settings, the path color will be that color. Otherwise, it will be taken from a preset selection of colors.
- While all GPS data is saved, only paths with a sufficient accuracy will be displayed on the map.
- If 4 minutes has elapsed between the last location ping and the current time, a new path will be created.
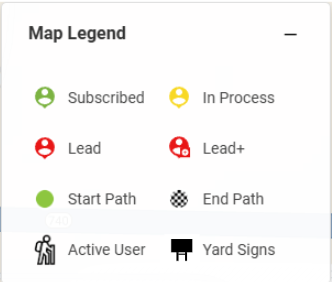
- Path endpoints
- Shows the starting and ending points of each path displayed on the map. This layer also displays other active users who are on the map.


- Service Areas
- Highlights the designated service areas tied to the door to door expedition. Only points within these boundaries will appear on the map.
- Fiber cables
- Displays the locations of fiber infrastructure, which could indicate homes primed for installation. These are shown regardless of service area boundaries.
- Yard signs
- Marks the spots where yard signs have been placed within the service area so long as they are not in the same location as the warehouse to which they are tied. This layer can be useful if you'd like reps to collect yard signs in the area they are canvassing.

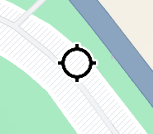
- Current Location
- Although not a map layer, the Current Location icon displays the real-time position of your device on the map, if available. This helps reps orient themselves in the field and track where they are in relation to nearby points of interest.
Core Functionality
Adding a Lead on the Map
To add new leads, start by double-tapping the desired location on the map. This action will drop a red pin at that spot. Then, this pin can be dragged after being placed to more precisely mark a location. Finally, once in your desired location: clicking the pin will open a dialog with three options for adding subscriber information.
-
New Subscriber
-
New Lead+
-
New Lead
Each option launches a different workflow depending on the type of interaction you've had.
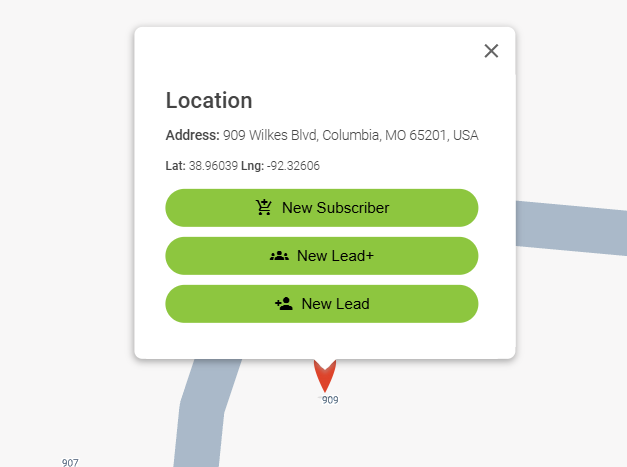
New Subscriber
Select this option when someone is ready to sign up. It will open a new tab with the public shopping cart, starting with address verification preloaded. Once the purchase is completed, a yellow subscriber icon will appear on the map at the selected location. The corresponding workflow will be attributed to the rep who launched it for tracking purposes.
New Lead+
Choose this if you've gathered any demographic information—like a name, phone number, or email.
After confirming the address, you'll be taken to a page where you can enter any amount of demographic information, depending on what the person shares. Additional notes or fields can also be collected, and additional followup steps triggered. Once submitted, a red Lead+ icon will be added to the map at that location. This is intended to be a path to further contact with the subscriber.
New Lead
Use this for quick lead tracking when no personal info is collected. You’ll only need to confirm the address—no additional data is required. Once saved, a red lead icon appears on the map.
Overlay Buttons
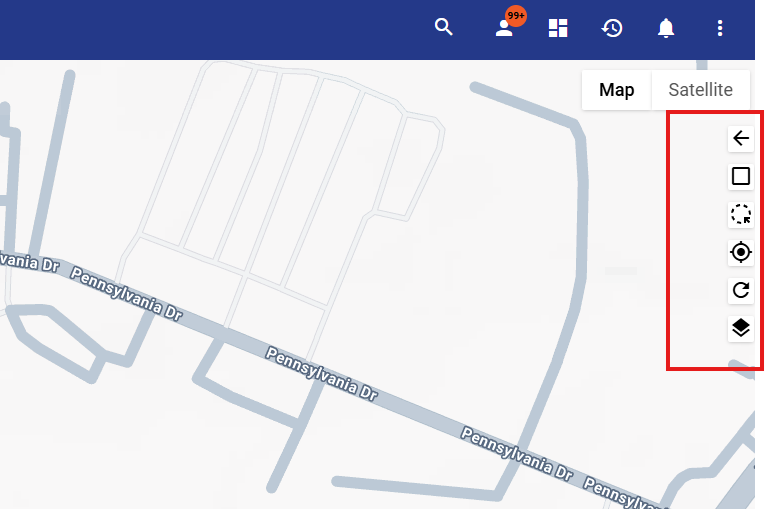
- Back arrow
- This button takes you back to the door to door expedition selection page.

- This button takes you back to the door to door expedition selection page.
- Full screen
- Allows you to toggle between full screen mode.

- Allows you to toggle between full screen mode.
- Data selection tool
- Allows you to create your own shape on the map and it will display a table containing all of the points contained in the shape you made.

- Allows you to create your own shape on the map and it will display a table containing all of the points contained in the shape you made.
- Center map
- This recenters the map onto your current location and pans the map with you as you move.

- This recenters the map onto your current location and pans the map with you as you move.
- Refresh Layers
- Refreshes the data of all the layers on the page

- Refreshes the data of all the layers on the page
- Layer toggle menu
- Allows you to toggle the visibility of each layer on the screen and will save your settings.

- Allows you to toggle the visibility of each layer on the screen and will save your settings.
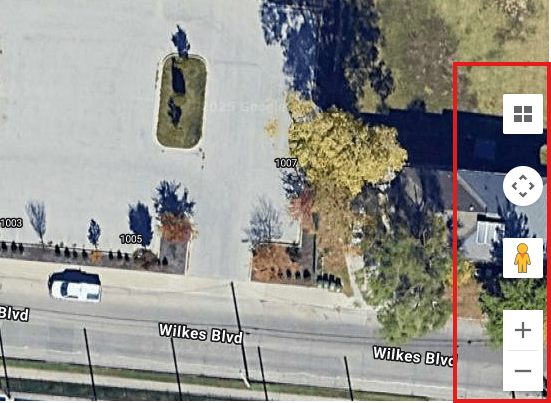
- Map Orientation
- Use this tool to rotate the map or switch between bird’s eye view and a tilted, angled perspective. This helps you better visualize terrain and building layouts as you navigate. This option is only available on satellite view.


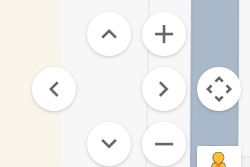
- Move Map
- On-screen arrow buttons and plus/minus controls allow you to move and zoom the map without using touch gestures. This is especially useful on mobile devices when you want precision control without interacting directly with the map surface.

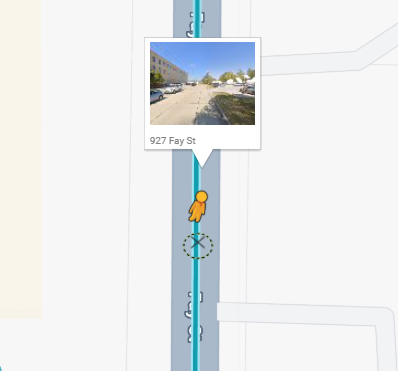
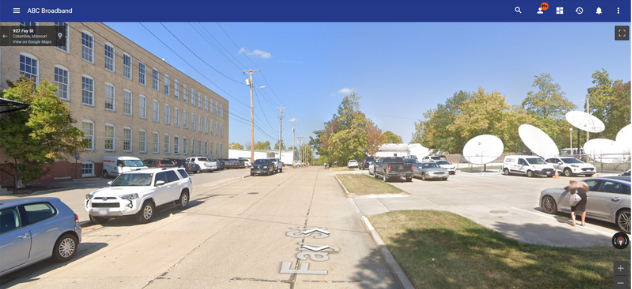
- Street View
- Click and drag the Street View icon (the little yellow figure) onto a map location to enter Street View mode. This gives you a real-world visual of the selected area, helping you better recognize landmarks or house features when canvassing.


- Zoom in/Zoom out
- Use the zoom buttons to easily zoom in or out on the map for a closer or broader view. These controls provide quick access to map scaling without pinching or double-tapping.
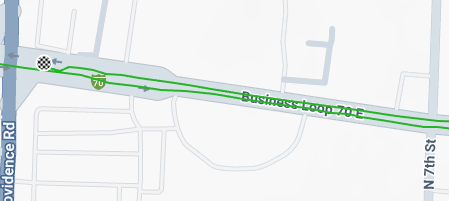
Hotspots and GPS Accuracy
If a device doesn’t have its own SIM card or built-in GPS, using a mobile hotspot can provide internet access, but may not provide accurate location data. Hotspots typically do not share GPS information, and devices without built-in GPS rely on approximate estimations of real location. As a result, location accuracy on such a device may be significantly lower than that of a GPS-enabled device. For better accuracy, we recommend using an external GPS accessory, such as a Bluetooth GPS receiver, or a device with a cellular connection.
As seen in the image below, a hotspot has a harder time pinpointing an accurate location. This tends to make path lines less smooth.
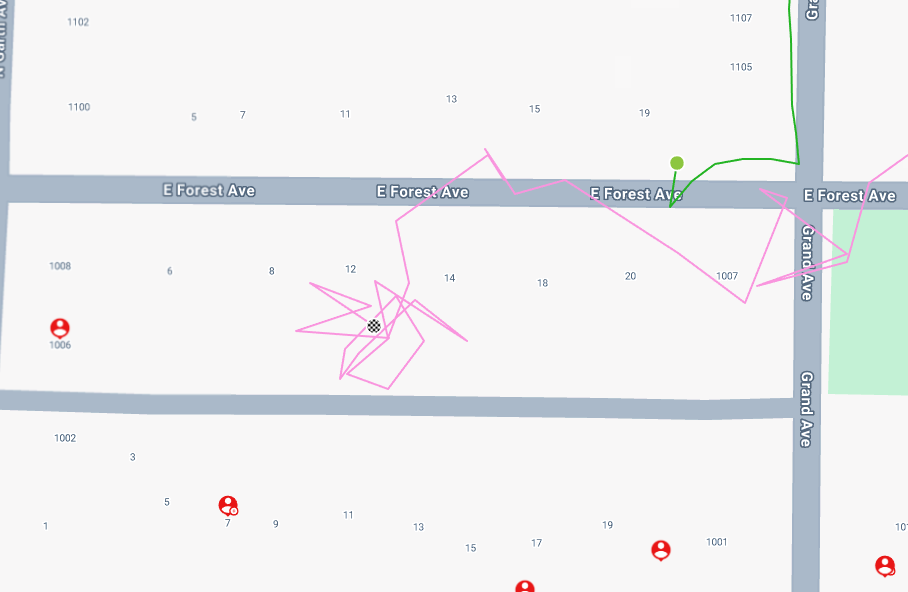
Whereas an iPhone or GPS enabled device for example gets much more accurate data.

Users will be notified when their location tracking is not precise.