Vision accurately tracks the physical location of your hardware, along with any associated subscribers. But, in order to ensure that these tracking methods are effective, it requires utilizing the system correctly.
Service Package Workflows use tools to tie or assign hardware during a live install or to untie or remove hardware during a service cancellation. However, there might be execptions that require a manager or network operator to manually associate the hardware.
Here's how to add physical hardware locations and associate them with a specific subscriber and service item:
1. Network > Hardware: Scroll or search for the specific piece of hardware, then click on the device to view details.
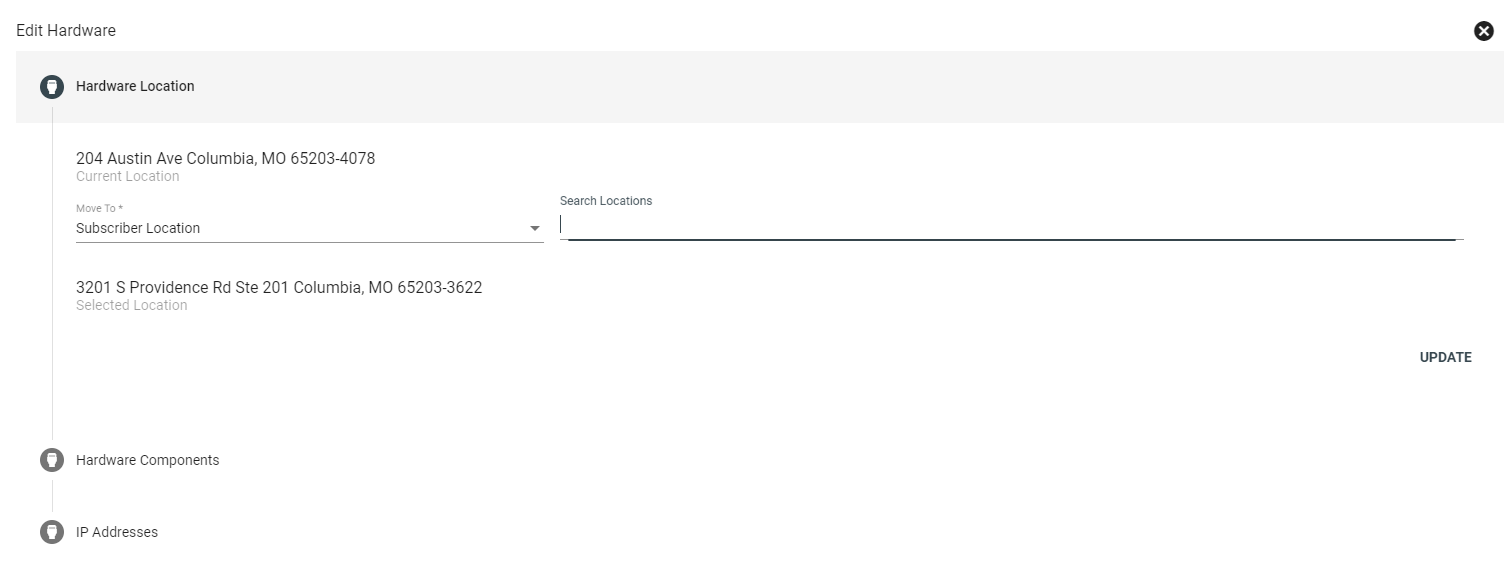
2. Hardware > Edit hardware: Select the Edit Hardware icon in the top right-hand corner, then choose to move the equipment to either a warehouse or subscriber location. Search for a location by typing the location attributes in the Search Locations bar, then select the applicable location. Click UPDATE to move the hardware.

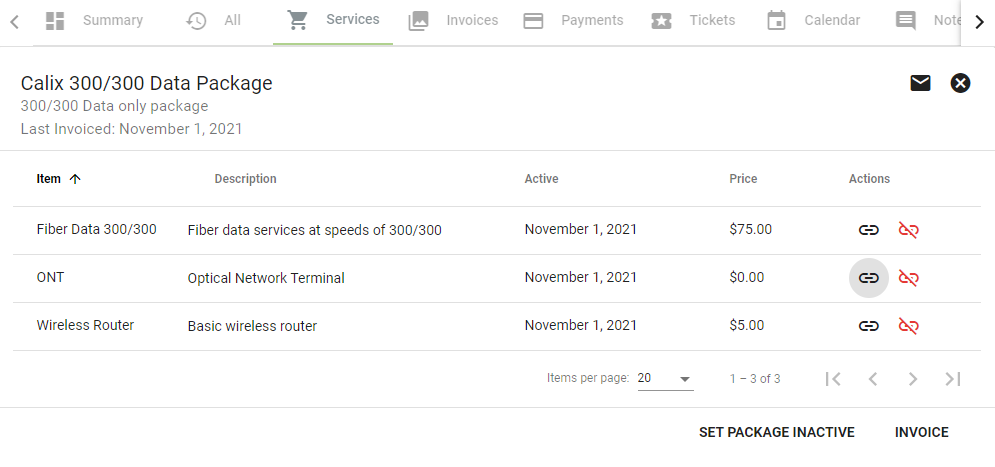
3. Subscriber 1 > Services > Package X: Search for the hardware’s new subscriber location by searching for the subscriber in the super search field. Select the applicable subscriber, then click on the services tab in the toolbar. Click on the specific package (if more than one) that the hardware will be tied to.
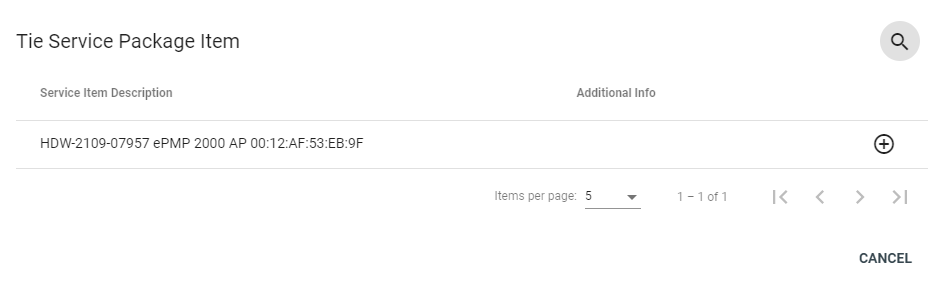
4. Services > Package X > Service Item: Select the Tie Service icon under the Actions column to tie the hardware with the specific service item.
To move hardware that is already tied to an account, follow these steps:
1. Subscriber 1 > Services > Package X > Item: Search for and select the subscriber that is tied to the existing hardware, then click on the package that hosts the tied service item. Select the Untie Service Item icon and confirm.

2. Follow the above steps 1-3 to move hardware location — either to a warehouse or a different subscriber location. If moving to a different subscriber location, follow step four to tie the service item to that new location.
Add a hardware location:
Add a physical location to a piece of hardware by selecting the edit tool in the toolbar for the hardware.
Click on the pencil icon