Inventory consists of several categories within Vision — manufacturers, purchase orders, vendors and warehouses. Some inventory will later become hardware in use at a subscriber location.
All inventory starts with a purchase order. A purchase order is where you can bring gear into the system and track it throughout its lifetime — including the initial cost, where it is being used and how long it is used for.
Tracking inventory with a purchase order ensures that the billing department is firmly tied to the hardware that is being used, which allows for a clear image of your actual operational costs.
If you would like to follow along with a video you can visit out Youtube page or click on the image below to direct you to step by step video showing how to add equipment into your inventory.
Placing a new purchase order for a product that you have not previously stocked:
The first step is adding the new product manufacturer and model to the system.
-
Inventory > Manufacturers: Click the Add icon in the bottom right-hand corner to create a new manufacturer. Enter the name and description, then select SUBMIT.

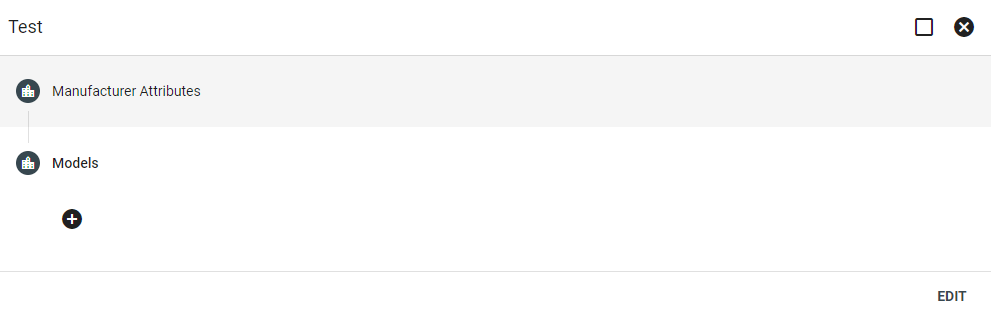
2. Manufacturers > View > Models: Click on the new manufacturer to view more details and to add a new model. Select the + icon underneath Models to add a new model.
Enter the model name and select a product type from the drop-down menu. Accurately selecting a product type ensures that the relevant model detail fields can be completed.
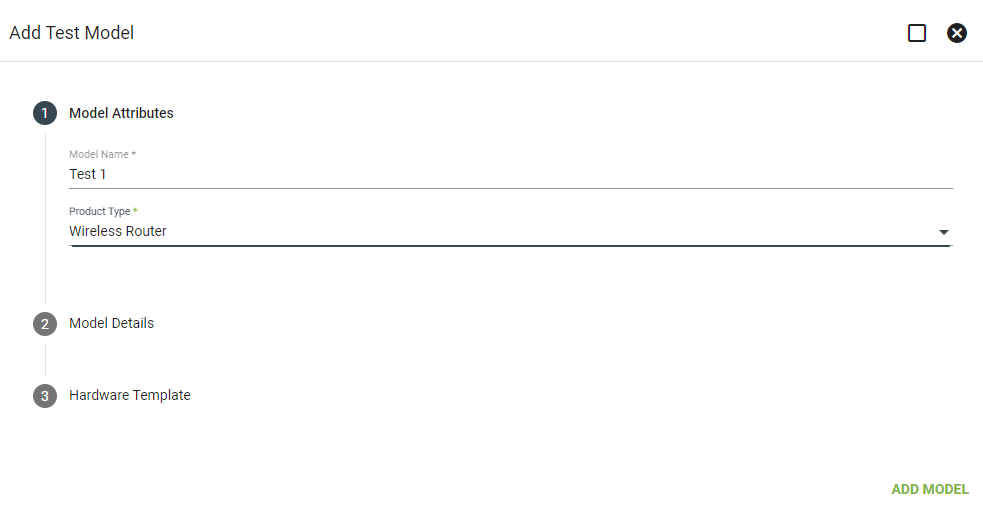
Add a model description, MAC address, serial number and any other applicable details.
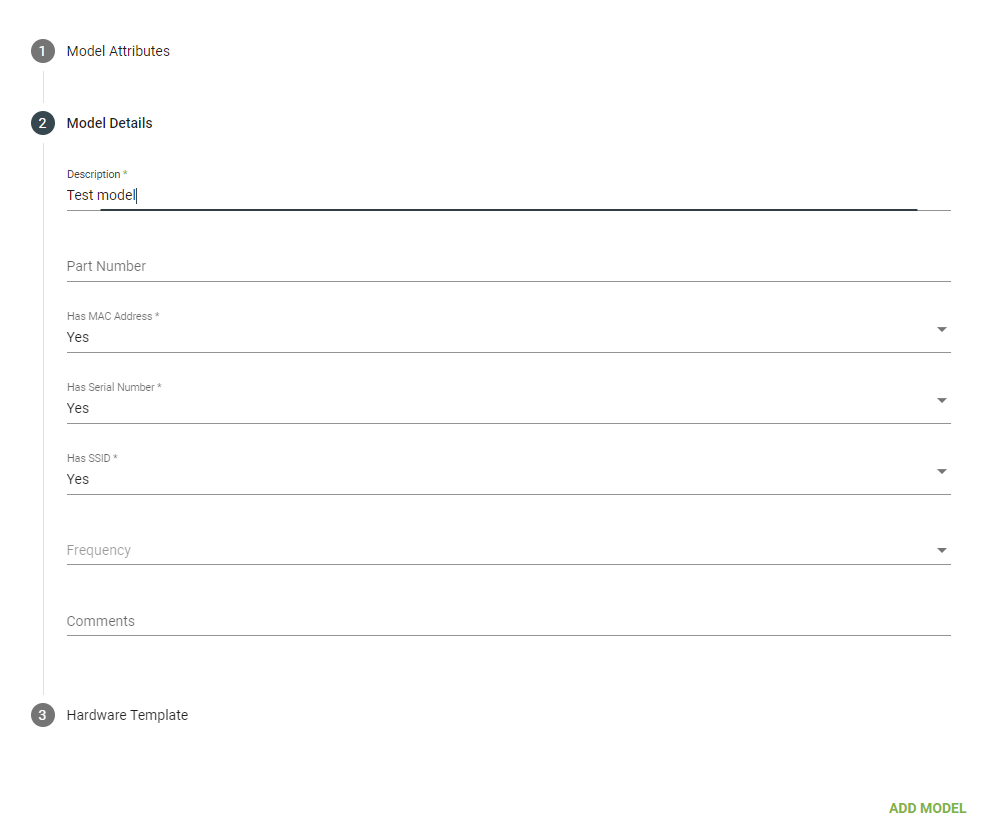
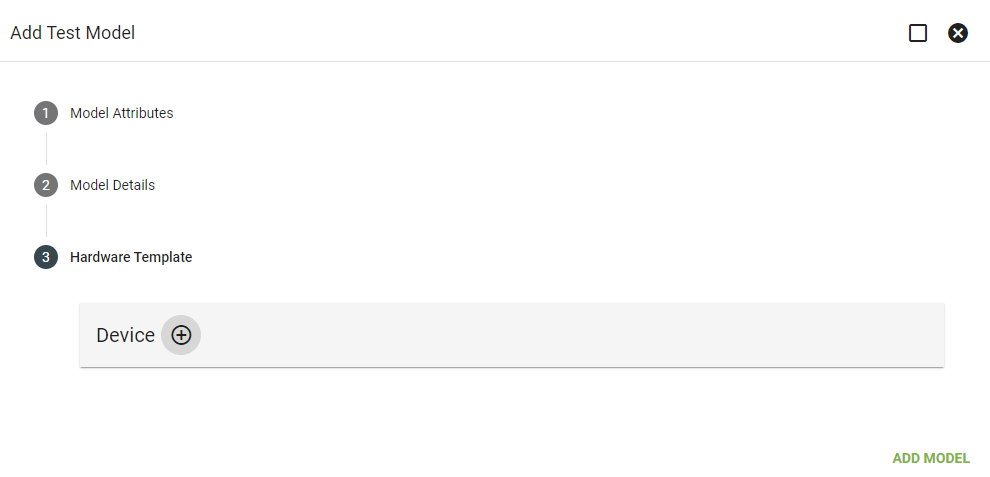
Add any applicable device slots. Select ADD MODEL to add a new model to an existing manufacturer.
Placing a purchase order for a product you have stocked, but with a new vendor:
-
Inventory > Vendors: Click on the ADD icon in the bottom right hand corner to add a new vendor. Enter the name and description for the vendor, then select NEXT.
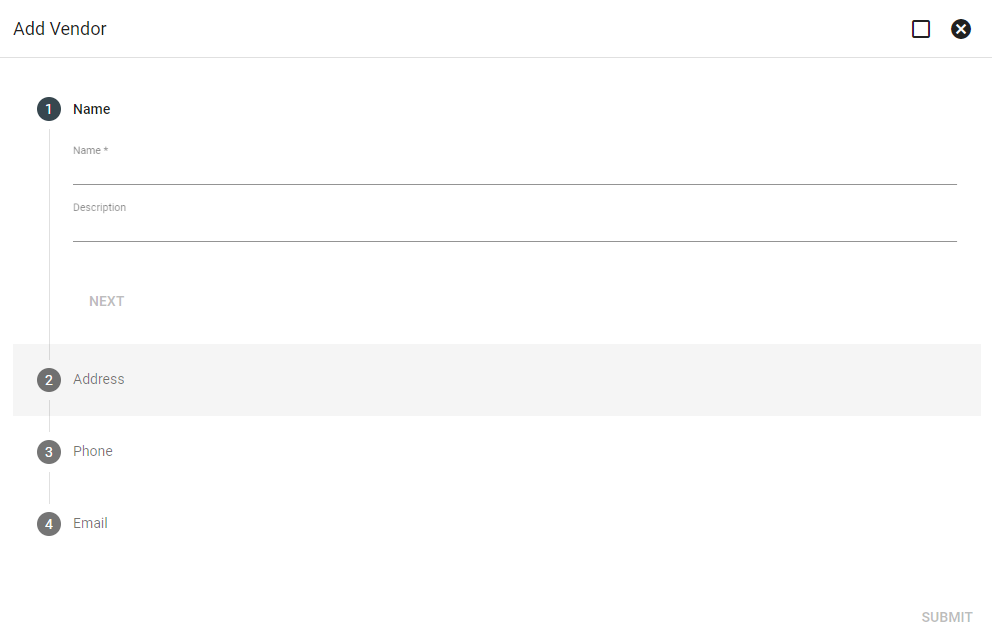
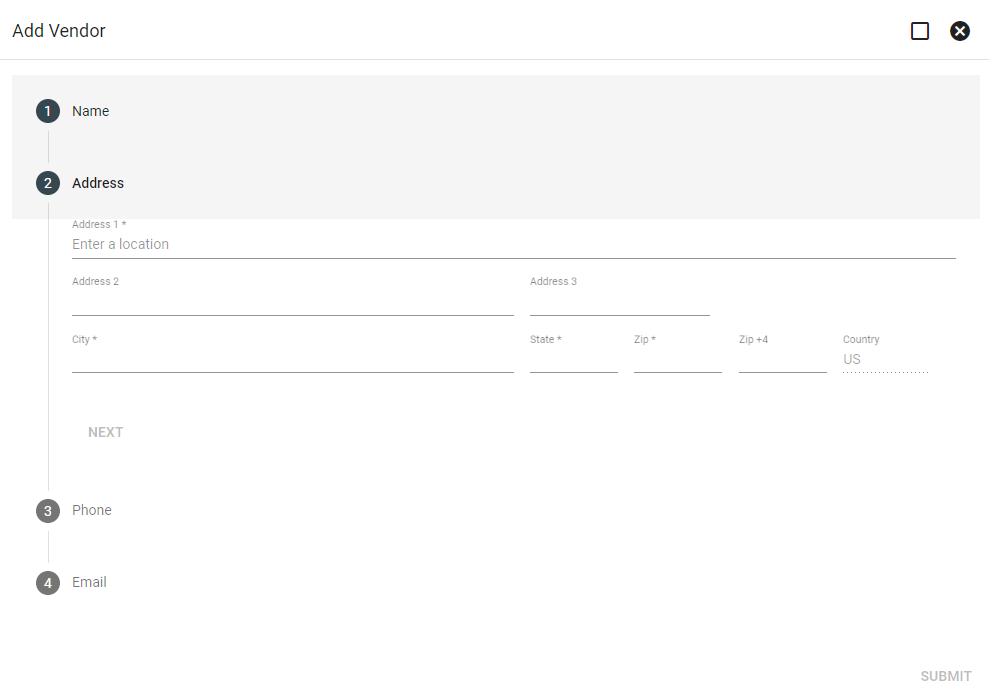
Enter the vendor's address, then select NEXT.
Enter the phone number and phone number description, then select NEXT.
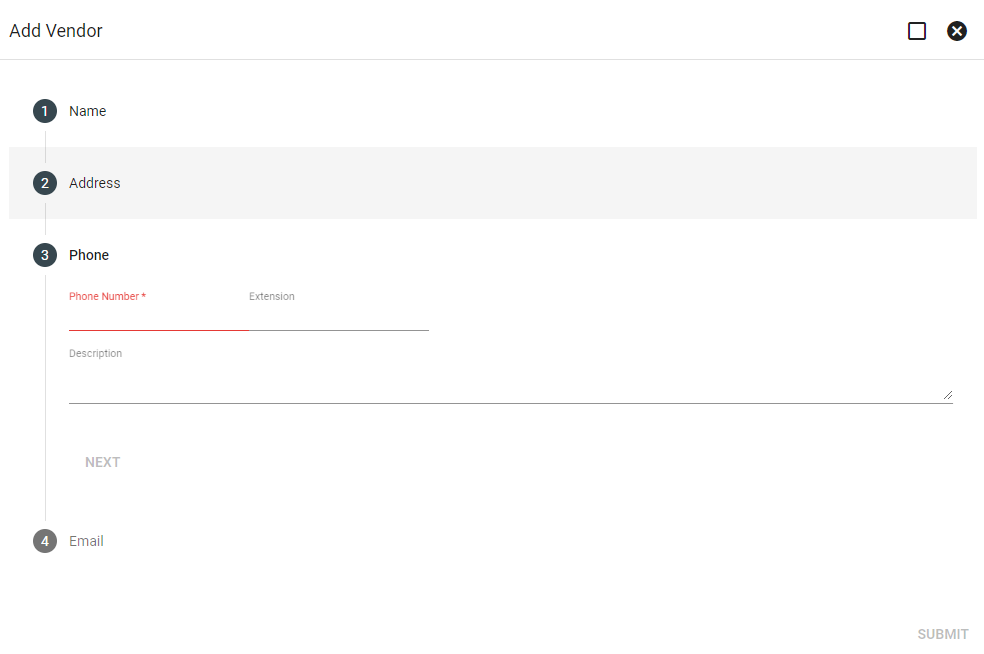
Add the applicable email address and description, then click SUBMIT.

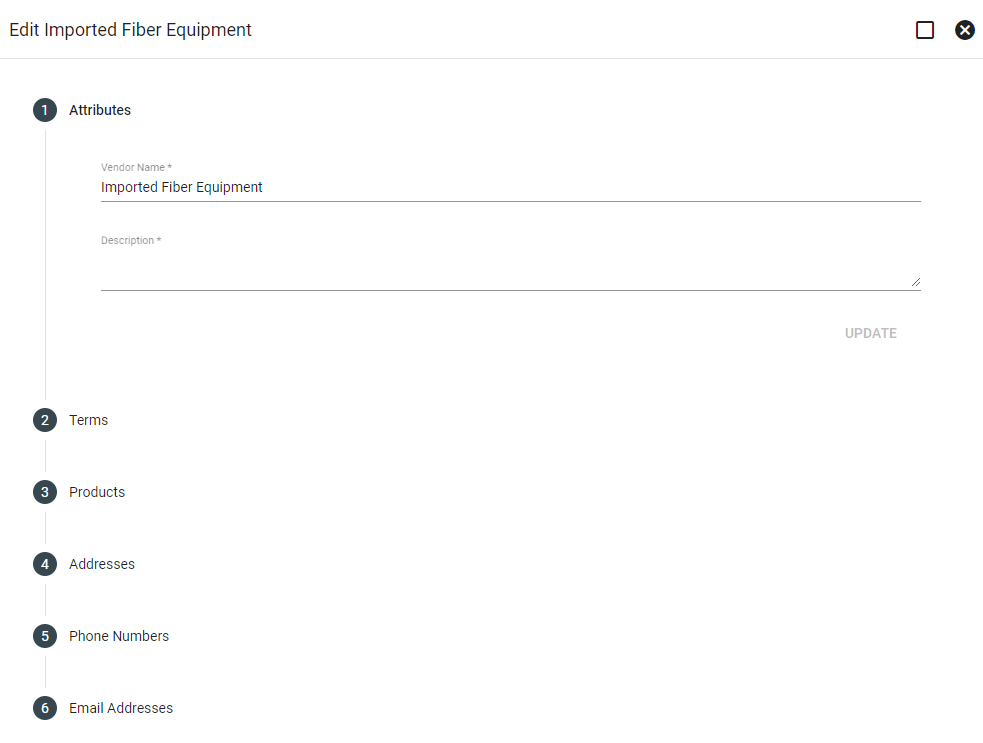
2. Vendors > View > Edit: Click on the vendor profile, then select EDIT in the bottom right hand corner. Click on the Products tab to add the existing Manufacturer and Model.
Placing a new purchase order with an existing vendor:
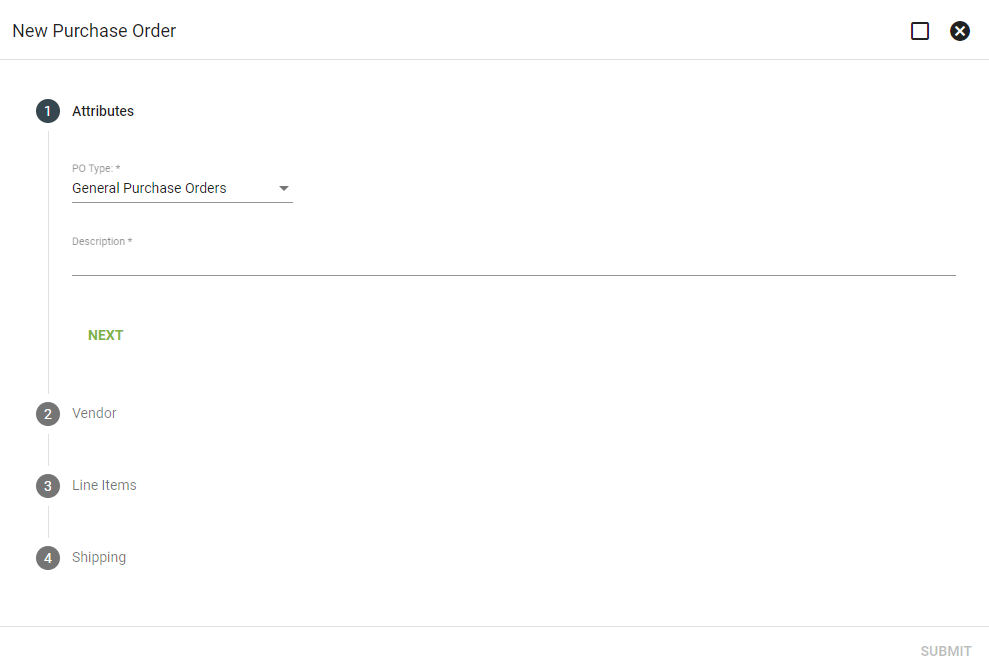
- Inventory > Purchase Orders: Click on the ADD icon in the bottom right hand corner.
- Purchase Orders > Add > Attributes: Choose a PO Type from the drop-down menu and add a description of what the order entails.
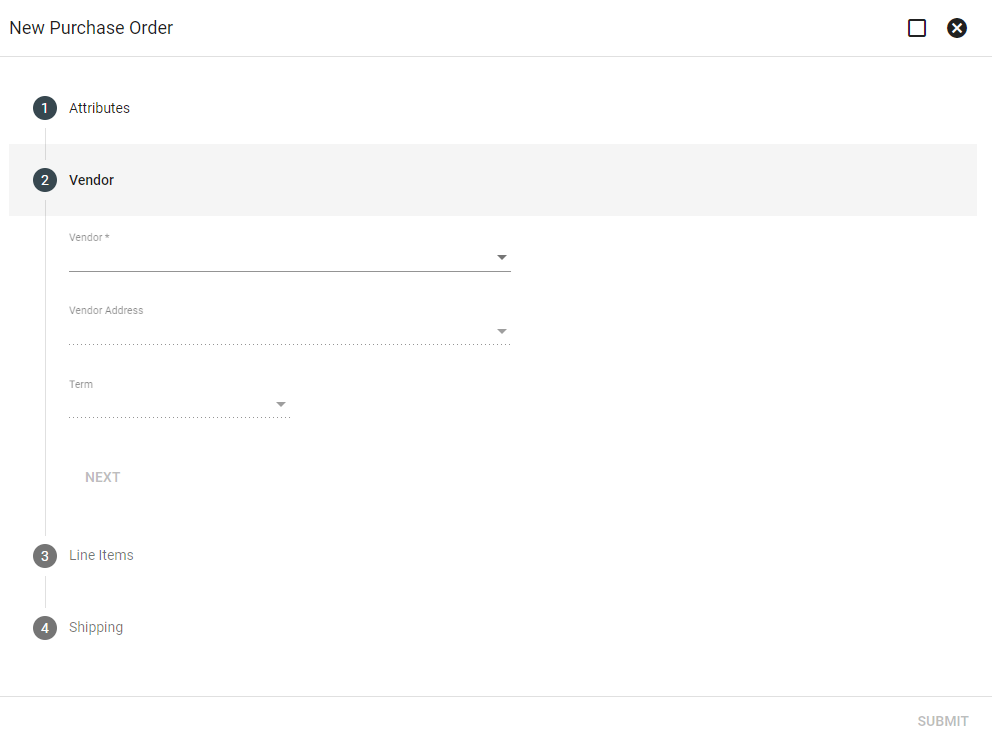
- Purchase Orders > Add > Vendor: Select a vendor and a vendor address from the drop-down menus. Choose a term length from the drop down menu, or create a new term length by selecting Add New Term.
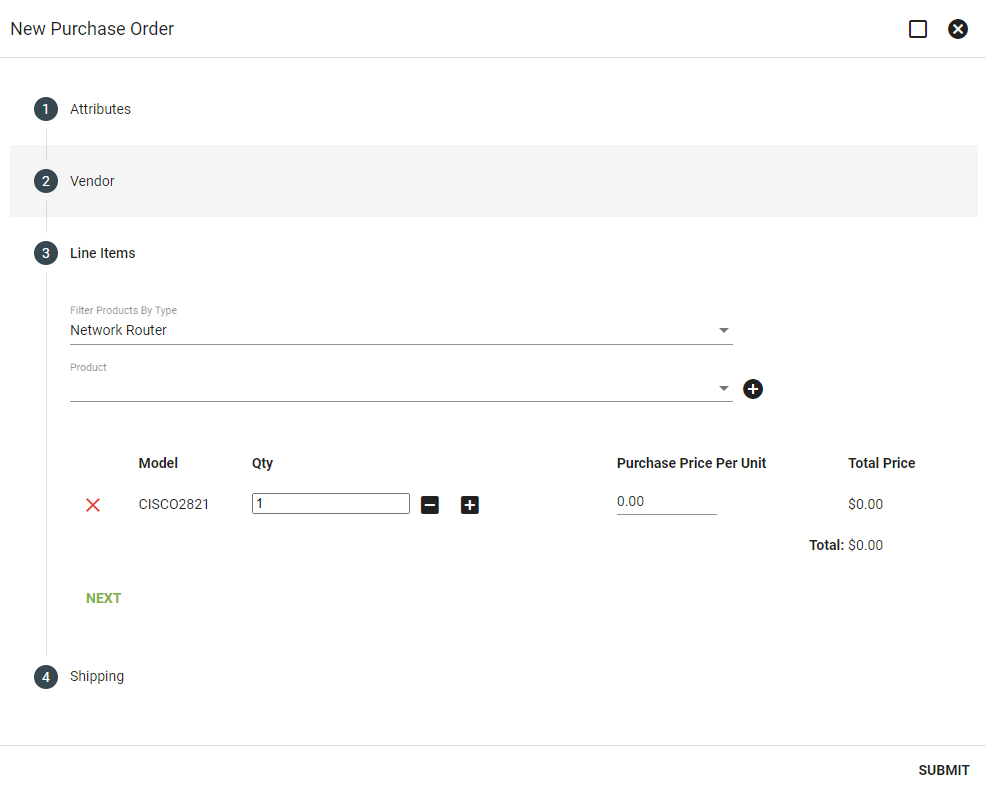
- Purchase Orders > Add > Line Items: Select a product type from the drop-down menu. The product types drop-down menu will only display existing equipment models. Choose an existing Product from the Product drop-down menu.
To add a new product, click the Add New Product option under the Product drop-down menu. Select a manufacturer and a model from the drop-down menus. Click the 
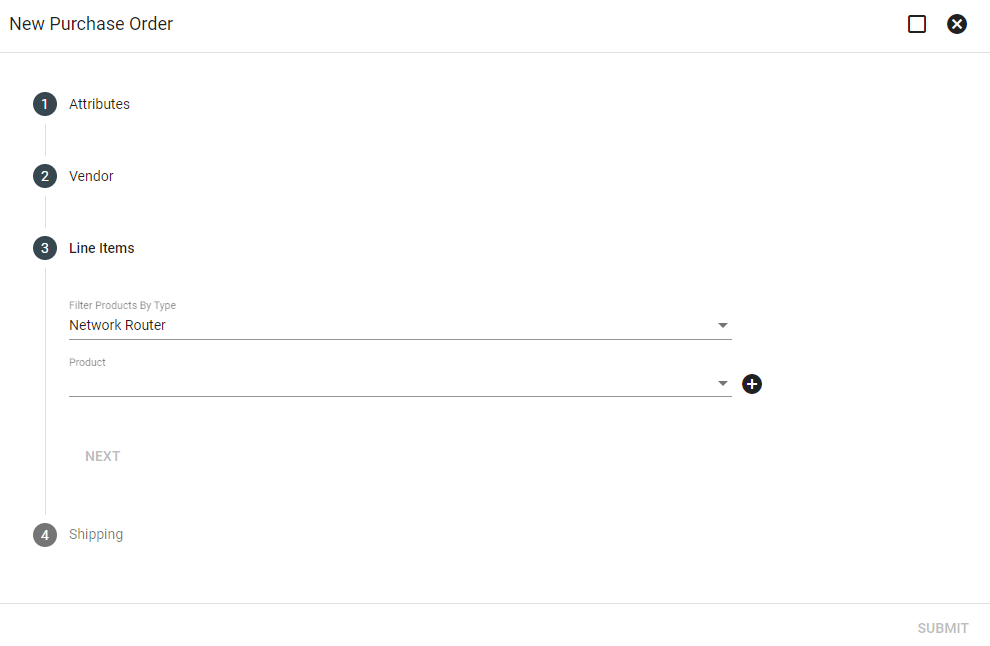
Add more than one new manufacturer and model by choosing an additional manufacturer and model from the drop-down menu. Select ADD to add the product to the vendor and purchase order.
Change the quantity of each model being ordered under the Qty column. Type the new amount, or click the + and - icons to change the quantity.
Choose NEXT to proceed with the purchase order.
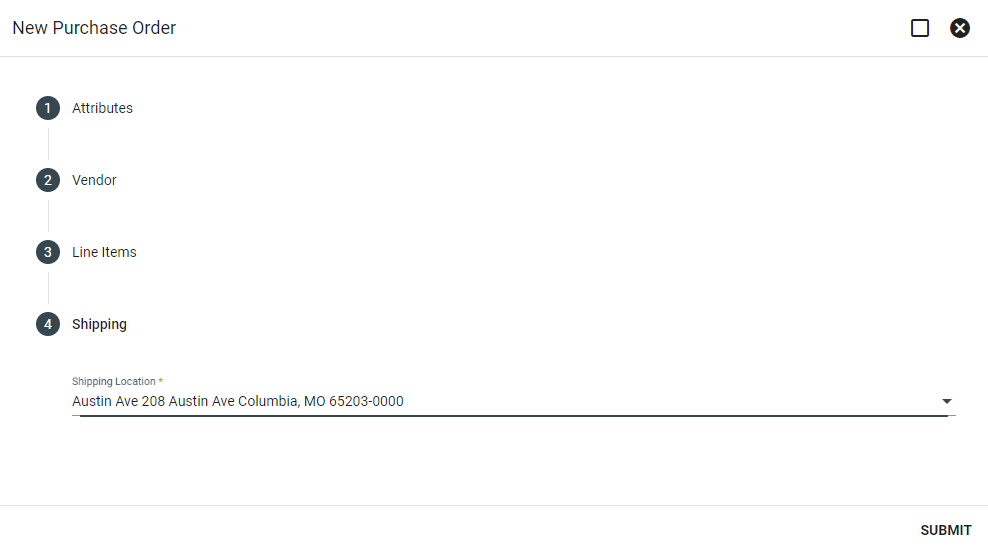
Select a shipping location from the drop-down menu. Click Add New Warehouse to create a new shipping address for the purchase order.
Click SUBMIT to save the changes.
Adding a new warehouse:
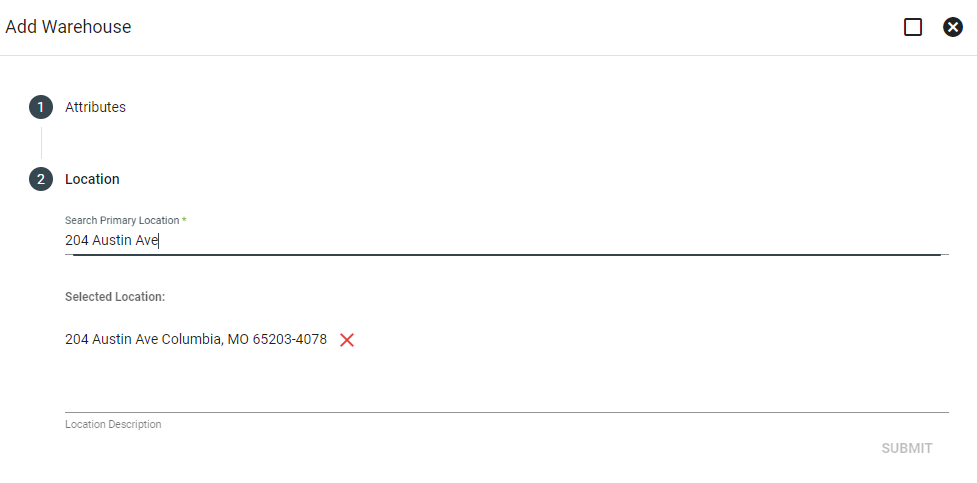
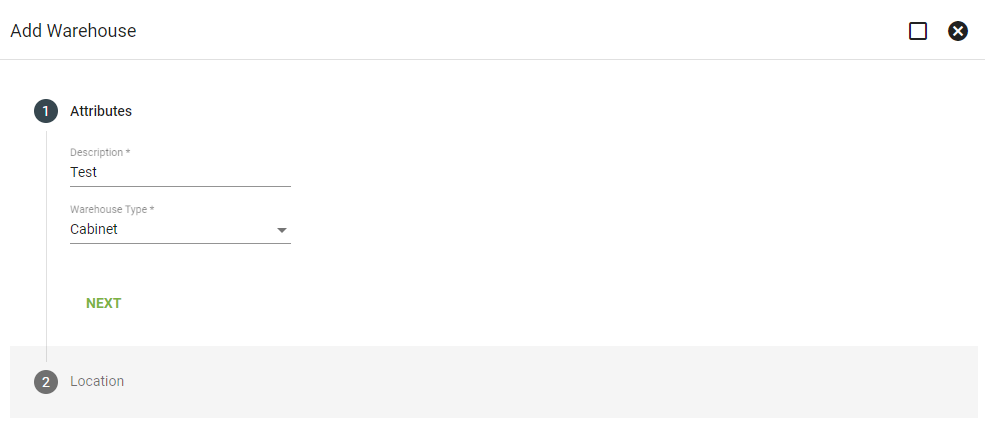
- Inventory > Warehouse > Add > Attributes: Input a description for the warehouse and select a warehouse type from the drop-down menu. The warehouse type helps to categorize the use of the warehouse, especially when it comes to dispatching technicians and storing equipment.
- Warehouse > Add > Dispatch > Location: Search for a location to house the warehouse. Select the location from the search results and enter a description of the location.