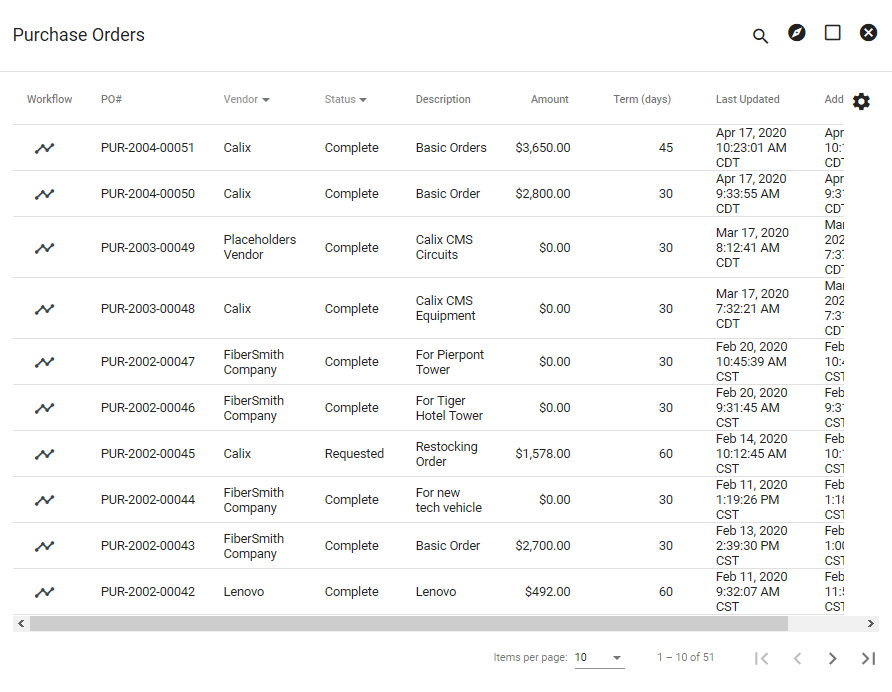
Purchase Orders
Purchase Orders are sorted by PO# by default. Use the tools in the upper right to search for specific Purchase Orders based on a variety of information. Click the 
Click in a Purchase Order line to view it's contents.
View Purchase Order
Use the PDF button in the lower left to preview and download the Purchase Order PDF.
In a PO with complete status, click the 
Click COPY in the lower righthand corner to copy this PO into a new Purchase Order.
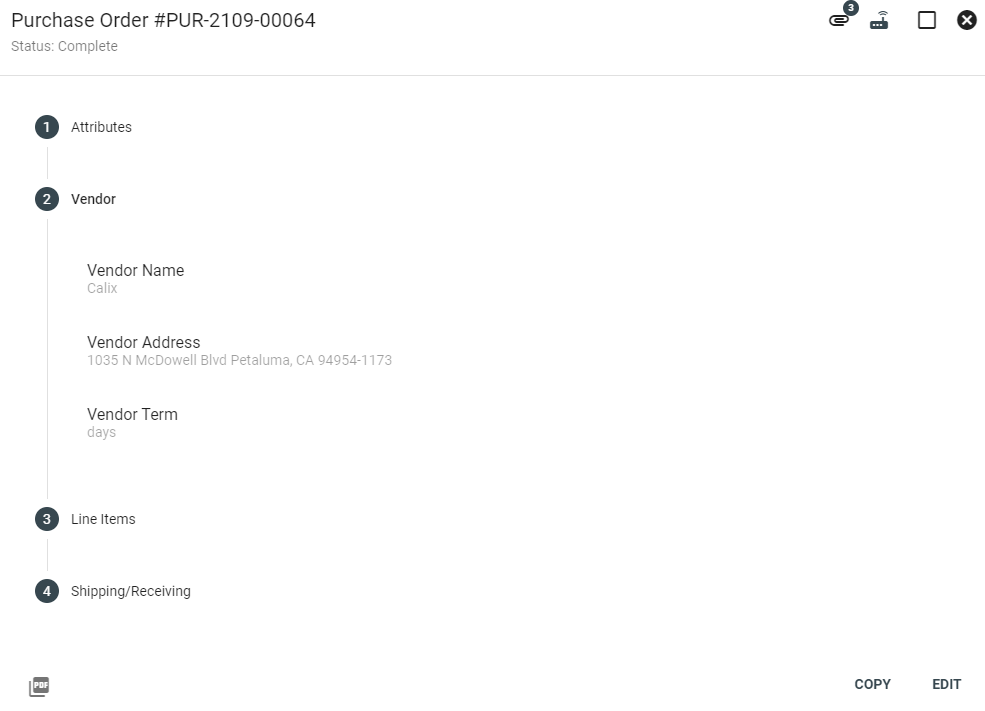
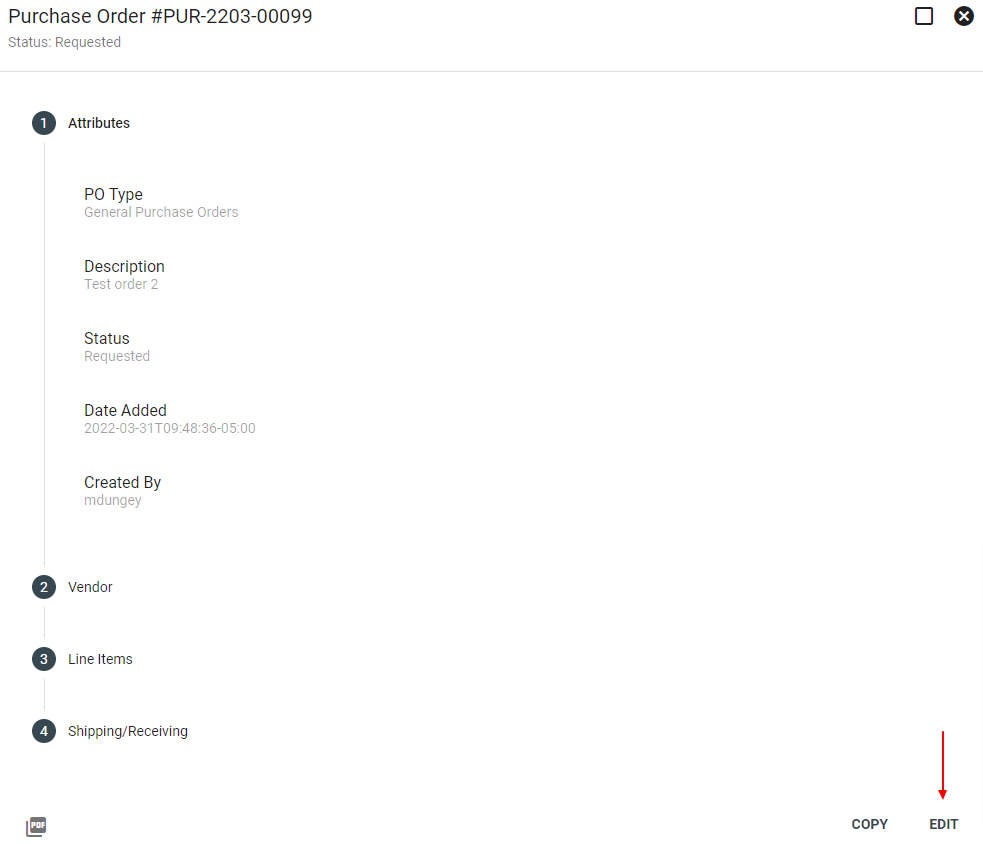
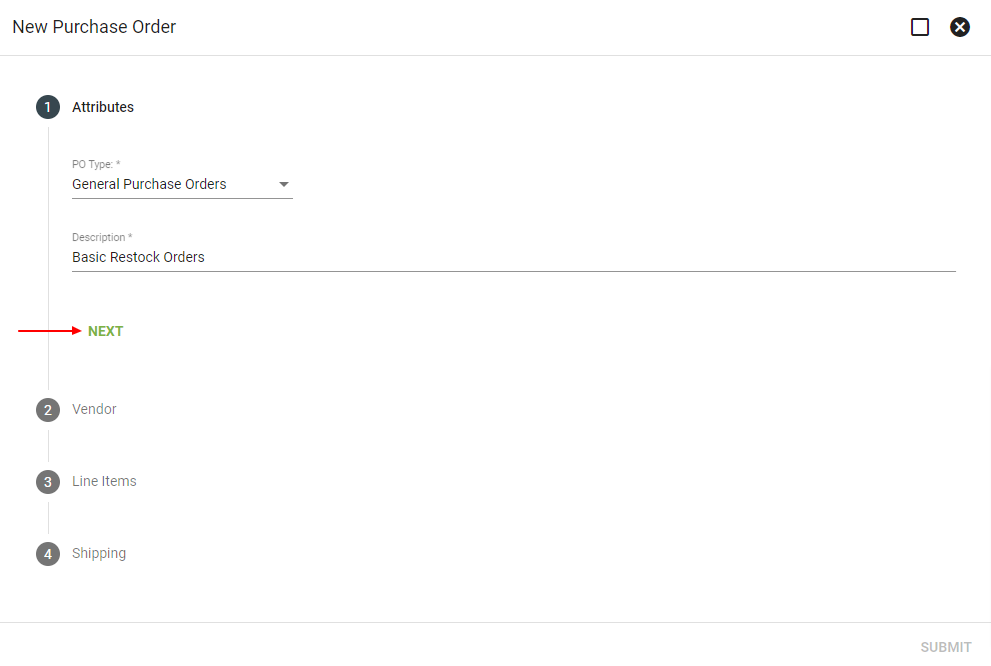
Under Attributes you will see the PO Type, Description, Status, Date Added, and who created the PO.
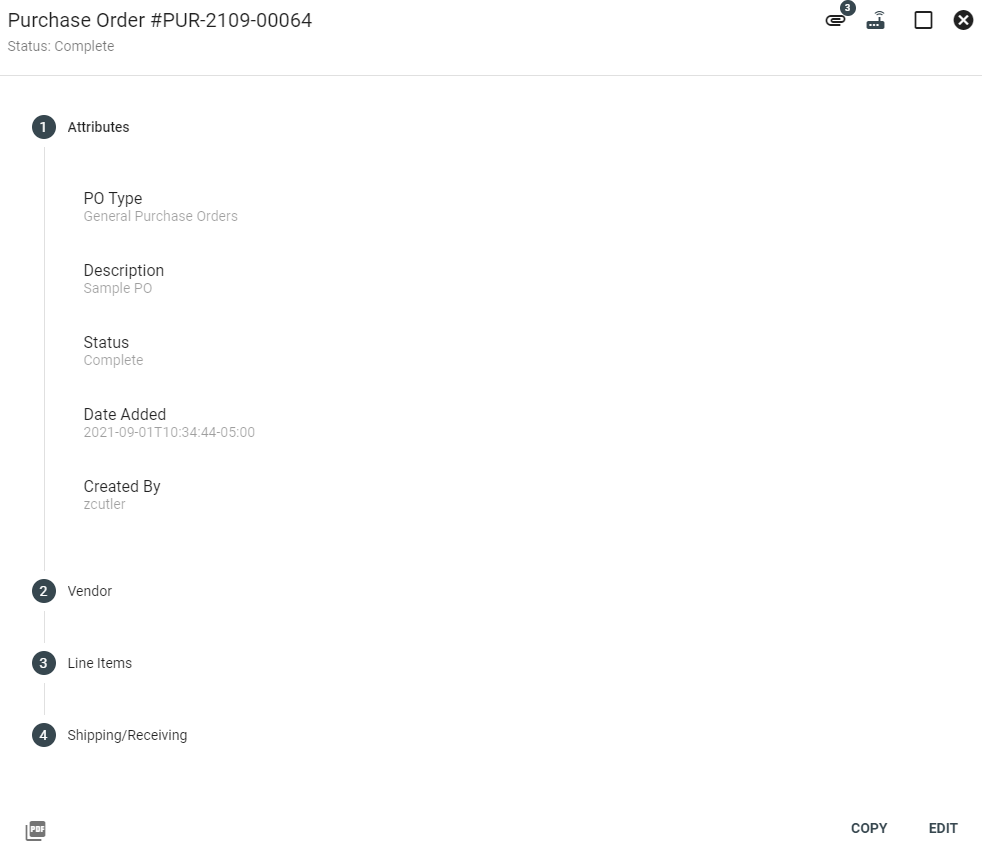
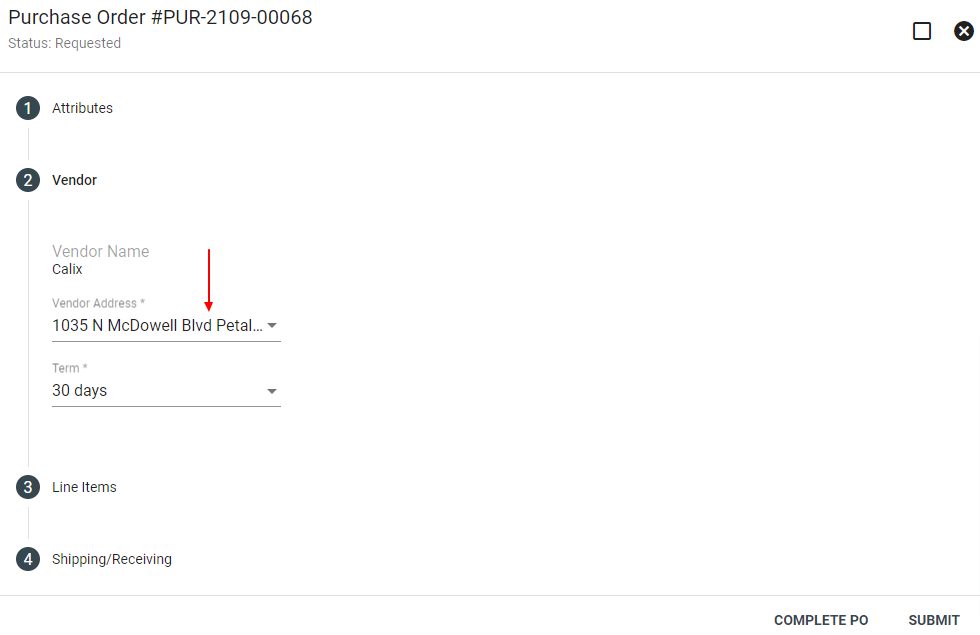
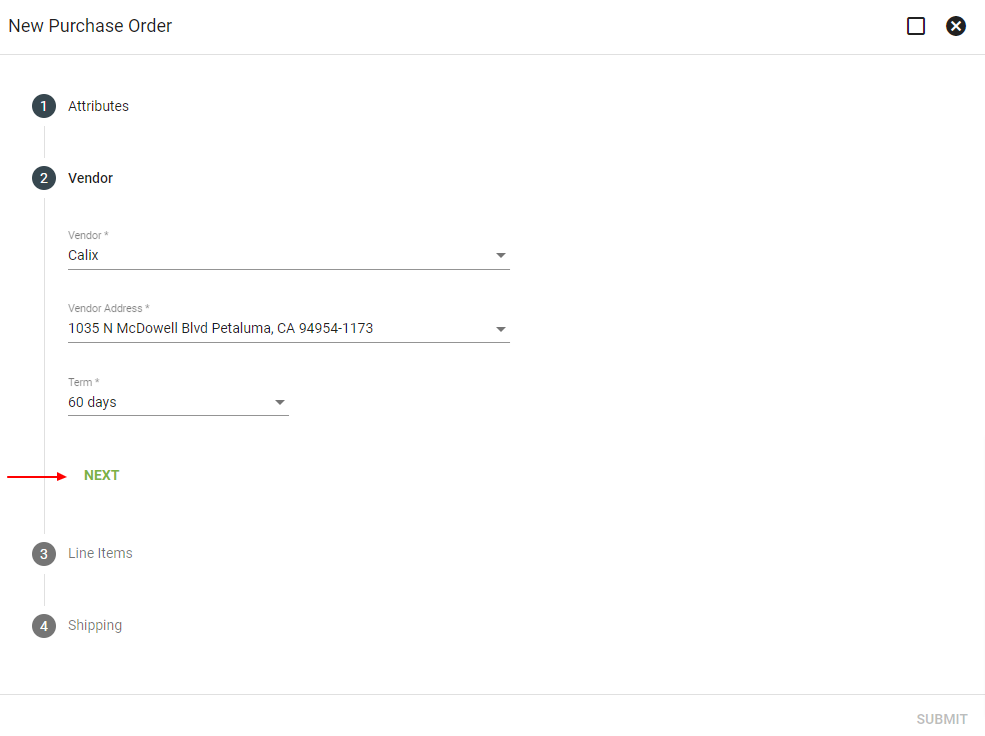
Under Vendor you can view the name, address and terms.
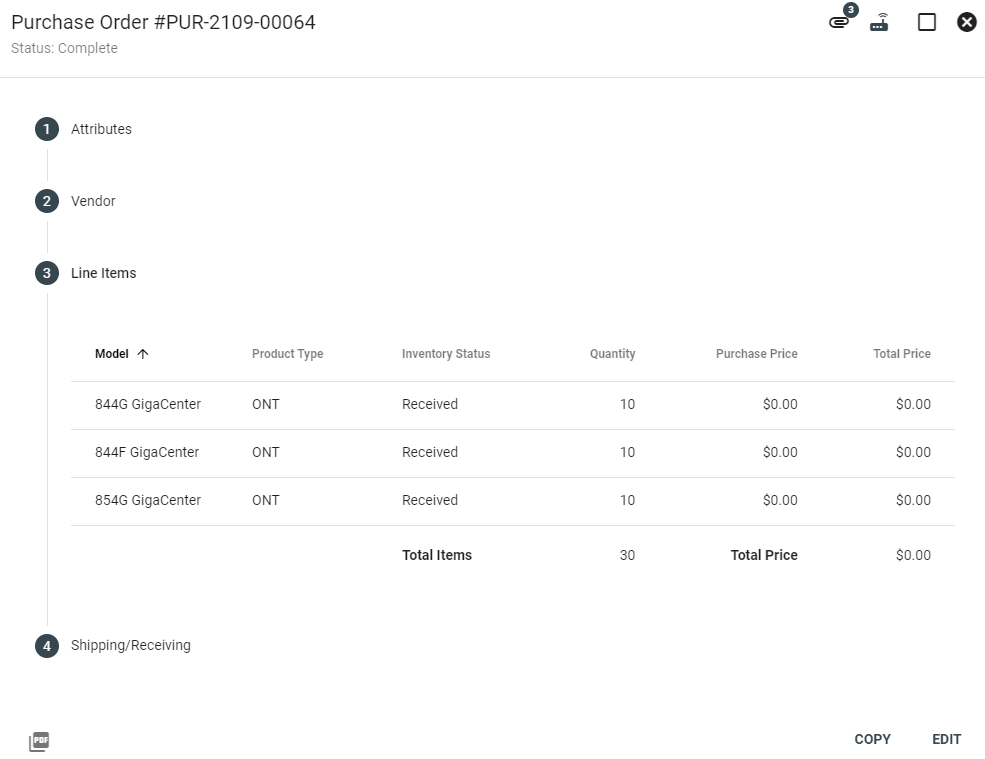
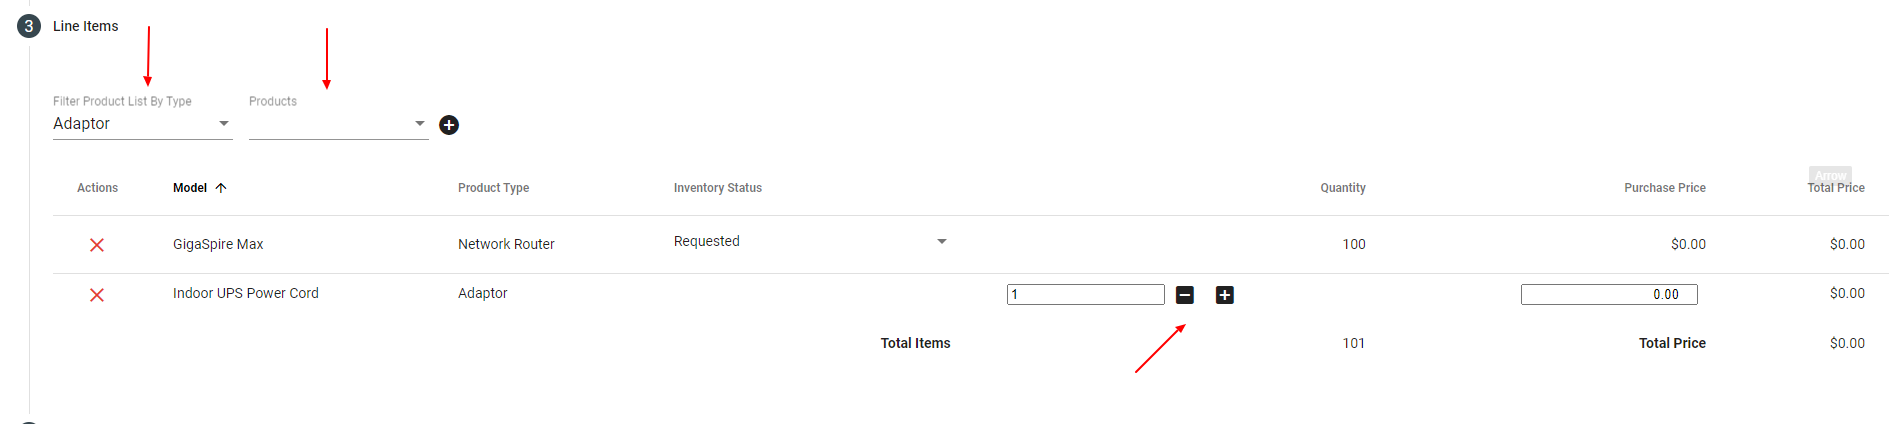
Under Line Items you can view the contents of the order including models and price.
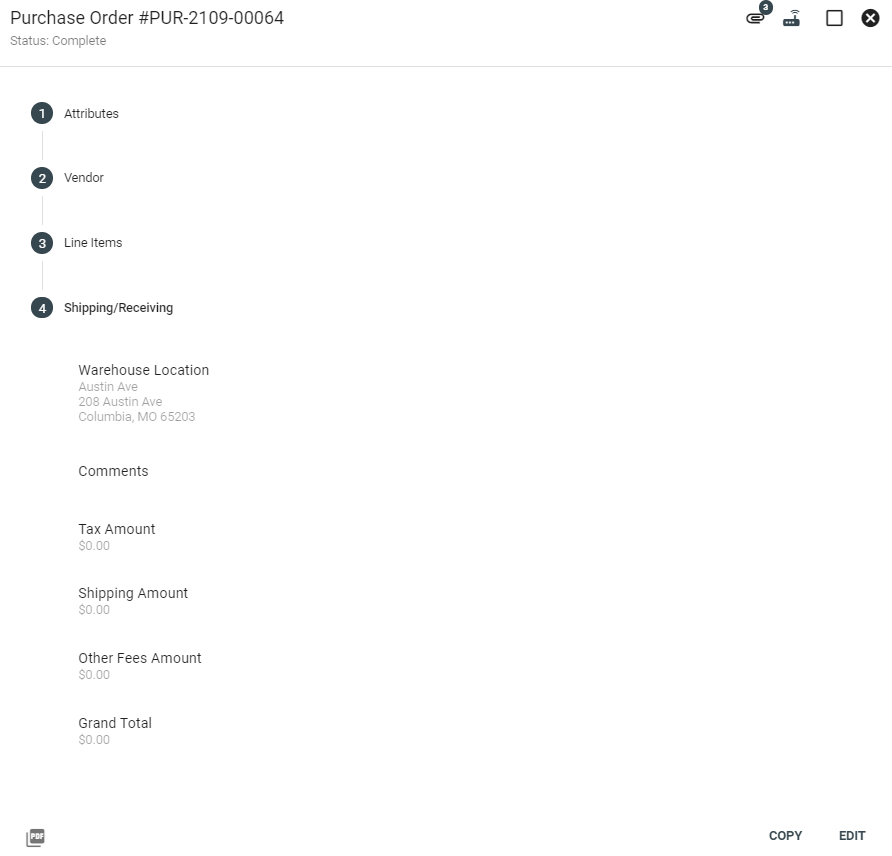
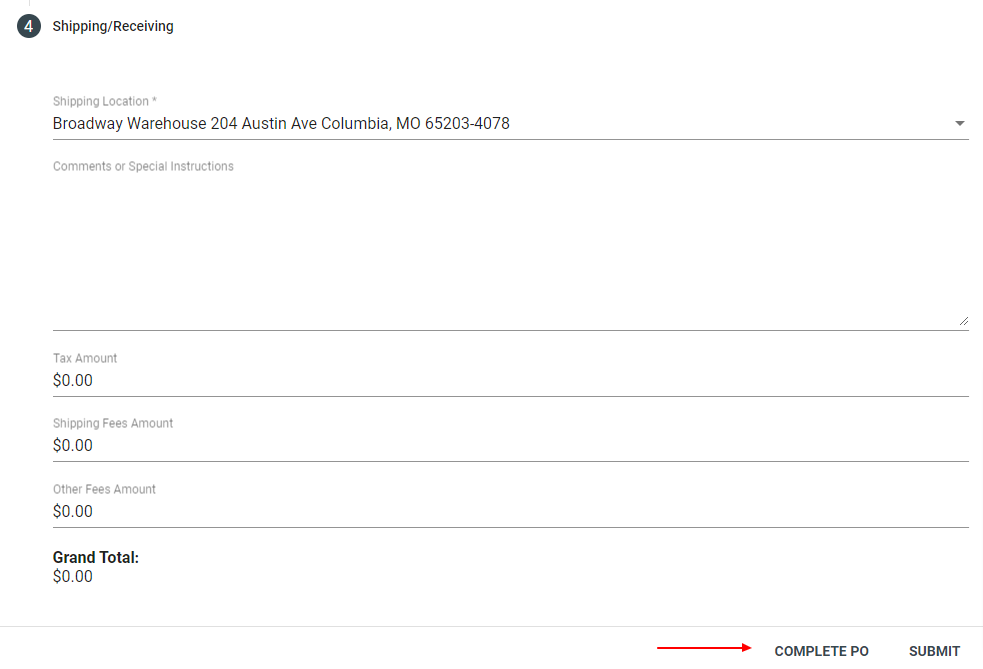
Under Shipping/Receiving you can view the Warehouse locations, comments, tax amounts, shipping amounts, other fees, and the grand total.
Set Hardware Data from CSV File
Click the
The information on the righthand side is the data being imported from the CSV file, while the information on the lefthand side is the hardware's existing data.
Only columns with a blue border around the data boxes are able to have CSV data imported.
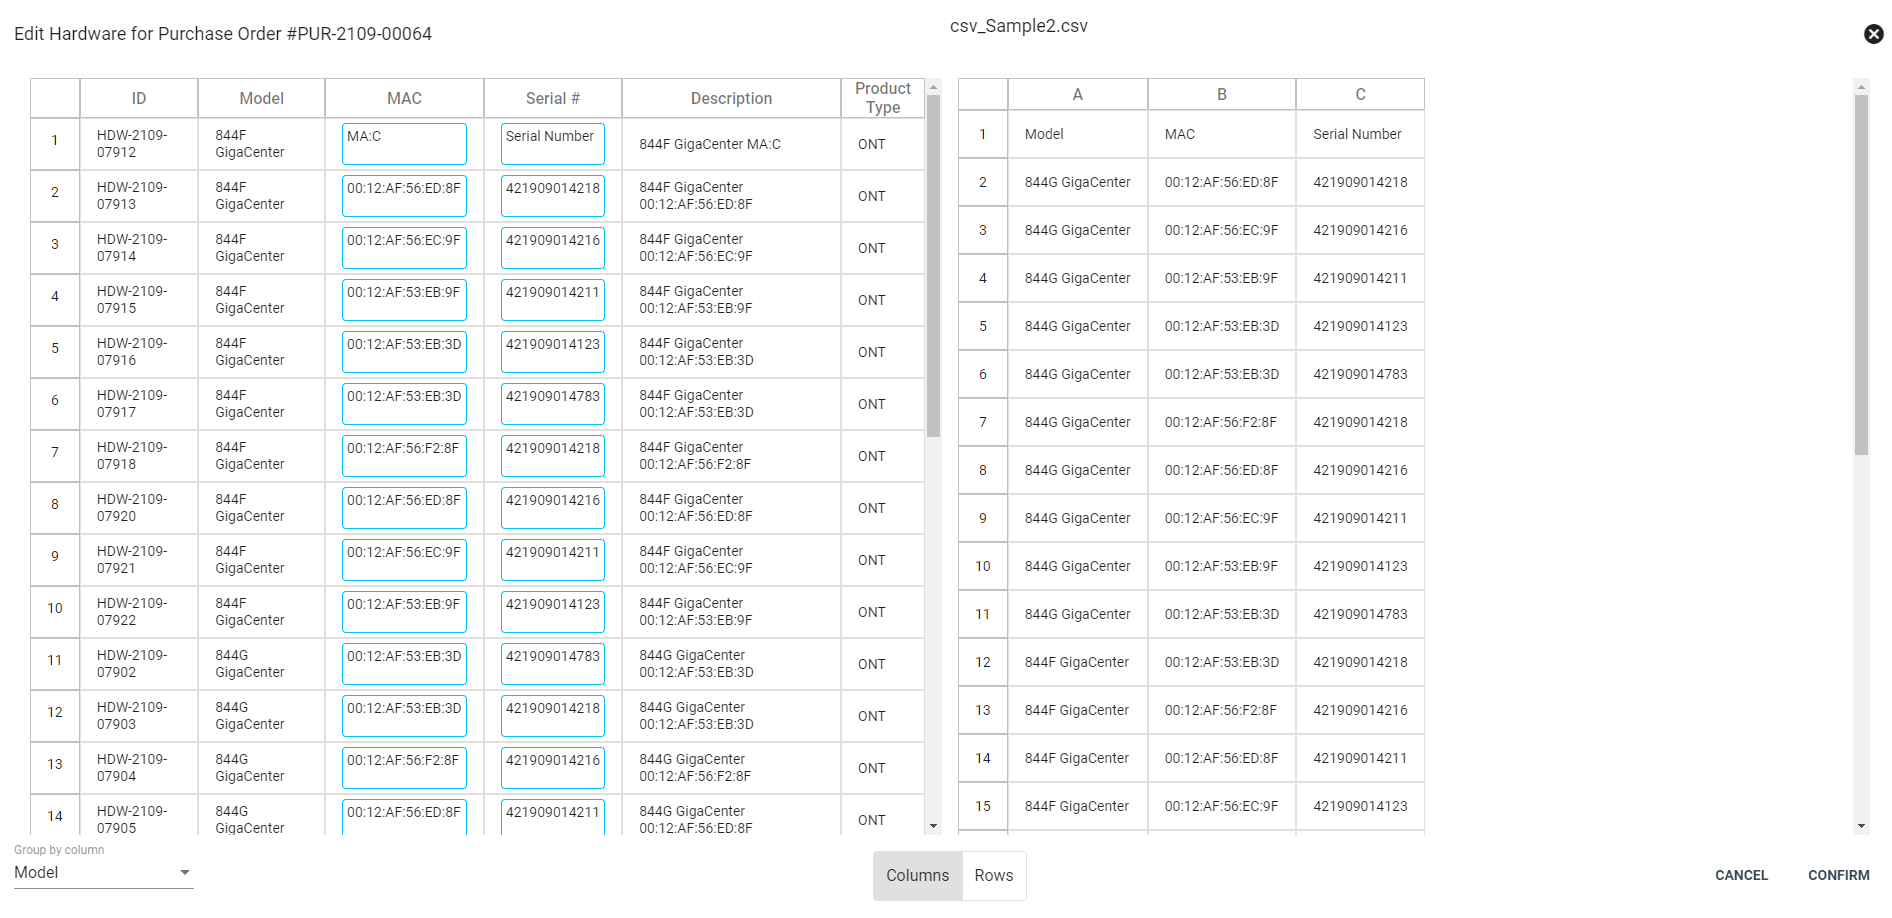
Click on a column on the lefthand side and then select the corresponding column on the righthand side. For example, click on the MAC address column on the left, then select the MAC address column on the right. Paired columns will display in the same color to indicate a match.
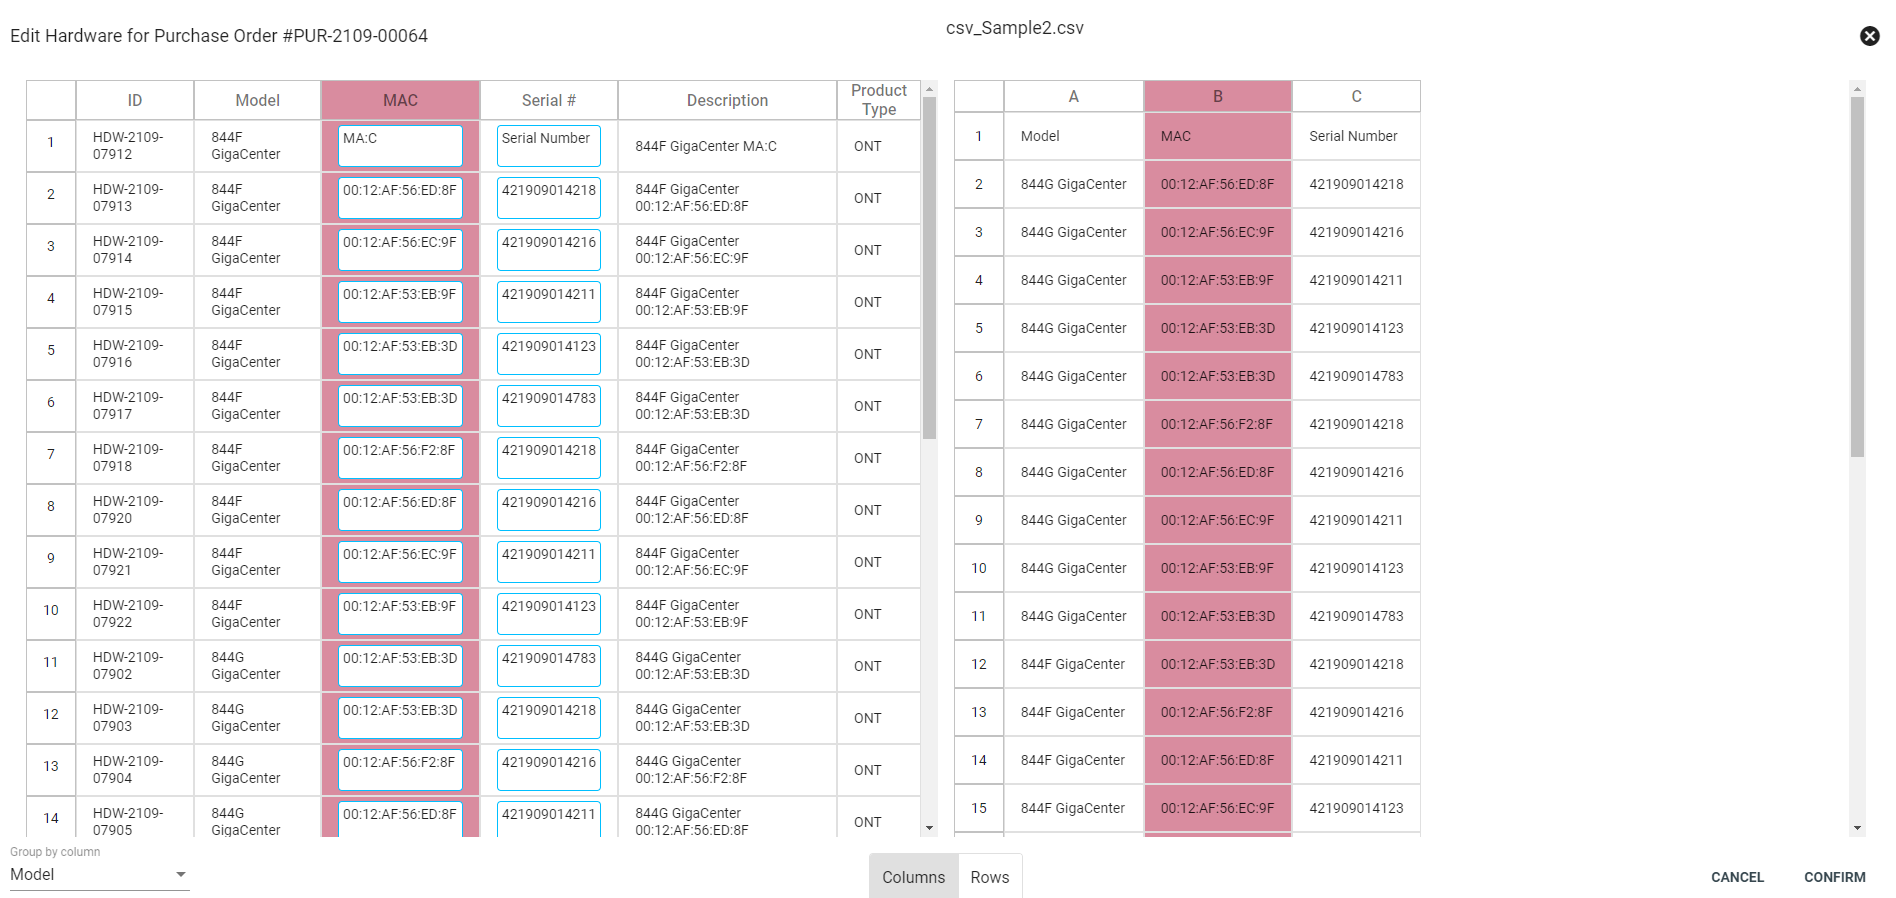
Select the next column of a pair on the lefthand side, then select the corresponding column on the righthand side.

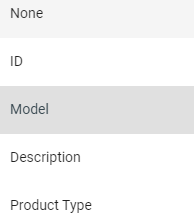
Change how the columns are grouped by selecting from the dropdown menu in the bottom lefthand corner.
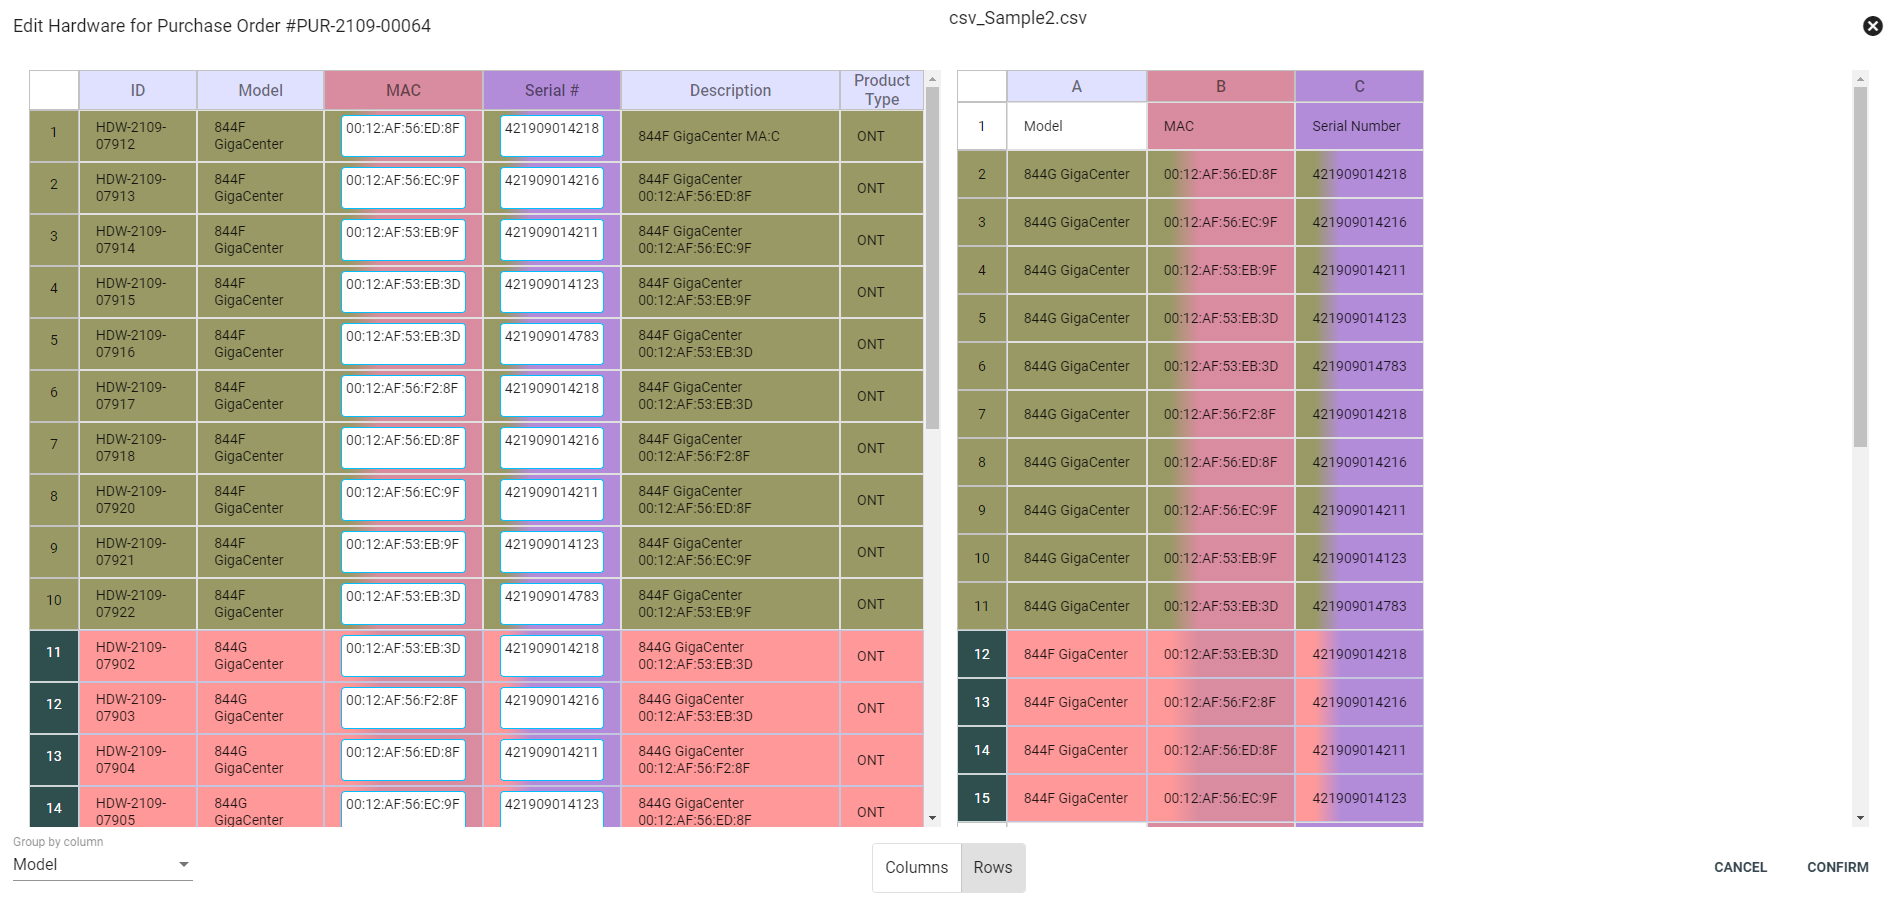
Change the data being selected by clicking on the column or row button at the bottom of the page.
Selecting the data by rows allows you to choose which rows of the CSV apply to the specific rows of hardware.

Change how the rows are grouped by selecting from the dropdown menu in the bottom lefthand corner. This will sort the rows based upon a specific column's values. Selecting a row will highlight all of the rows with that specific value in that column.
Click CONFIRM in the lower righthand corner to save the selections.
Edit Purchase Order
Uncompleted Purchase Orders may be edited. Click EDIT in the lower right to make changes. Here you can change the PO Types, Description, and Status.
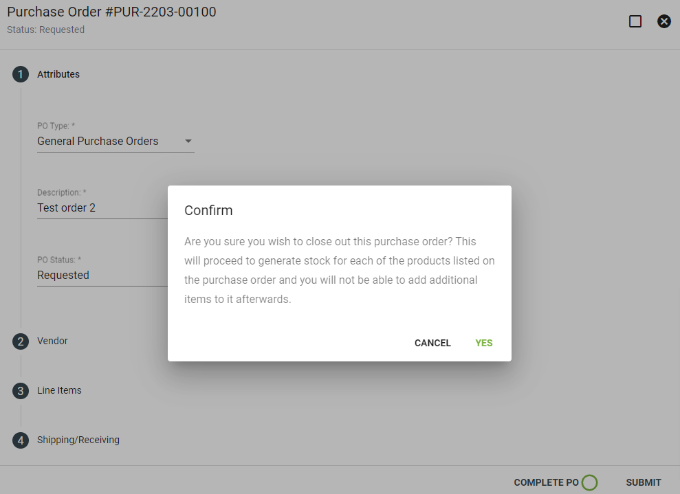
Note: You can click COMPLETE PO to receive all items at the designated Warehouse and mark the PO as complete.
Under Vendor you can change the Address and Term.
If adding more items to the PO you can filter the products to display using the Filter Product List by Type drop down, then search through items using the Products drop down. Then click 

Under Shipping/Receiving you can change the Shipping Location, and add comments. You can change the tax amount, shipping fees, and other fee amounts. When finished, click Complete PO or SUBMIT.
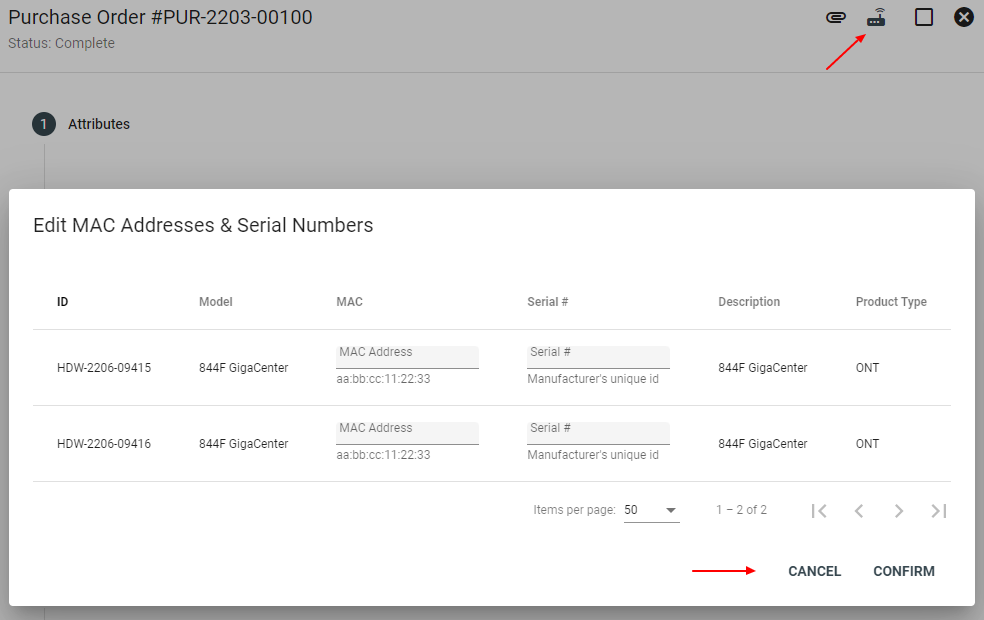
Edit MAC Addresses and Serial Numbers
Click the 
Add Purchase Order
On the Purchase Orders page click the floating action button
Choose a Vendor, their address, and term. Then click NEXT.
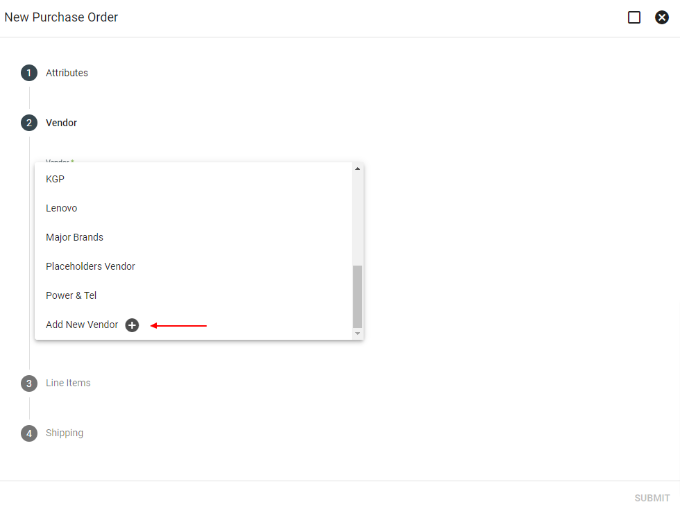
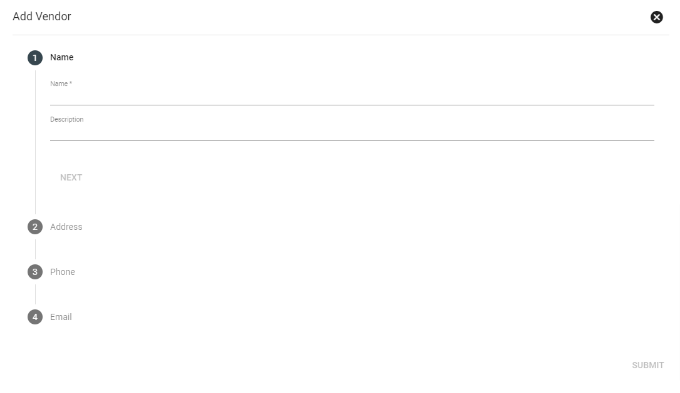
If you need to add a new Vendor, you can do that here. Scroll down to the bottom of the drop down menu and click on Add New Vendor
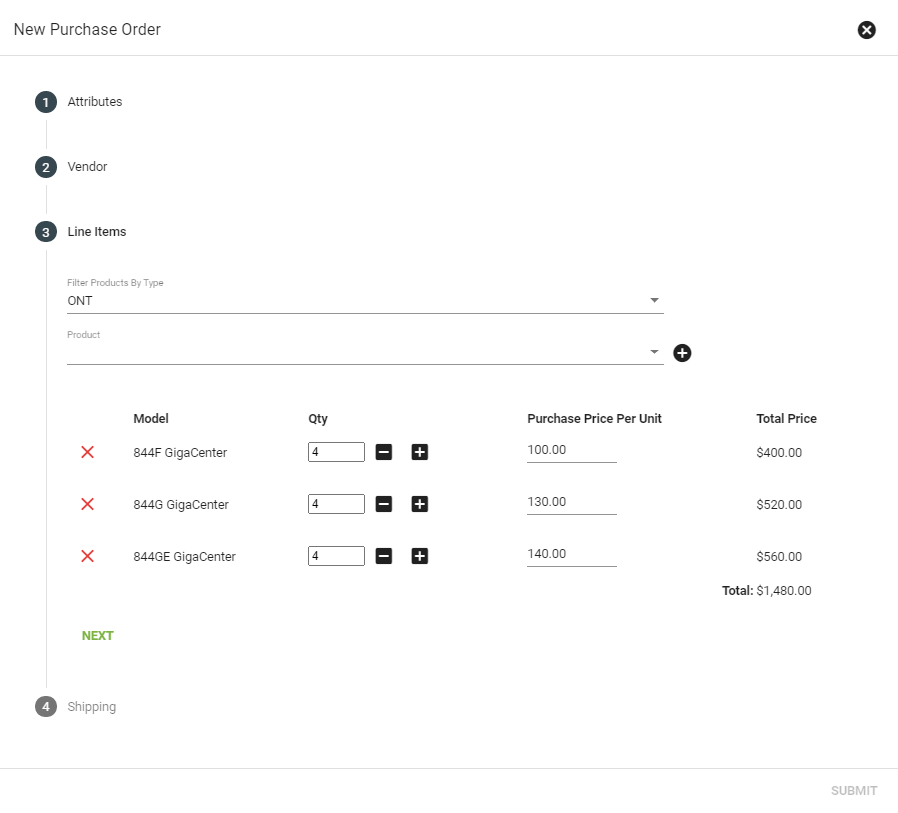
Filter through products by type then add products using the drop down menu. Enter the quantity and price per unit. Then click NEXT.
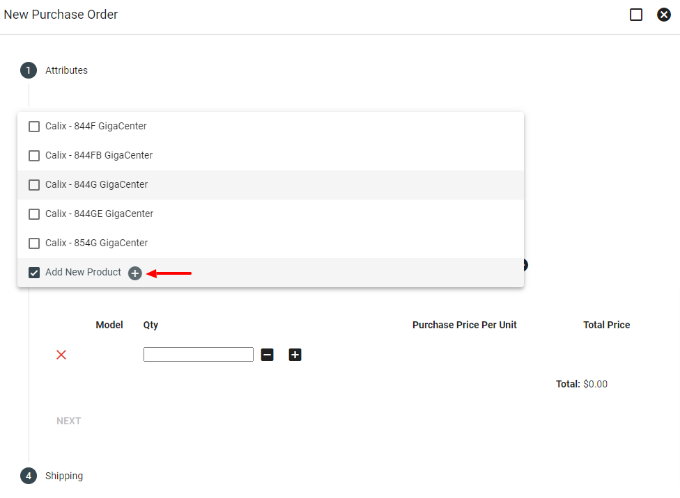
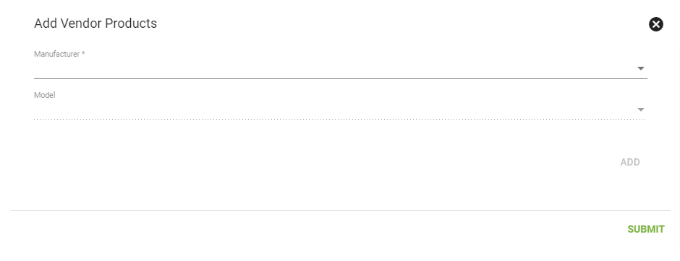
If you need to add a New Product, you can do that here. Scroll down to the bottom of the drop down menu and click on Add New Product
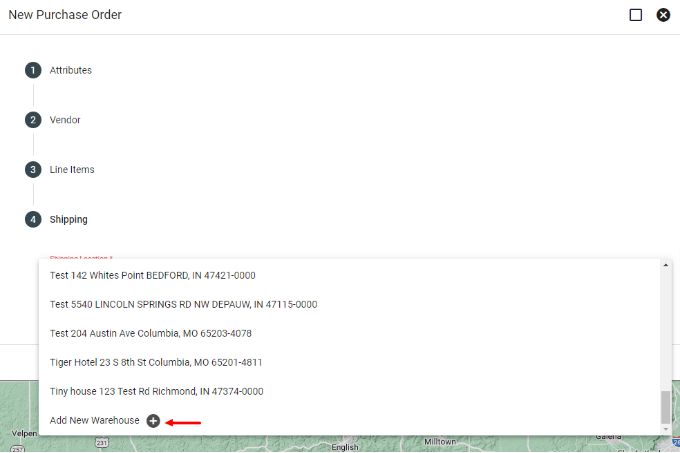
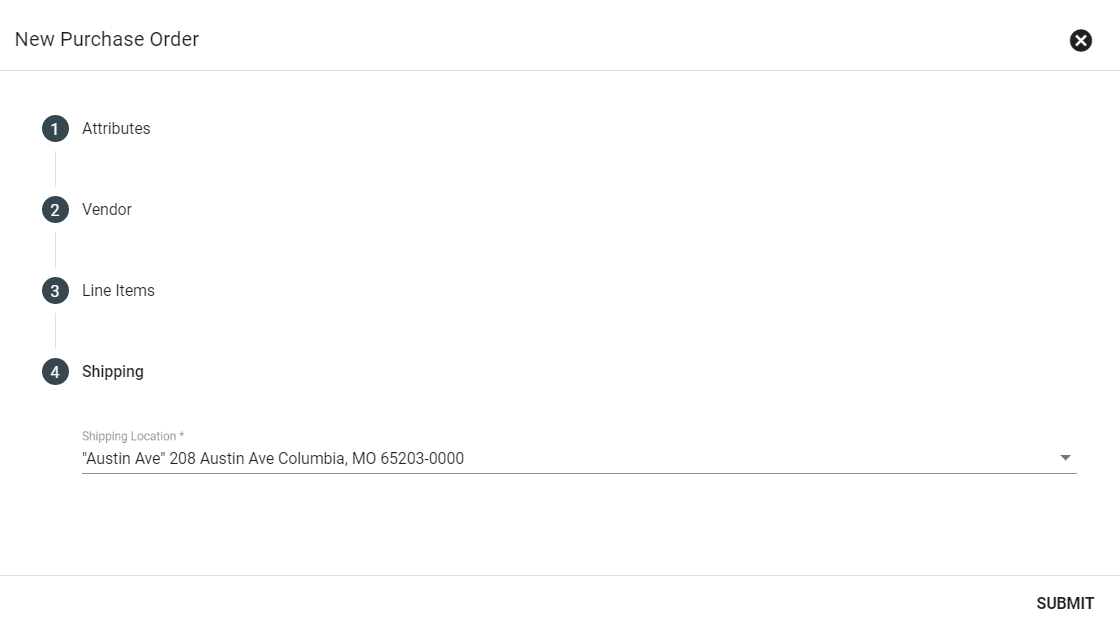
Now choose a Warehouse to have the items shipped to. When finished, click SUBMIT.
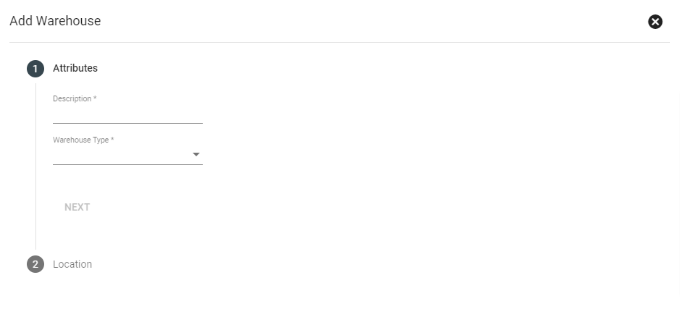
If you need to add a New Warehouse, you can do that here. Scroll down to the bottom of the drop down menu and click on Add New Warehouse