Service Area Management
Admin Permission Area
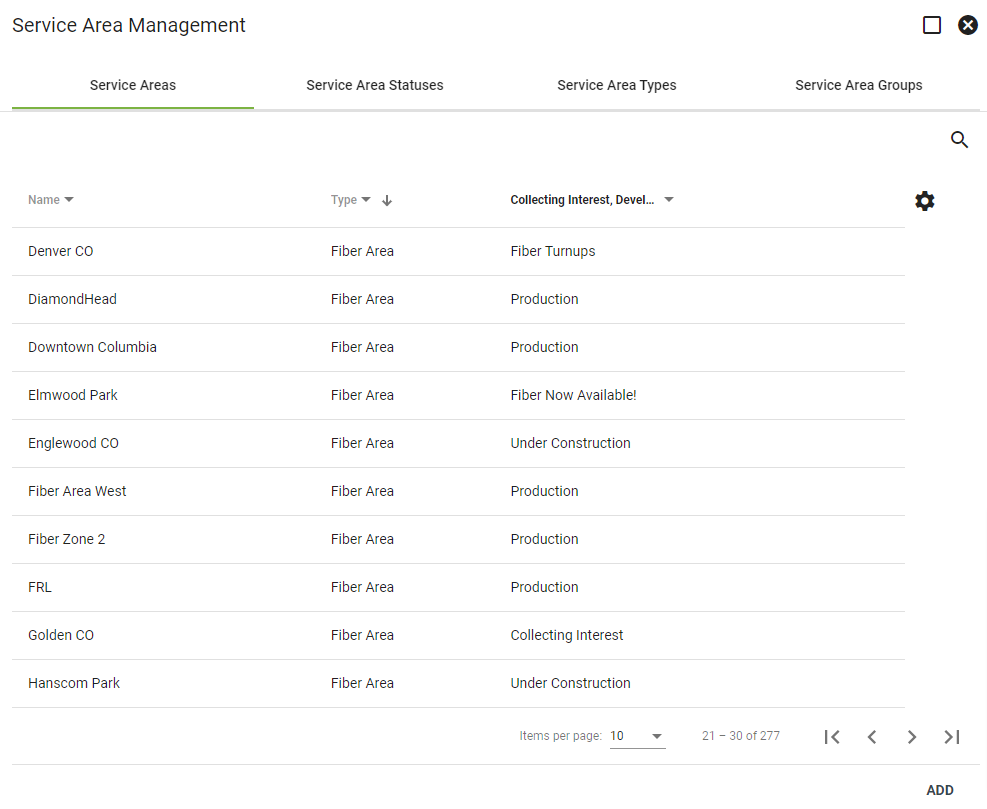
Service Areas are geographical areas defined by the service provider. Within each area, Service Offers are built to make available for purchase. All potential subscribers within the Service Area have the option to purchase these offers or sign up for interest packages in the public shopping cart.
- View Service Area
- View Service Area Statuses
- View Service Area Types
- View Service Area Groups
- Multi Dwelling Unit
Service Areas can be used to communicate a variety of information, such as phased fiber construction progress, potential expansion opportunities, or wireless speed predictions. It's a versatile tool to keep employees up-to-date and more informed when speaking to current or potential subscribers.
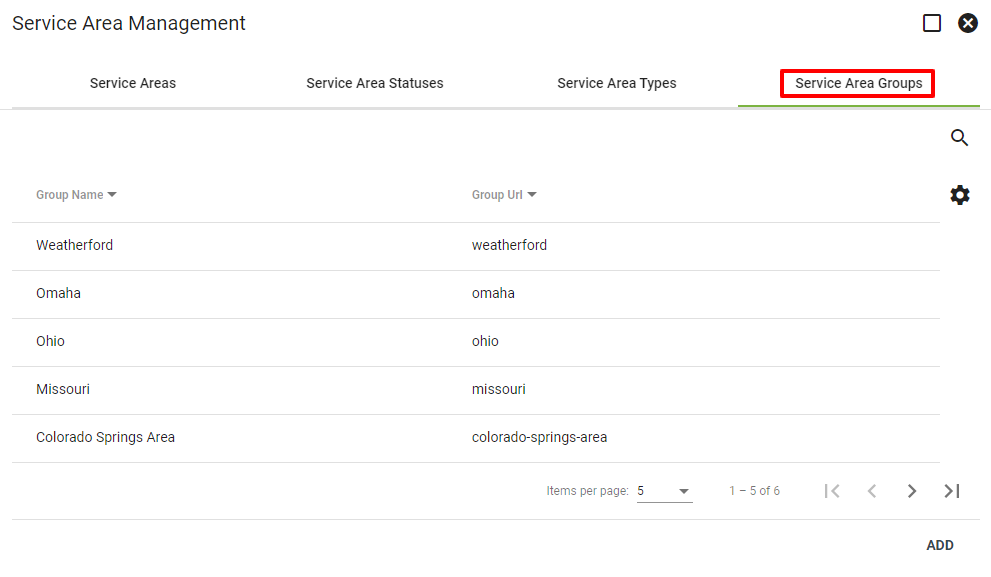
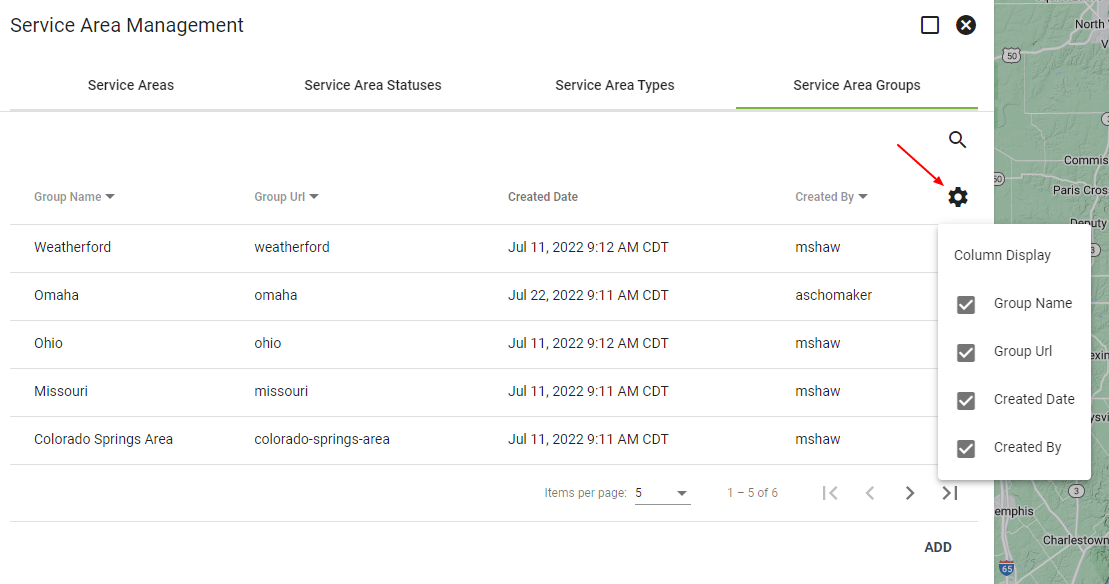
The Service Areas list is sorted by date created by default. It can be resorted by Name, Type, or whether the area shape is in Production or Development. Click on each of these column headings to choose what to display.
Click 
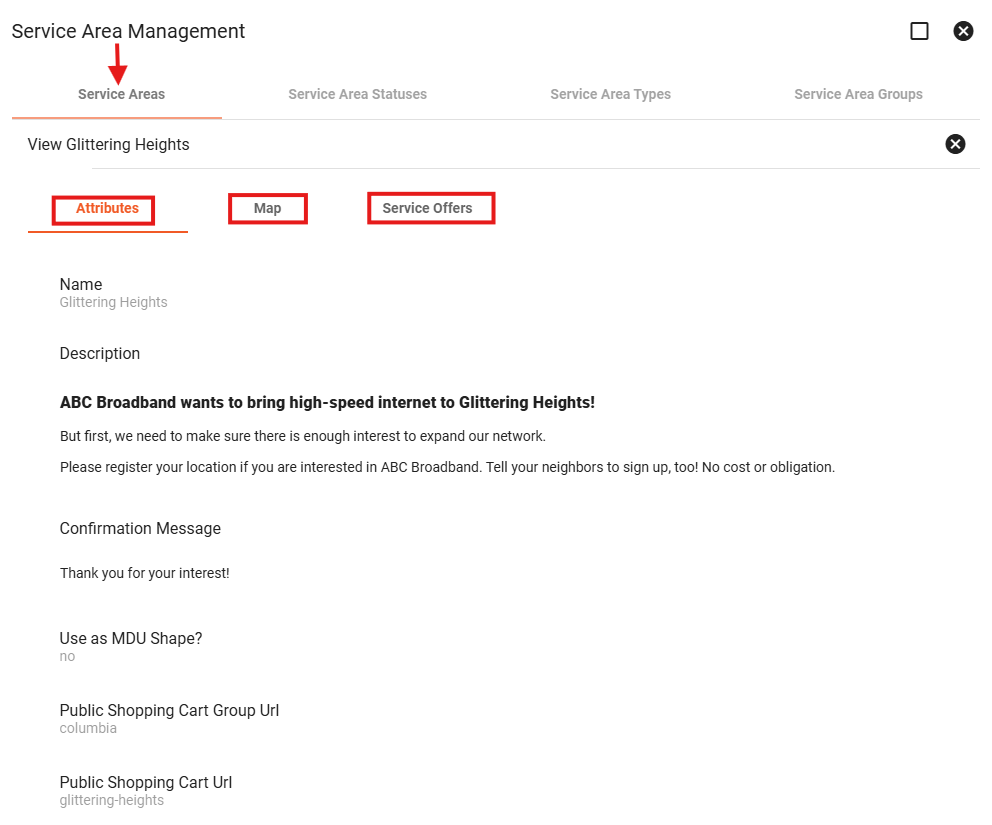
Click on a Service Area to view more information and to make changes.
View Service Area
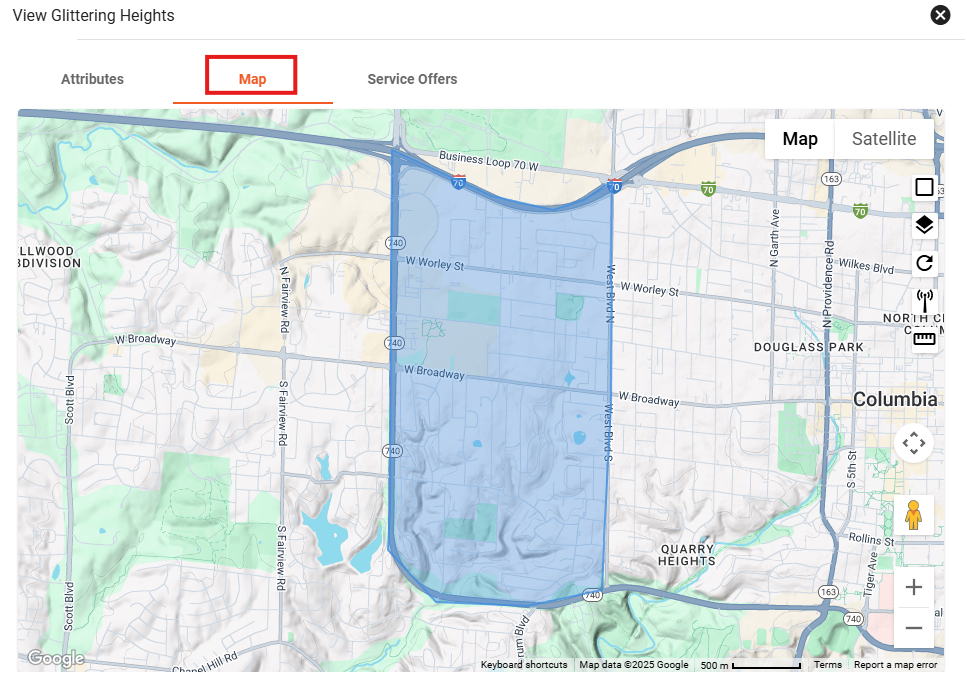
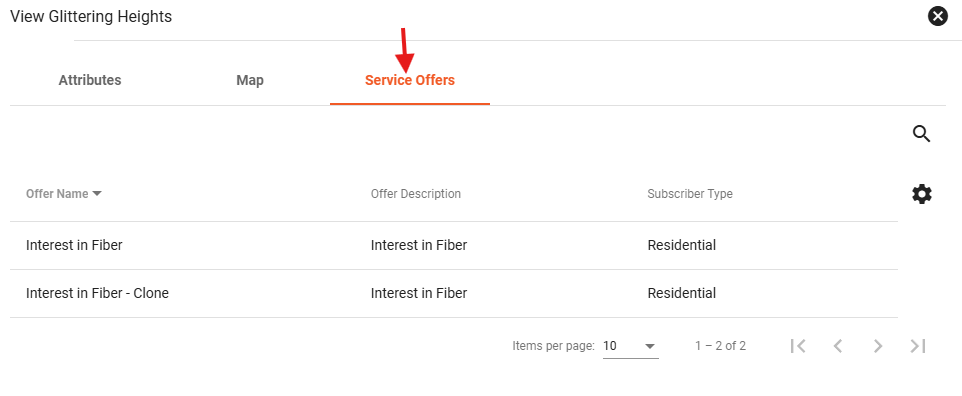
Under the Service Areas tab you can view service area names. Then click on a specific service area name to view more details. Under the Service Area's attributes you can view items such as the description, the public shopping cart URL, and the sign-up goal. Clicking on the map tab, you can view the shape on the map. Clicking on the service offers tab, you can view service offers are attached to the area as a whole.
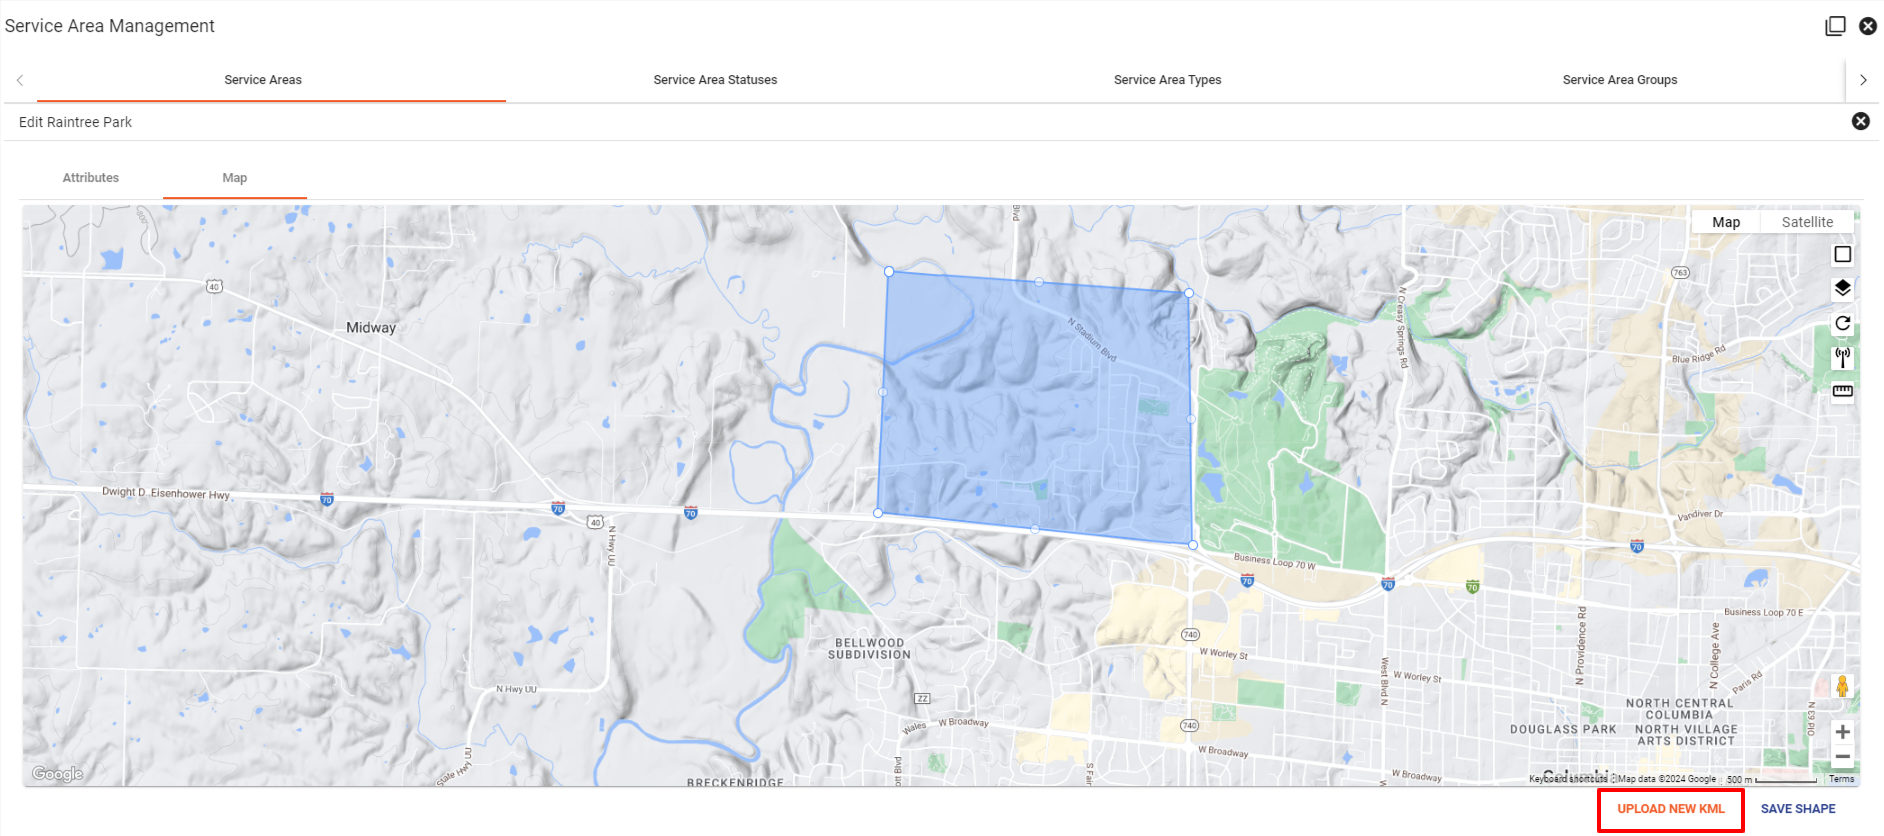
Edit a Service Area
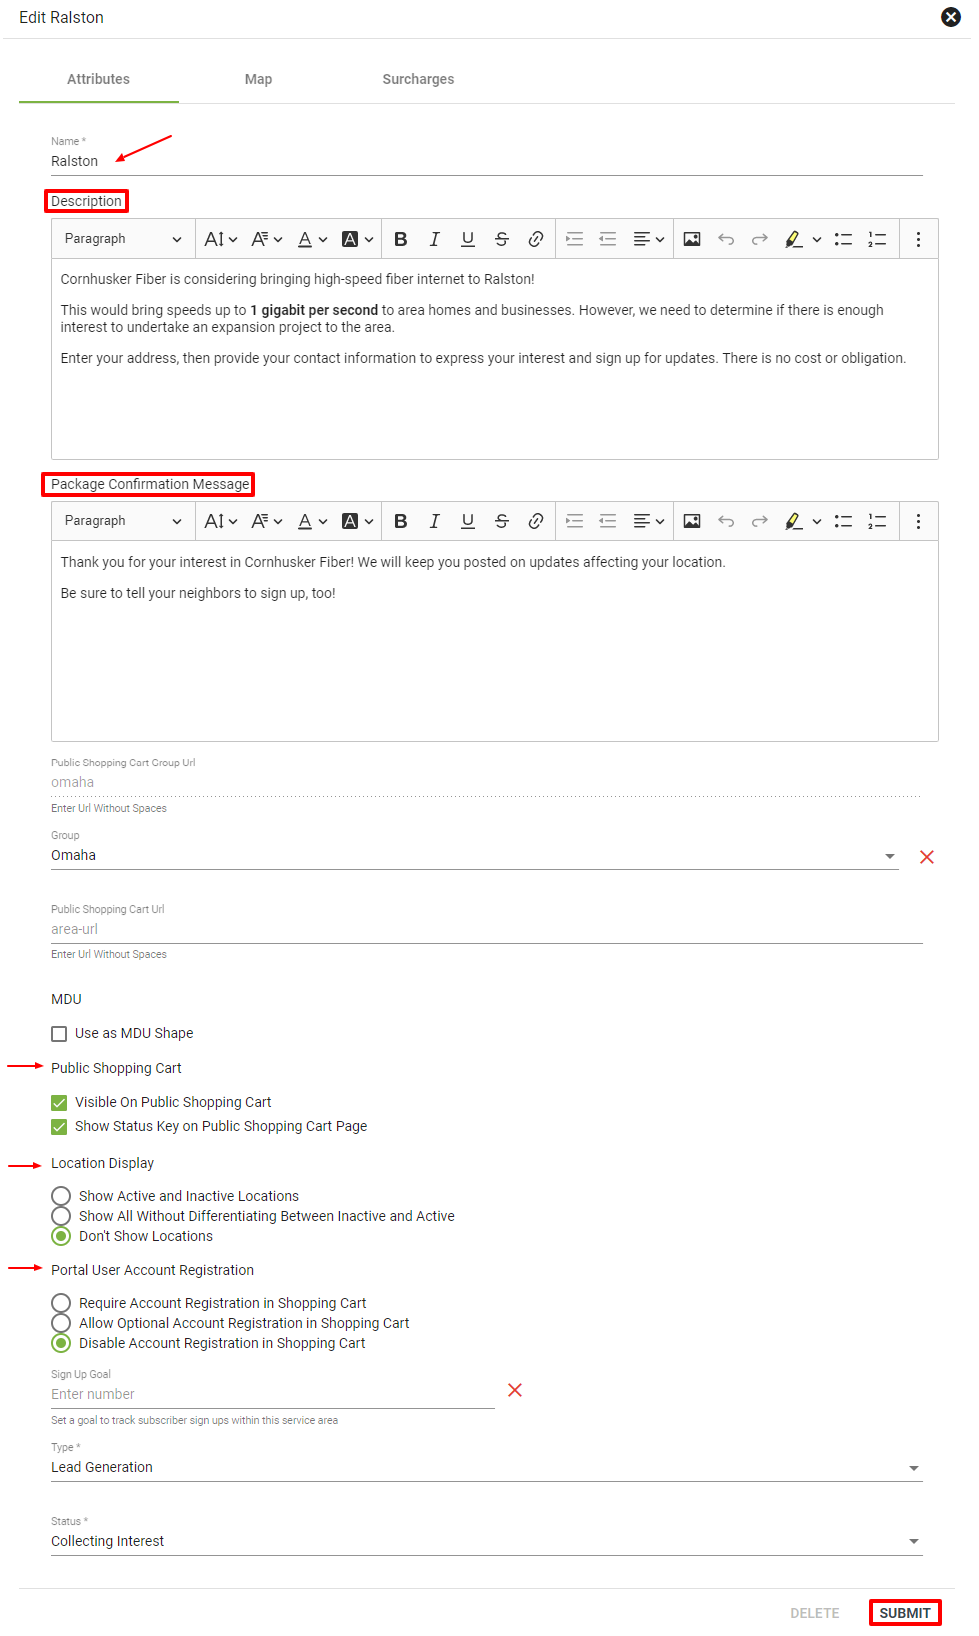
To make changes to any of the Service Area categories, click EDIT in the bottom righthand corner.
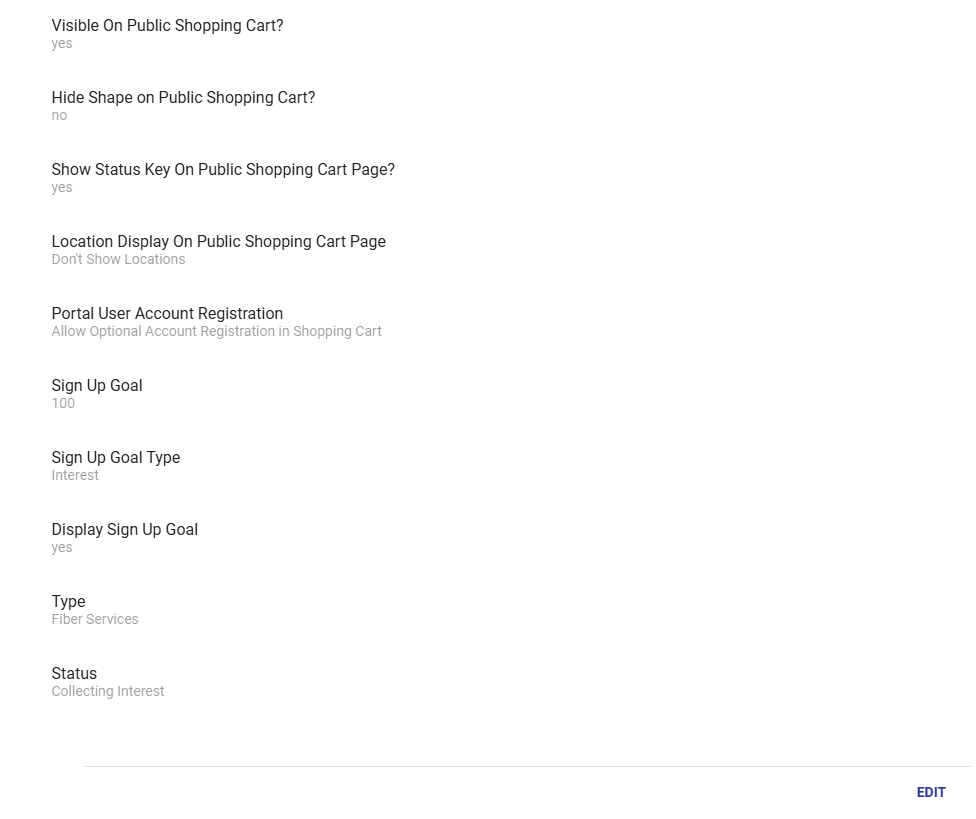
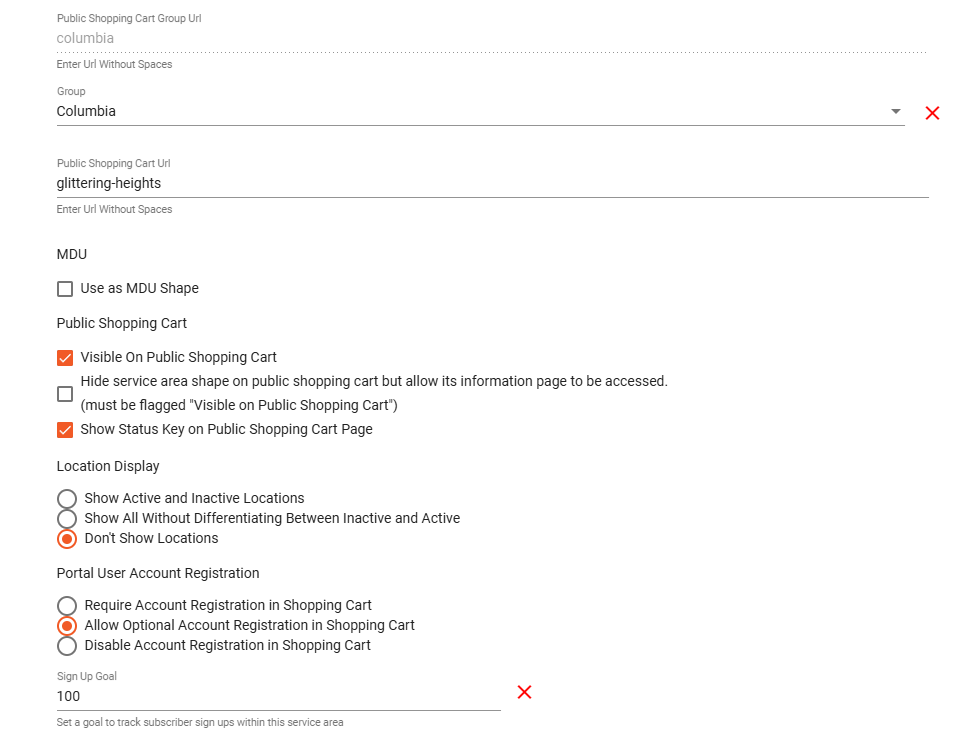
You can change or add to the Service Area description and package confirmation message. The description will display to the subscriber when they select a service area, and the confirmation message will display when they sign-up for service.
Select or deselect options in the public shopping cart, location display, or portal account registration.
Requiring account registration in the shopping cart will prompt the subscriber to create an account when they checkout. The location display is able to hide areas that are not currently under construction, or display where future service will be delivered to the subscriber.
Make changes to the service area type and status by clicking on the dropdown menu. Development means that the area is currently being built. Production designates an area currently being used. Archive is an area no longer in production. Click the drop down menu to view more options.
When complete, select SUBMIT to save.


Click the Map tab to make changes to the location of your Service Area. You can click and drag the points to move or change the shape. When finished, click SAVE SHAPE.
Another way to change the service area is to add a new KML file to the service area that needs the change. Then you can drog and drop the file or upload straight from a computer.
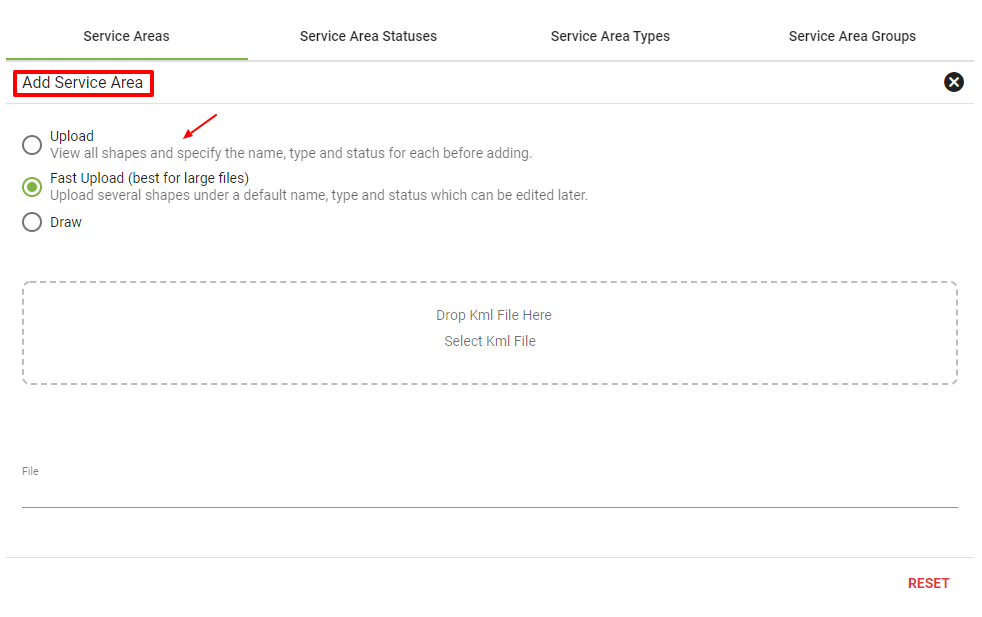
Add a Service Area
To add a new Service Area click ADD on the Service Areas page.

There are two options that allow for the upload of a KML file, or one option to draw the Service Area using Google Maps. If you chose to upload a KML file to add a service area drag and drop the file where its labeled or click on "Select KML File". If a User has Google Earth installed on thier computer and set as the default application for opening KML files, Google Earth changes the file type form "KML file" to "KML" which has been affecting the option to select a file through the interface. Our recommendation to users with Google Earth installed is to drag and drop the KML file when doing an upload instead of using the select button.
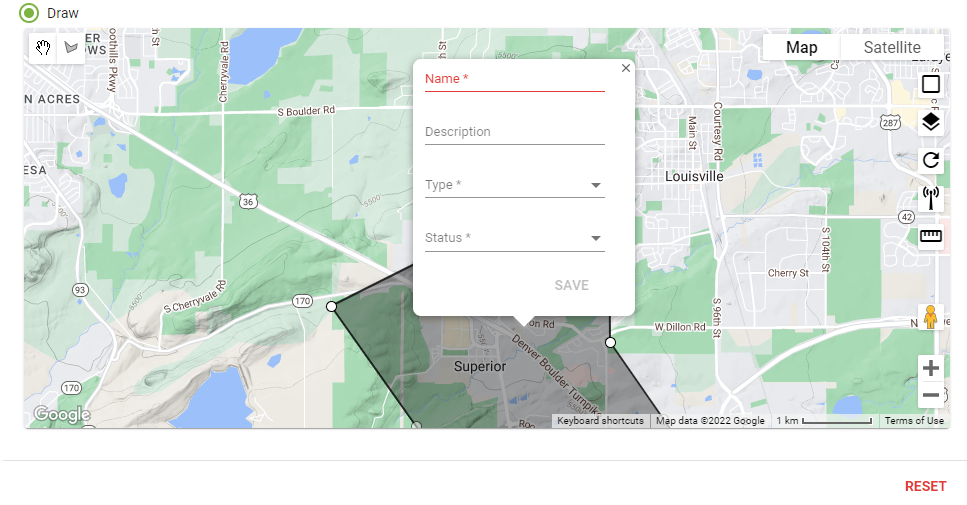
To draw a shape, click a point, then click another point to draw a line. Continue to do so until you end at your first point, making a shape. Enter a description, choose a type of service area and a status. The service area type indicates the type of coverage offered in that particular service area. When finished, click SAVE or click RESET if needed.
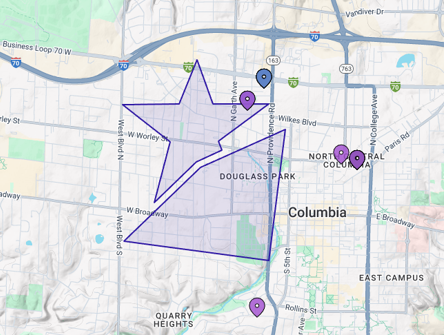
Multipolygon Service Areas
Service Areas can support more than one shape within the same Service Area. This is useful when a coverage area is not one continuous boundary, but still needs to be managed as one Service Area.
For example, you may have a Service Area that includes several separate neighborhoods, pockets of coverage, or non-contiguous build areas. Instead of creating a separate Service Area for each shape, you can include multiple shapes together.
When drawing a Service Area, you can draw more than one polygon before saving. Each shape will be stored as part of the same Service Area.
When uploading a file, Vision can also accept files that contain multiple polygons. If the uploaded file includes more than one shape, those shapes can be saved together as one multi-shape Service Area.
Supported upload file types include:
- KML
- KMZ
- GeoJSON
- JSON, if formatted as GeoJSON
- ZIP, if it contains a shapefile
When uploading a file with multiple polygons, you may be given the option to save the geometry as one combined multi-shape Service Area or as separate Service Areas for each polygon.
Once saved, the Service Area can be viewed and edited like any other Service Area. If you edit an existing single-shape Service Area, it will continue to behave the same way unless additional shapes are added.
View Service Area Statuses
Select the Service Area Statuses tab. There you can view available service area statuses and whether they are visible in the public shopping cart, in production, or required.
Click on the
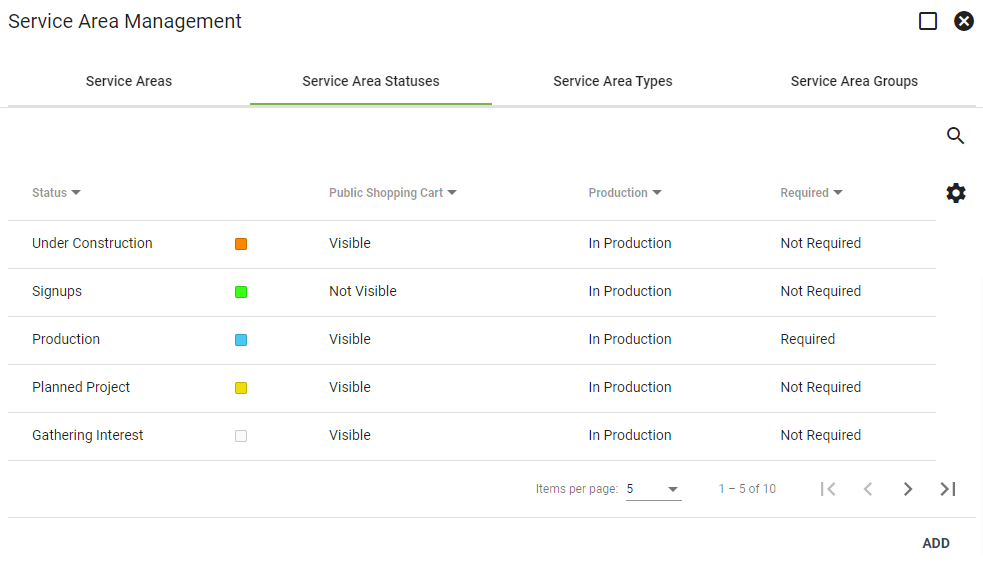
Click on a line item to view more details about a status, for example the public shopping cart overlay message subscribers will see.
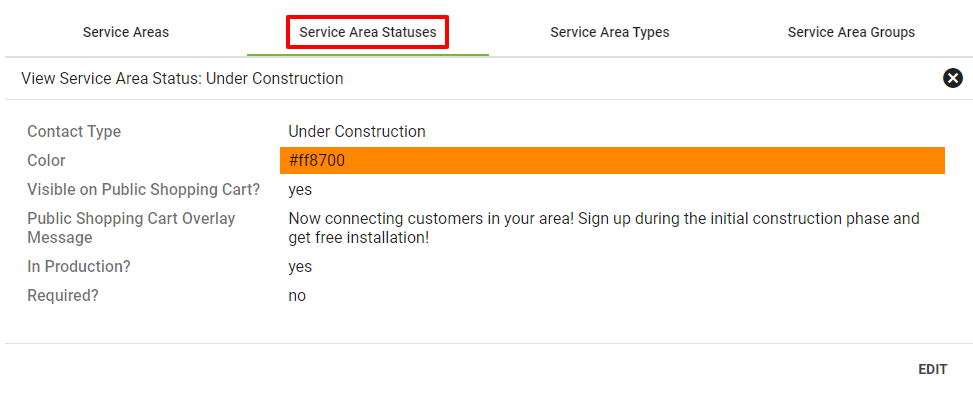
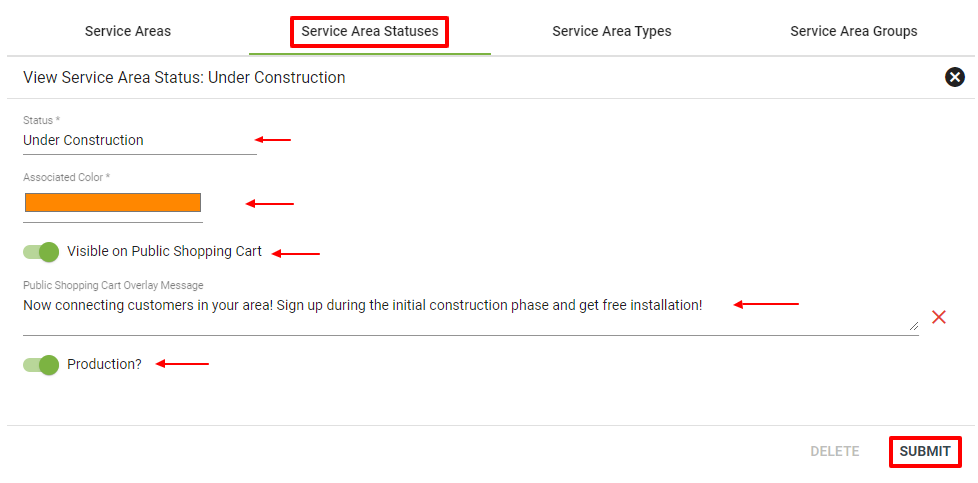
Edit Service Area Statuses
Click into the Service Area Status you want to Edit. Click EDIT in the bottom righthand corner to make changes. You can edit the status name, associated color, toggle to make the status visible in the public shopping cart or to put into production. You can also edit the message in the public shopping cart overlay.
Click DELETE or SUBMIT to save changes.
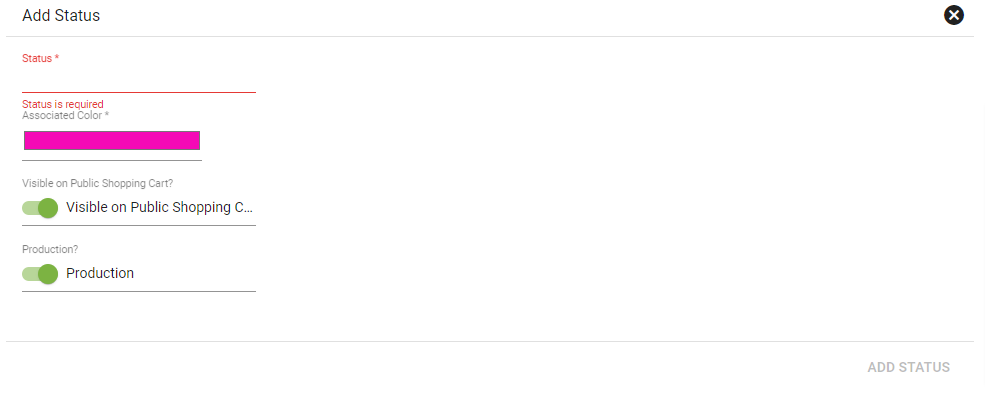
Add Service Area Statuses
To add a new service area status, click the ADD button in the bottom righthand corner under the Service Area Statuses page.
Create a name for the status and choose an associated color. Toggle to determine if the service area is in production or will be visible on the public shopping cart.
Click ADD STATUS to save changes to the new service area status.
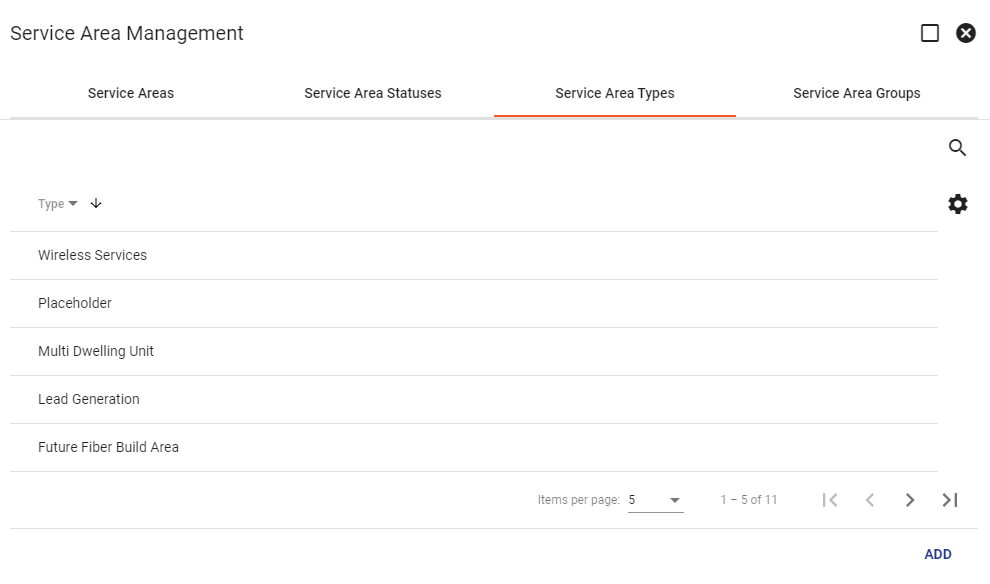
View Service Area Types
To view the available service area types, select the Service Area Types tab.
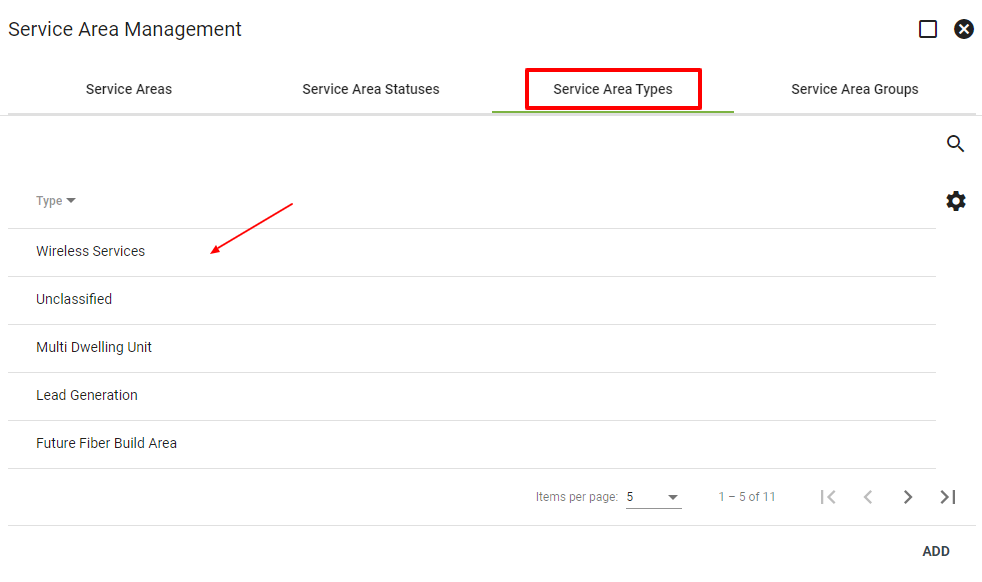
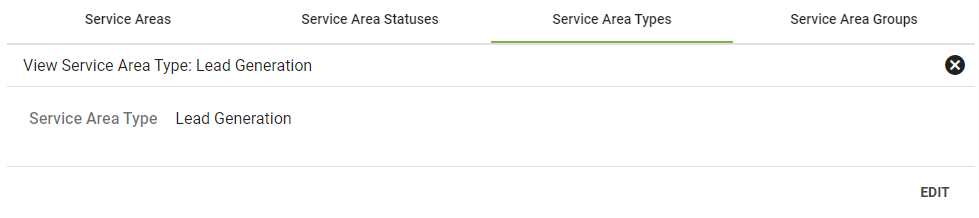
Click on a line item to view more details.
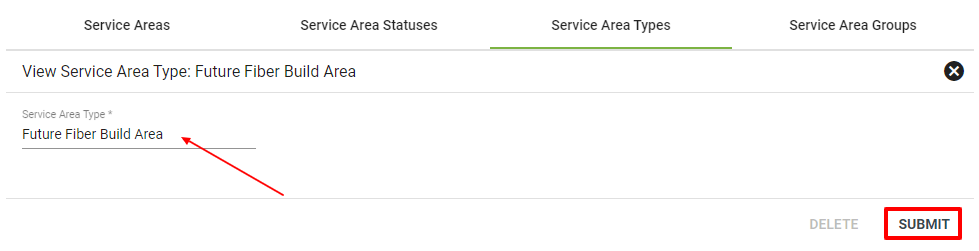
Edit Service Area Types
Click on a line item under Service Area Types to view more details. Select EDIT in the bottom righthand corner to make changes to the service area type. Change the name of a service area type, then click SUBMIT to save changes. Select DELETE to remove changes.
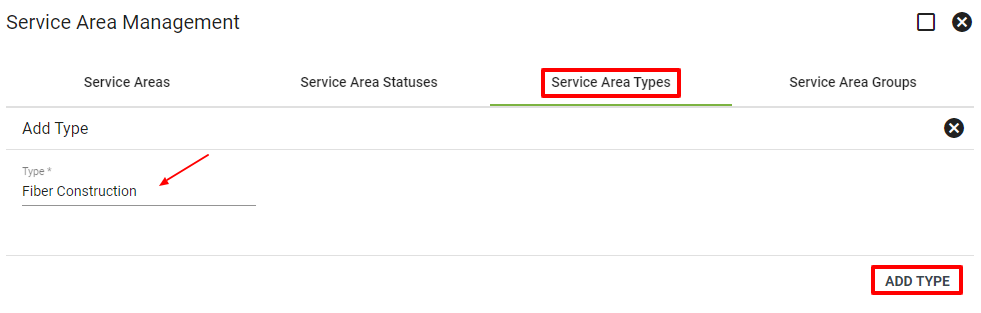
Add Service Area Types
Click on ADD in the lower righthand corner of the Service Area Types page, then input the type details. Select ADD CATEGORY to save the new service area type.
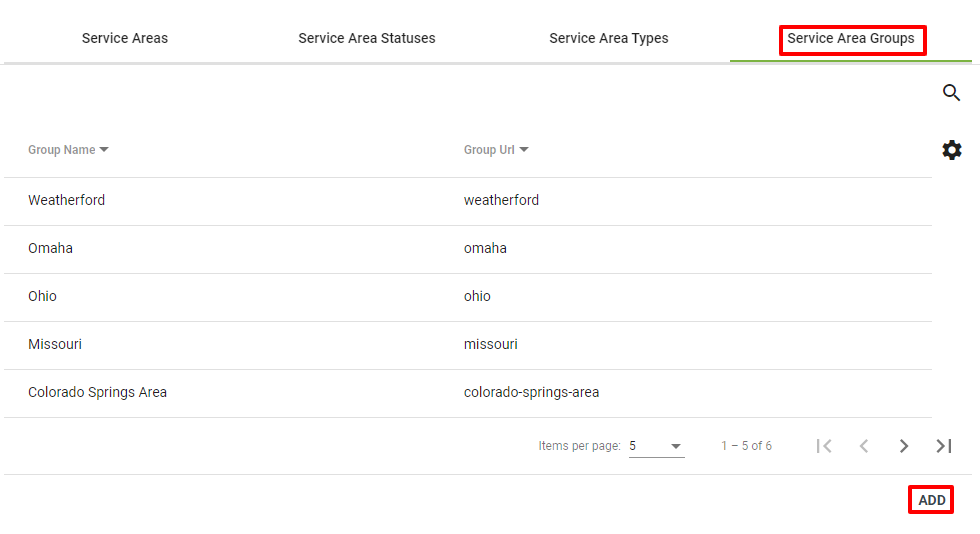
To view the available service area groups, select the Service Area Group tab.
Click on the
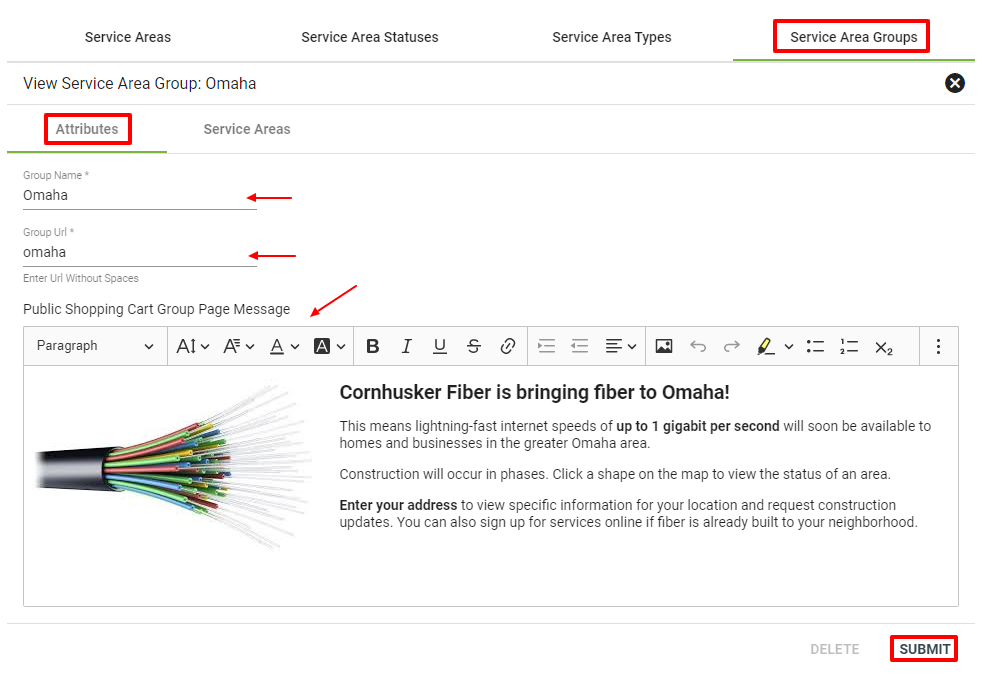
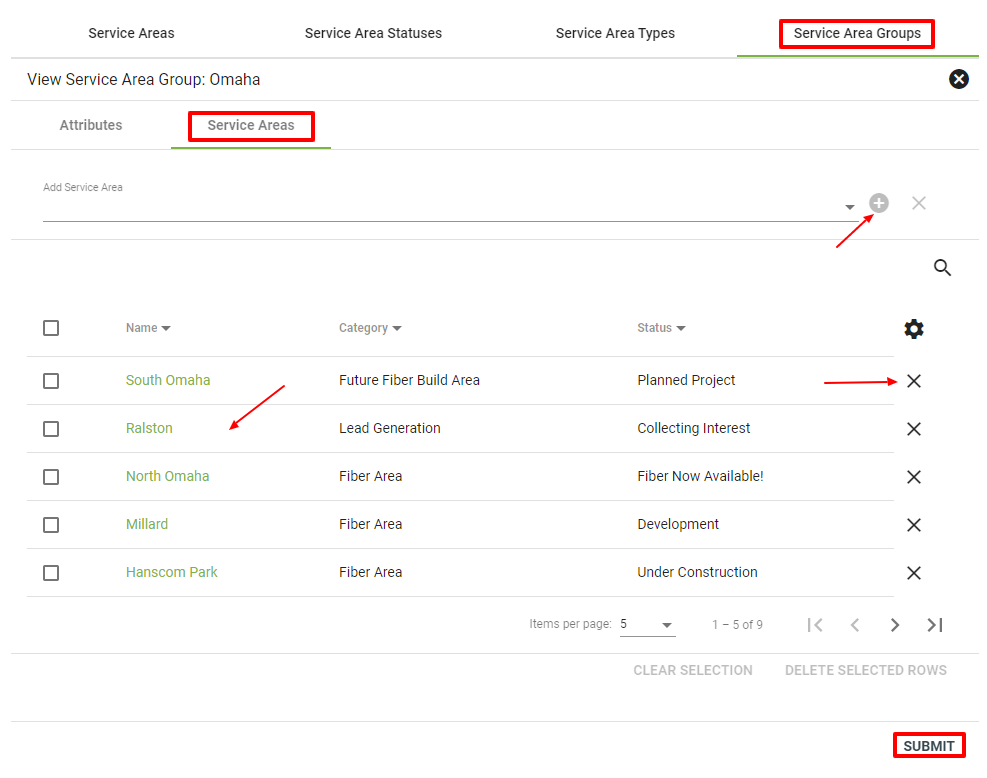
Click into the Service Area Group you want to Edit. Click EDIT in the bottom righthand corner to make changes. Under the Attributes tab, you can edit the group name, group URL, and public shopping cart group message. If you click the Service Areas tab, you can add, edit, or delete service areas included in the service area group. Click DELETE or SUBMIT to save changes.
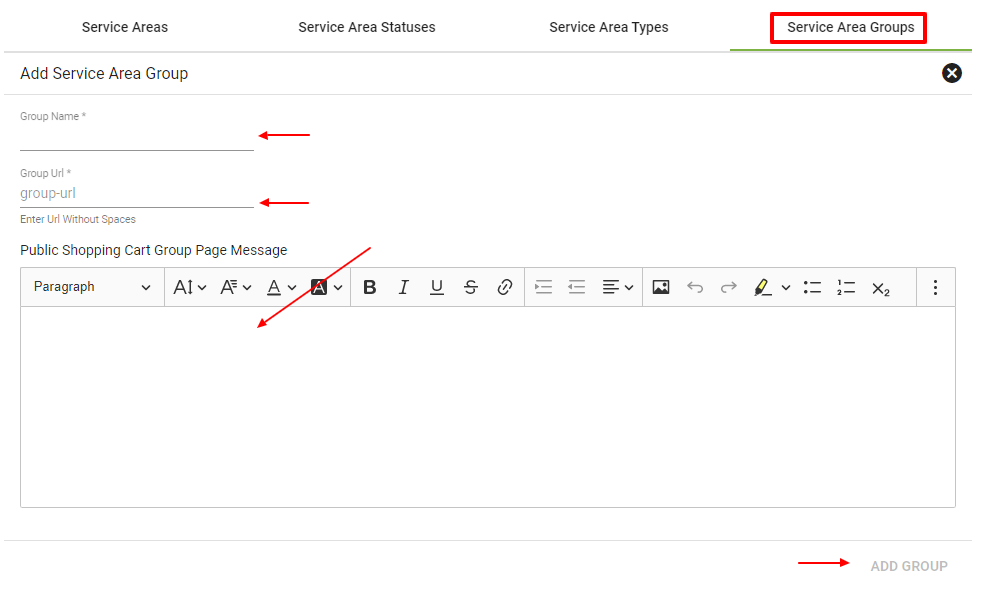
To add a new service area group, click the ADD button in the bottom righthand corner under the Service Area Group page.
Create a group name, group URL, and public shopping cart group page message. Click ADD GROUP to save changes.
Multi Dwelling Unit
Service Area
To add a MDU as a service area it is very similar procress as a normal service area with a couple of changes. First step is to upload or draw the service area into Vision, after the area is created the selected service area type should be MDU. Once the basic information of the service area is added to the system, going into the recently service area and clicking EDIT and select the appropriate boxes to get the area active in the shopping cart and make the shape as a MDU.

Service Area Type
To add a MDU type to the system is one simple step, in the service area management section click on the tab labeled "Service Area Types" and click ADD and you can enter the MDU name or just put MDU/Multi Dwelling Unit, then select add type to confirm the area type into Vision.