Tickets
Admin Permission Area
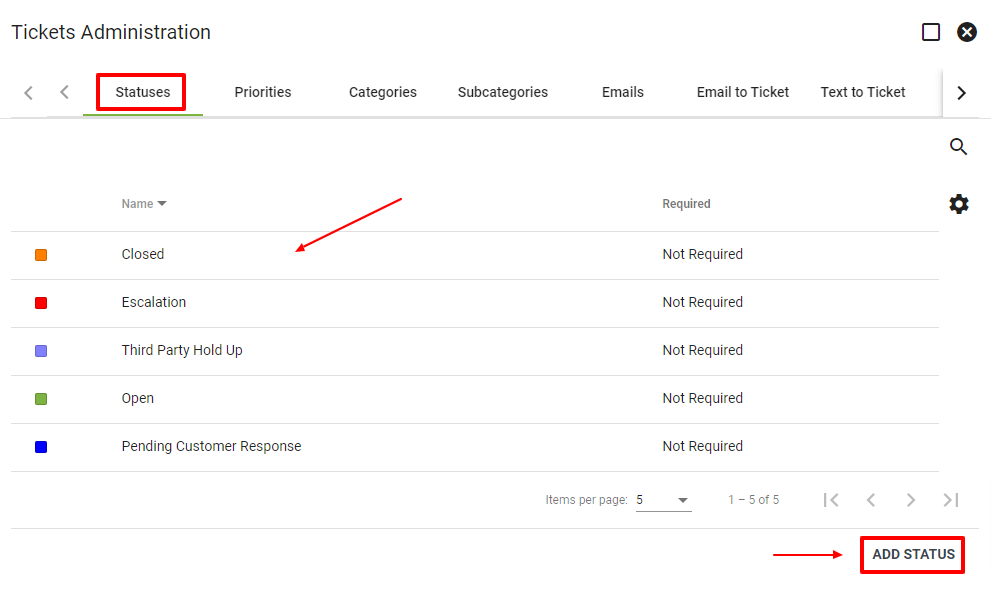
The Tickets page within Admin Utilities allows administrators to set up how your company uses the Ticketing system. This includes creating and editing statuses, priorities, categories, etc. You also have the ability to create ticket templates. Using templates is key in developing consistent company wide practices in terms of problem solving and speed of service.
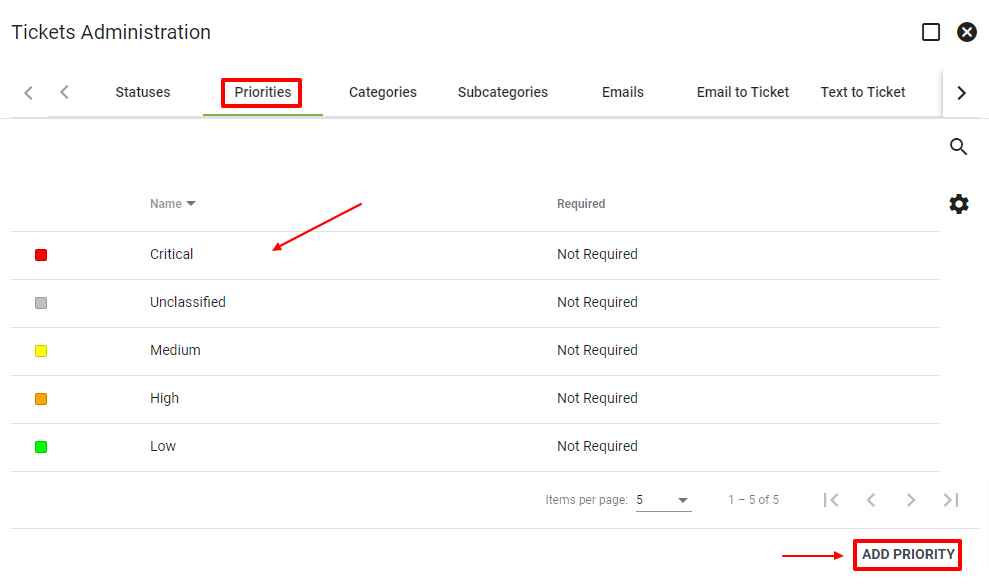
Priorities
Priorities help employees understand the importance of a Ticket. Click a priority to change the name, color, or to delete. Click ADD PRIORITY to create a new one.
Categories
Categories are essentially the "type" of Ticket. Click a category to change the name, color, or to delete. Click ADD CATEGORY to create a new one.
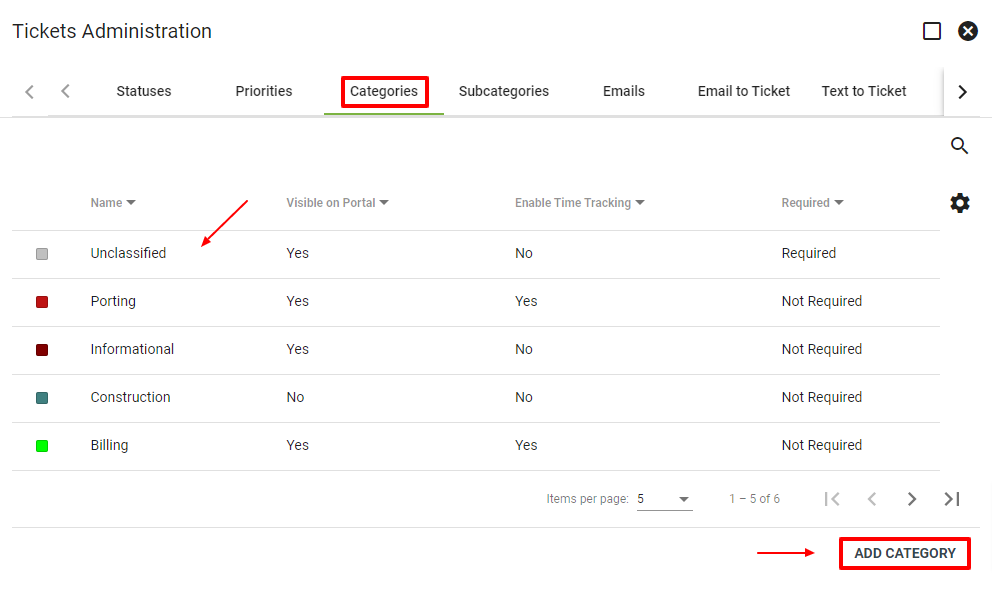
Click on a Category to view the details. View details about the category like if it is visible on the subscriber portal or if time tracking is enabled.
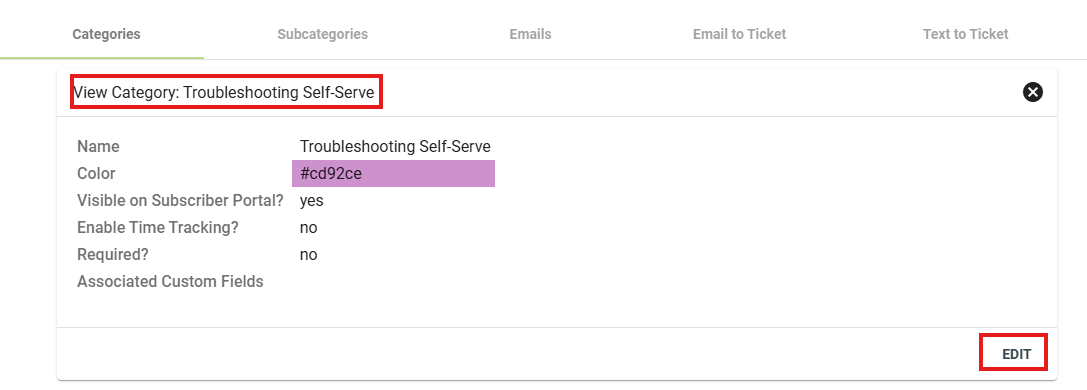
Click EDIT in the lower righthand corner to make changes to the category details. Select or deselect the boxes to enable time tracking or make the category visible in the subscriber portal.
Change the category name or choose a different associated color. Click SUBMIT to save any changes or DELETE to remove the category.

Click ARCHIVE to archive a category. Archived status does not affect existing tickets.
NOTE: Categories cannot be archived with active subcategories, subcategories cannot be restored while their parent category is archived, and categories or subcategories tied to templates or email/SMS-to-ticket cannot be archived. The workflow function "Change Ticket Category and Subcategory" returns false when a selected category or subcategory is archived.
Subcategories
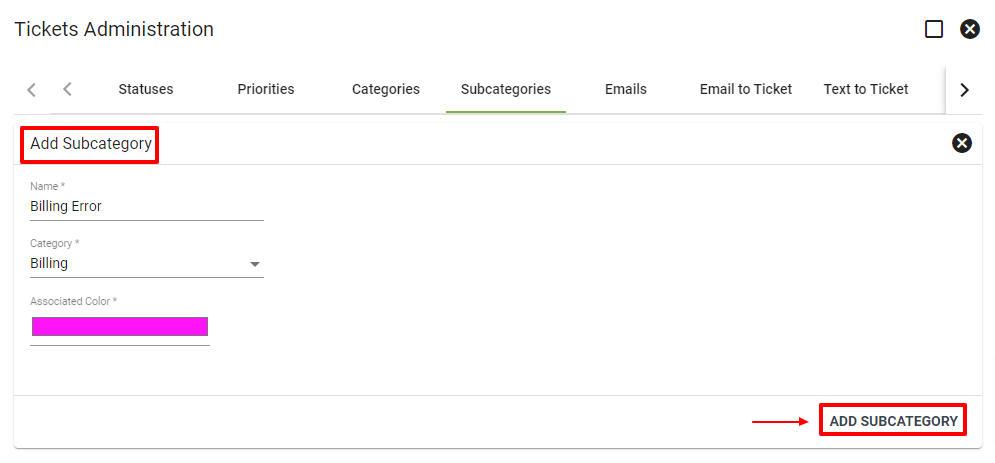
Subcategories allow you to further classify Tickets. Click on a subcategory to make changes or to delete. Click ADD SUBCATEGORY to create.
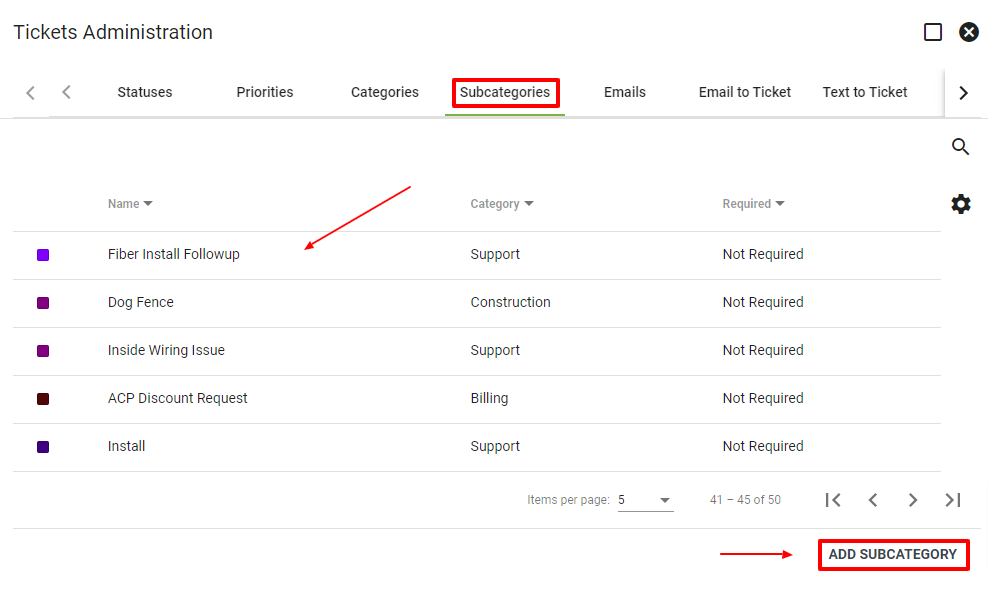
Subcategories must be associated with a category when created.
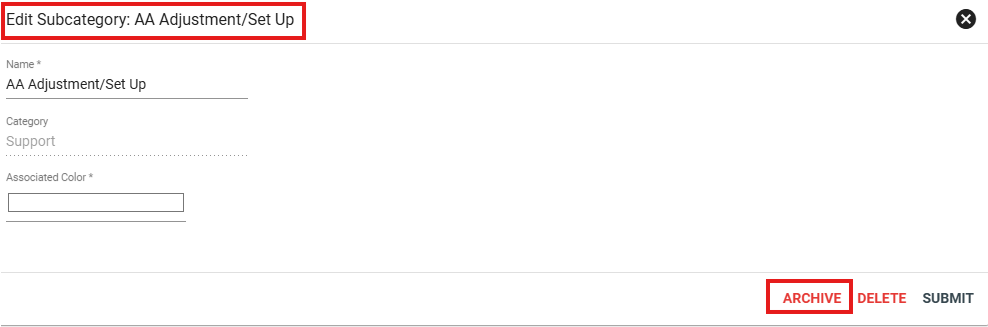
Click on a subcategory to view the details.
Click EDIT in the lower righthand corner to make changes to the subcategory details.
Change the subcategory name or choose a different associated color. Click SUBMIT to save any changes or DELETE to remove the category.
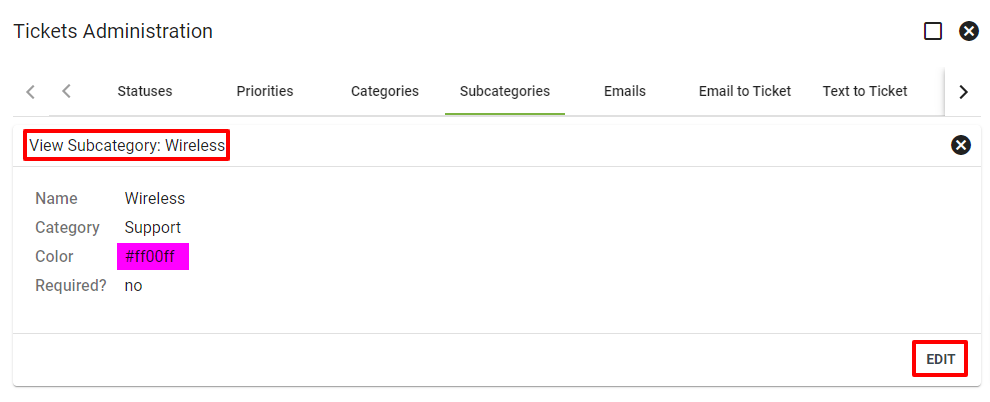
Click ARCHIVE in the lower righthand corner to archive the subcategory. Identical to archiving ticket categories, archived status will not affect existing tickets and they cannot be restored if the parent category is archived.
Emails
The emails tab allows you to set to whom and when to send emails to Ticket users. Click the line item to edit.
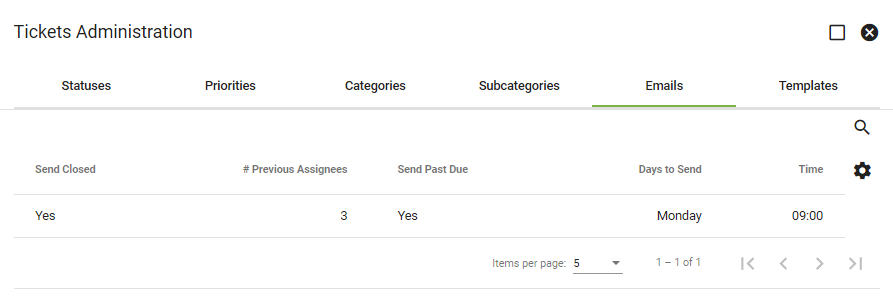
Here you can choose to send an email to previous Ticket owner when closed and whether to send email reminders about past due Tickets. You may also choose when and at what time to send the emails. When finished click SUBMIT.
Email to Ticket
The Email to Ticket function allows emails to be automatically digested as a ticket to the applicable Subscriber Account. Allowing a user to view the open ticket associated with that Subscriber. The benefits in using the Email to Ticket function are the fact that your incoming customer emails will be digested into their Subscriber Account, it alert a Vision User to work that ticket, and in turn creating a better customer service environment.
The system completes several steps behind the scenes to ensure that the email is assigned to the correct subscriber account. These are the processes in place when an email comes into a mailbox that is digested into Vision:
- Check the email body for a Vision ID to tie back to an existing ticket (only if an email had been previously sent out of Vision).
- If there is an email address matched to a subscriber, but no existing open ticket, then a new ticket will be created on the subscriber account.
If there is no match, then:
- Check from email address to match to an account, then use email subject to match to specific ticket.
- Check the default subscriber for email subject that matches to a specific ticket.
- Create a new ticket on a default subscriber.
Under Admin Utilities Tickets, you can control the Email to Ticket function. Here you can view the emails used in digesting tickets. Click the gear icon to filter the display. Or use the magnifying glass icon to search for a specific item. Click on an inbox line to view more details, edit, delete, or deactivate. Select ADD EMAIL TO TICKET RECORD to add an email to the ticket admin record.
Admin Utilities > Tickets > Email to Ticket
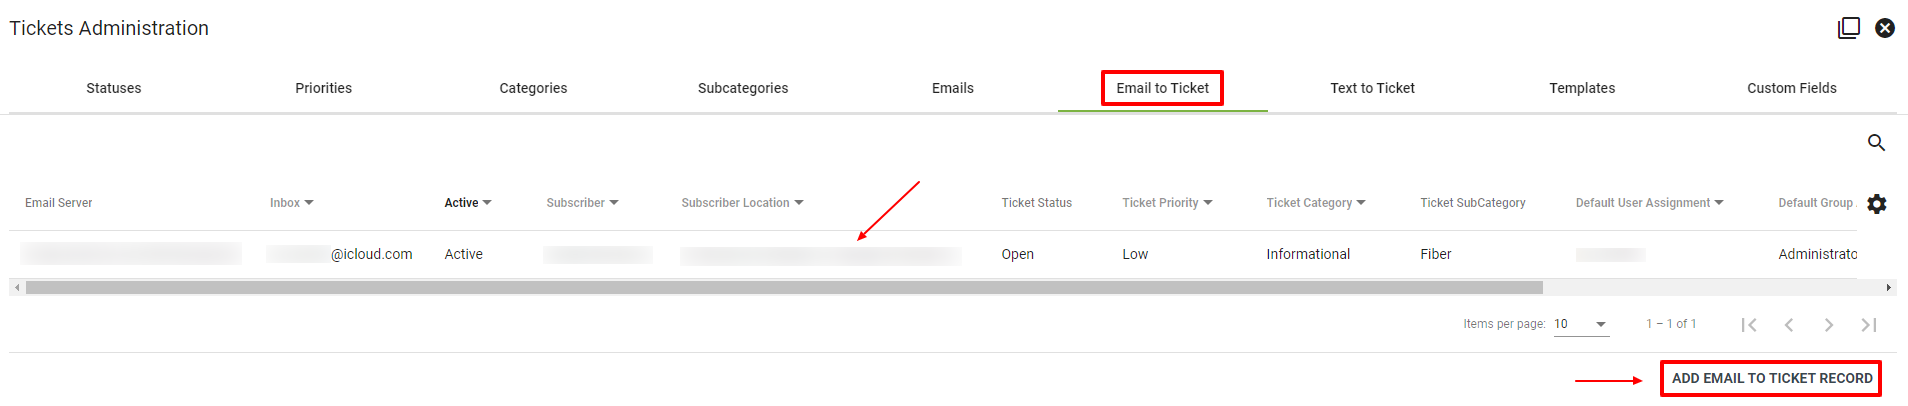
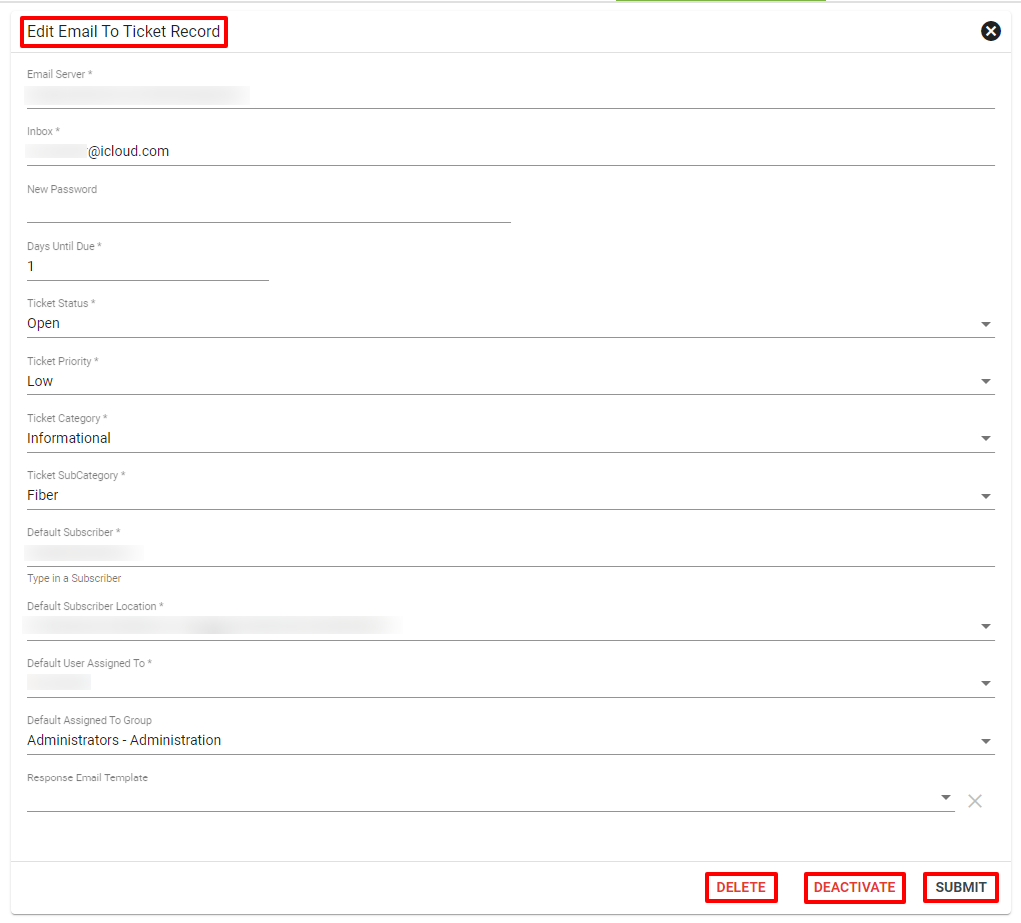
Click ADD EMAIL TO TICKET RECORD. Then input the specific information. The ticket record will hold all the information that the ticket will create from an email with; status, priority, category, and subcategories.
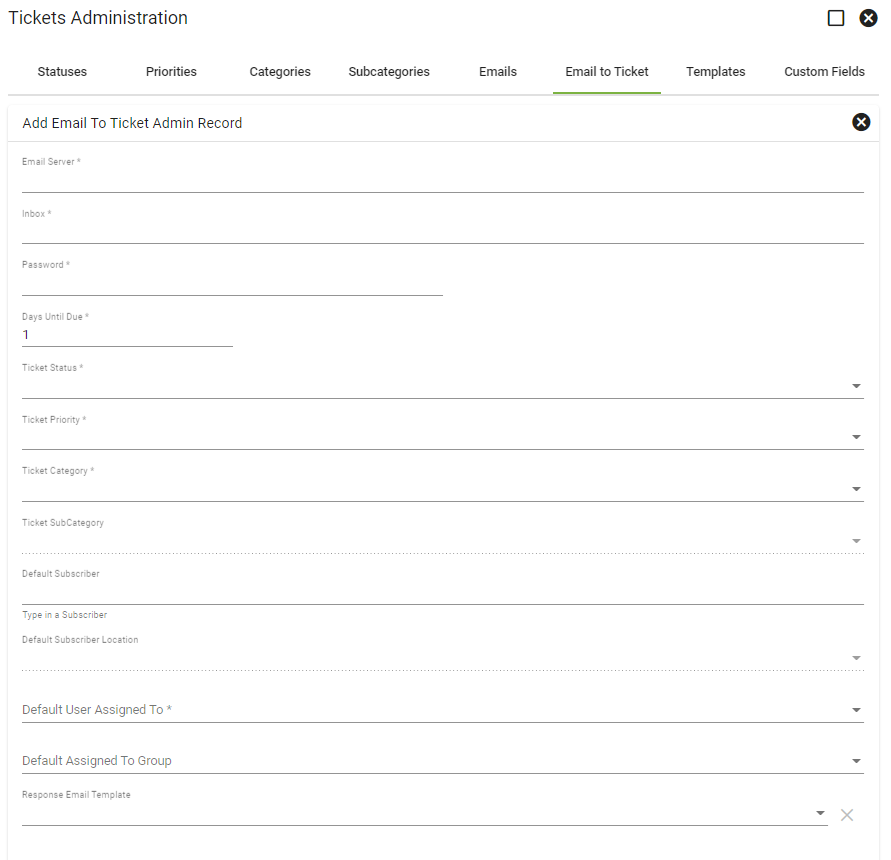
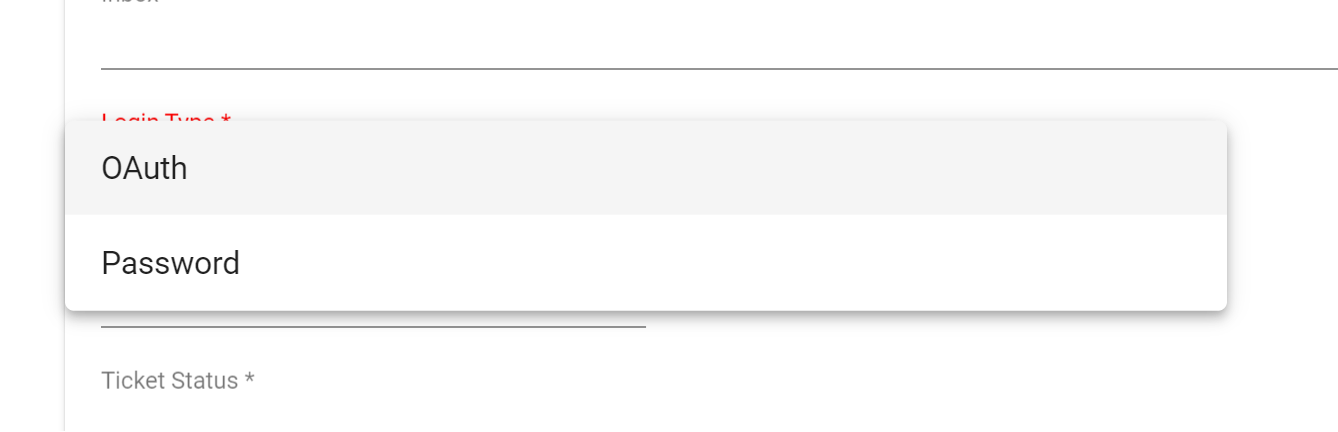
When setting up a ticket to Email record, the login for the email that will house the all the emails from subscribers depend on the emails account. If using a Microsoft account, the login selection will use OAUTH that would host the email account. For a Google account the LOGIN TYPE will use PASSWORD to setup the eamil server and account.
After filling out the tickets priorities and categories the next step is to default the User and/or Group that would be assigned to the ticket after it is created.

Below is an example of an Email to Ticket record. Here you can edit information, DELETE, or DEACTIVATE the email. If you make changes be sure to click SUBMIT.
Manually Moving a Ticket
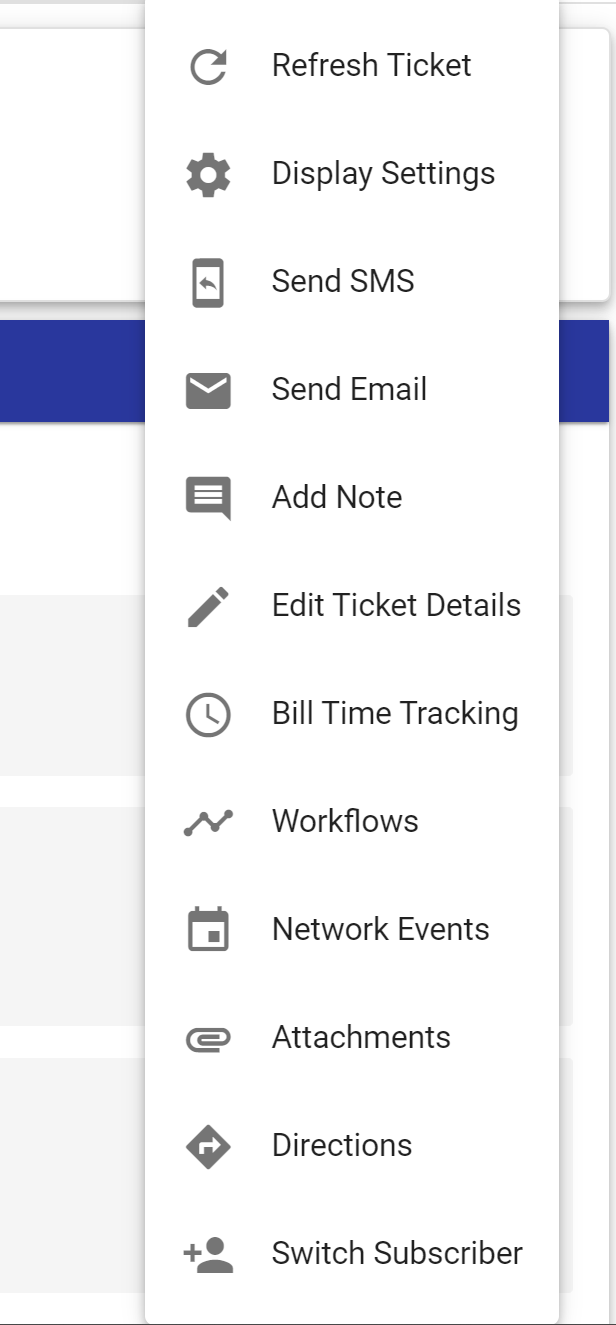
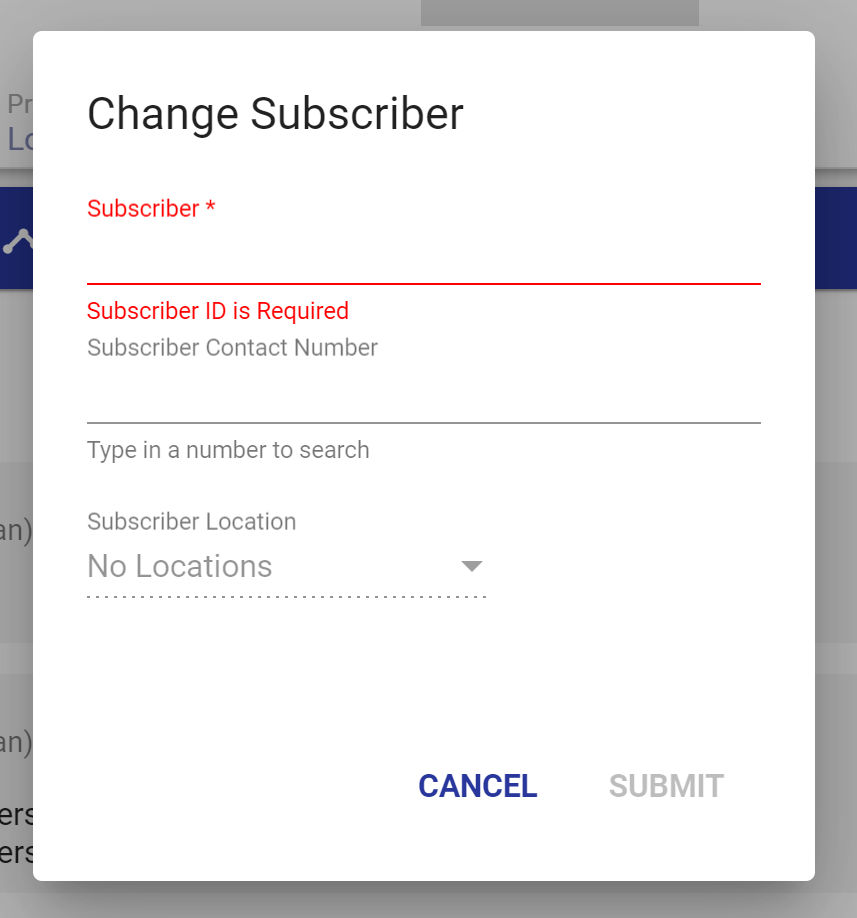
Vision will attempt to route the ticket to a subscriber account if the sender's email matches back to a contact on their account. When there is no match, or an email is on multiple accounts, Vision will open the ticket on the default account. You can manually move a digested ticket from the ![]() 3 dot menu in the upper right of the ticket, then click
3 dot menu in the upper right of the ticket, then click ![]() Switch Subscriber.
Switch Subscriber.
Responding to email from a ticket, in the ticket click on the 3-dot![]() in the original email in the ticket to respond to keep the emails in the chain inside the ticket.
in the original email in the ticket to respond to keep the emails in the chain inside the ticket. 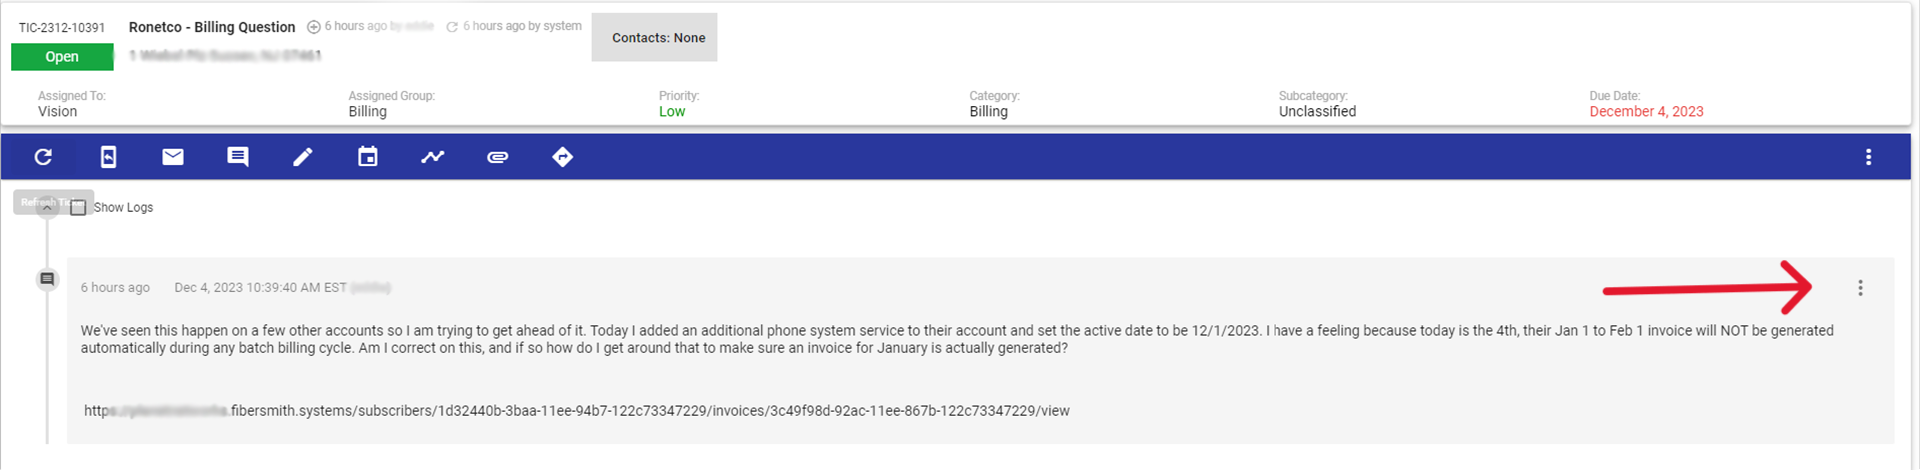
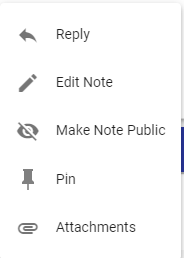
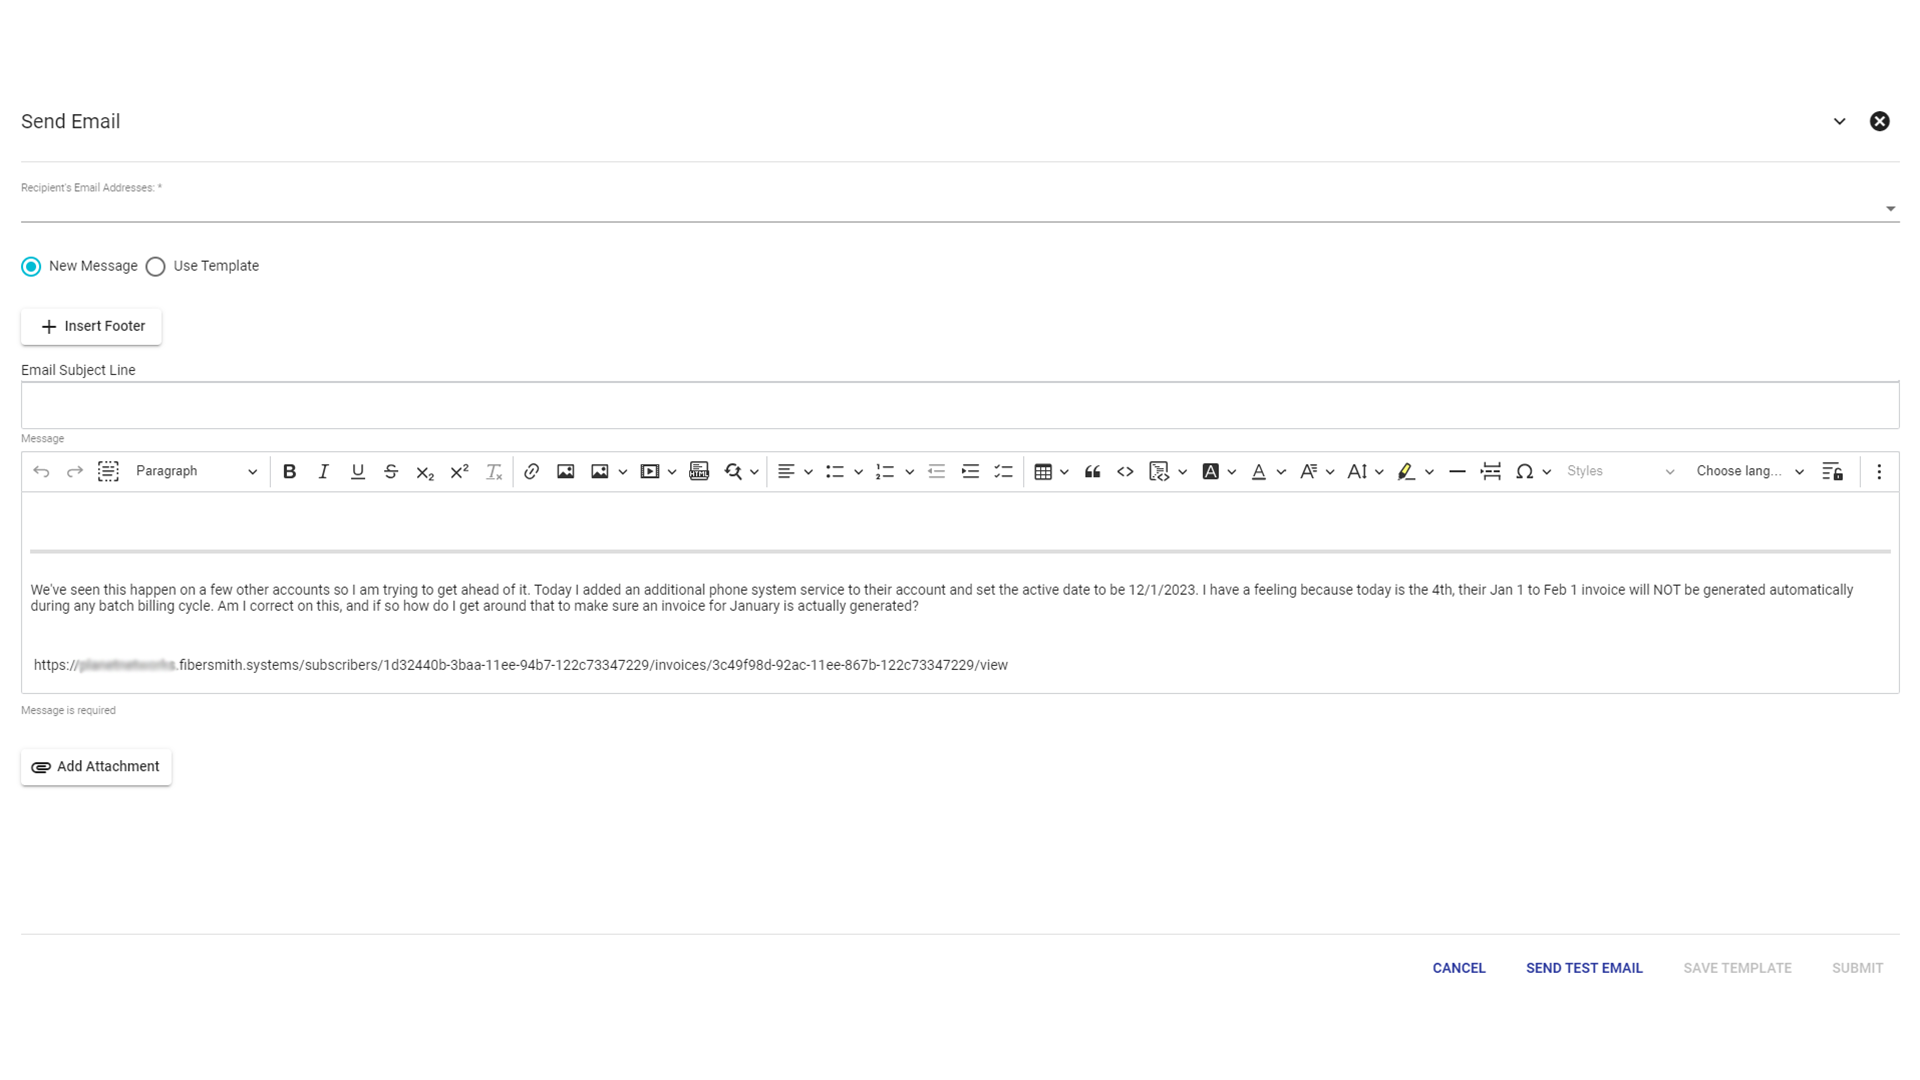
After clicking on the 3-dot menu this menu will be displayed click reply and it will direct you to an email template where you can respond and it will show up in the ticket so all communication can be tracked in the same place without having to dig through emails.
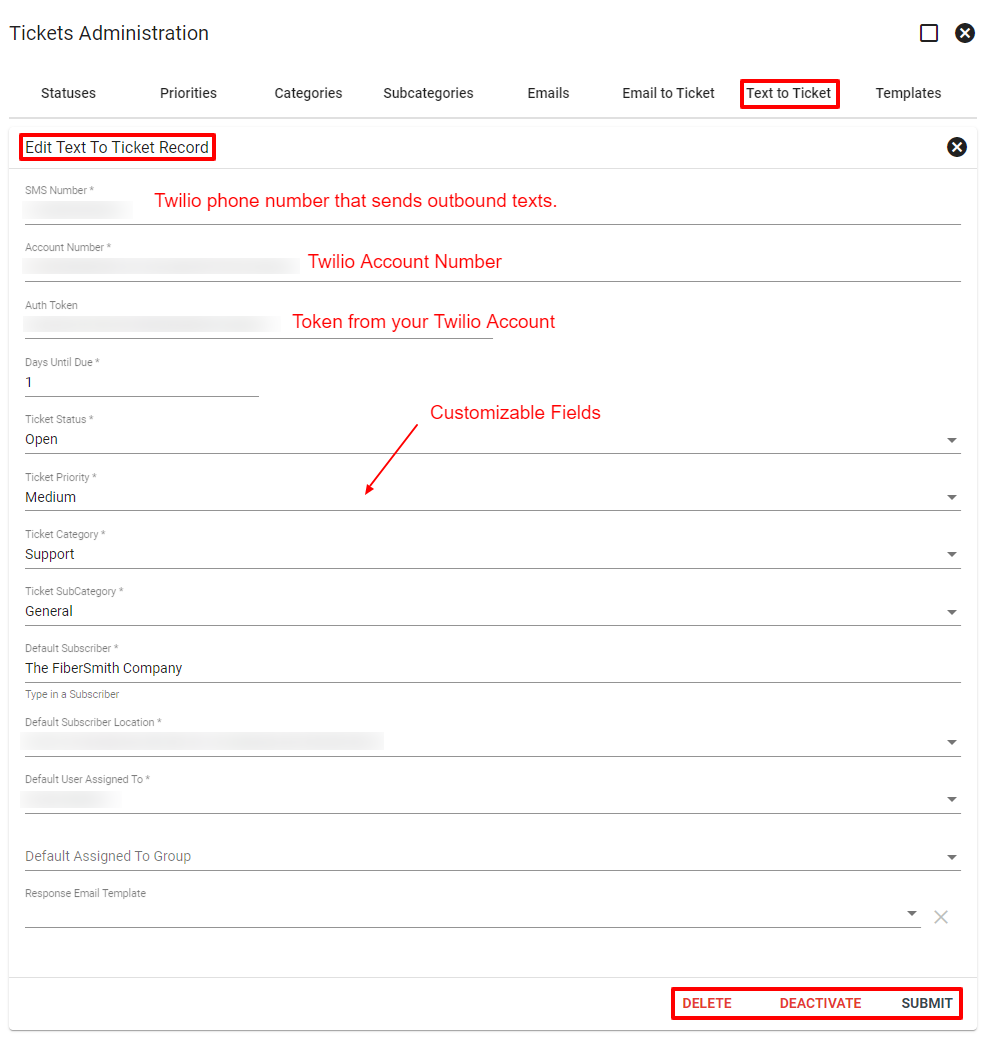
The Text to Ticket function allows inbound texts to automatically digest into an open ticket on an associated subscriber's account. If the system does not find a subscriber account to assign the ticket to, it will be assigned to a default subscriber such as User Support. Then someone can work that ticket later and assign it to the correct subscriber or close it out.
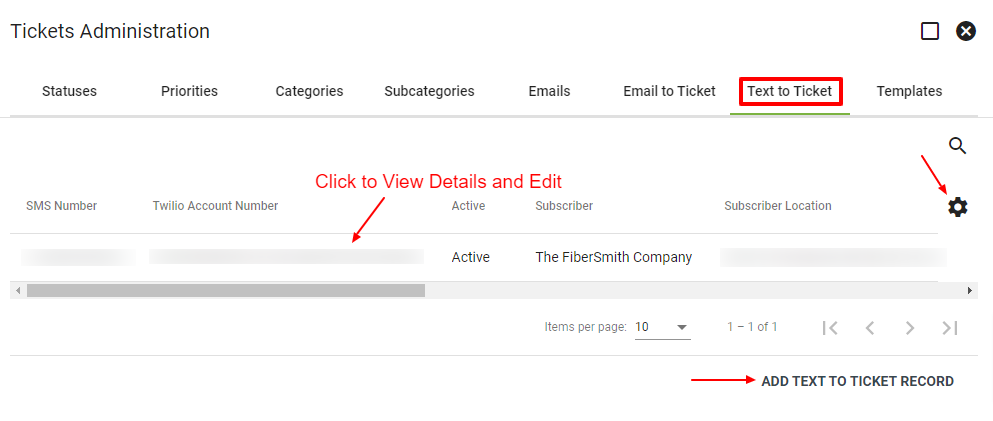
To access the Text to Ticket admin area, click on Admin Utilities then select Tickets.
Admin Utilities > Tickets > Text to Ticket Tab > Click on specific Twilio Account Line
Setting up the Text to Ticket feature:
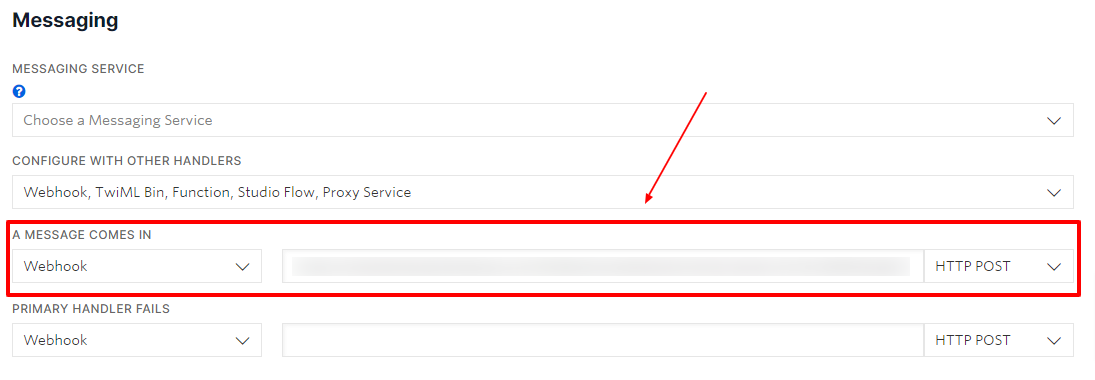
In your Twilio account, you will need to add a webhook generated by Vision. In Twilio next to the webhook, there will be a drop down menu to change to “HTTP POST.”
You will then need to click ADD TEXT TO TICKET RECORD from the Tickets Administration page. There you will fill out the fields including your Twilio account information and Auth Token from Twilio. Once complete click SUBMIT. The Support Team can walk you through these steps.
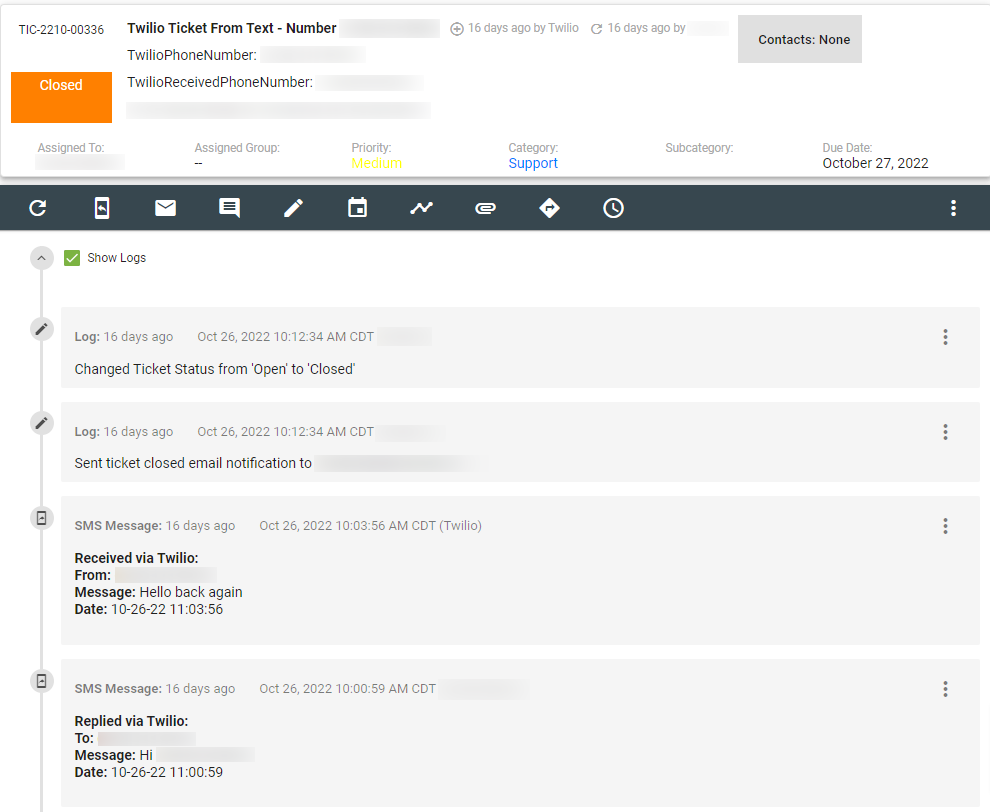
Example of a Text to Ticket Log:
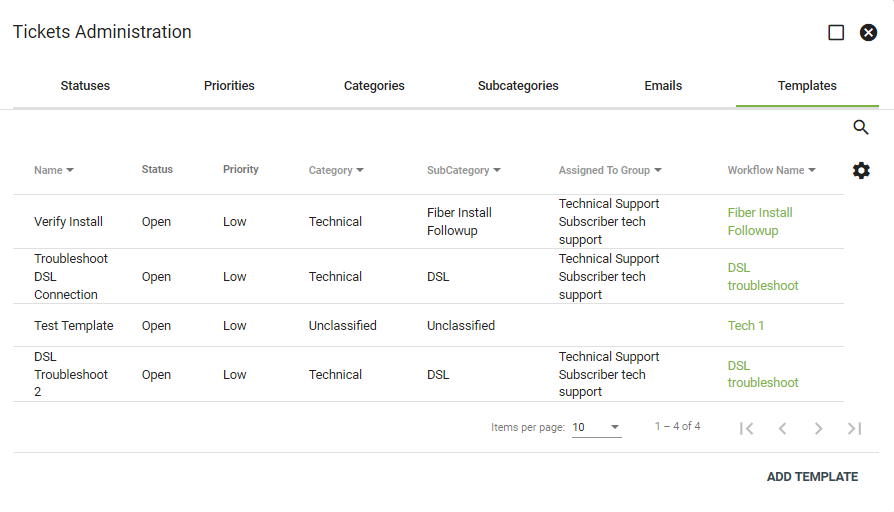
Templates
Ticket templates are key in developing consistent company wide practices in terms of problem solving and speed of service. Templates may have Dynamic Workflows associated with them which will kick off upon Ticket creation. Click on a template to view and edit.
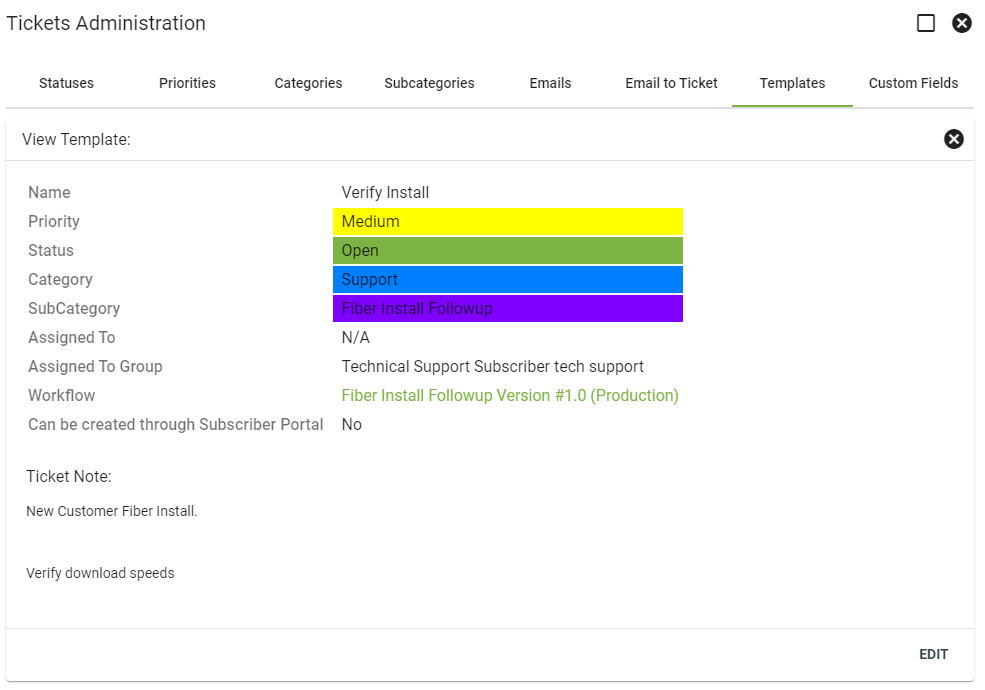
View Template
Here we'll see all the information pertaining to this template. Click EDIT to make changes.
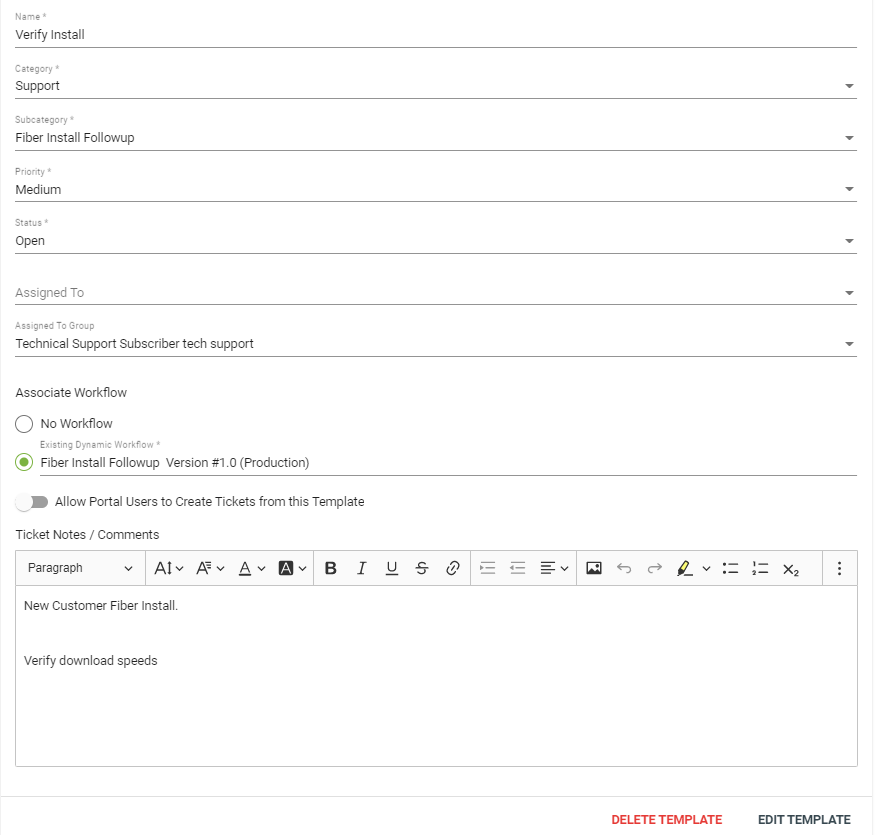
Edit Template
Here you can make any desired changes to a ticket template. When finished, click EDIT TEMPLATE.
Toggle the 
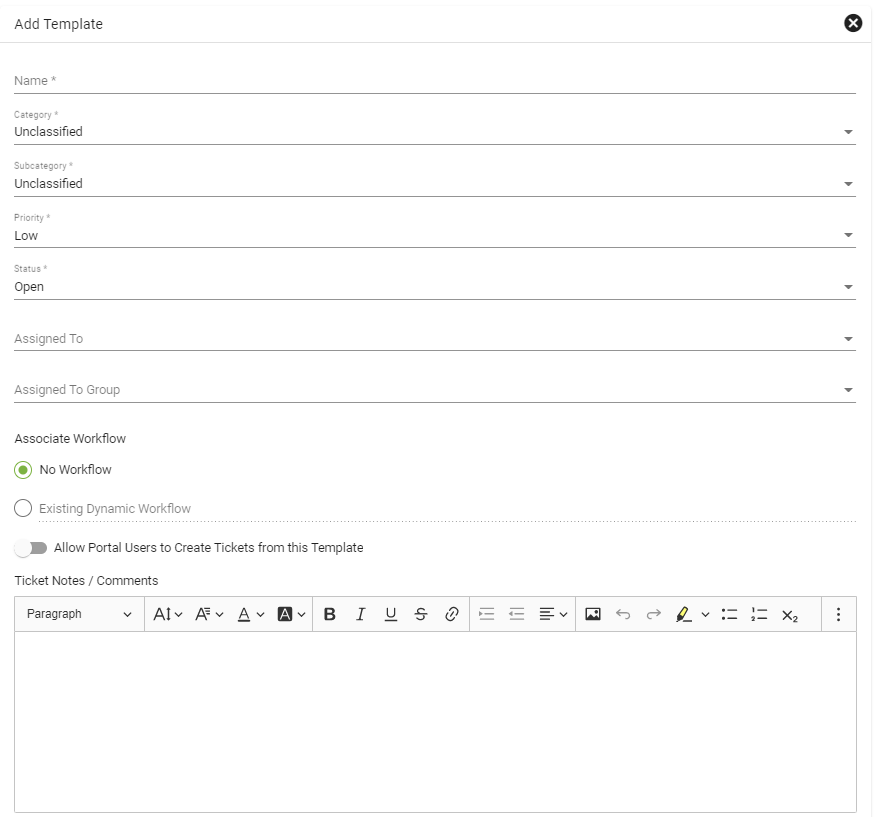
Add Template
To add a new template, click ADD TEMPLATE on the templates tab within Tickets Admin. Enter a name and choose a category, subcategory, priority, status, and assignment. Next, choose whether or not to associate a previously created Dynamic Workflow. Then fill out the Ticket Notes/Comments area with formattable text. When finished, click ADD TEMPLATE.
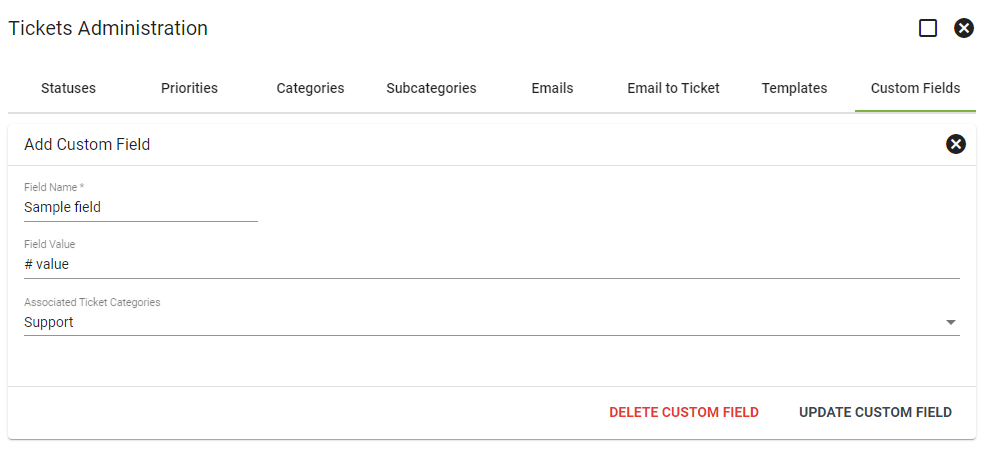
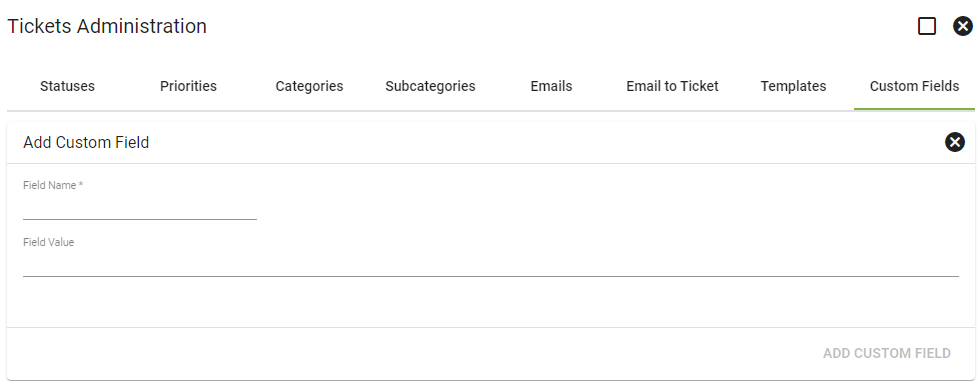
Custom Fields
Custom fields can be a useful way to further categorize tickets. Custom fields will display in the selected ticket below the ticket title.
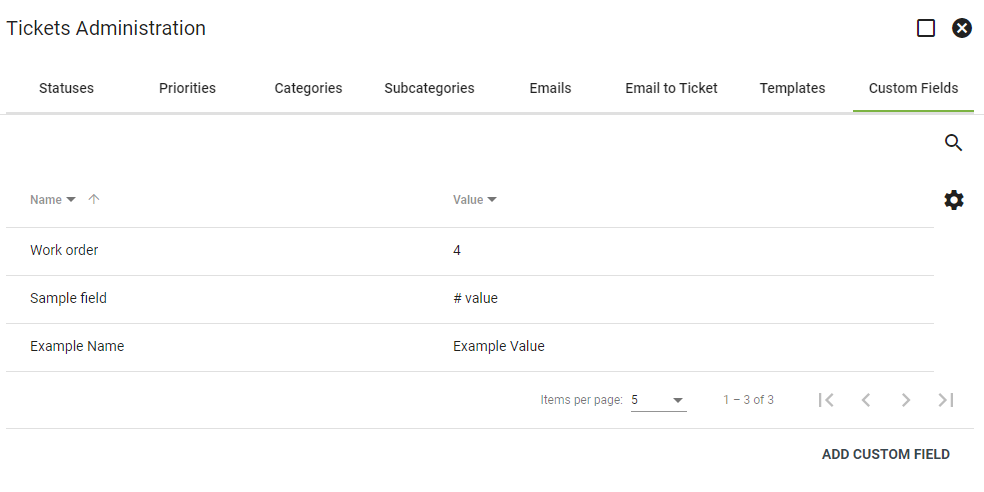
Select ADD CUSTOM FIELD to create a new custom field. Input the field name and any field values (optional).
Click EDIT to make changes to the custom field and to add any associated ticket categories. Adding an associated ticket category will only allow that custom field to be added to a specific category of ticket.
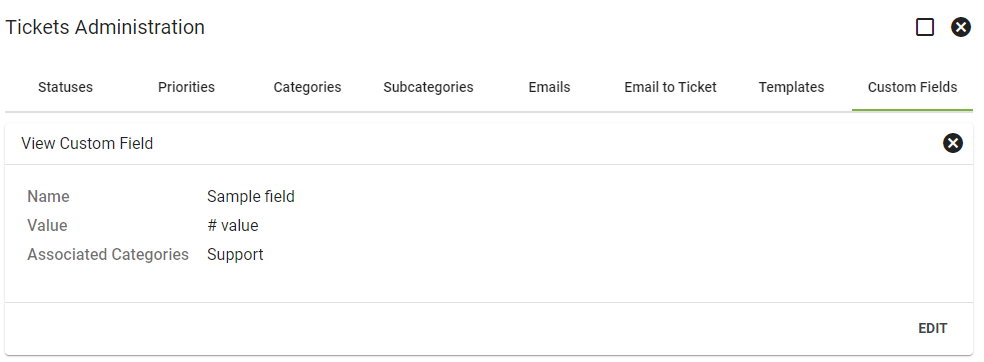
Choose an associated ticket category (or select mutiple categories) from the drop-down menu. To save any changes, select UPDATE CUSTOM FIELD. Click DELETE CUSTOM FIELD to remove the custom field.