Warehouse
Within Vision, Warehouses track the location of Inventory. These locations can be configured to be traditional warehouses, work vehicles, technicians or other locations. Warehouses may be divided further into departments, rooms, racks, shelves, or other infinitely divided constituent locations. Inventory received in a purchase order may be strictly enforced as being received into a specific warehouse to control the flow and availability of equipment.
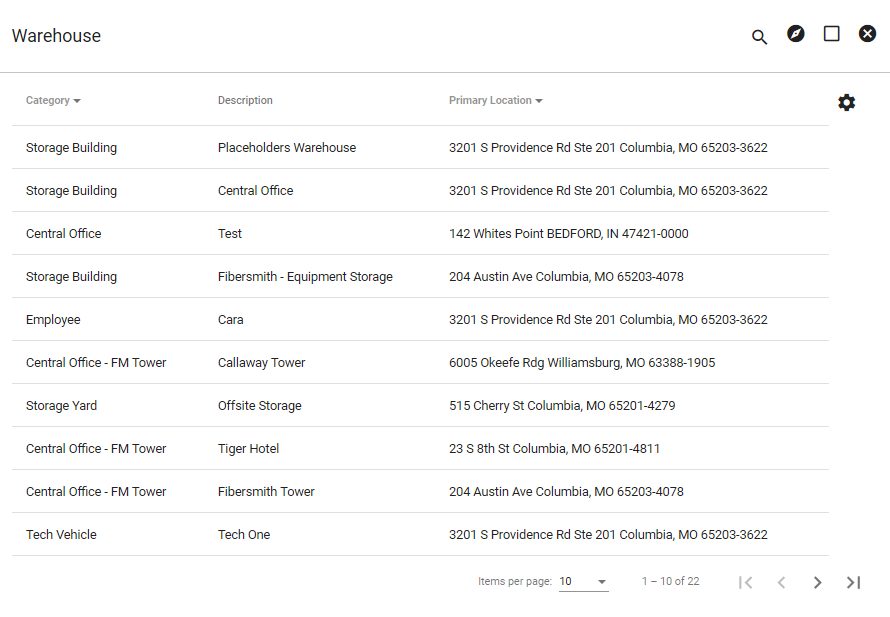
Warehouses may be sorted by category, description, or primary location. Click on a Warehouse to view attributes and inventory.
View Warehouse
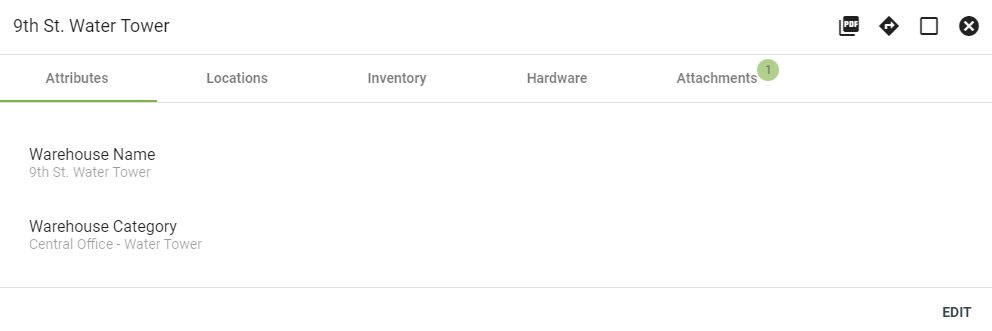
Under Attributes click on the user to be taken to the user's profile within Admin Utilities.
Click on the 
Click 
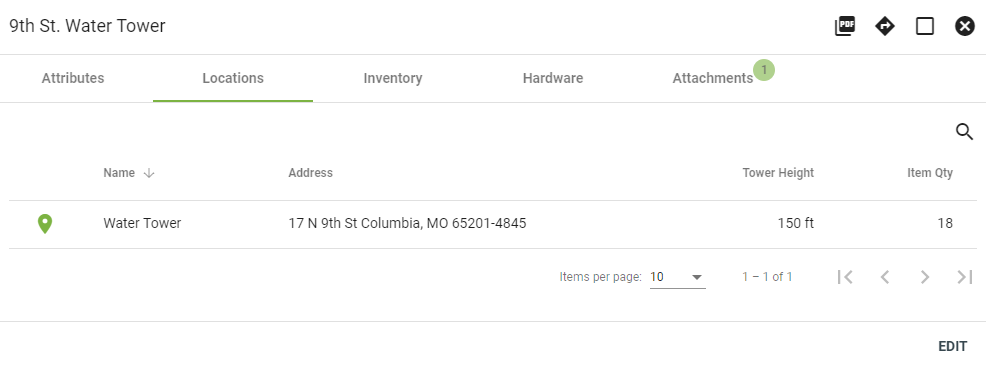
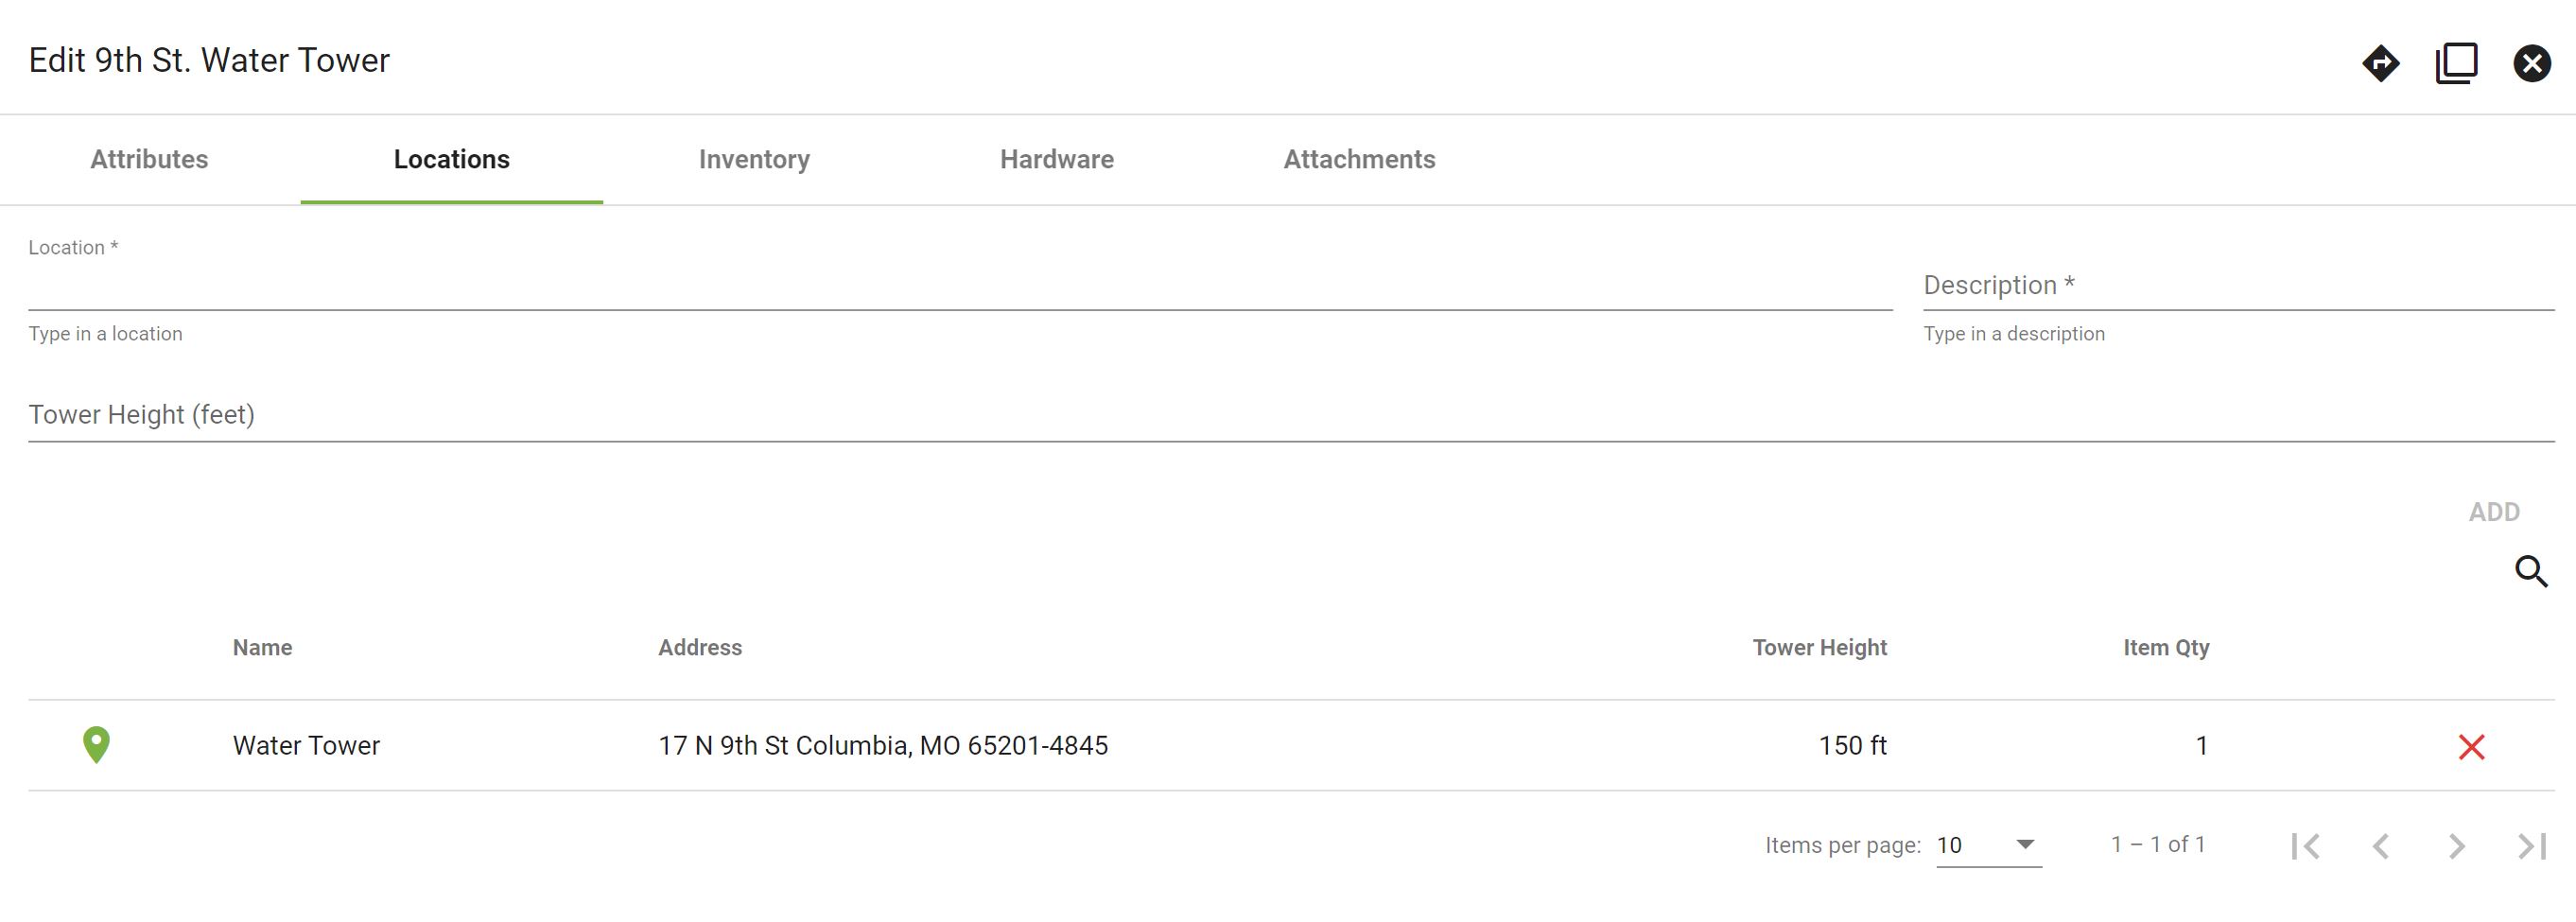
The Locations tab will show you not only the Primary Location (designated by the colored location icon 
Sublocations can be anything associated with this Warehouse. Examples might include racks within a building or vehicle, spots on a tower, or an employees office. Next to each location you'll see Tower Height (if applicable) and Item Quantity.
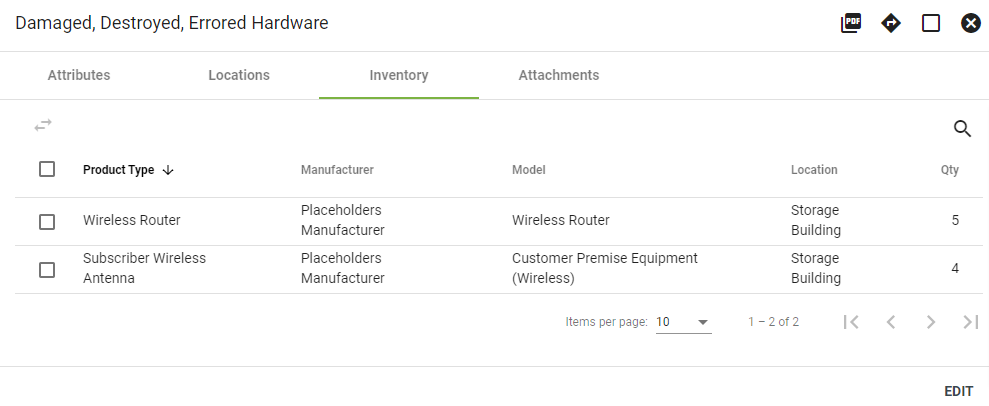
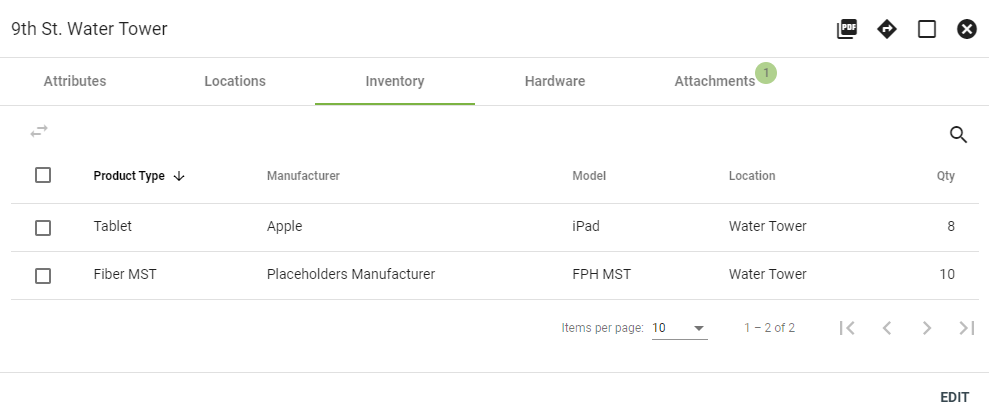
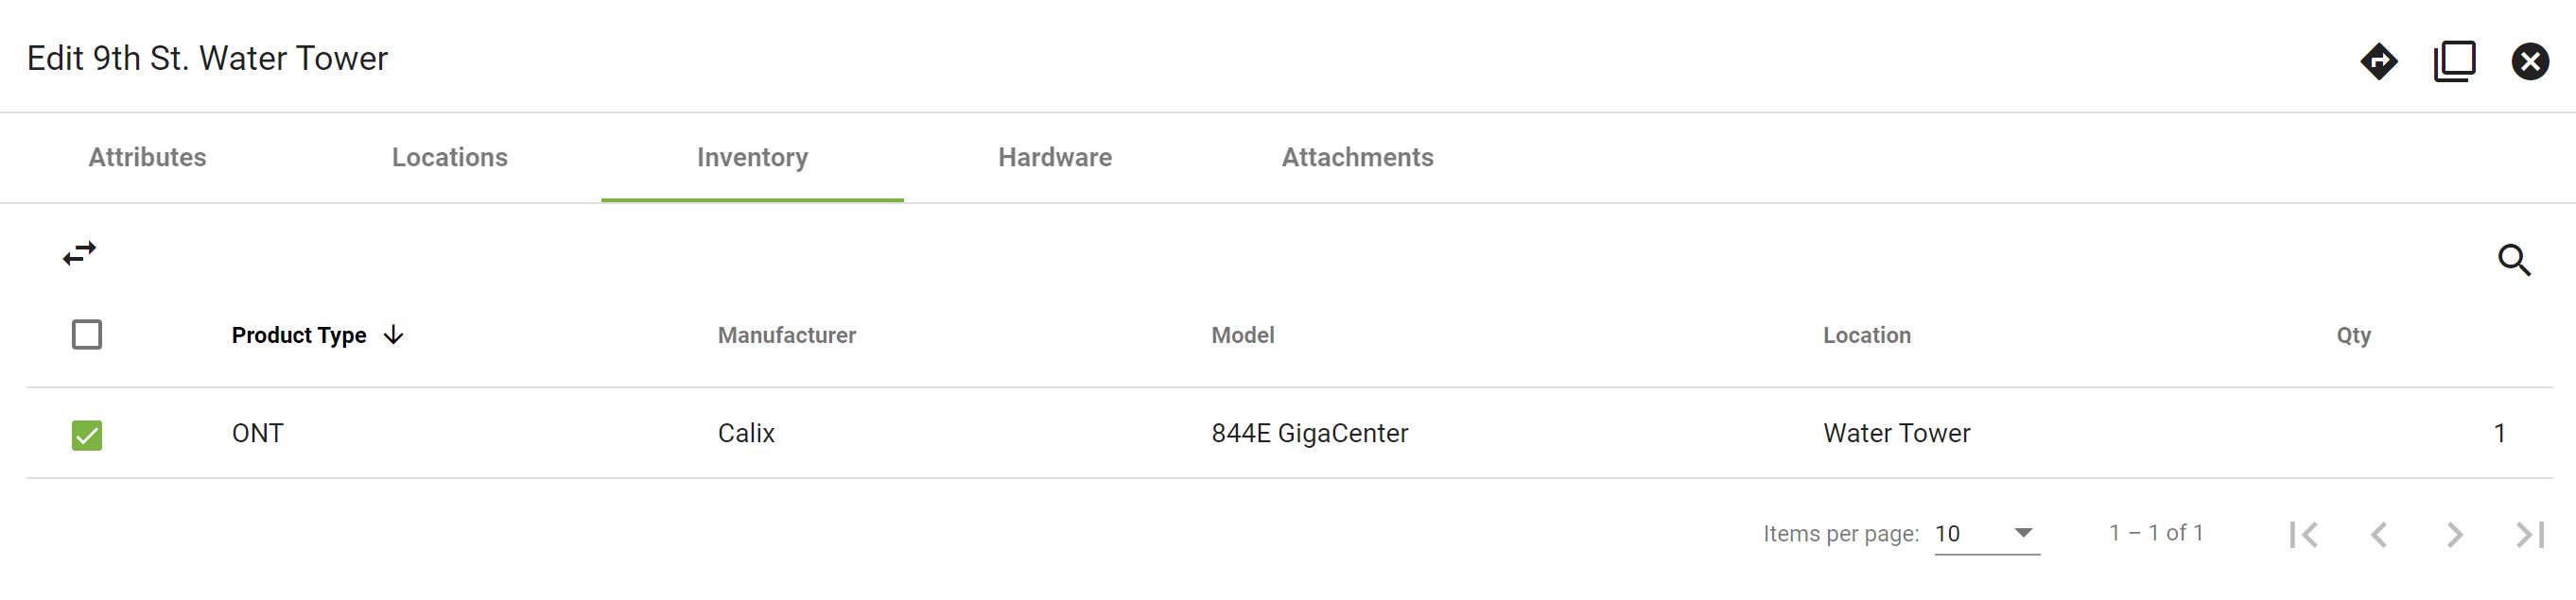
The Inventory tab shows you any inventory in the warehouse, as well as the number of inventory items in that warehouse.
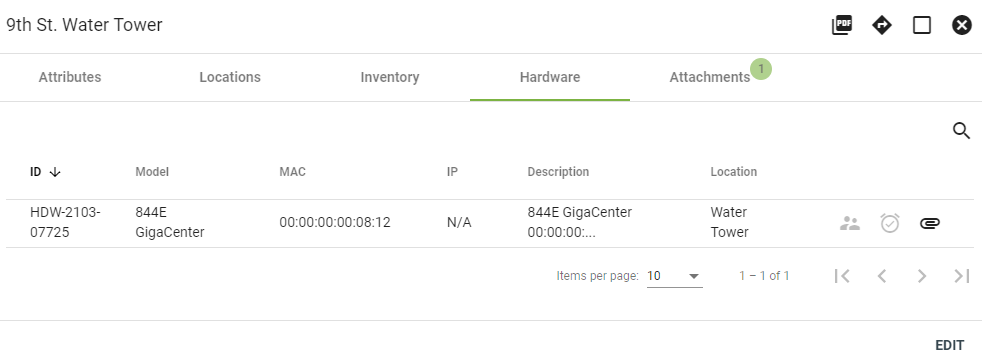
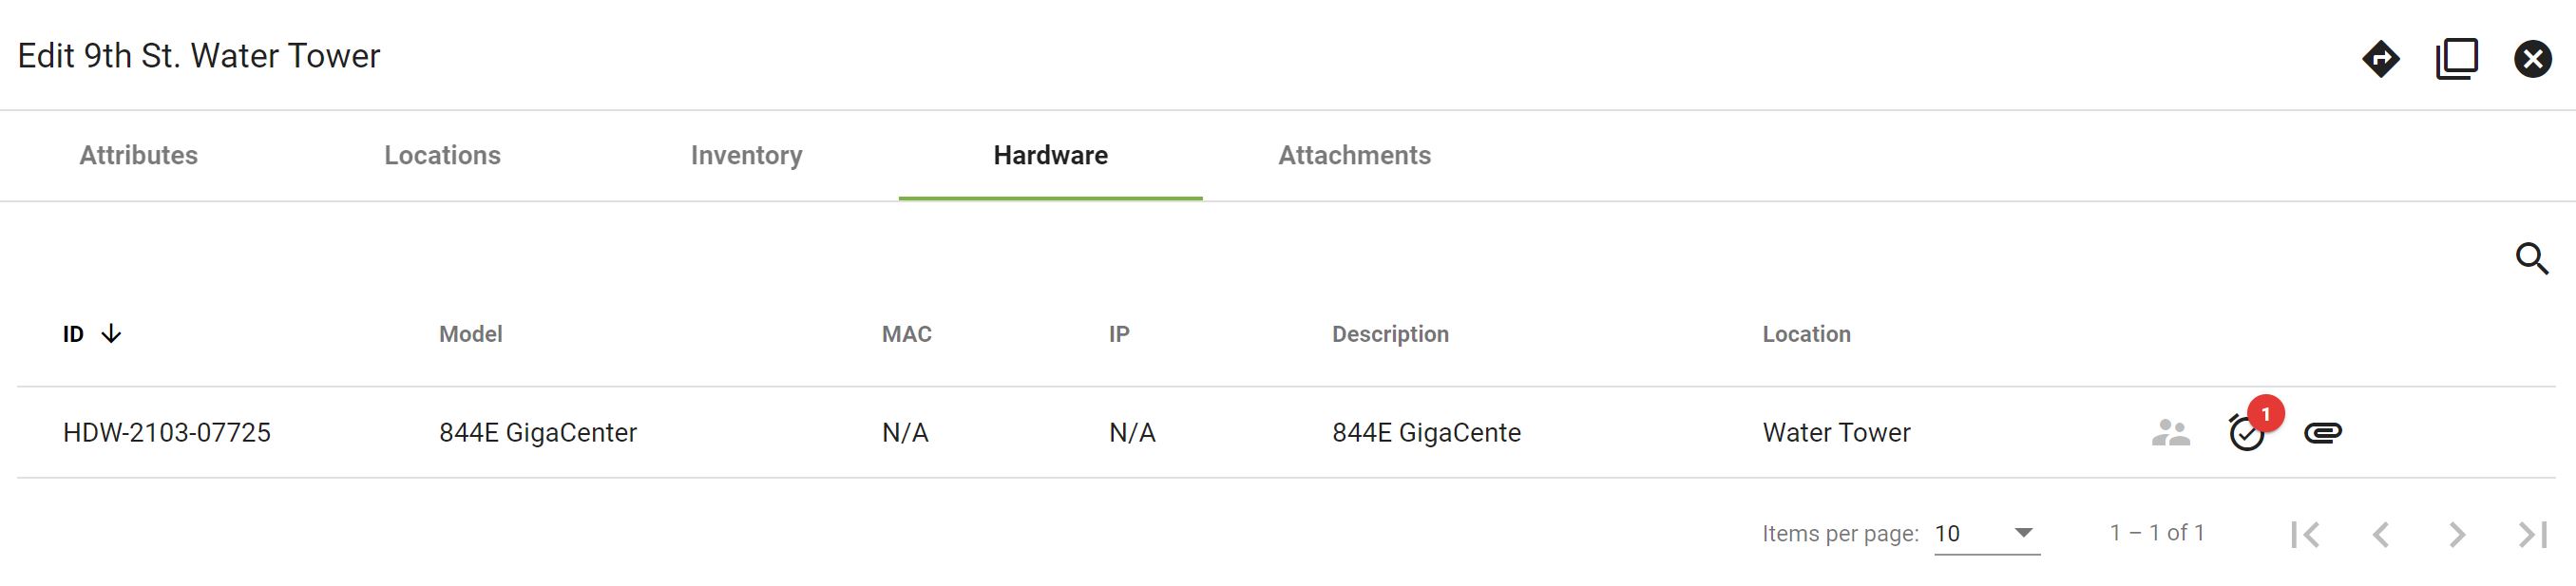
The Hardware tab lists all hardware in that location (if applicable).
The 
The 
Click on the 
Click on the subscriber icon
Click on the
The 
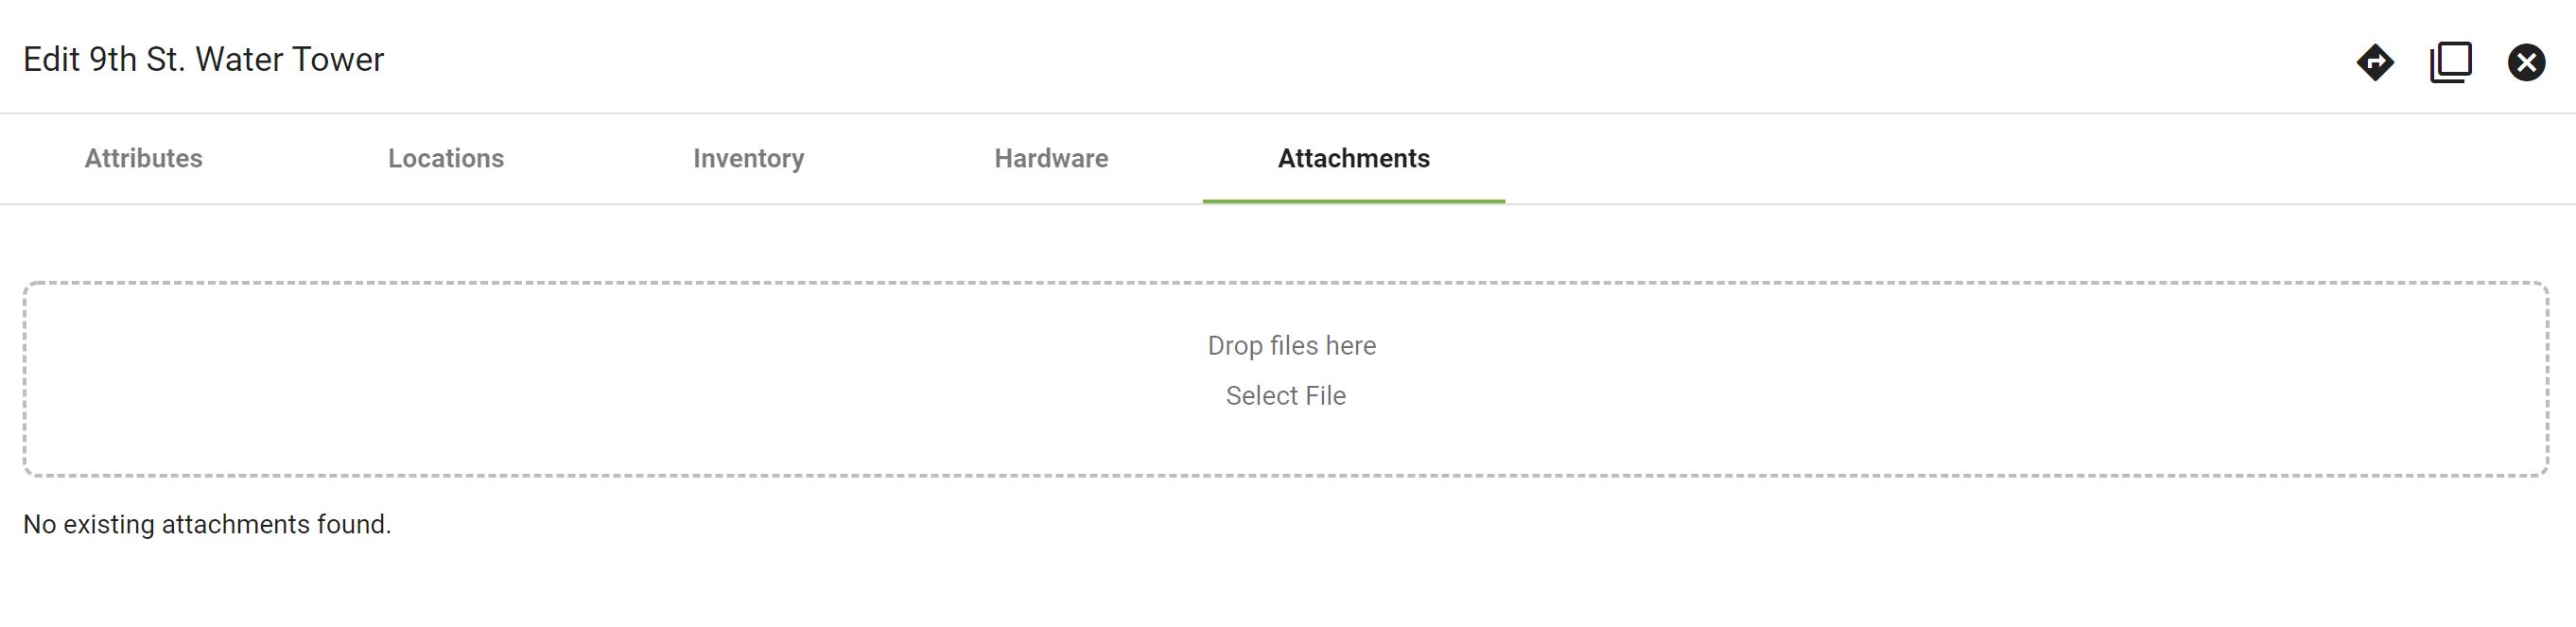
Under Attachments you can upload and view any appropriate files.

Edit Warehouse
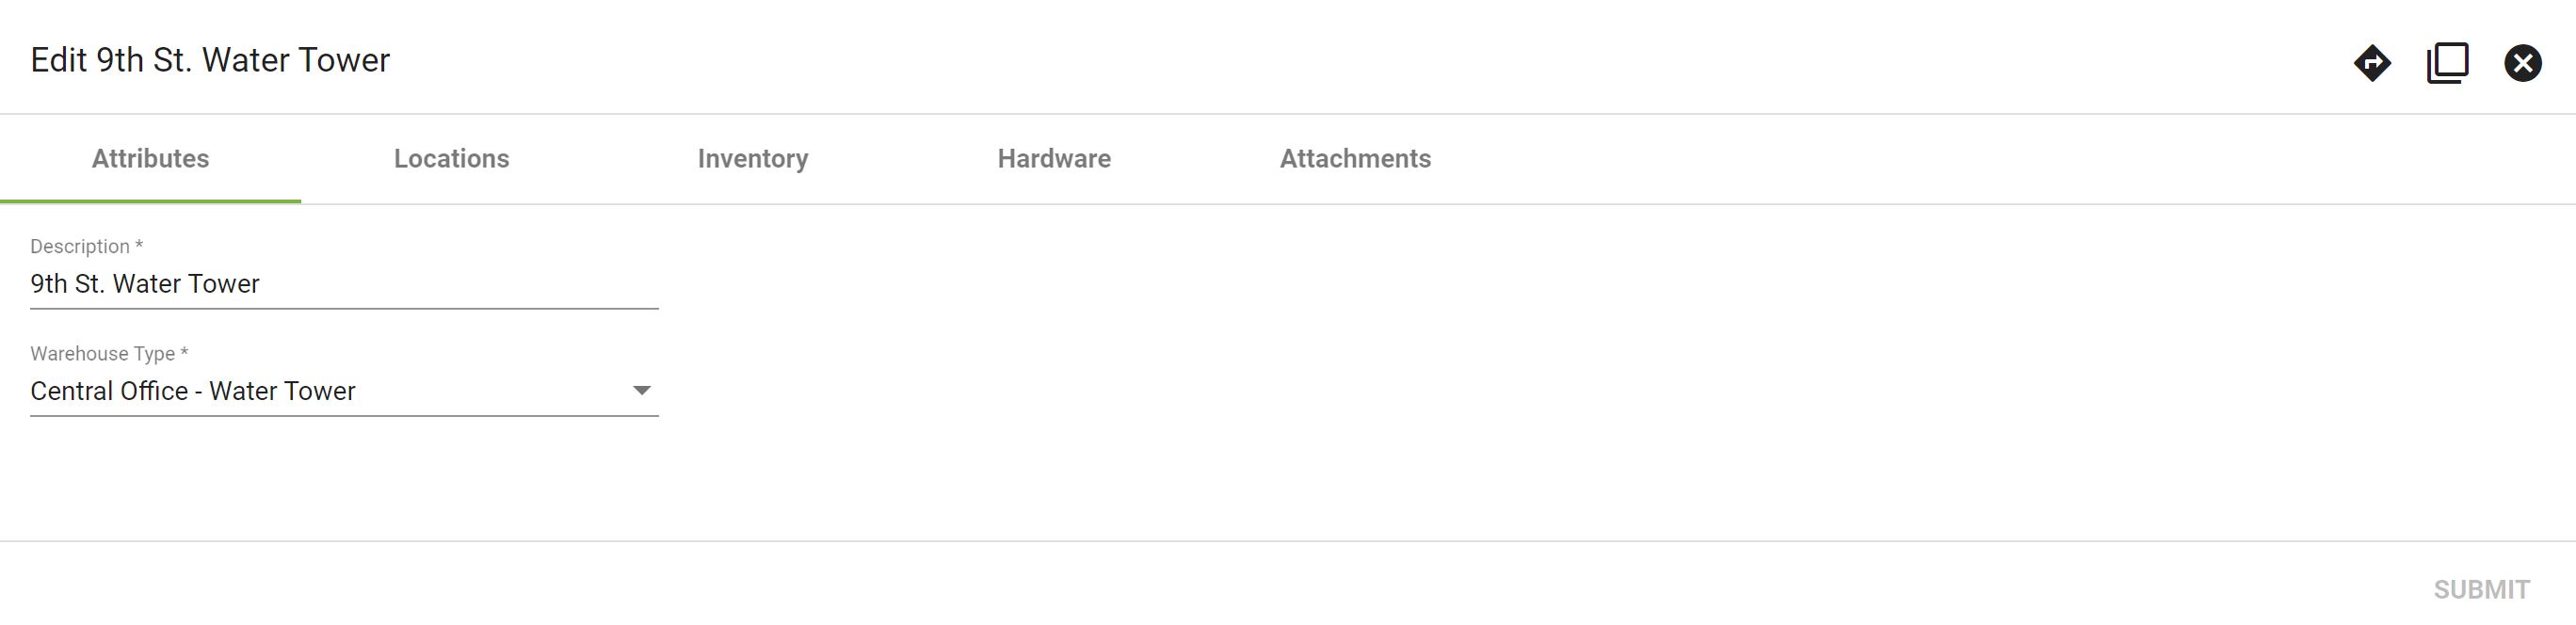
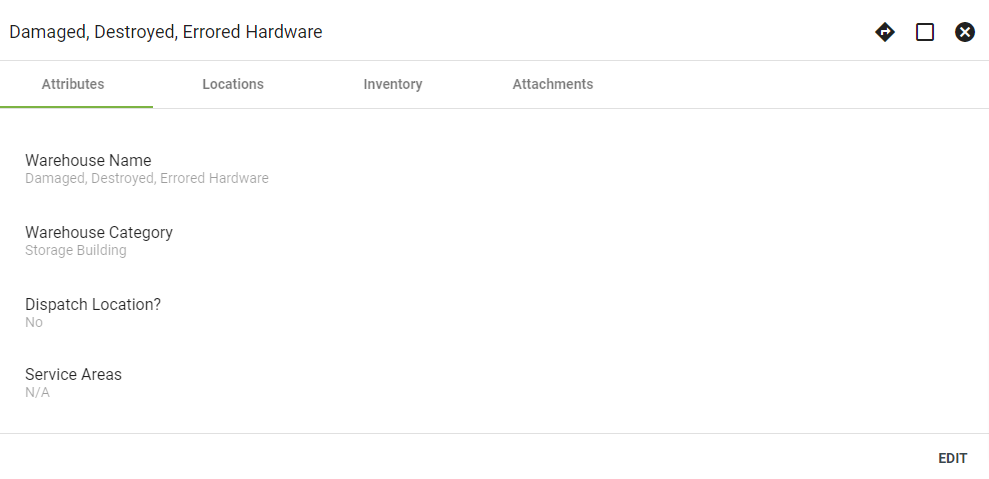
Click EDIT in the lower right of a Warehouse view to make changes. Under Attributes you can edit the Description and Warehouse Type. You can also associate Service Areas, Users, or Vehicles. Check the Dispatch Location? box to mark the Warehouse as a location that houses technicians and/or their vehicles.
Under Locations you can add new Sublocations. Type in an address and a description then click ADD. Click 
Click on a line item to view details about a specific piece of Hardware. Click on the
View, delete or add attachments to the warehouse.
Moving Inventory
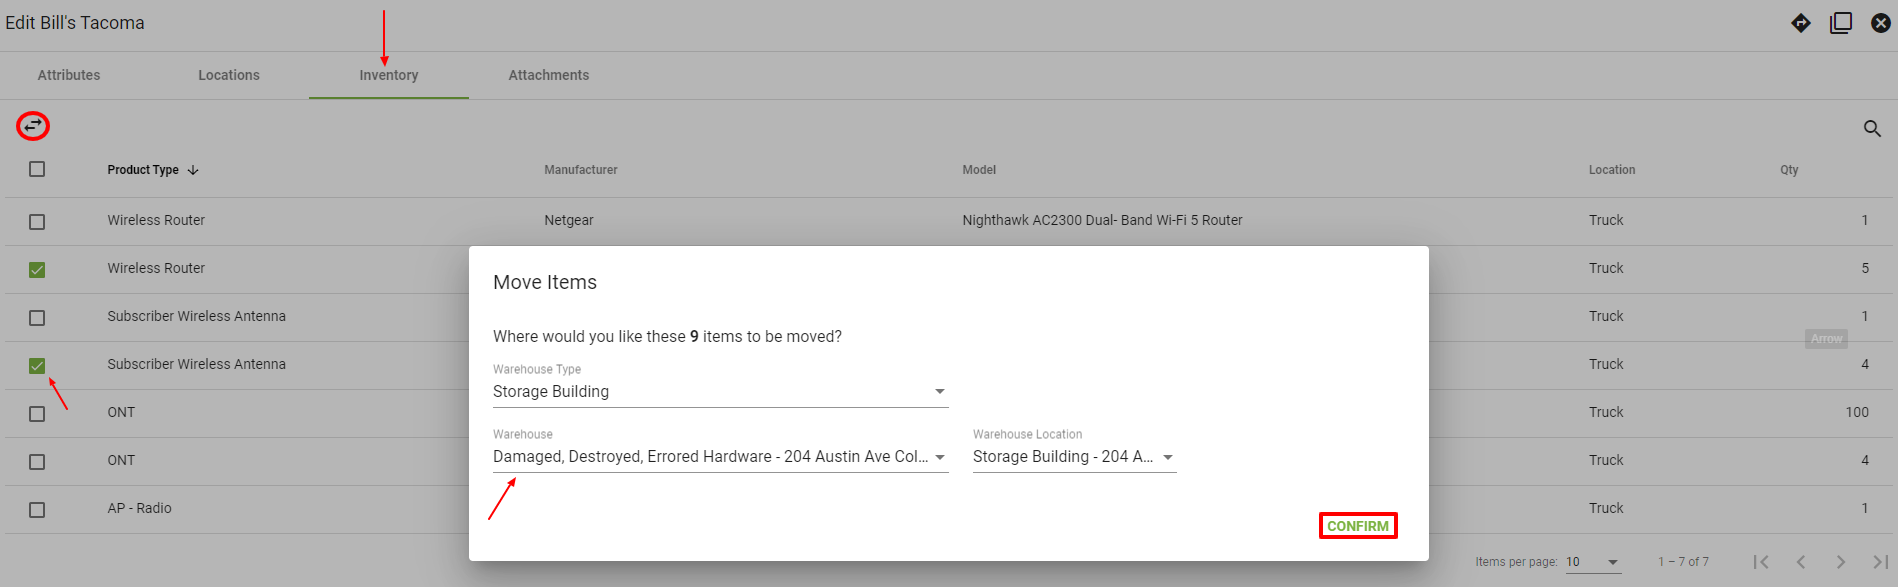
Click EDIT under Inventory to move items, then select the check box next to the item and click 
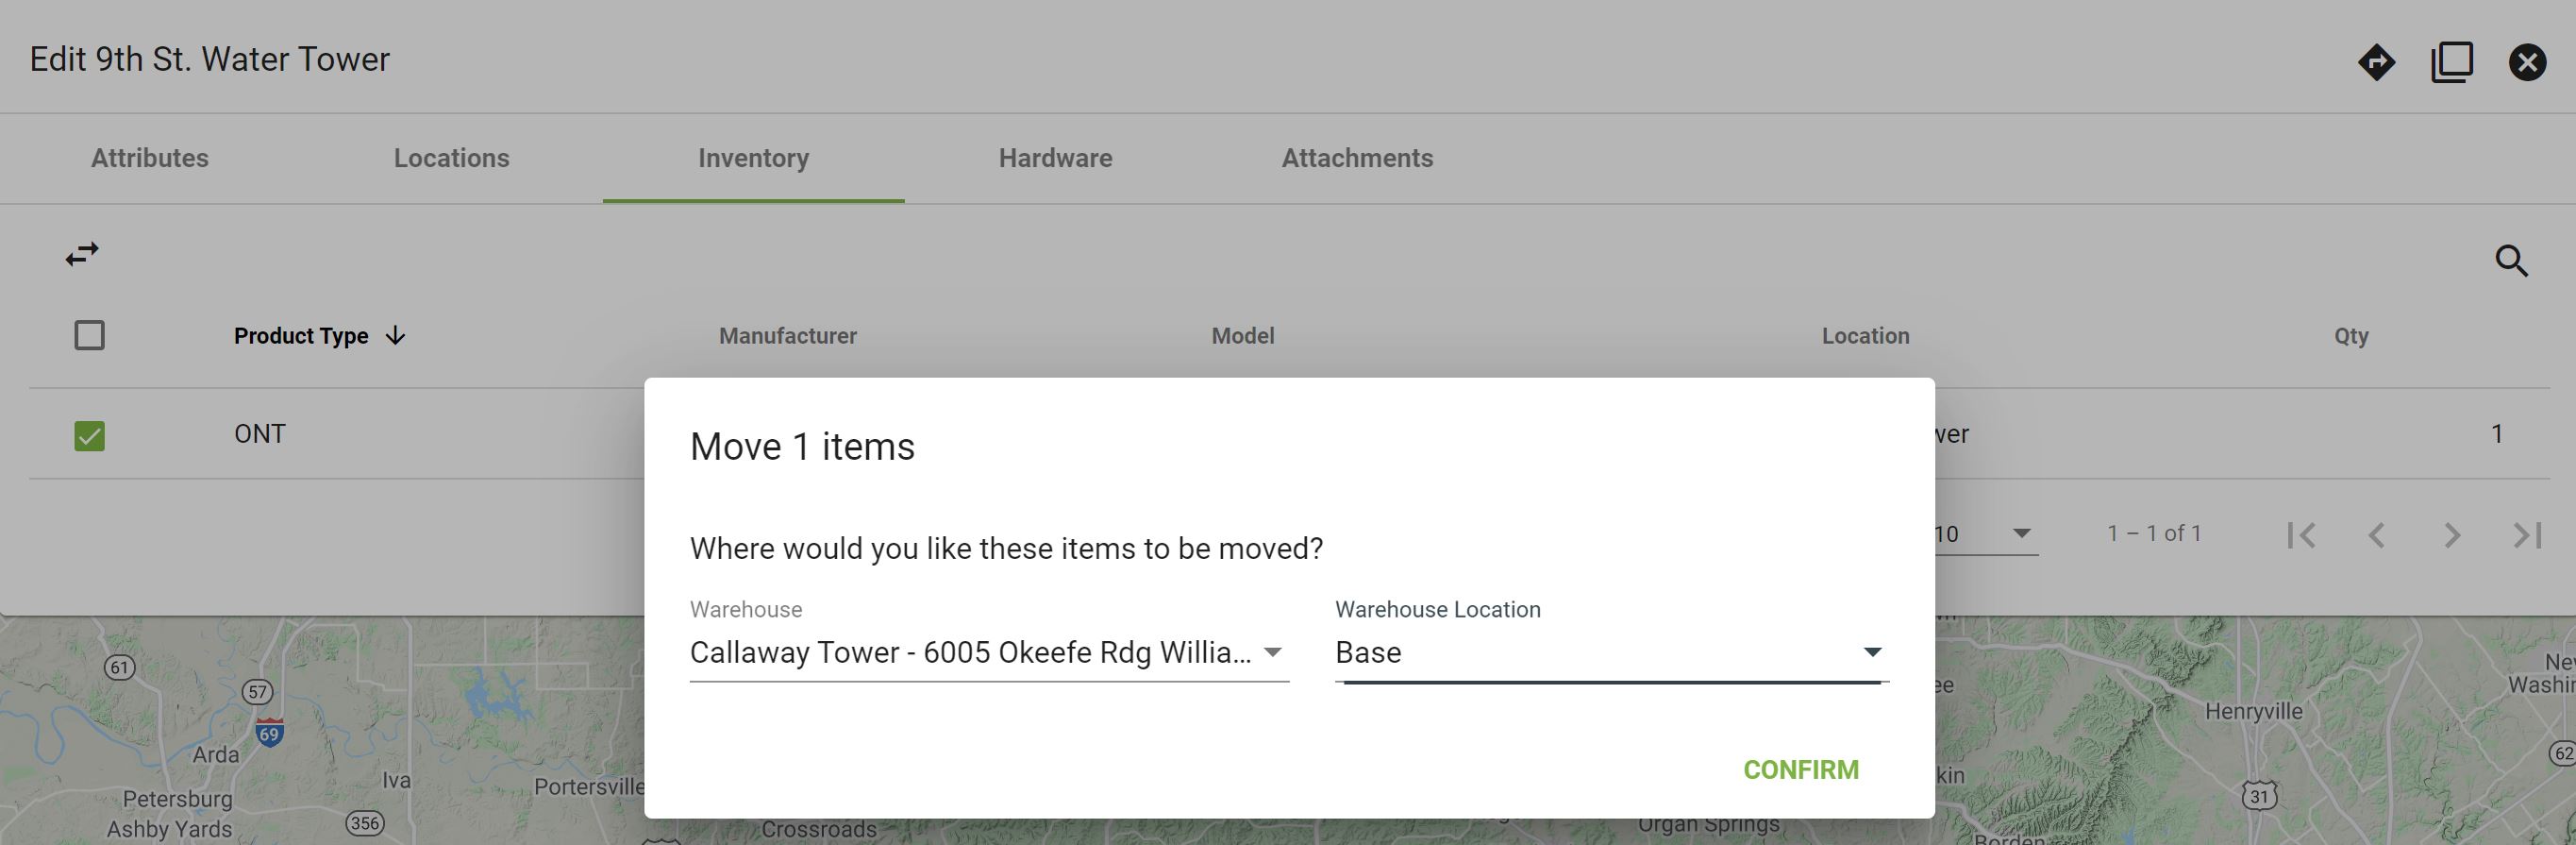
Choose the Warehouse and Location to where you would like the item moved, then click CONFIRM.
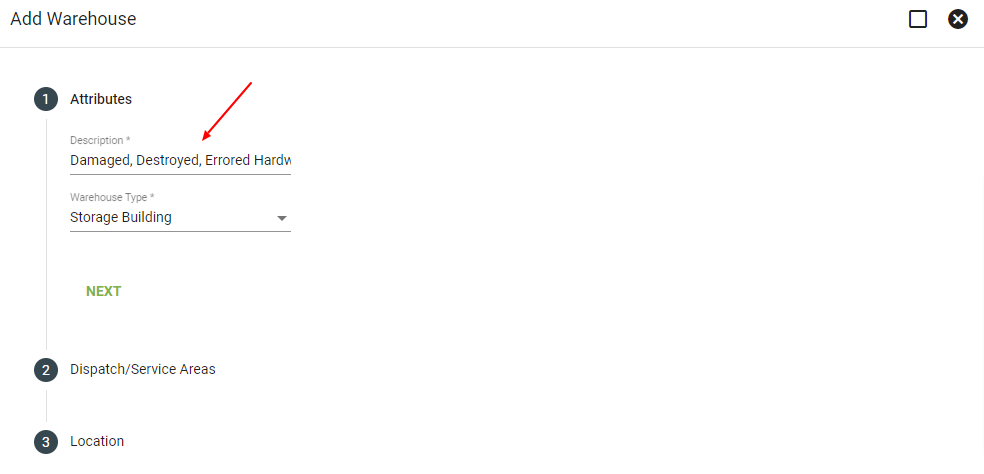
Add Warehouse
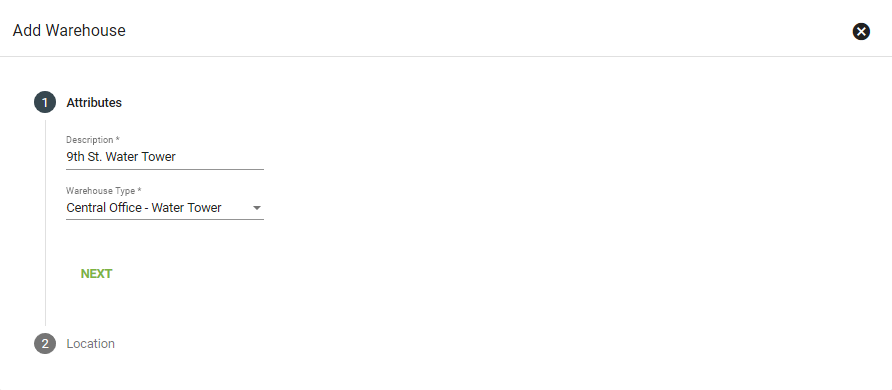
First enter a description and type. Then click NEXT.
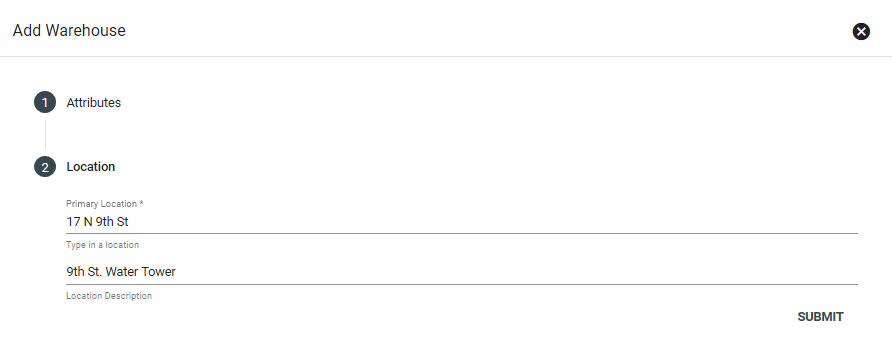
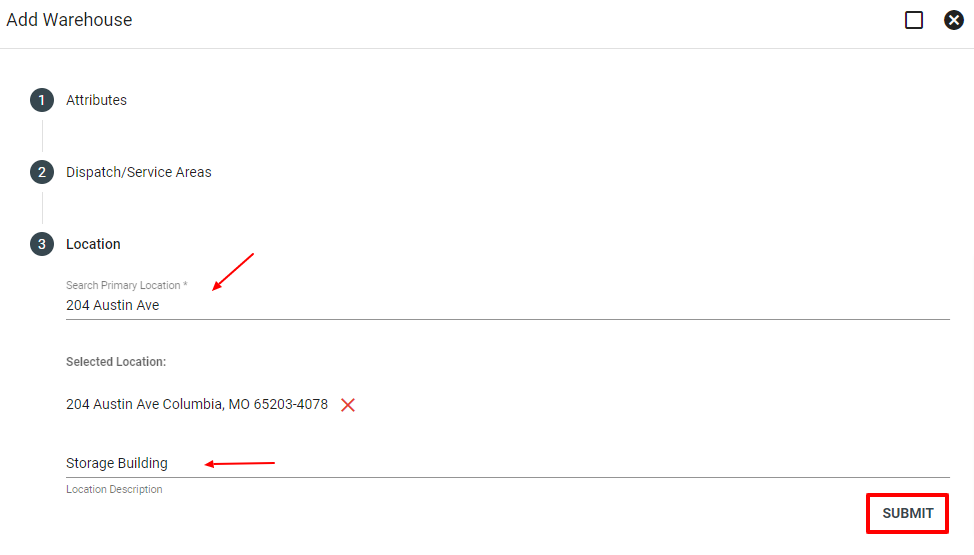
Now enter the Primary Location and description. Then click SUBMIT.
Damaged hardware does not get deleted from the system, instead it is placed in a warehouse for damaged hardware.
1. Add New Warehouse
Inventory > Warehouse > FAB > Create New Warehouse
First enter a description and type. (For example: Damaged, Destroyed, Errored Hardware) Then click NEXT.
Then enter a dispatch/service area. Then click NEXT.

Now enter the Primary Location and description. Then click SUBMIT.
Now you should have your new placeholder warehouse set up.
2. Move Damaged Inventory to New Warehouse
Click EDIT under inventory to move items, then select the check box next to the item(s) and click
Choose the Damaged Warehouse and location to where you would like the item moved, then click CONFIRM.
The damaged inventory will now be in the new warehouse you created.