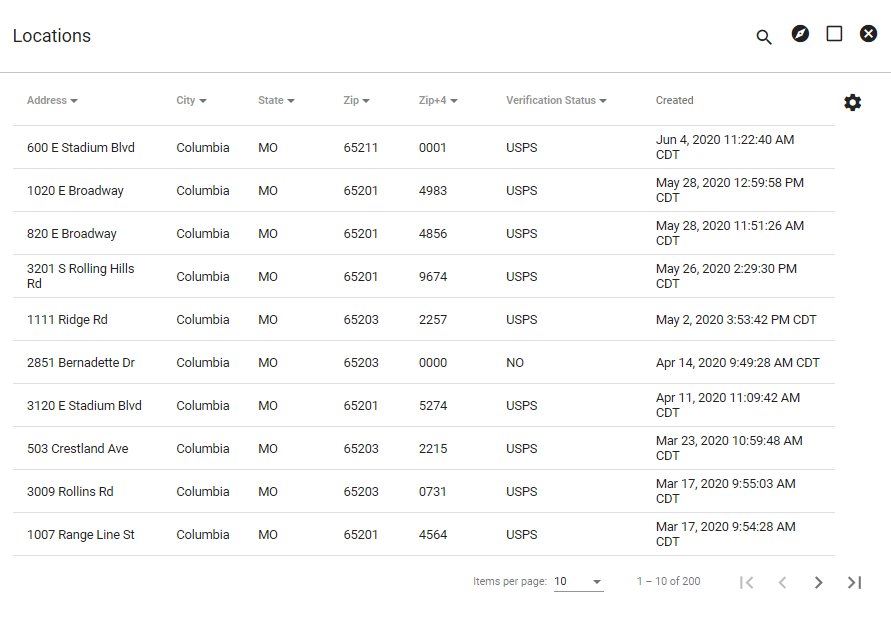
Locations
Vision is location based and the foundation for every piece in the system. An address only exists once and it does not allow duplicates such as ‘Rd and Road’. All other resources are layered on top of a specific location. Vision utilizes Google and the United States Postal Service database to verify exact rooftop address locations. It is important to know where service is being delivered to ensure accurate tax reporting and regulatory compliance. On the Locations page administrators are allowed to view, edit, and add service addresses stored within your database.
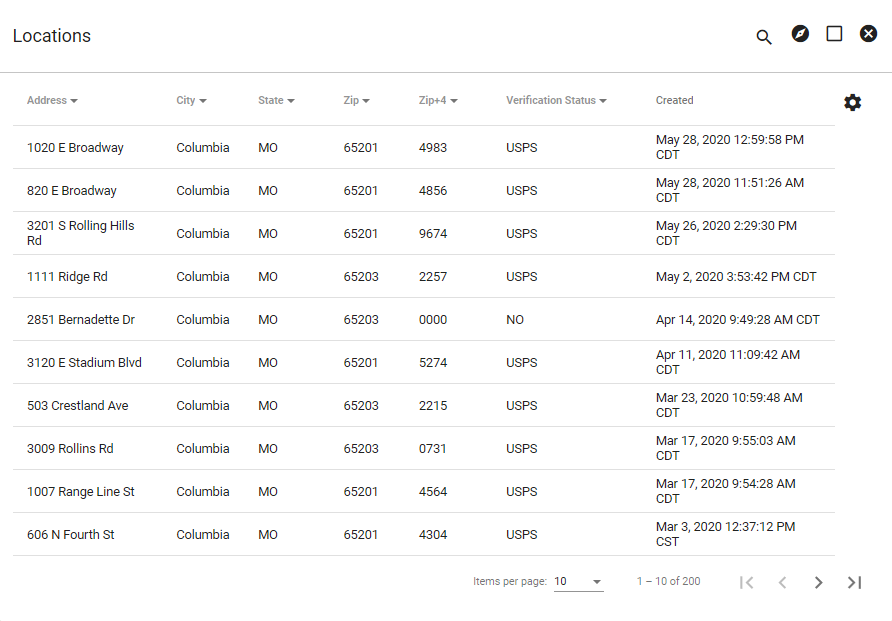
Locations are automatically sorted by the created date to show the most recent additions first.
The locations page automatically displays the 200 most recently added locations in the system.
Click on a column heading to change the order in which the information is sorted. Select the 
Click the 

View Location
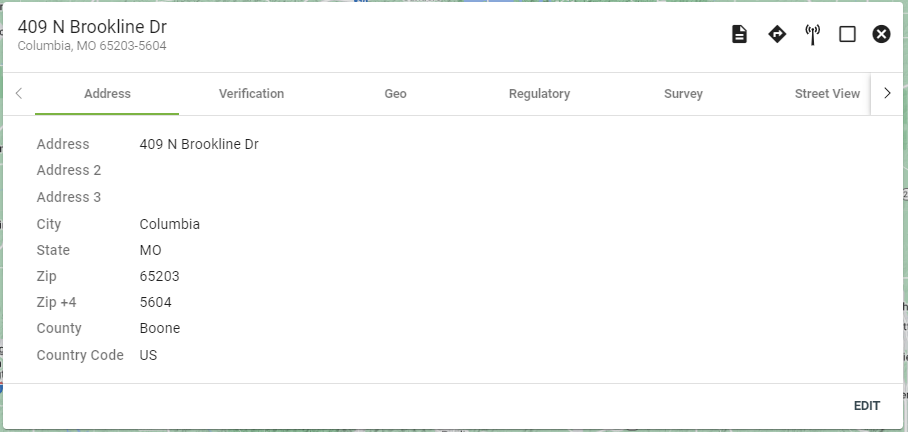
Click on a Location to view more information:
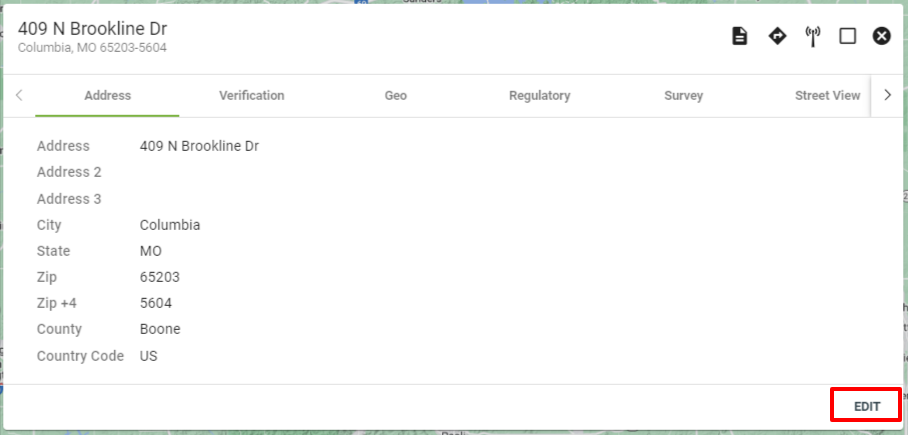
- Address - The location's physical address
- Verification - USPS verification information
- Geo - Geographical information (latitude, longitude, etc.)
- Regulatory - Census information used in 477 reporting
- Survey - Google Maps view
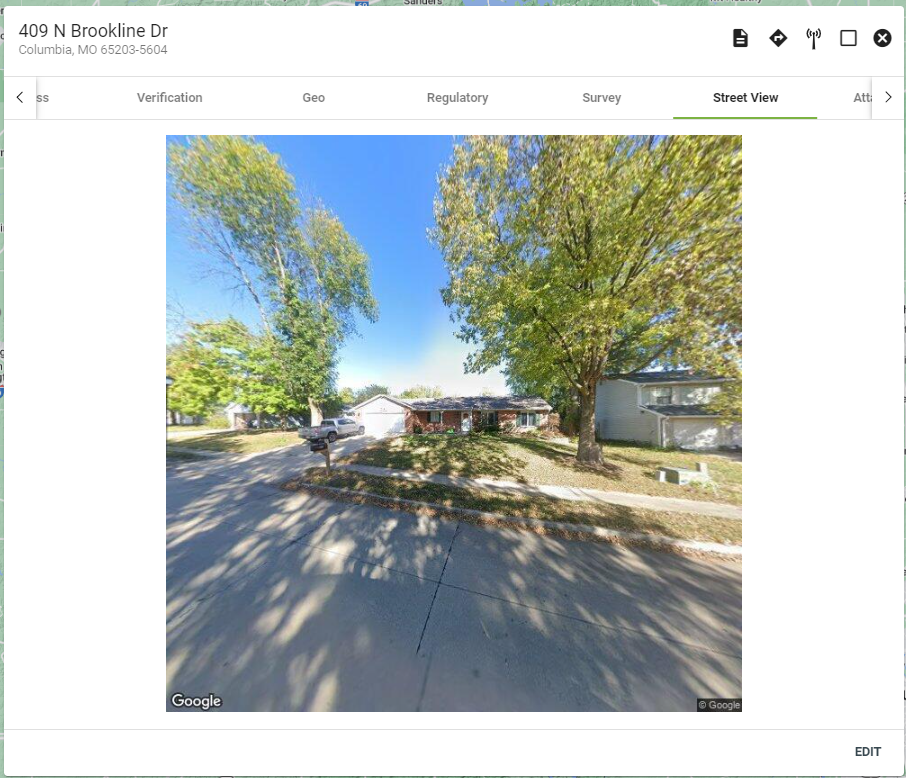
- Street View - Google street view
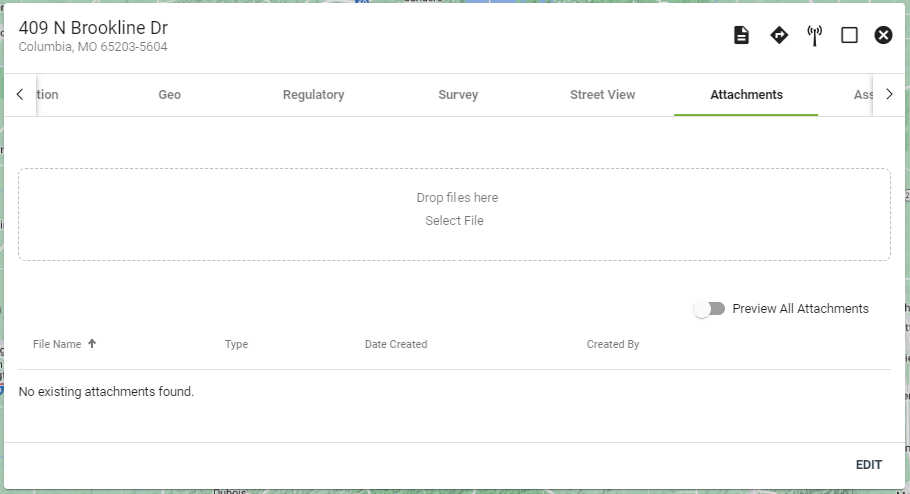
- Attachments - All associated attachment with this location
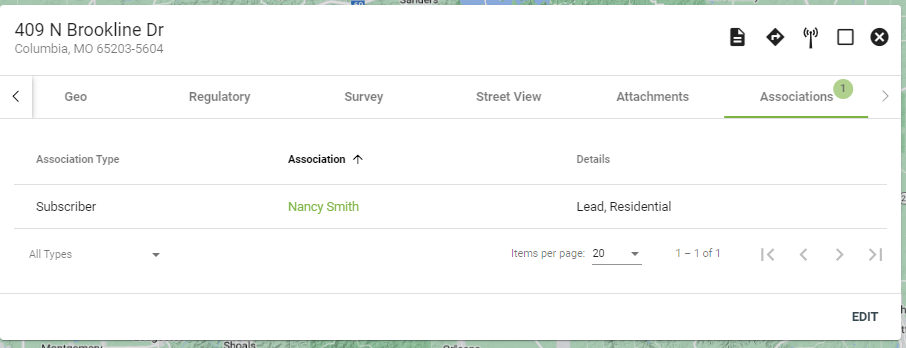
- Associations - All associated subscribers with this location
In the upper right you can view Tax Preview Tool ![]() , Directions/Drive Time
, Directions/Drive Time 

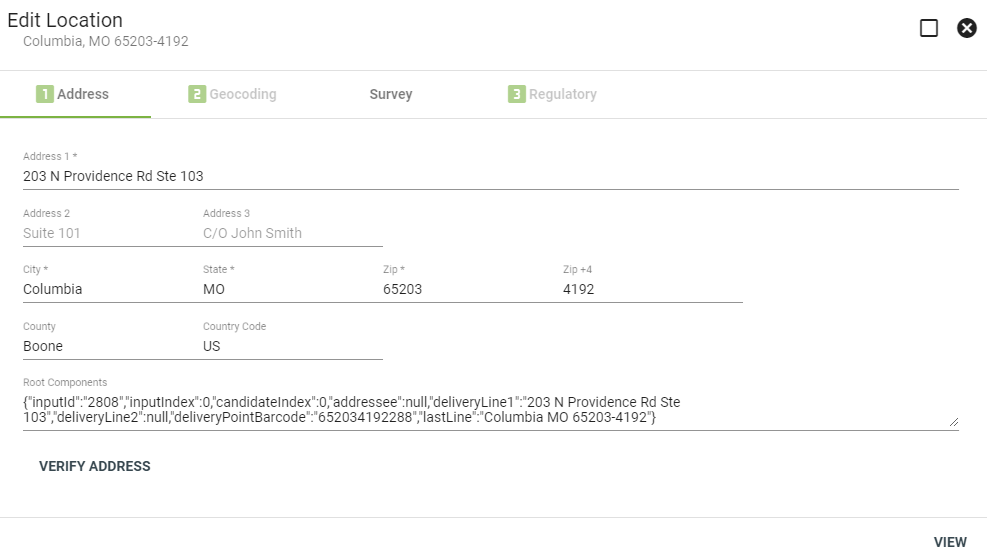
View the address details under the Address tab.
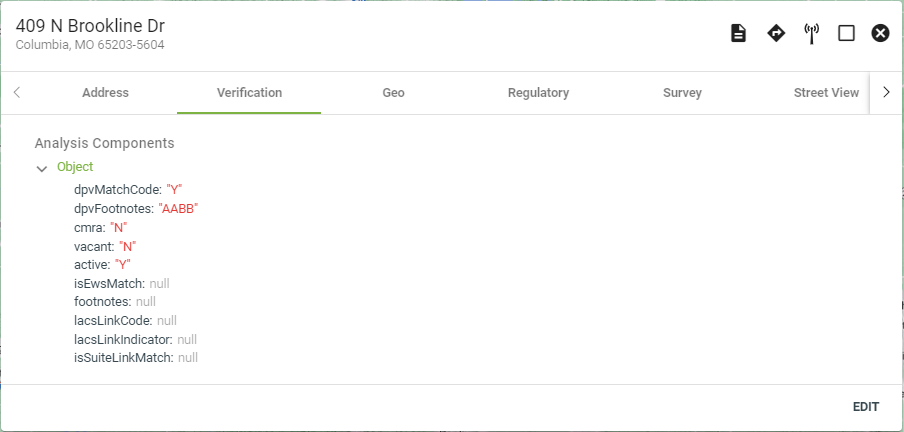
The Verification tab provides the address verification details from USPS.
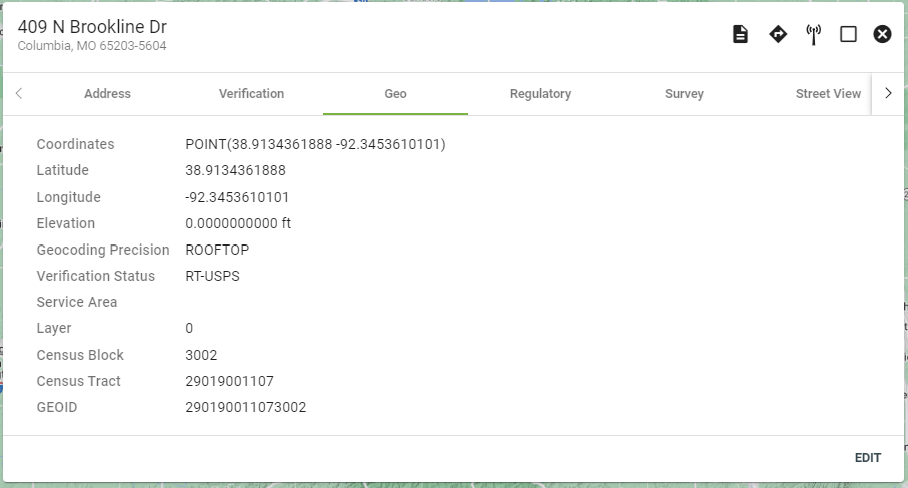
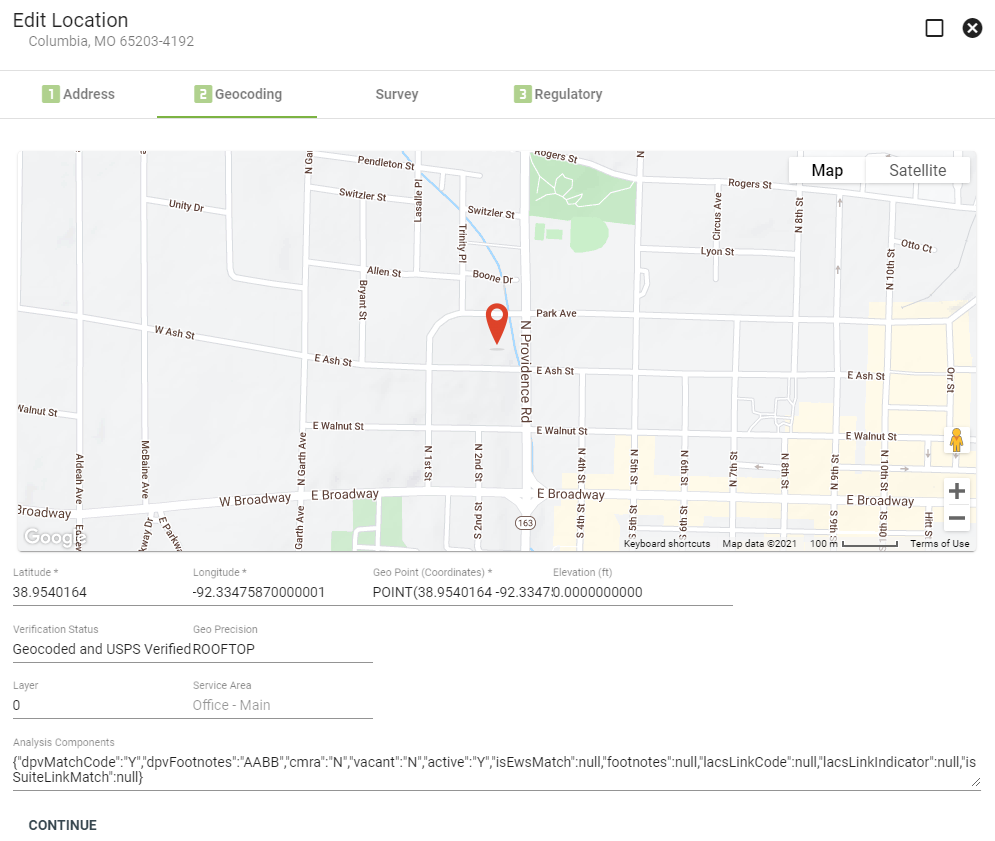
View the specific geolocation of an address, including the latitude, longitude and elevation.
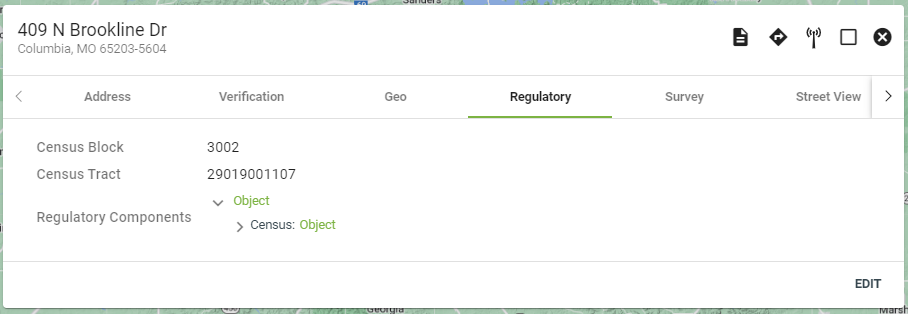
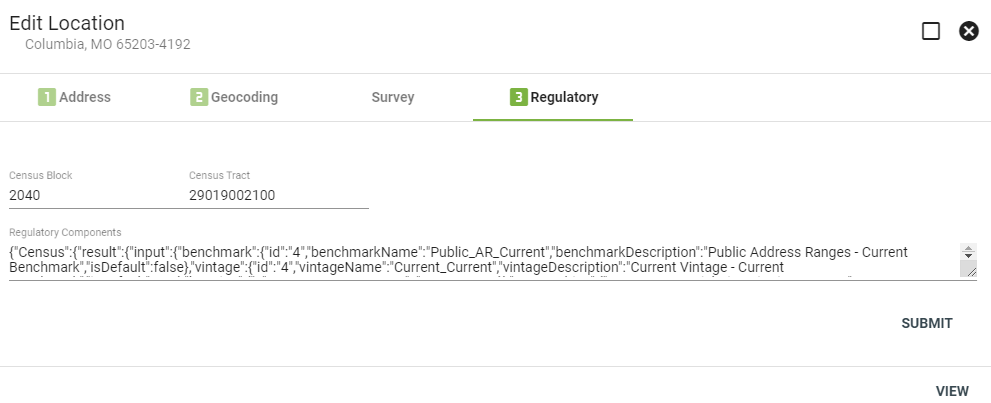
The Regulatory tab provides census data details, including the census block and tract.
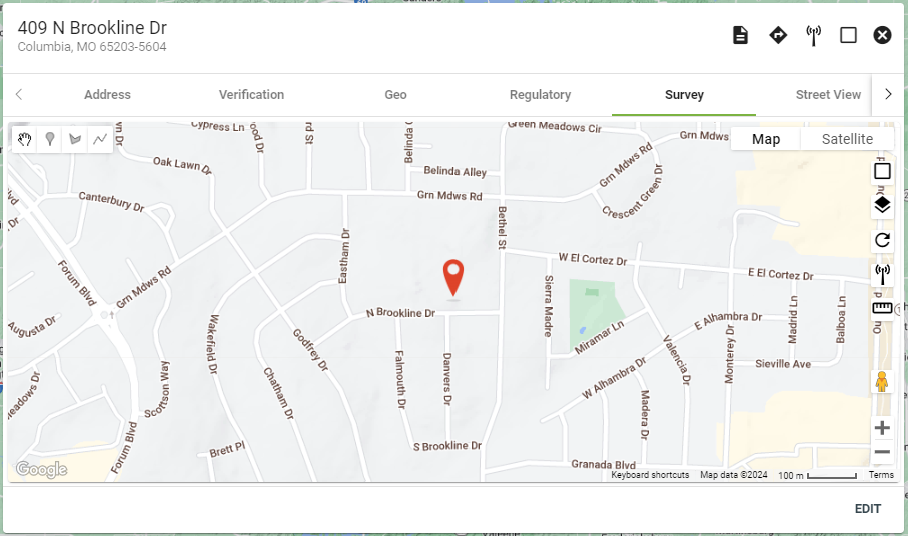
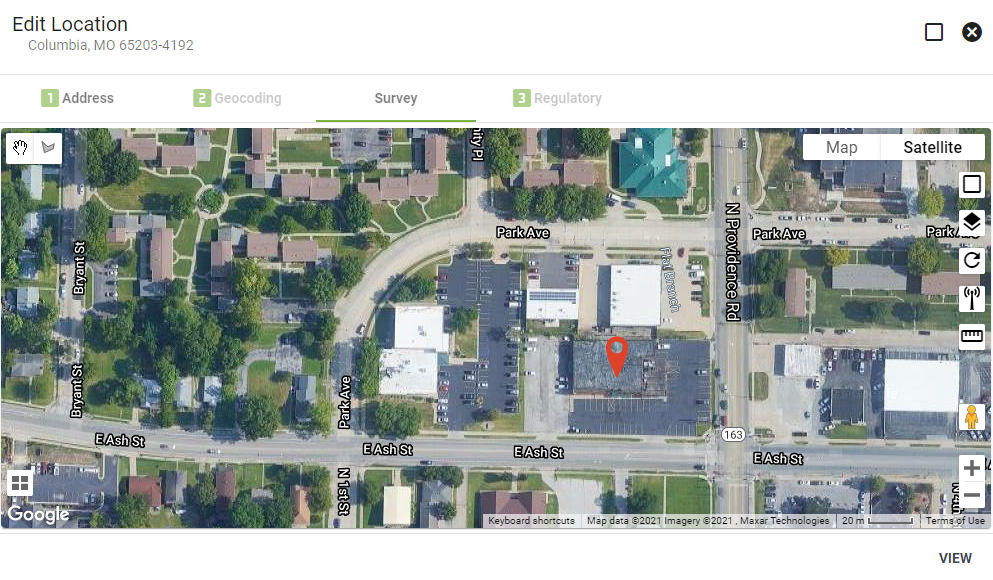
View the address location on a map under the Survey tab.
Click on the map display tools on the righthand side of the map to change the data that is displayed on the map, like the service areas. Click and drag the pin to change the specific geo-coordinates of the location.
View the street view of an address.
View any attachments associated with an address, like photos of existing equipment.
The Associations tab lists any hardware, subscribers or warehouses that are associated with the specific location.
Add an association on the desired hardware, subscriber or warehouse page.
Edit Location
Click EDIT in the lower righthand corner to make changes to a location.
Click on the Satellite view to move the location pin to the rooftop of the address. This can be a helpful tool to utilize if the address as entered is not actually dropping a pin on the appropriate rooftop.
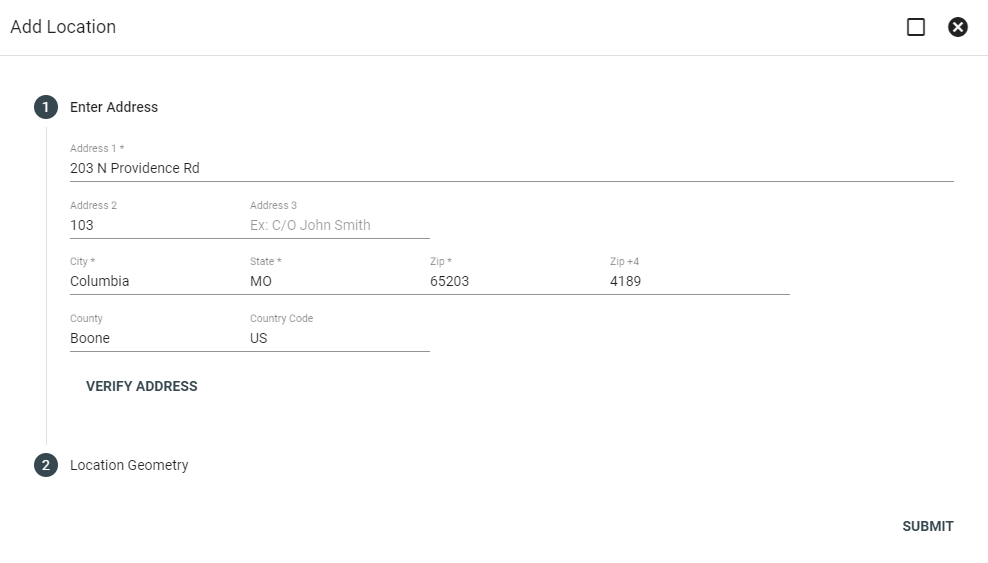
Make changes to a location's details, then click VERIFY ADDRESS.
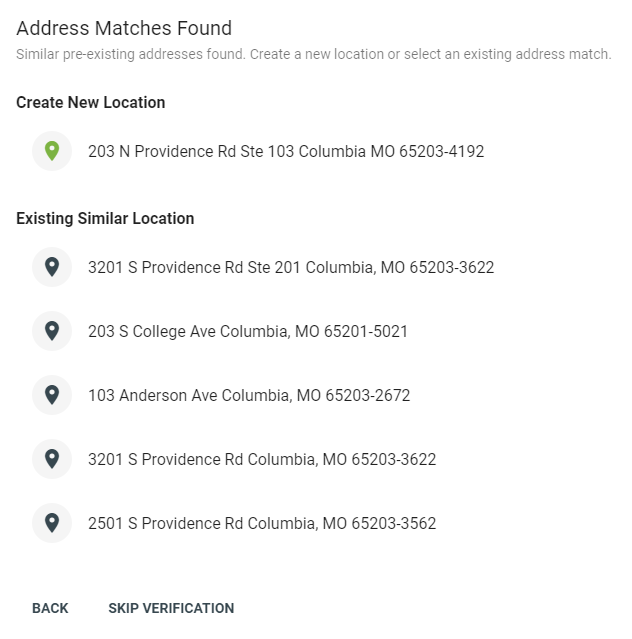
Create a new location in the system and select the address as entered, or choose from an existing location.
Clicking SKIP VERIFICATION will allow you to enter the address into the system even if there are no new or pre-existing matches found. This can be useful when adding locations that do not yet exist in USPS records, like a new construction subdivision.

The Geocoding tab allows you to view and make changes to the specific geo-coordinates of a location.
The Survey tab is a helpful tool to use to ensure the entered address actually corresponds to the correct rooftop. Click and drag the pin as needed onto the correct rooftop.
Make changes to the map view by toggling between map or satellite view in the upper righthand corner. Satellite view is particularly helpful to use for determining rooftop pin placement.

Click on the Regulatory tab to make changes to the census block and tract data for that specific location.
Click SUBMIT to save any changes.
Add Location
On the Locations admin page, click 
Vision will then check for similar pre-existing address within the system. Choose from this selection or choose to add a new address.
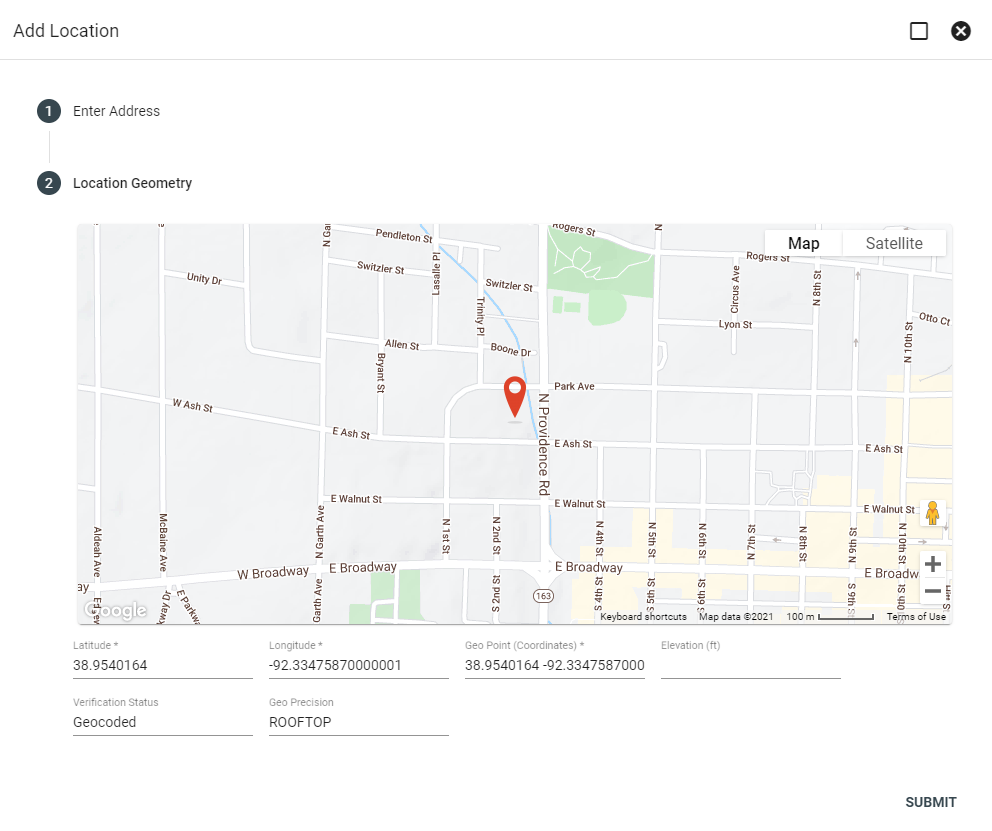
Now check the survey information. Drag the pin if necessary to reflect installation location. Use elevation for wireless services. When finished, click SUBMIT.
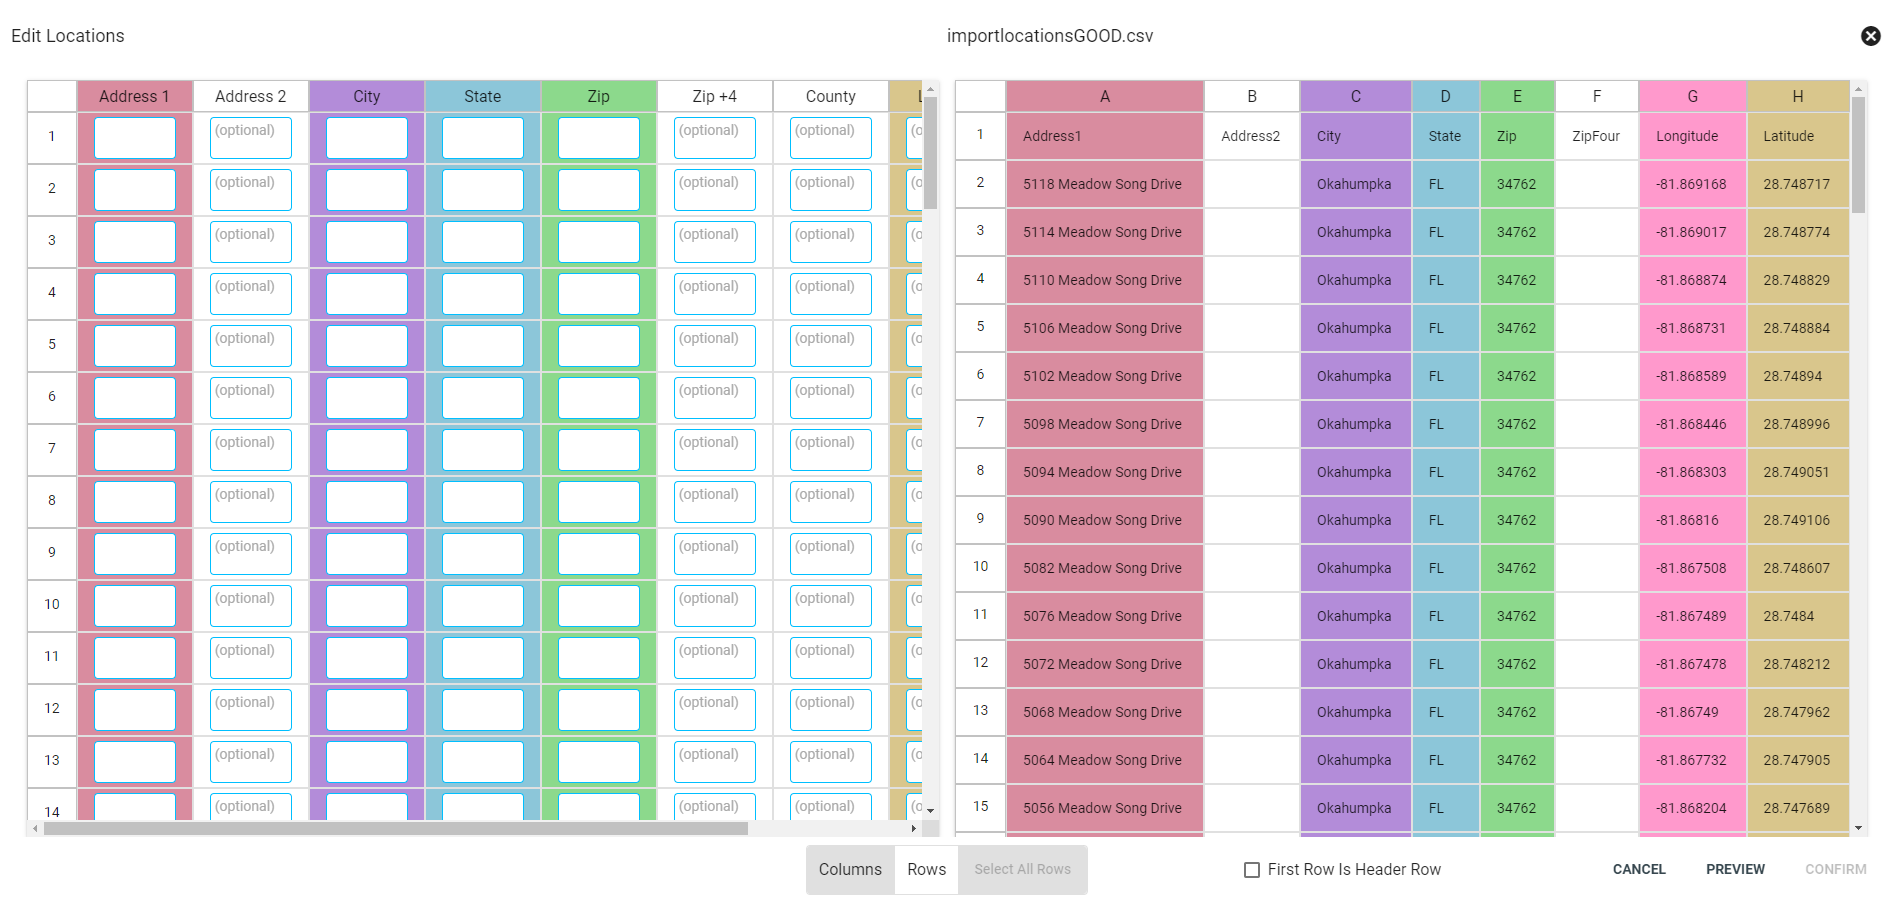
Import Locations from CSV File
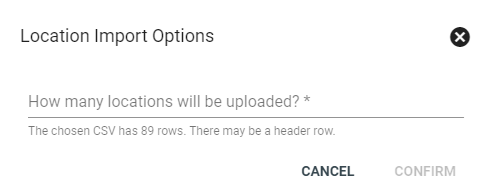
Click the  icon in the lower righthand corner of the locations page to upload a CSV attachment. Select the upload to import, then click CONFIRM.
Be sure the file name does not contain any periods(.). Underscores (_) are compatible.
Input the number of locations that will be imported, then click CONFIRM.
The information on the righthand side is the data being imported from the CSV file, while the information on the lefthand side is the existing data.
Only columns with a blue border around the data boxes are able to have CSV data imported.
The data required for a CSV import is: address 1, city, state and zip code. Optional data that can be imported includes: address 2, zip + 4, county, longitude and latitude.
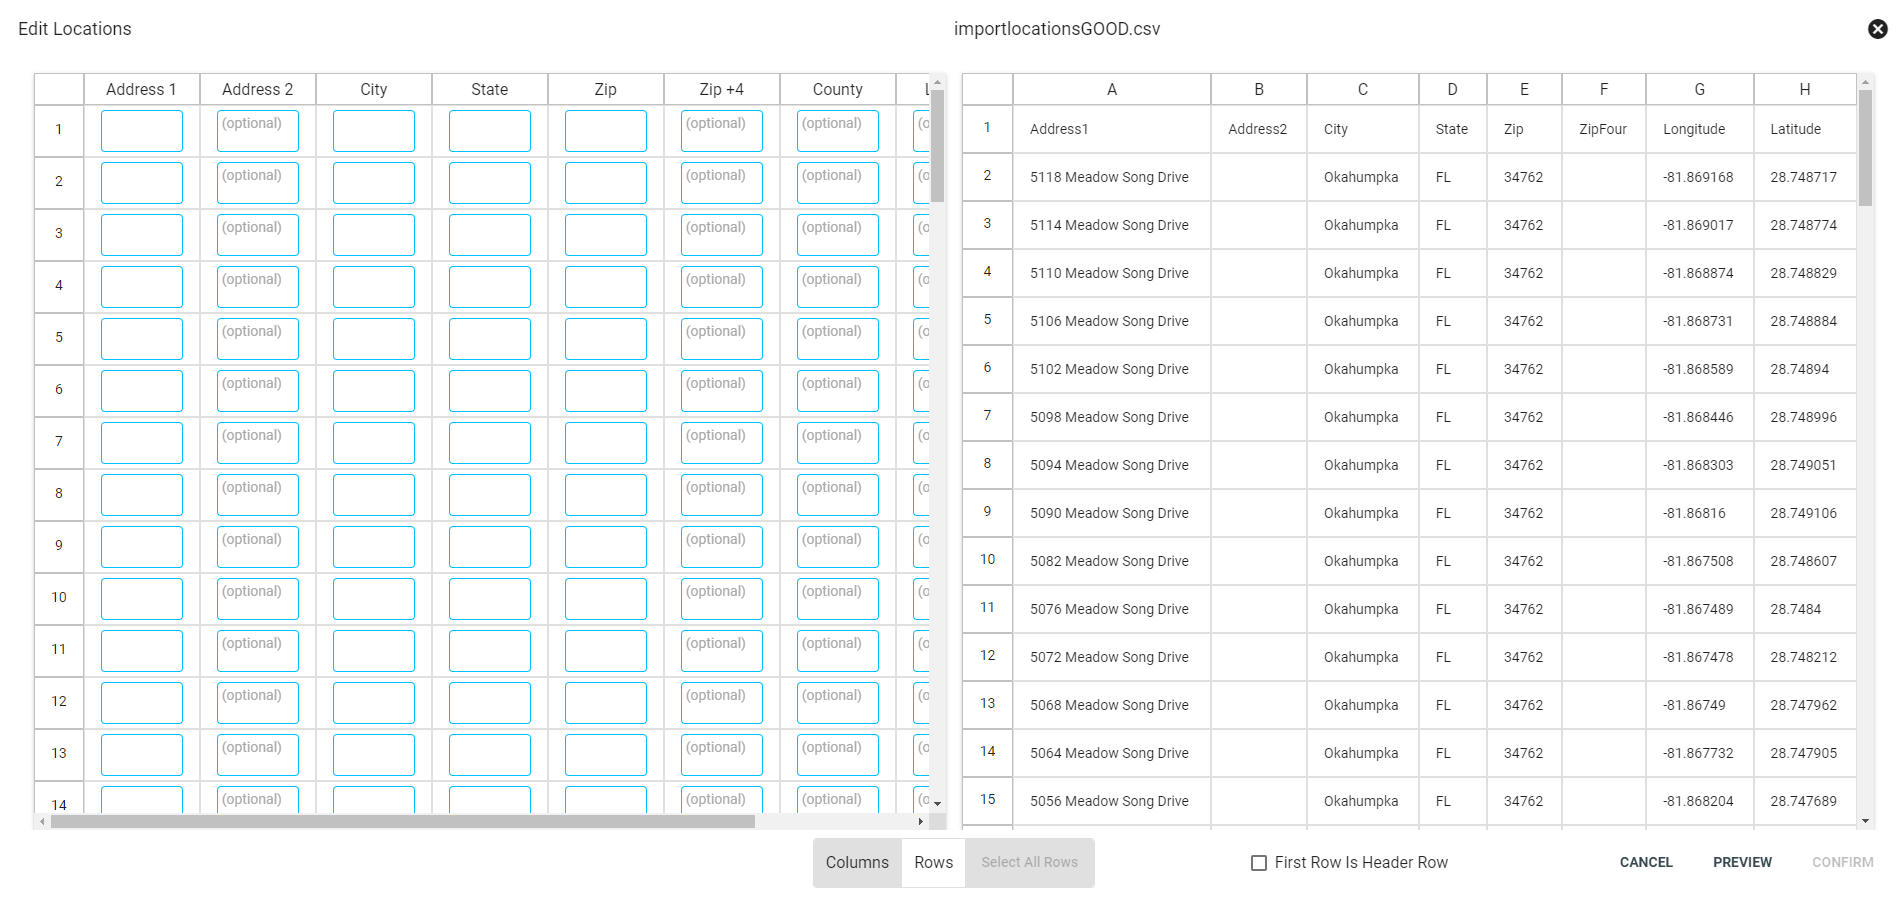
Click on a column on the lefthand side and then select the corresponding column on the righthand side. For example, click on the address column on the left, then select the address column on the right. Paired columns will display in the same color to indicate a match.
Change the data being selected by clicking on the column or row button at the bottom of the page.
Click CONFIRM in the lower righthand corner to save the selections.