Subscriber Management
Admin Permission Area
The Subscriber Management page within Admin Utilities allows administrators to add and edit the profile information used to categorize subscribers, as well as display important information on the Subscriber Account Page and during the Subscriber Onboarding.
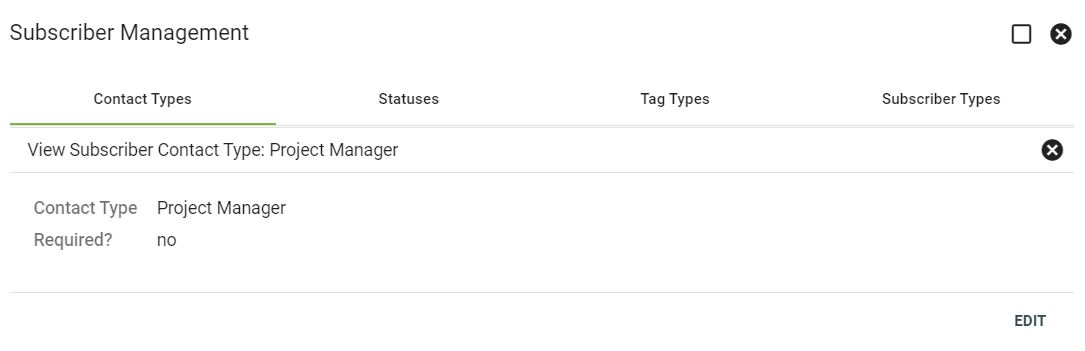
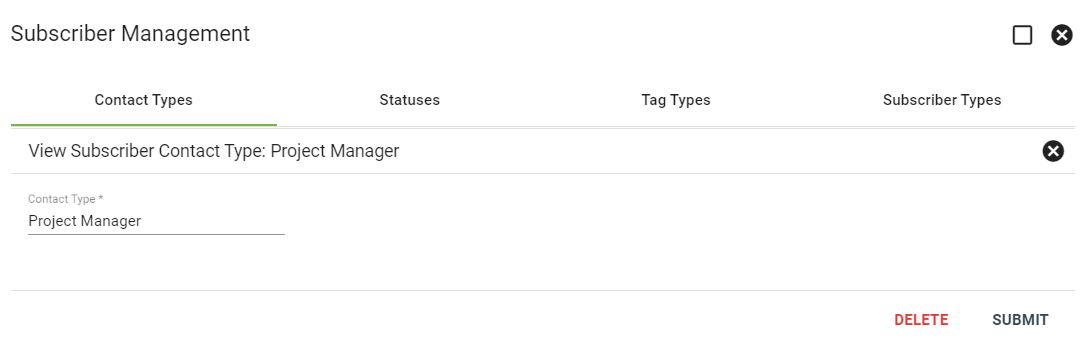
View Subscriber Contact Type
View the subscriber contact types and if the contact type is required. Primary and billing contacts are required by the system.
Click on the 

Click on a line item to view more details about the contact type. Select EDIT in the bottom righthand corner to make changes.
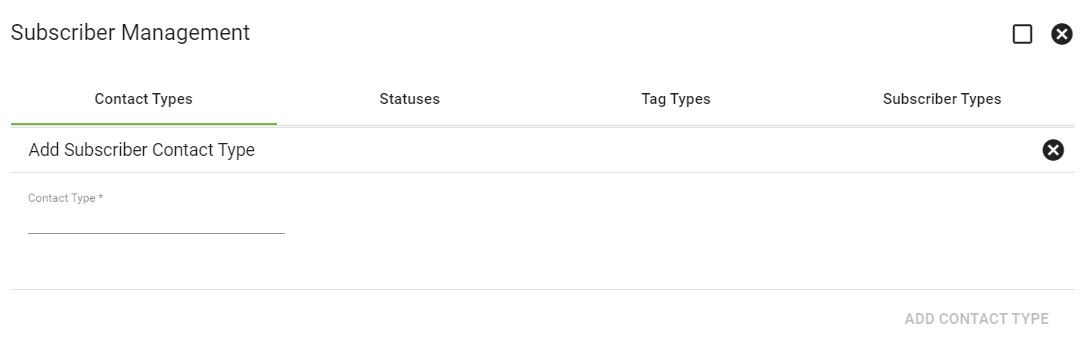
Add Contact Type
To add a new subscriber contact type, click ADD in the bottom righthand corner of the main contact type page. Input the new contact type title, then click ADD CONTACT TYPE in the bottom righthand corner.
Edit Contact Type
Click on the applicable contact type to make changes, then click EDIT in the bottom righthand corner.
Make any necessary changes to the contact type title, then click SUBMIT to save changes. Select DELETE to remove the contact type.
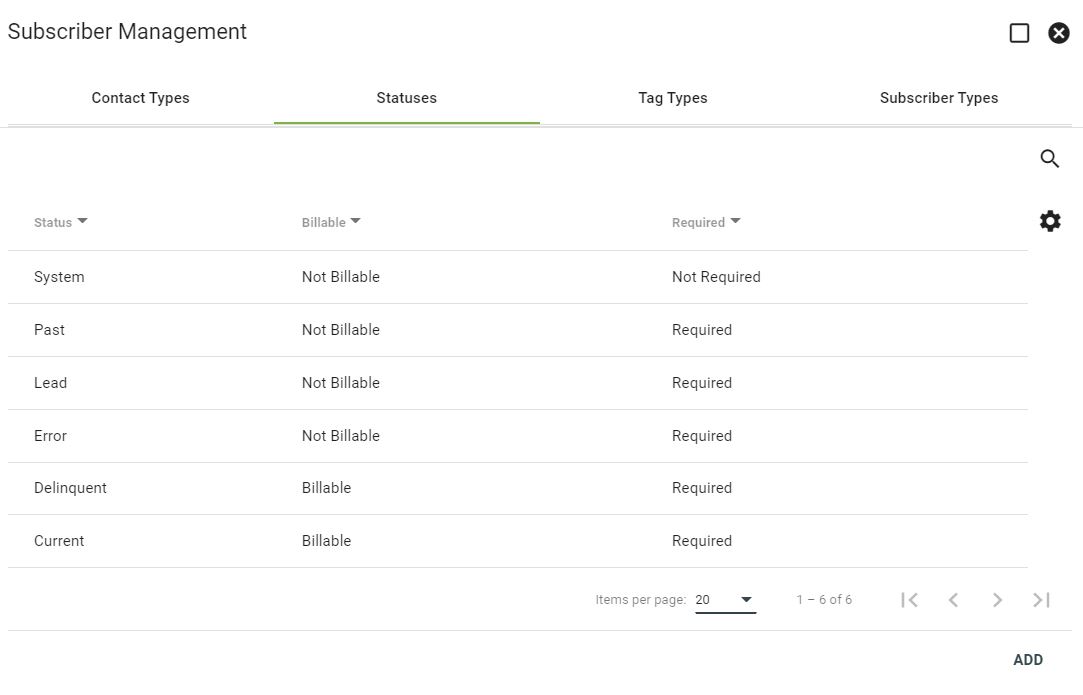
View Subscriber Statuses
Statuses help describe a subscriber's standing within the system.
View if a status is billable or required. Required statuses include: lead, current, delinquent, past and error.
Click on a status to view more details and make changes.
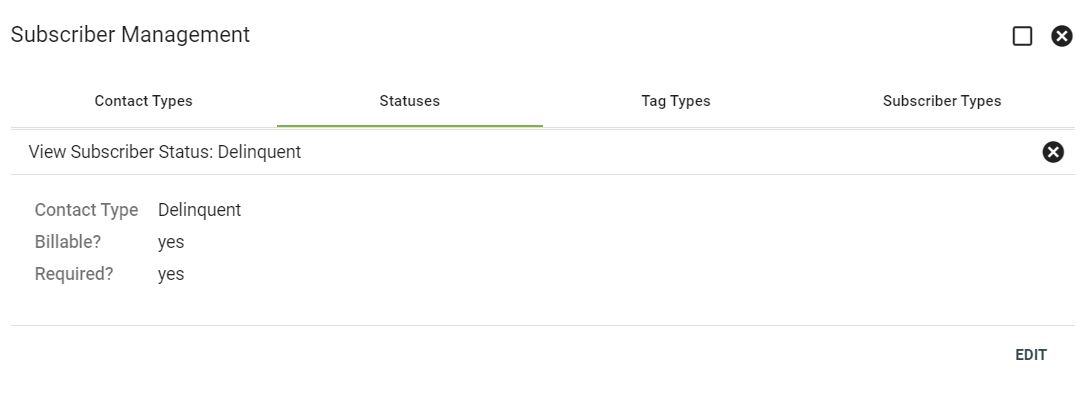
View details about a status, or click EDIT in the bottom righthand corner to make changes.
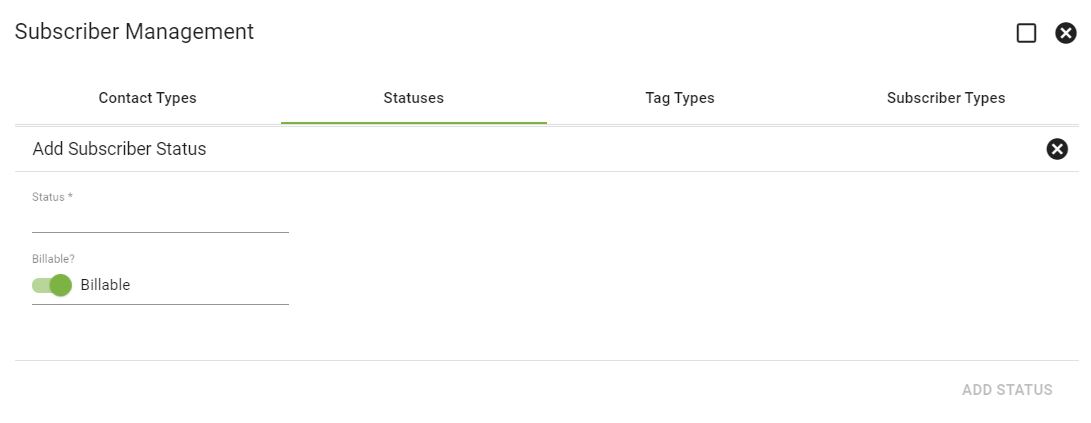
Add Status
To add a new subscriber status, click ADD in the bottom righthand corner of the status page. Input the new status and toggle to make the status billable.
Click ADD STATUS in the bottom righthand corner to save changes.
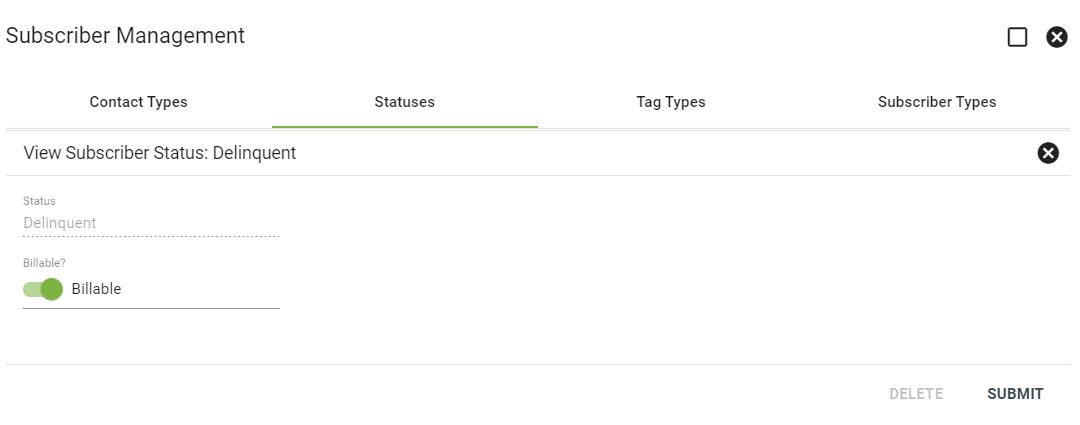
Edit Status
Click on the applicable status to make changes, then click EDIT in the bottom righthand corner.
Change the description or billable status, then select SUBMIT to save changes. Click DELETE to remove the status altogether.
View Subscriber Tag Types
Tags are a versatile tool for communicating notes for support employees to access during phone calls or on-site visits.
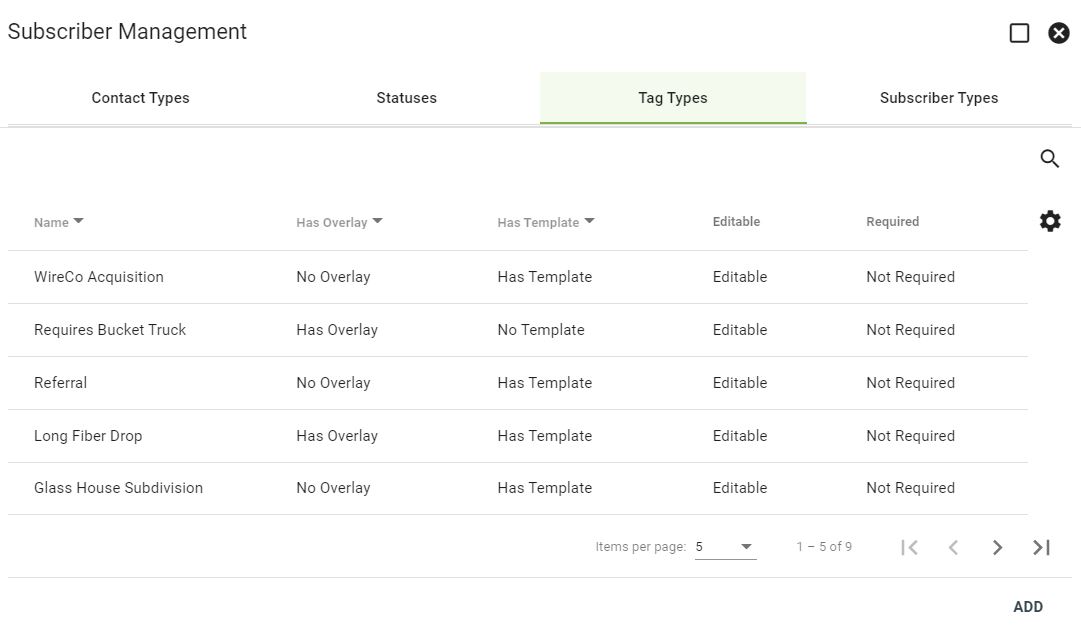
Click on a Tag Type to view more information. Select EDIT in the bottom righthand corner to make changes.

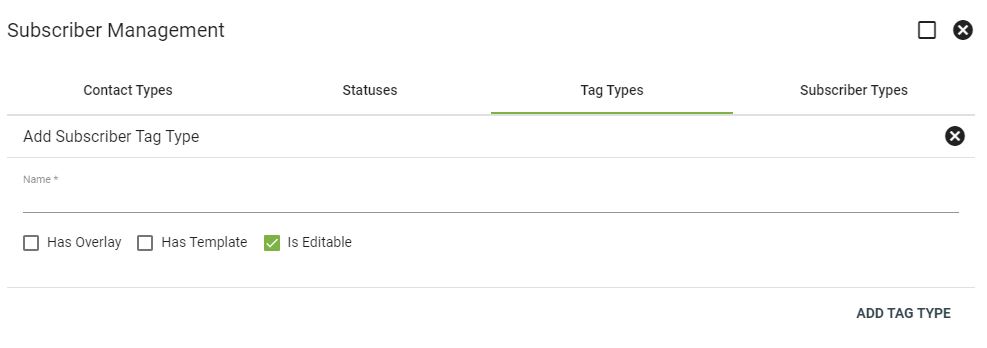
Add Tag Types
Click ADD in the bottom righthand corner of the main tag types page to add a new tag. Select the applicable checkboxes next to the options below.
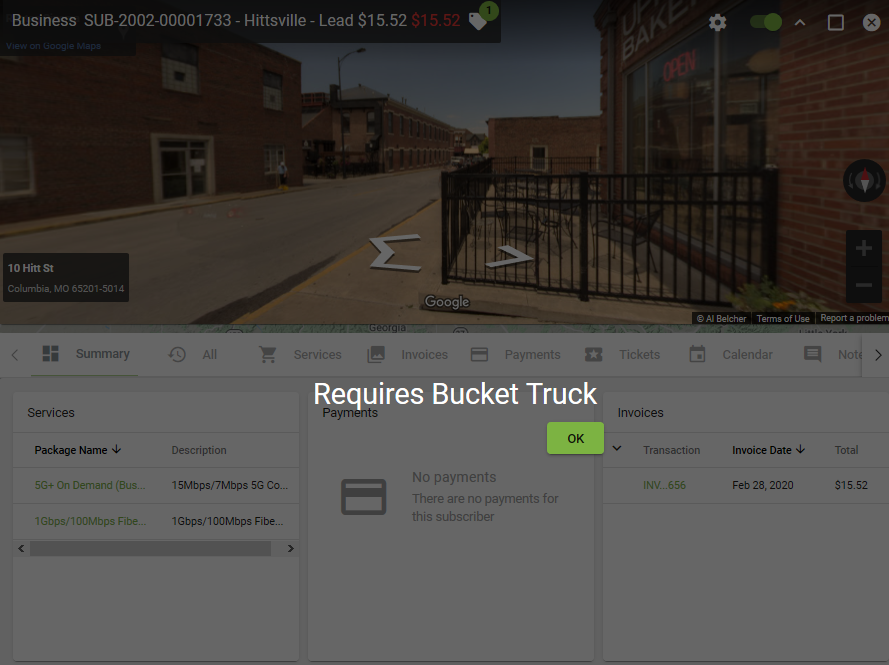
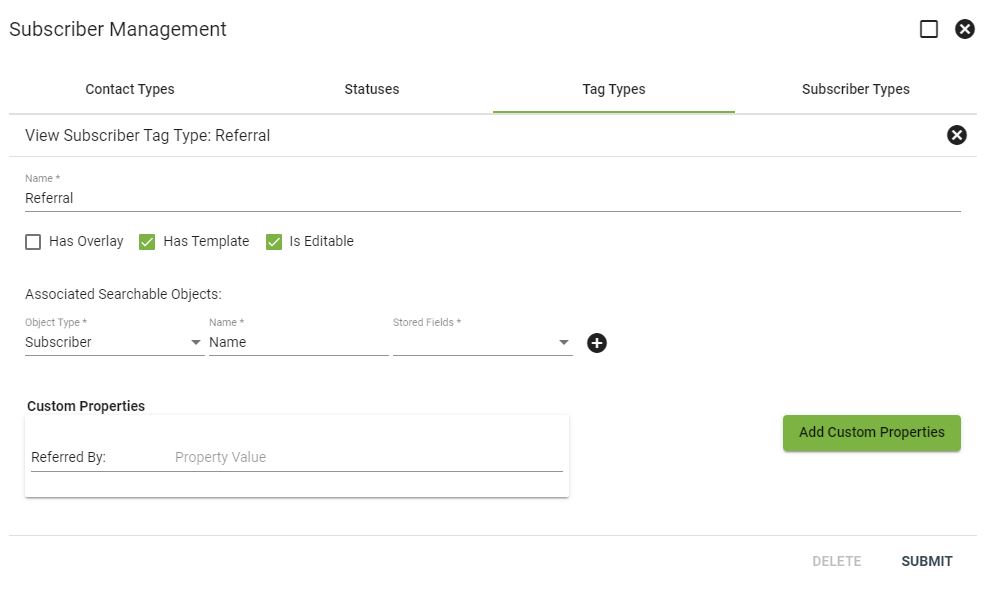
Has Overlay will allow the Tag to pop up anytime a user opens the Subscriber Account Page. Has Template allows you to add custom properties to the tag. For instance, the tag below has a custom property that allows a user to enter referral information. Is Editable allows the user to edit the tag upon adding. When finished, click ADD TAG TYPE.
Below is an example of an overlay on the Subscriber Account Page.
Edit Tag Types
Click EDIT in the bottom righthand corner of the applicable tag to make changes.
Make changes to the tag name and settings. Change how the tag can be searched under associated searchable objects. To add an associated searchable object, select the applicable descriptors from the dropdown menu. Click the 
Click on the Add Custom Properties button to add a new custom property. The custom properties field can be used to log information specific to a certain subscriber. For example,
Select SUBMIT to save, or DELETE to remove the tag.
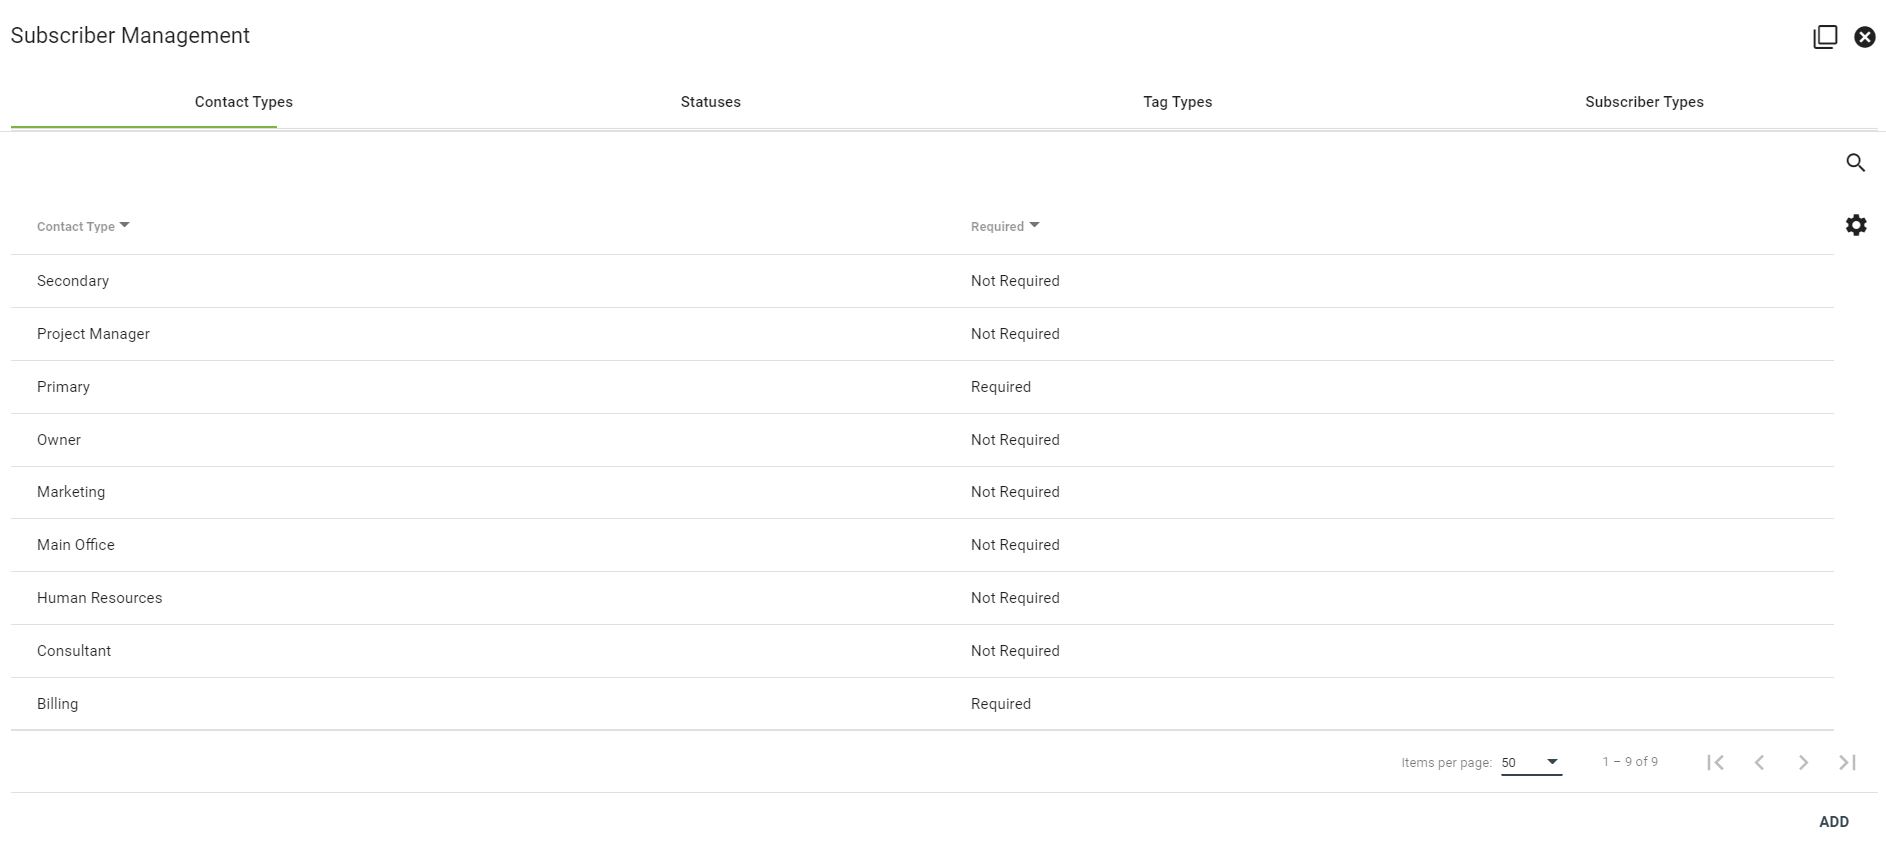
View Subscriber Types
View the types of subscribers and if they are required by the system. Construction, business and residential are all required subscriber types.
Click ADD in the bottom righthand corner to add a new subscriber type.
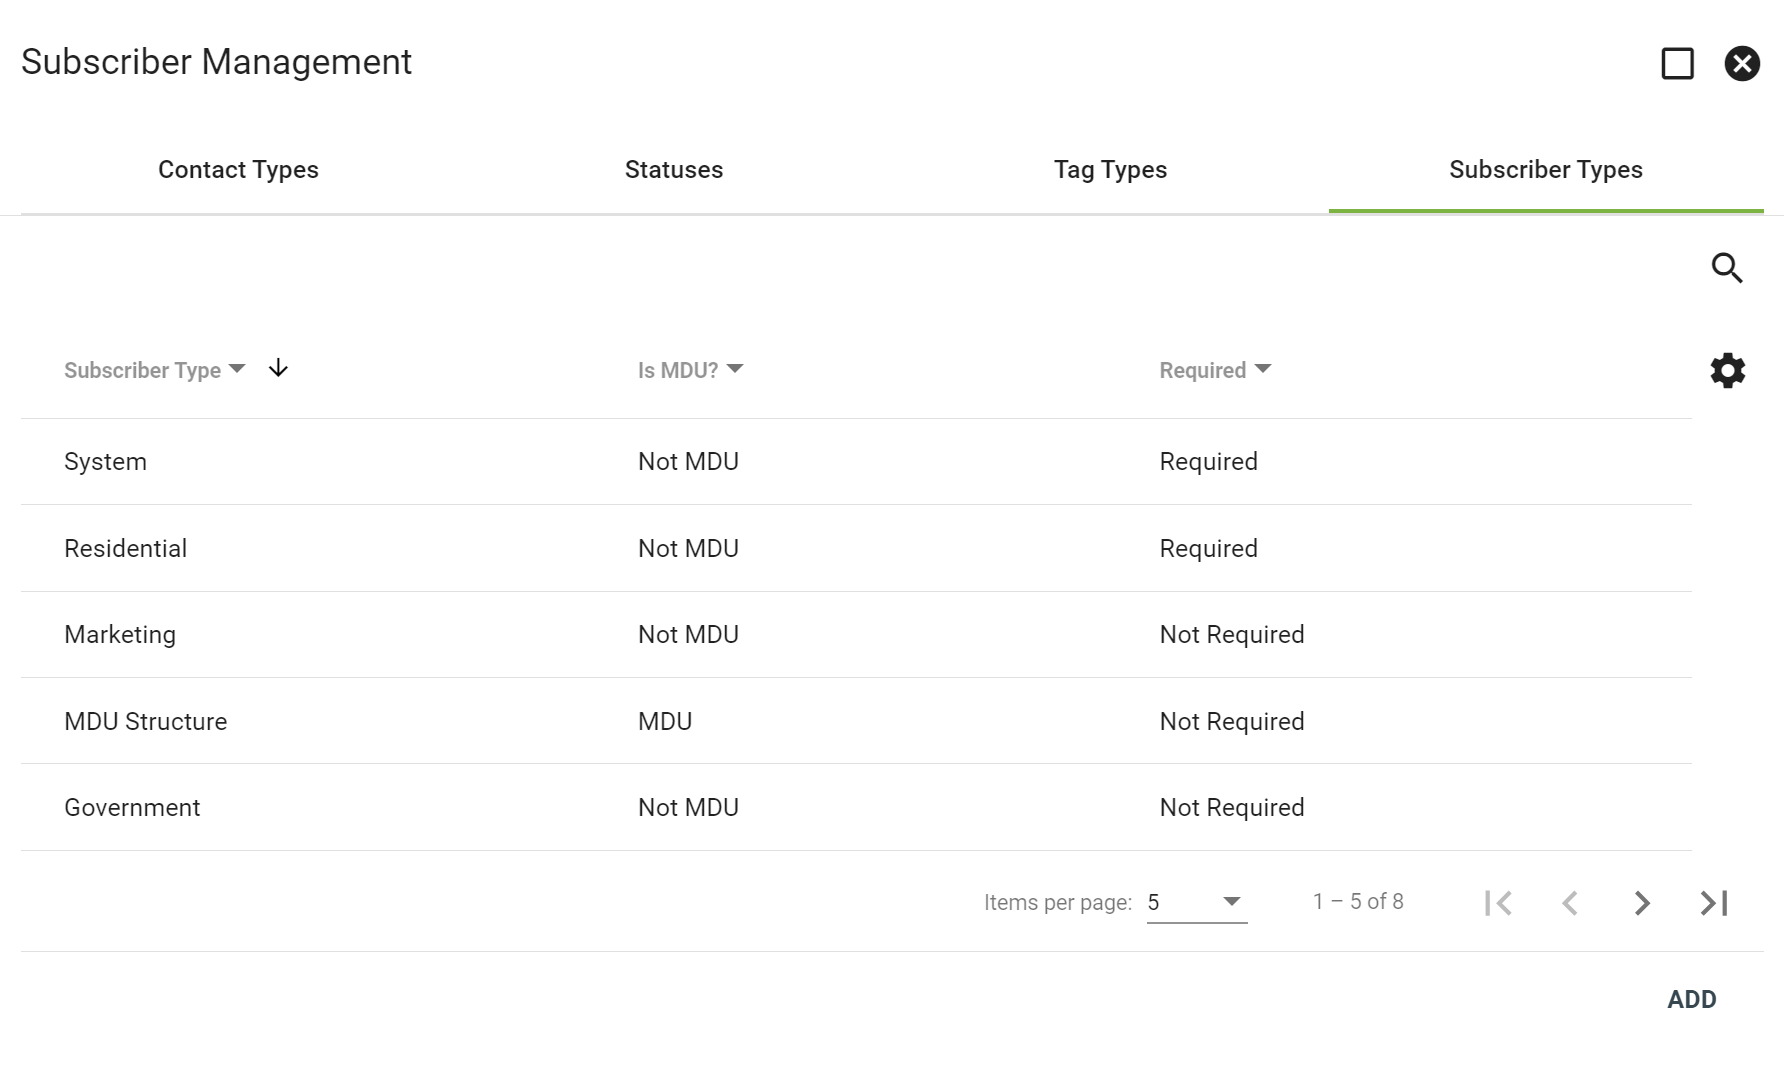
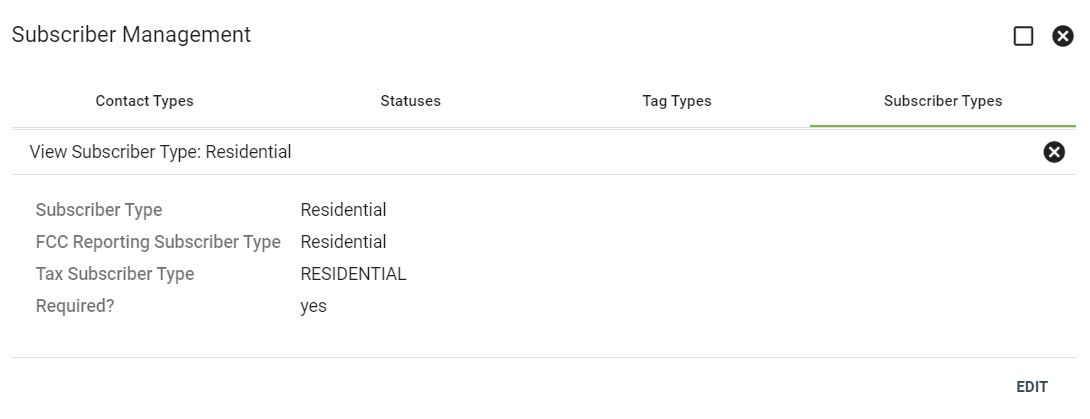
Click on a specific subscriber type to view more details, including if the subscriber type is required. Click EDIT in the bottom righthand corner to make changes.
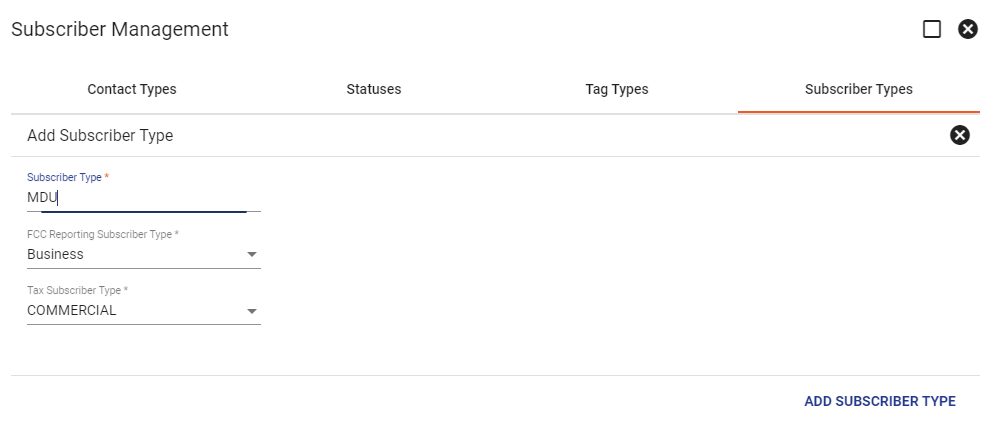
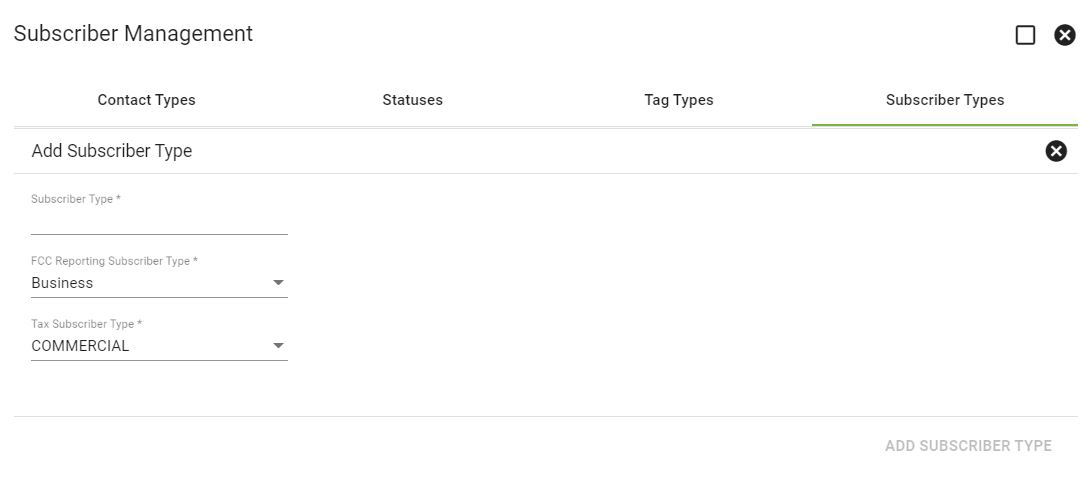
Add Types
Click ADD in the bottom righthand corner of the main subscriber type page to add a new subscriber type.
Add a subscriber name in the subscriber type field, then select the FCC reporting type and tax type from the dropdown menus.
Select ADD SUBSCRIBER TYPE to save the new subscriber type.
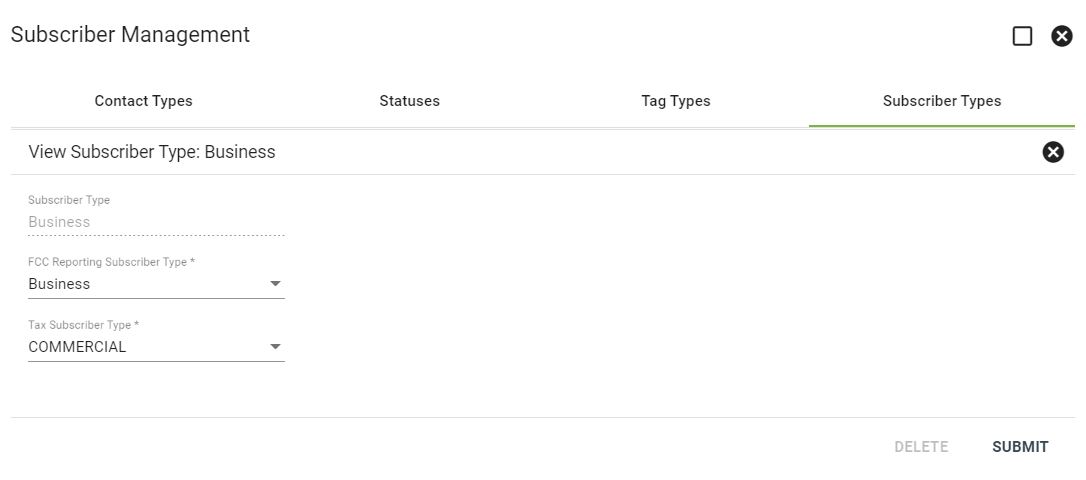
Edit Types
Click on a specific subscriber type to make changes, then select EDIT in the bottom righthand corner. The subscriber types of construction, business and residential are required and the type title is unable to be edited.
Change the description on subscriber types that are not required by the system. Make changes to the FCC reporting type (residential or business) and the tax subscriber type by selecting from the dropdown menu. Click SUBMIT to save or DELETE to delete the subscriber type.
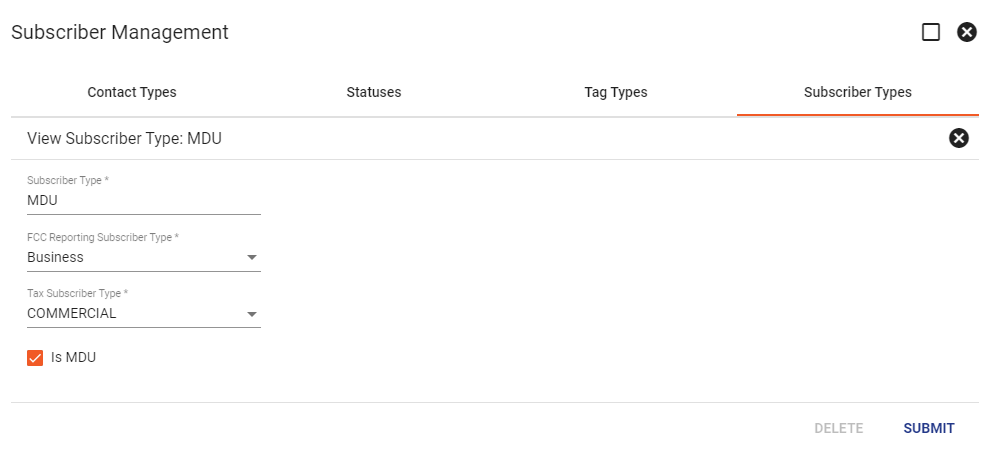
MDU Subscriber Type

Add MDU Subscriber Type
Adding a Subscriber type to the subscriber management page is two easy steps. First step is to click on the tab under subscriber management page labeled Subscriber Types, then select the ADD Button. The next step is to input the subscriber type name and select the FCC reporting subscriber type and tax subscriber type, then click ADD SUBSCRIBER TYPE To submit the new subscriber type.
You MUST then go into the type you just created and edit the following parameters to the bolded options:
FCC Reporting Subscriber Type: Business
Tax Subscriber Type: COMMERCIAL
Is MDU: CHECKED