Marketing Leads
Importing Marketing Leads
To create marketing leads requires the following from a potential subscriber; first and last name, service and mailing address, zip code, and Business name (if setting up a business account). If you do not have a first and last name for a subscriber but would like to send them information on services you can check out Adding Locations to get a step by step process on adding a subscribers location into Vision. Once the location is in Vision you can add that address to a Marketing Campaign to send promotional postcards, emails, sms texts. After compiling the information needed for to import a marketing lead the status of the subscriber needs to be set to "Lead" and the type of subscriber to "Marketing"
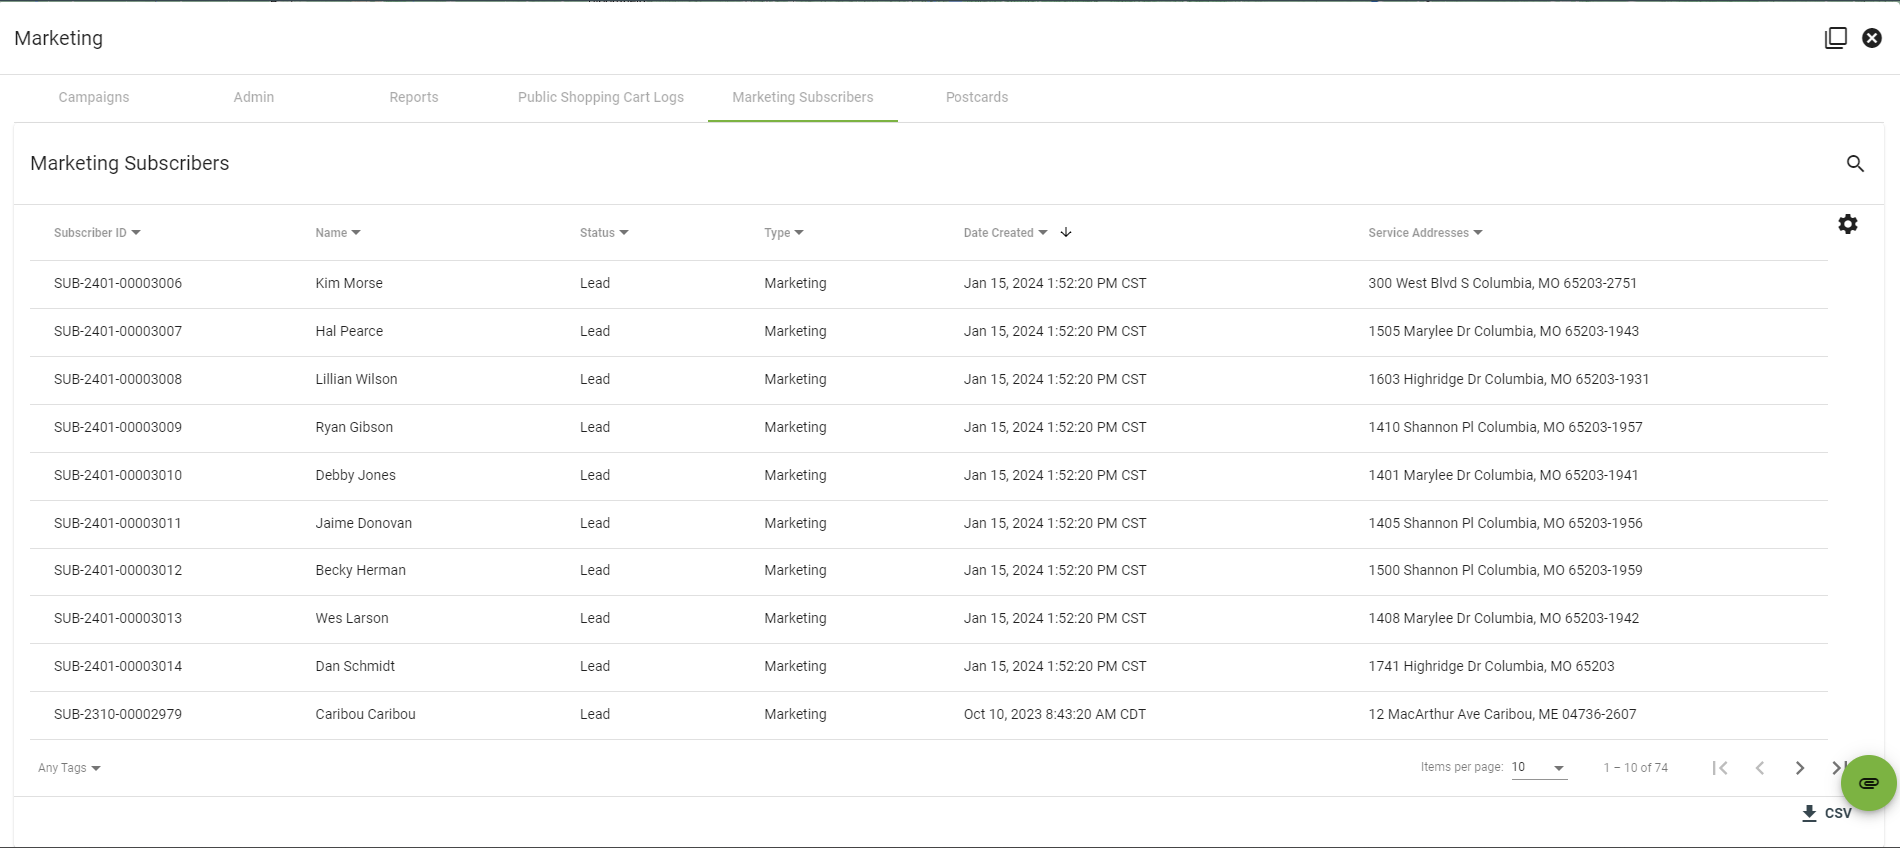
The quickest and easiest way to import marketing leads is with a CSV file through Operations then Marketing and in the Marketing click on "Marketing Subscribers" this will pull up all the subscribers that are labeled as marketing subscribers. To add your new list of subscribers click on the  paper clip icon in the lower right hand corner, a popup window will show where you can either drag and drop the CSV file or select file from your computer.
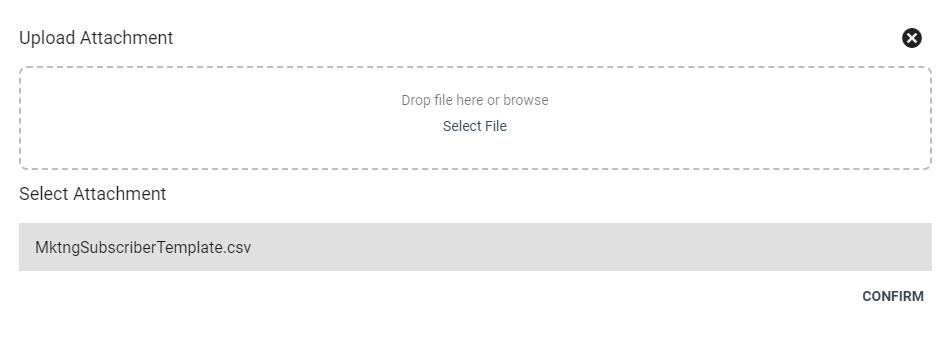
After uploading the CSV file the next step is to transform the correct information from the CSV file into Vision by allocating the columns and rows of the file. Once the appropriate columns and rows are designated Vision will be able to take each piece of data from the file and use that information to create a new subscriber with name, address, and zip code in the system that will be able to be added to a marketing campaingn to receive promotional documentation.
Building a Marketing Campaign
From the Marketing Campaign page, click the Floating Action Button 
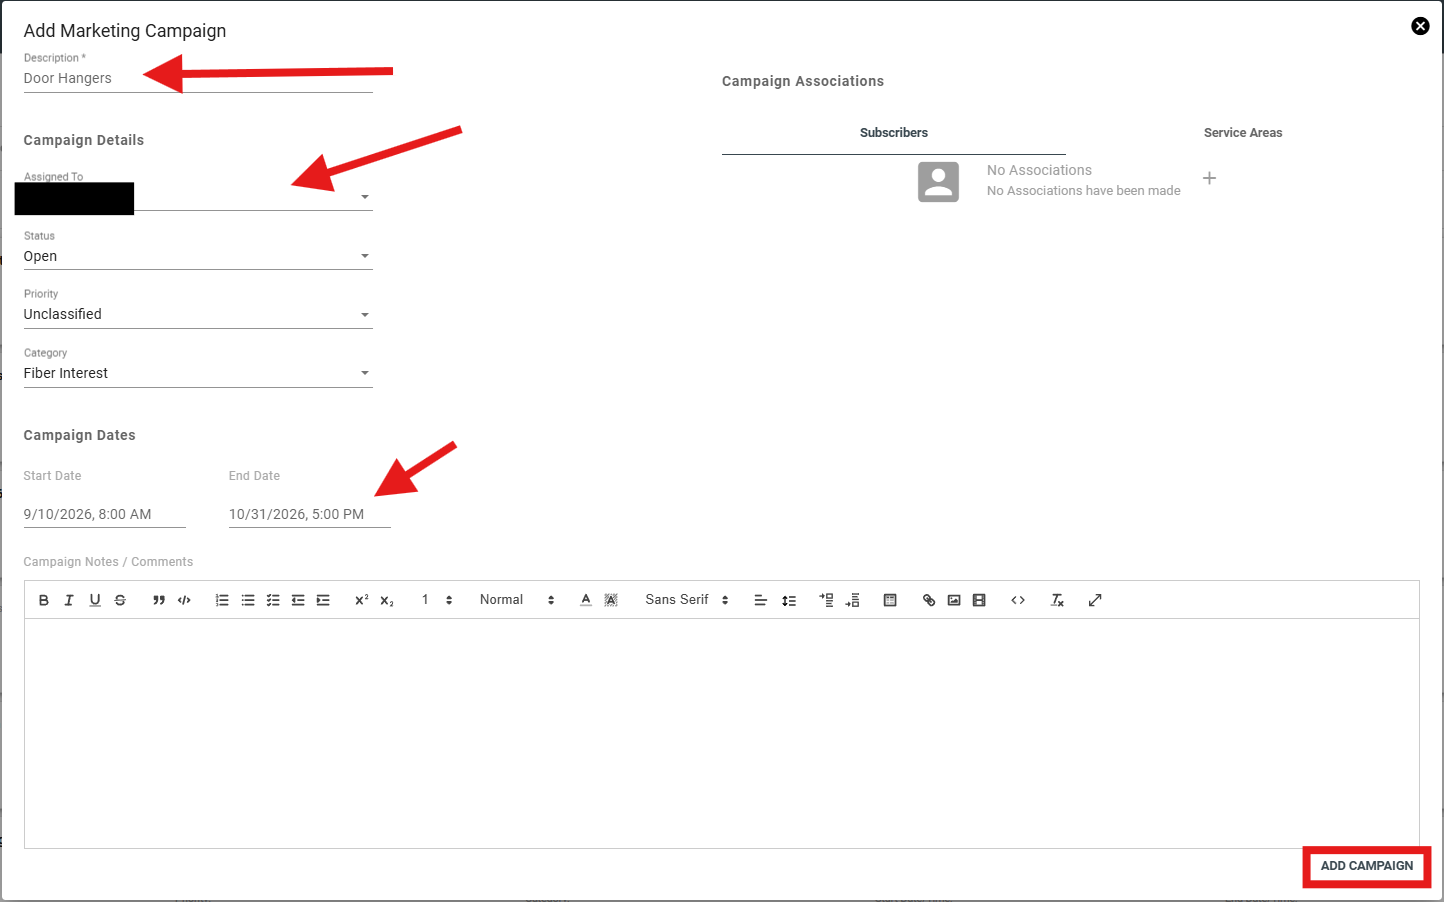
There are a couple of ways to add associations to a campaign. At the top right of the Add Marketing Campaign page, you will see Subscribers and Service Areas underneath Campaign Associations; these will allow you to add subscriber or service area associations by pressing the Add 
ADD SUBSCRIBER:
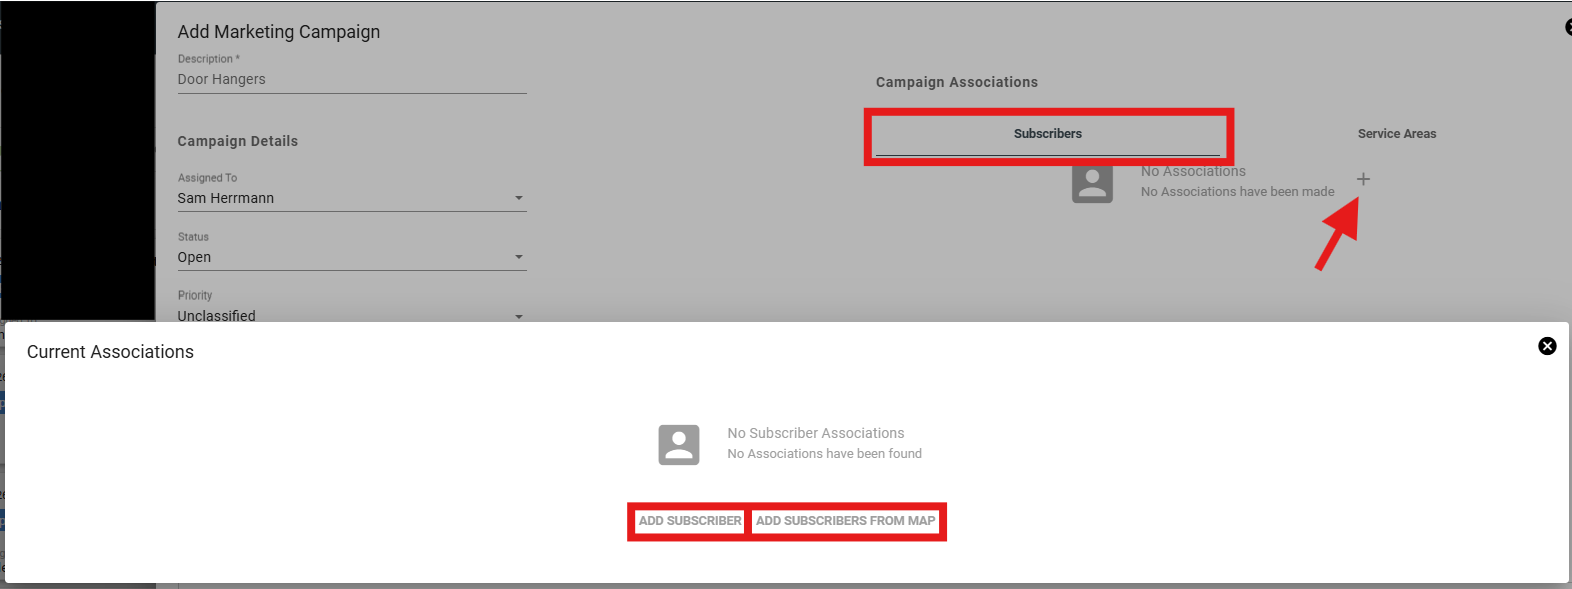
ADD SUBSCRIBER FROM MAP:
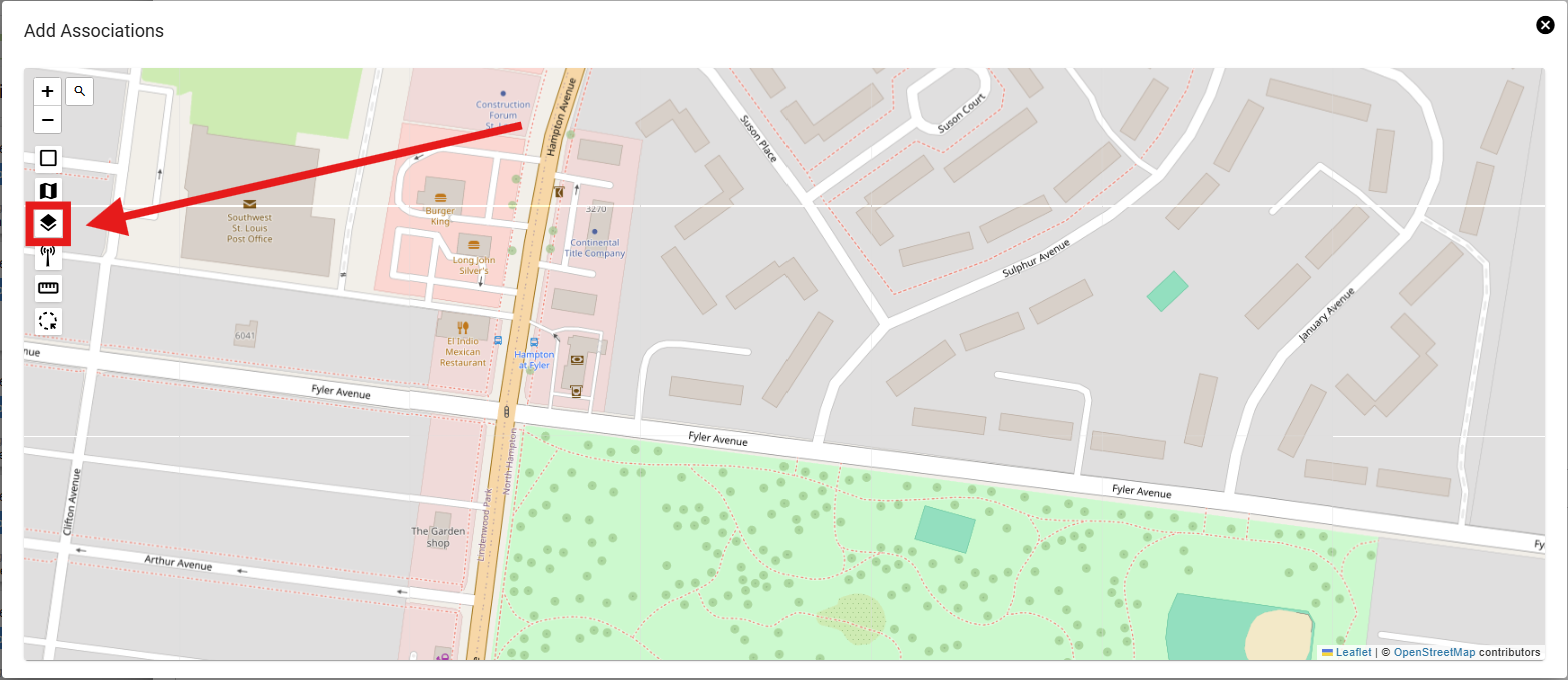
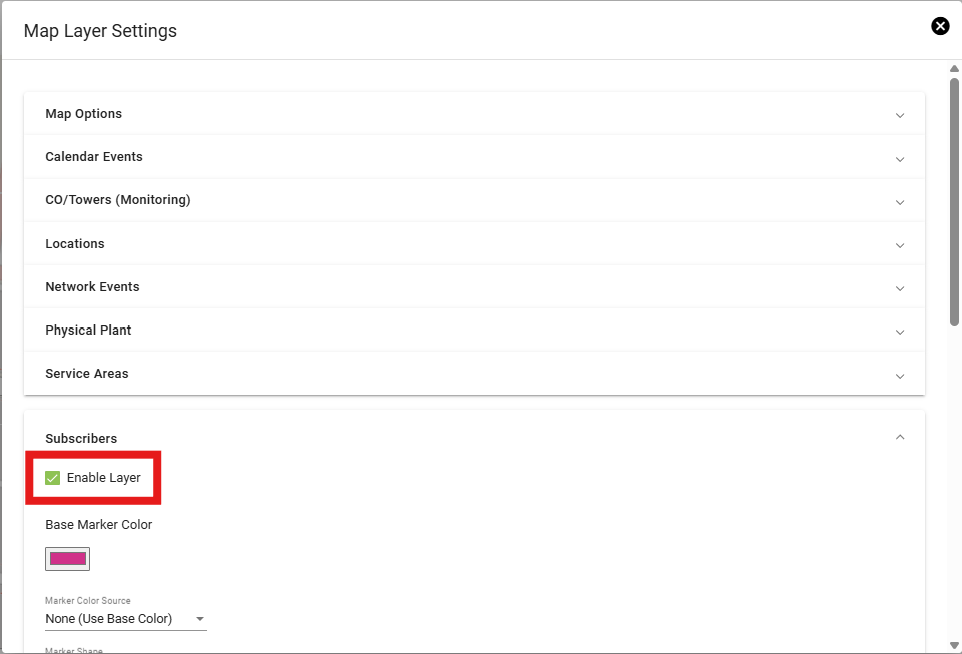
When you click on ADD SUBSCRIBERS FROM MAP, a pop-up of the map will appear, and you can then click on the toggle map layers icon 
The selected subscribers will display on the map.
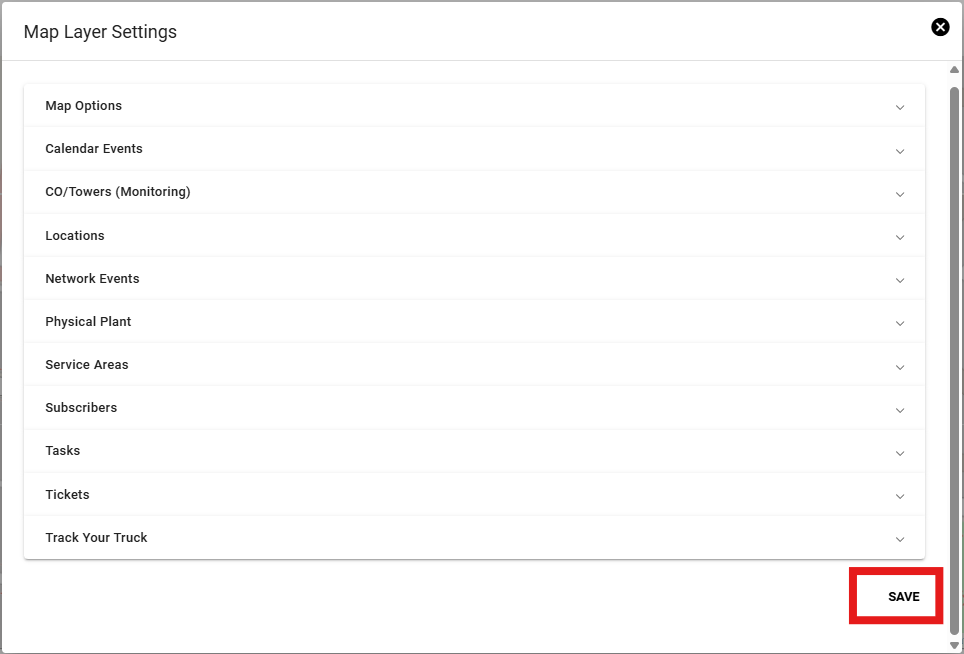
Use the Select Data Objects tool 
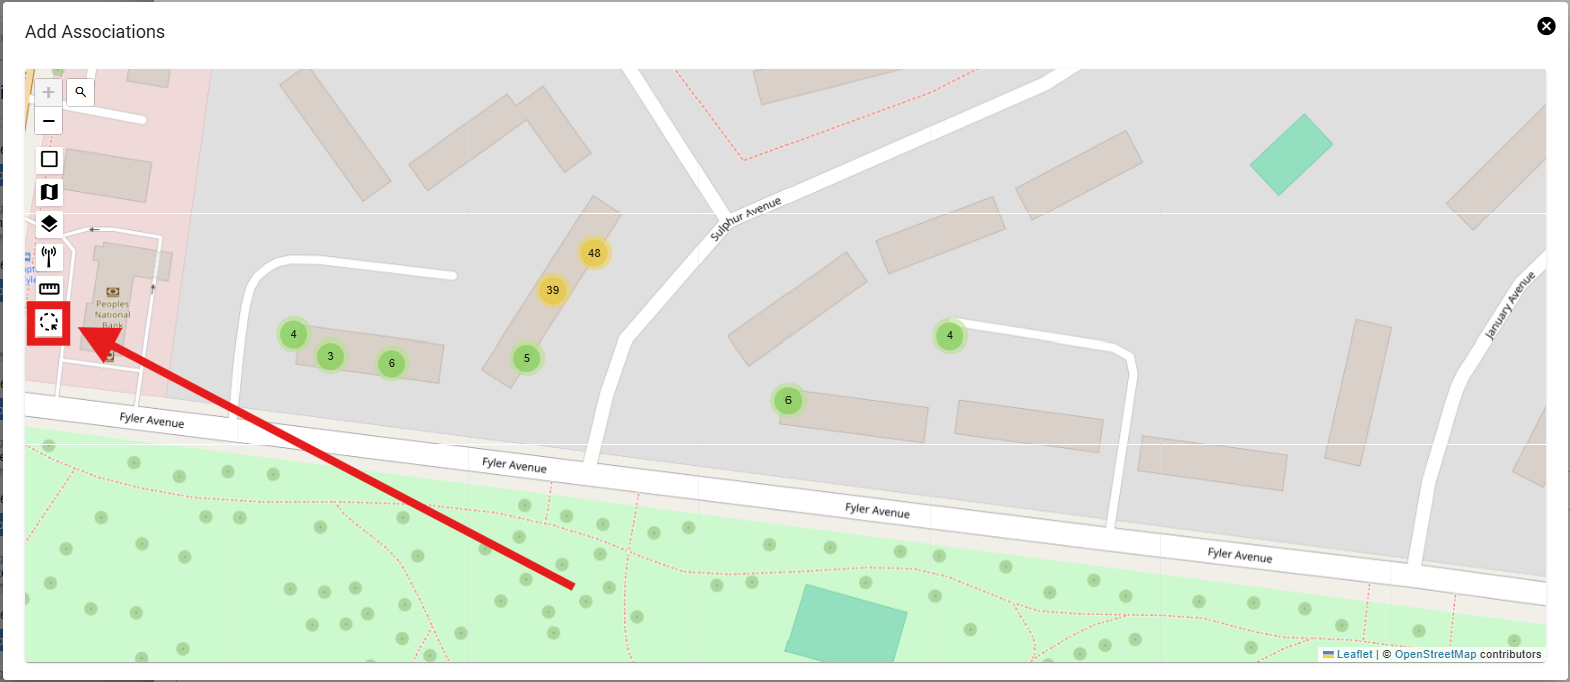
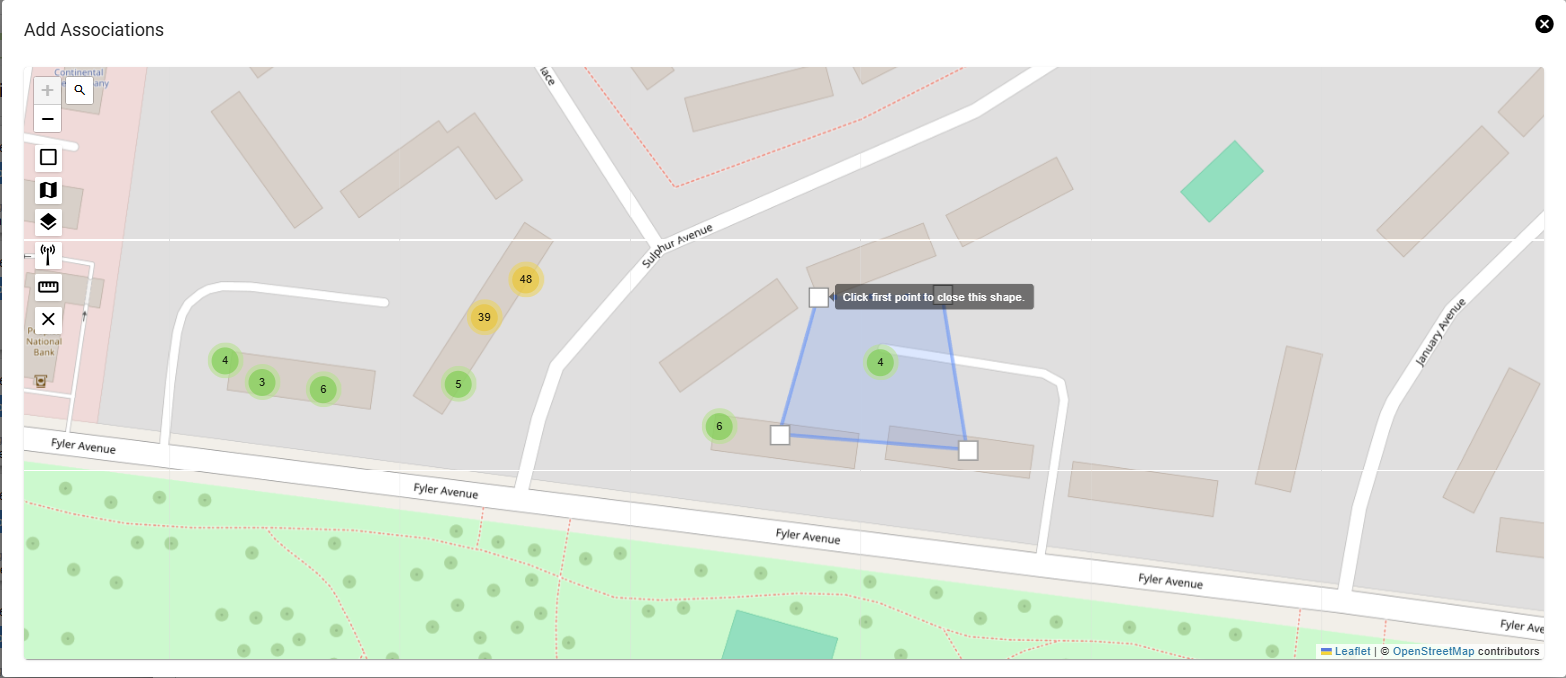
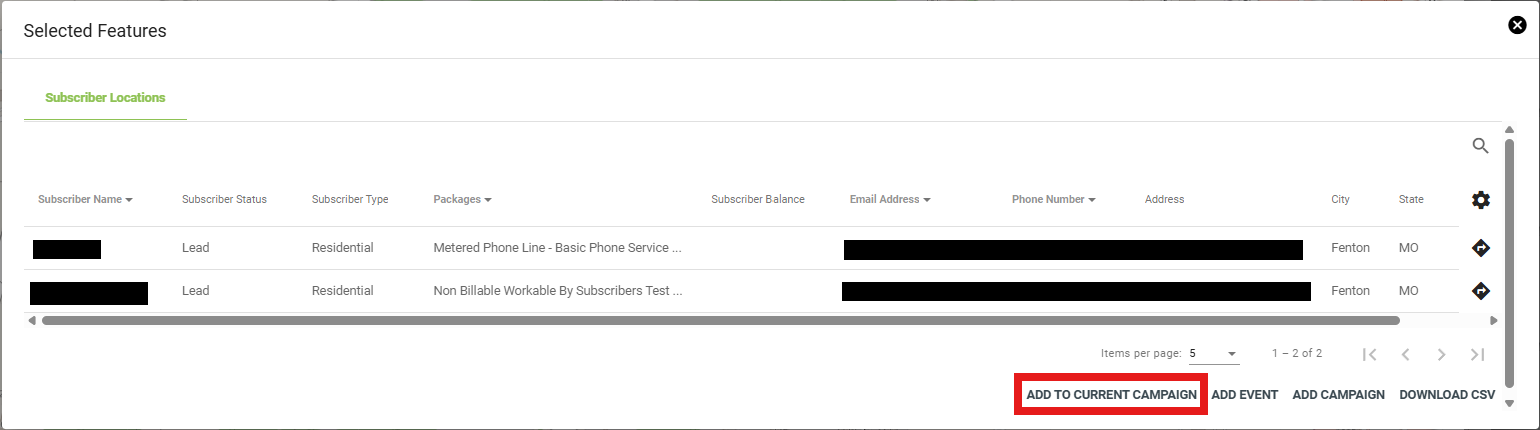
Then, select ADD TO CURRENT CAMPAIGN.
This can also be done from the base map, when doing so you will need to select ADD CAMPAIGN instead and then choose your campaign from the second menu that will appear, then click ADD SUBSCRIBER ASSOCIATIONS.
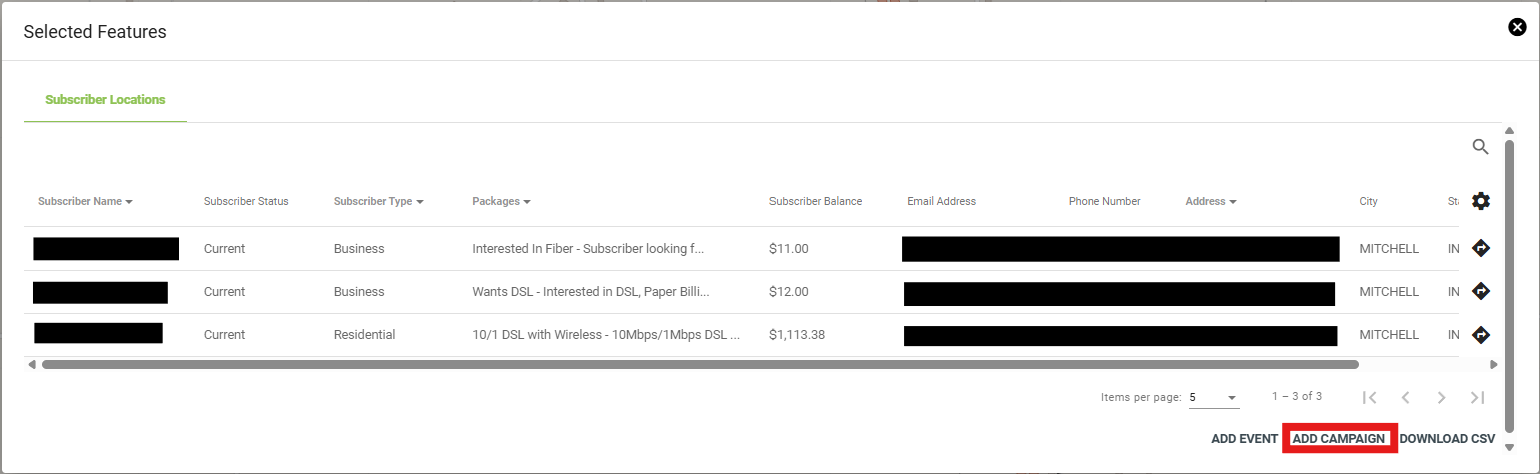

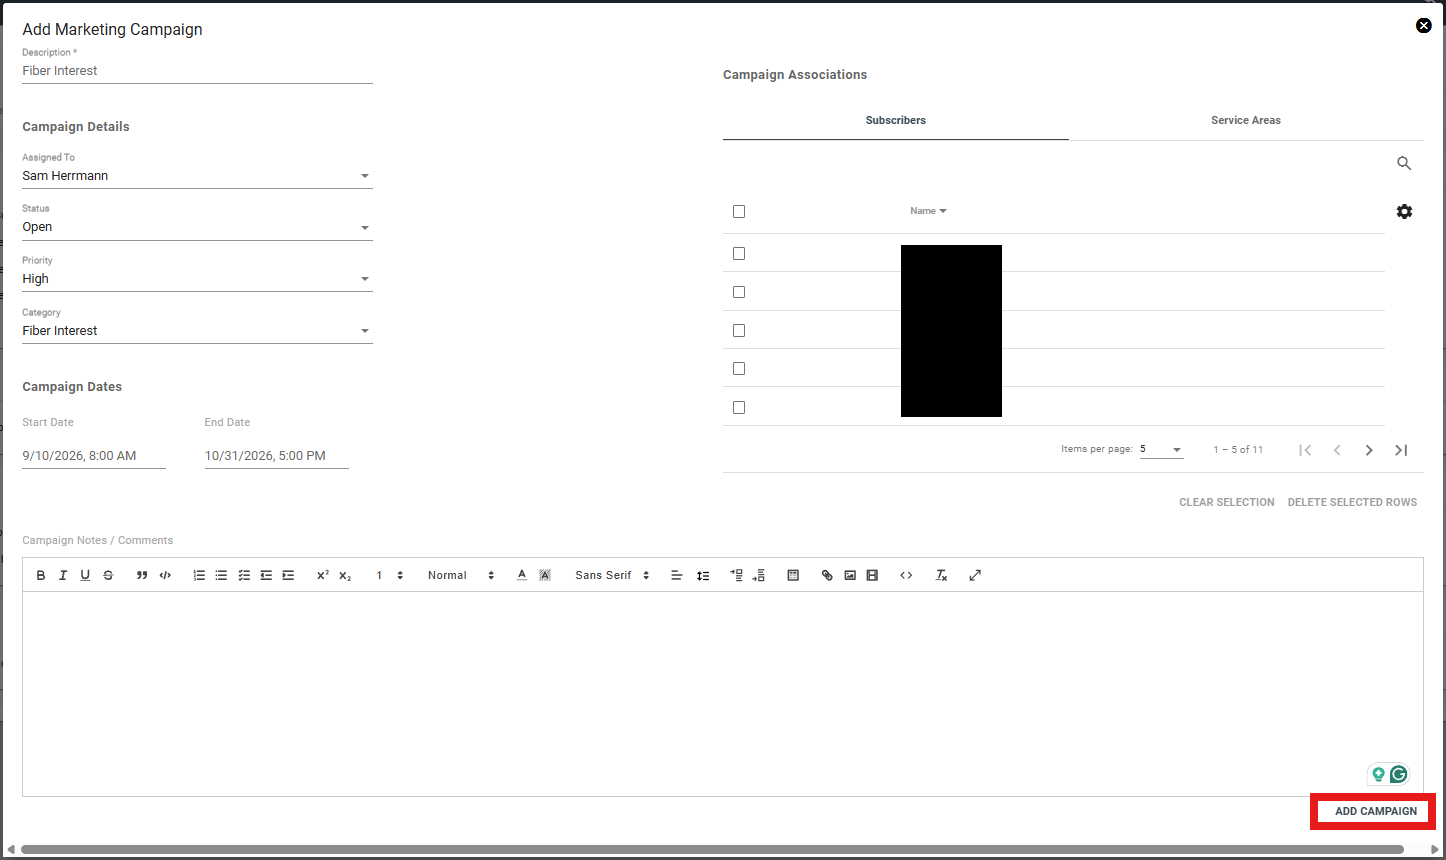
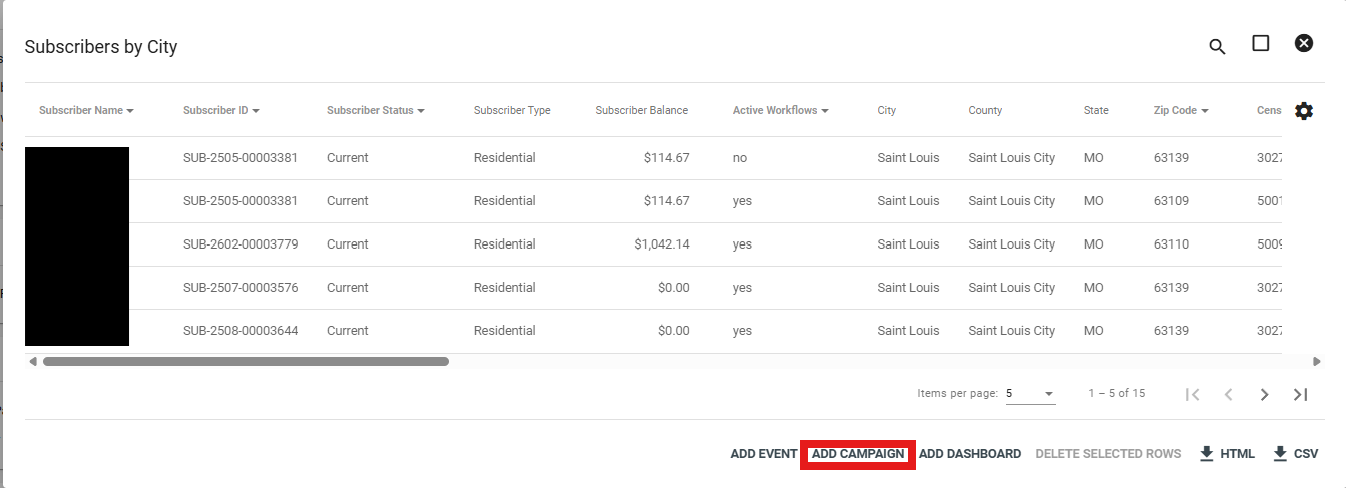
It is also possible to create a marketing campaign from the subscriber report page. Select the applicable subscriber categories to generate a list, then select ADD CAMPAIGN.
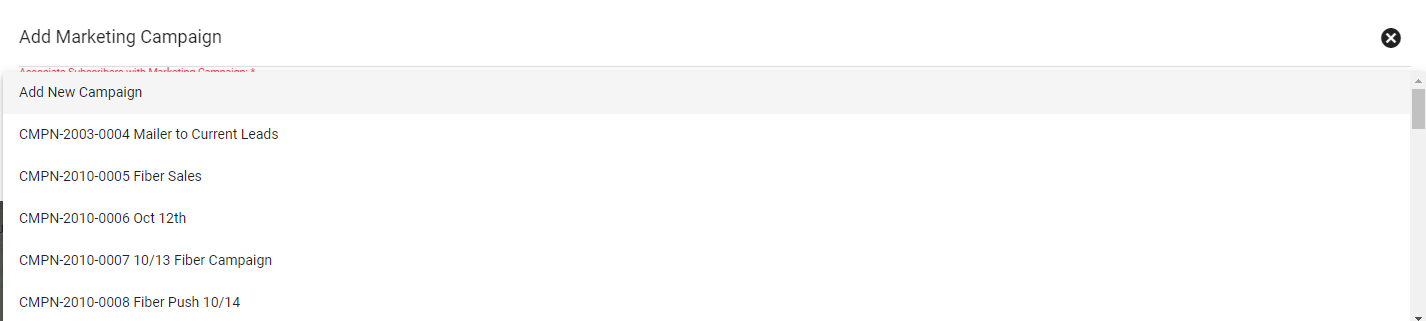
Choose whether to associate the subscribers with a pre-existing marketing campaign, or create a new campaign by selecting Add New Campaign.
Add a description of the campaign and any applicable notes, then select ADD CAMPAIGN.