Public API Guide
Vision’s Public API allows approved clients to connect external tools, reporting systems, or internal applications to Vision data. This page provides a general starting point for requesting API access, viewing available endpoints, and setting up a basic API connection.
Quick Links
Getting Started
To begin using the Public API, contact the Vision Support Team and request API access for your company.
When submitting the request, provide an email address that should be used to create API documentation credentials. These credentials will allow the user to access the Swagger documentation and begin reviewing available endpoints for testing and setup.
Initial Setup Steps
- Contact Vision Support to request Public API access for your company.
- Provide the email address that should receive access to the API documentation.
- Vision Support will create the necessary credentials for accessing the Swagger documentation.
- Use the Swagger documentation to review available endpoints and understand the available request and response structures.
- Work with your technical team to configure authentication for real data pulls.
Authentication Overview
API requests require authentication before real Vision data can be pulled. Your technical team will need to use the provided API credentials to obtain a bearer token.
The bearer token is used to authorize API requests. When making API calls, make sure only one active token is being used at a time for the intended request. Using the wrong token, an expired token, or multiple conflicting tokens can cause authentication errors or failed API requests.
Below is an example cURL request for obtaining a token using the credentials provided by Vision:
curl -X POST https://{AUTH0_DOMAIN}/oauth/token \
-H "Content-Type: application/json" \
-d '{
"client_id": "{CLIENT_ID}",
"client_secret": "{CLIENT_SECRET}",
"audience": "{API_AUDIENCE}",
"grant_type": "client_credentials"
}'
Using the Swagger Documentation
The Swagger documentation provides a visual way to review the available Public API endpoints. From the documentation page, users can view endpoint paths, required parameters, request formats, and expected responses.
When accessing the Swagger documentation, users will be prompted to sign in. This is where the username and password provided by Vision Support are used. These login credentials are specifically for accessing the Swagger documentation so users can review and test available endpoints.
To use the Swagger documentation:
- Open the Public API endpoint documentation page: https://customer-api.fibersmith.systems/doc (This is a generic endpoint so ensure you go to your own endpoint)
- Click "Authorize" and enter the username and password provided by Vision Support.
- After logging in, review the available endpoint sections.
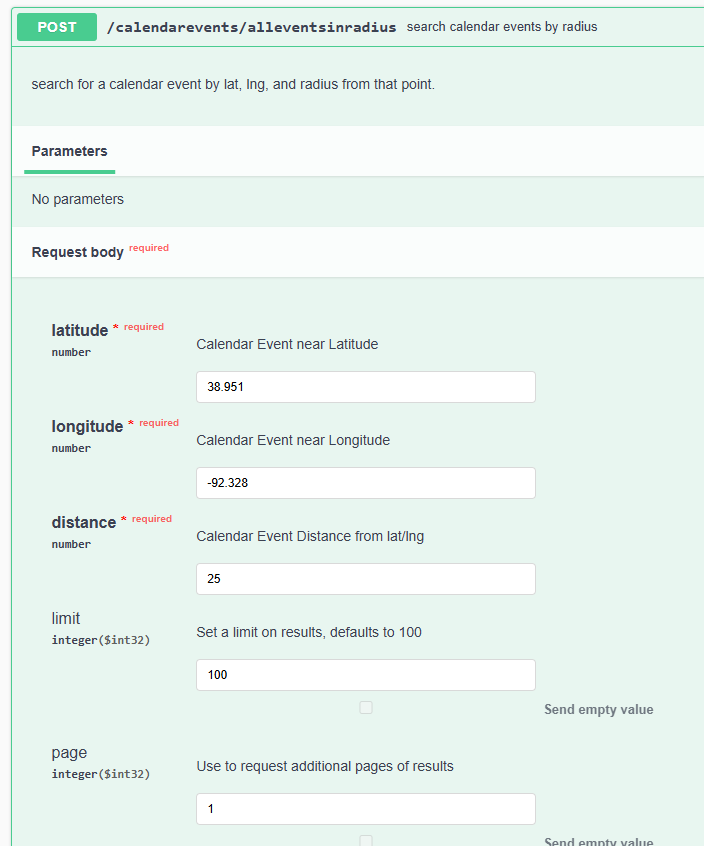
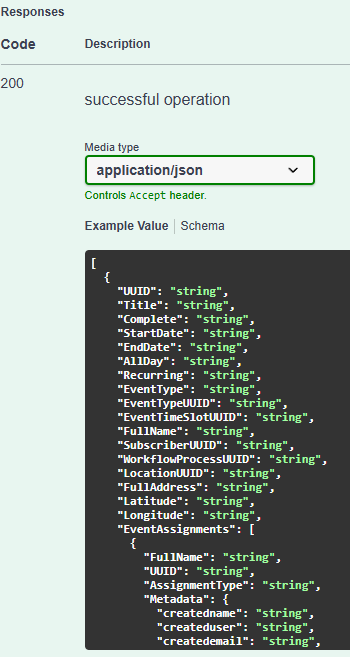
- Select an endpoint to view more details, including the request method, required parameters, request body, and expected response.
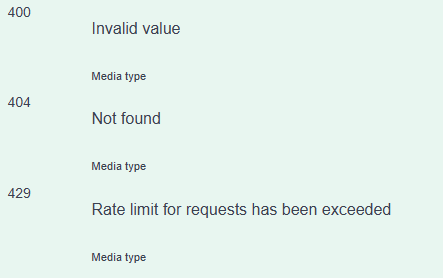
- Responses:
- Use the endpoint information to understand how the request should be structured before testing in Swagger, Postman, Insomnia, or a custom script. You can test the endpoint by clicking the "try it out" button. It will now let you input whatever parameters you want and execute it. Then you can view the output and also provides a Curl for you to easily replicate your request.
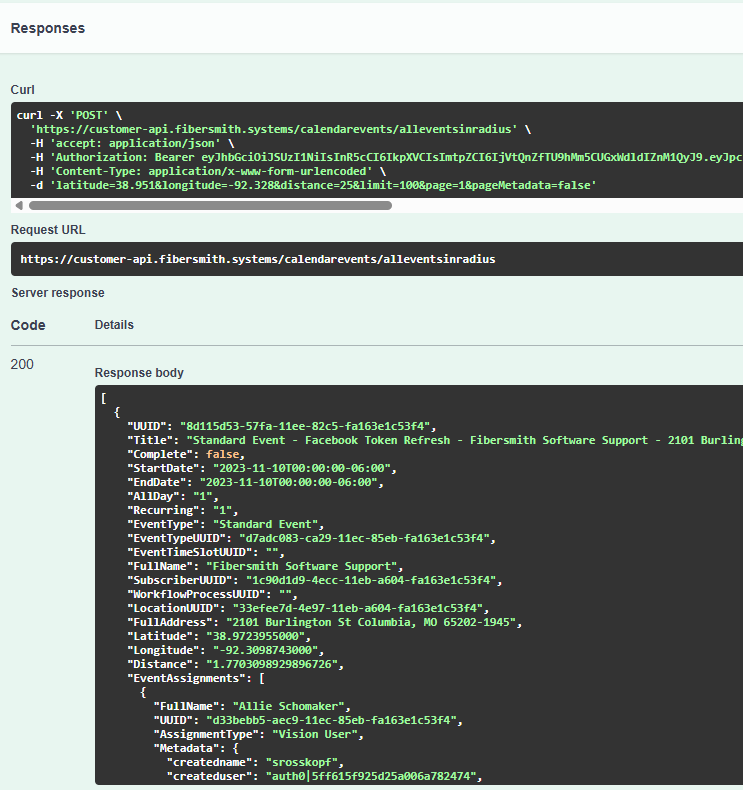
The Swagger documentation is helpful for understanding what data is available through the Public API and how requests should be built before connecting the API to a third-party tool, reporting system, or internal application.
Importing the API into Postman
Postman can be used to import the Public API from the Swagger/OpenAPI documentation. This can make it easier to test requests, organize endpoints, and confirm authentication before building a production connection.
To import the API into Postman:
- Open Postman.
- Click Import in the sidebar.
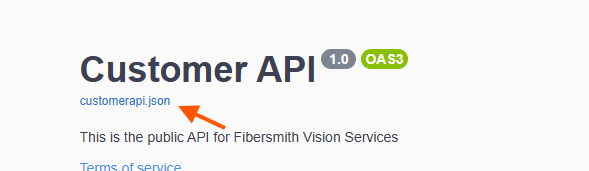
- Enter your Swagger Customer API JSON link:
-
- Choose whether to import the definition as a collection or as an API with a collection.

- Review any available import settings if needed.
- Click Import.
- Once the import is complete, open the imported collection in Postman. You can then review the available endpoints and begin configuring authentication.

Configuring Authorization in Postman
After the Public API has been imported into Postman, authorization should be configured at the collection level. This allows the same token setup to be used across the imported API requests instead of setting up authorization on each endpoint individually.
Open the imported collection and select the Authorization tab. Configure the authorization settings to match the example shown below.

Set the Auth Type to "OAuth 2.0" and Add auth data to "Request Headers".
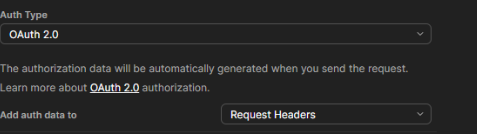
Also enable "Auto-refresh Token".

Scroll down to the "Configure New Token" section and input the credentials given by Vision
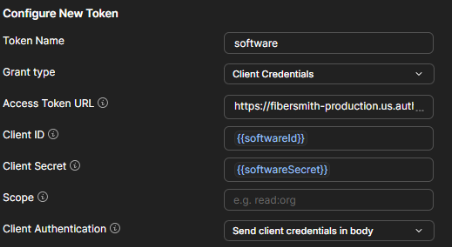
Expand the Advanced section and add the required request value so your tokens can auto-renew when they expire. In the Key field, enter "audience". In the Value field, enter your customer API URL, as shown in the example below.
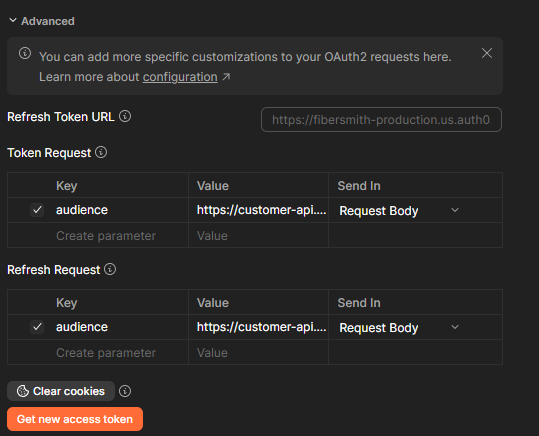
After the collection authorization is configured, individual endpoints can use the token created at the collection level. When opening an endpoint, go to the Authorization tab and select the available token from the collection.
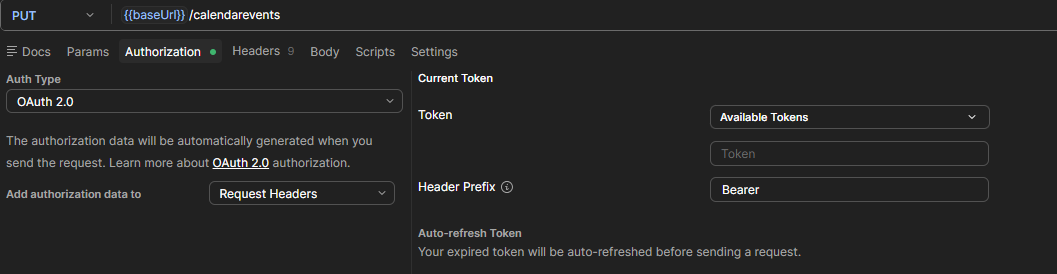
Once the token is selected, Postman will include it in the request headers when the endpoint request is sent. If the token is expired or incorrect, the request may return an authorization error.
Python Example
The Python example below shows the main function used to request a bearer token from Auth0. Vision Support will provide the client-specific values needed for the token request, including the Auth0 domain, client ID, client secret, and audience.
These values should be stored securely and should not be hardcoded directly into shared scripts. In the full example file, these values are loaded from environment variables.
def _request_token() -> str:
    """Request a fresh access token from Auth0."""
    response = requests.post(
        TOKEN_URL,
        json={
            "client_id": AUTH0_CLIENT_ID,
            "client_secret": AUTH0_CLIENT_SECRET,
            "audience": AUTH0_AUDIENCE,
            "grant_type": "client_credentials",
        },
        headers={"Content-Type": "application/json"},
        timeout=30,
    )

    if response.status_code != 200:
        raise Exception(
            f"Auth0 token request failed (HTTP {response.status_code}): {response.text}"
        )

    return response.json()["access_token"]
In this example, the token request is sent to the Auth0 token URL using the client credentials provided by Vision Support. If the request is successful, Auth0 returns an access token. That token can then be used as the bearer token in the Authorization header when making Public API requests.
The full Python example also includes recommended practices for token management, including caching the token, checking whether the token is expired, refreshing the token before it expires, and using request timeouts. This helps avoid requesting a new token for every API call while still making sure the token being used is valid.
When making API requests, use one valid bearer token at a time and include it in the request headers like this:
headers = {
    "Authorization": f"Bearer {token}"
}
Download full Python example
General Usage Notes
When working with the Public API:
- Use the Swagger documentation to confirm endpoint paths and required parameters.
- Make sure the correct authentication token is being used.
- Use one token at a time when testing requests.
- Start with small test pulls before setting up larger automated requests.
- Avoid repeatedly pulling large amounts of data unless needed.
- Coordinate with Vision Support if authentication errors, missing data, or unexpected responses occur.
Public API Access and Support
Public API access is set up per company and must be requested through Vision Support. If your team needs access, has questions about credentials, or needs help confirming the correct endpoint or authentication process, contact the Vision Support Team for assistance.