What steps are you prepared for in preparation for your fiber build? Equipping for your fiber build can seem like a hefty lift, we advise completing one assignment at a time. Use the following as a guide to explain the role Vision and workflows will take in your FSA turn up.
Just like tower activation, there are steps to complete before you are ready to turn up fiber. Below is a list of basic implementation steps in a fiber install workflow to ensure your fiber build is efficient and successful. The Support Team will teach and advise your team through the process. We can’t wait to celebrate with you as the system helps scale your business and increase subscribers!
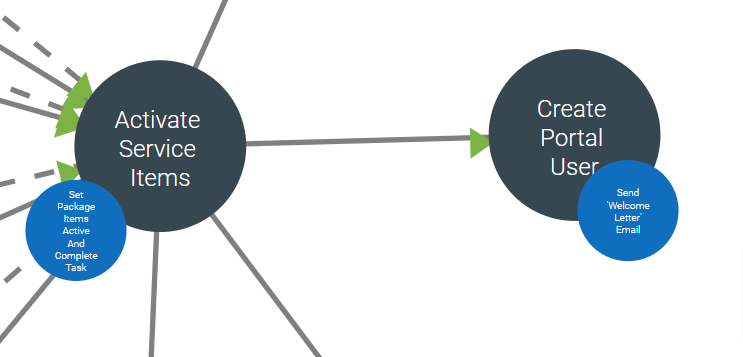
Everything happens in the order of operations!
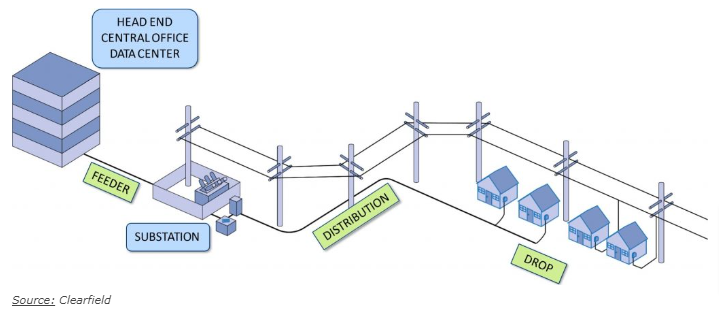
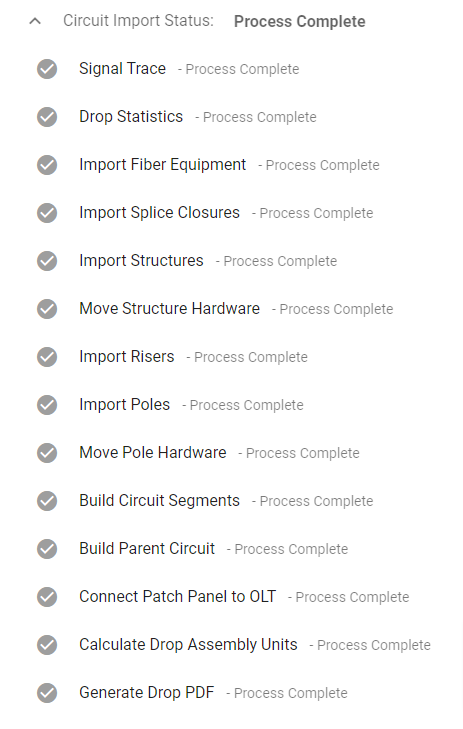
Take note that it is vital to begin planning and buying inventory. Entering your Central Office information into Vision is a step that cannot be skipped. In the System, a Central Office is considered a warehouse, so all new COs will be added by location as a new warehouse.
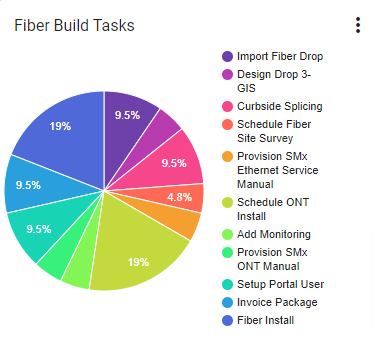
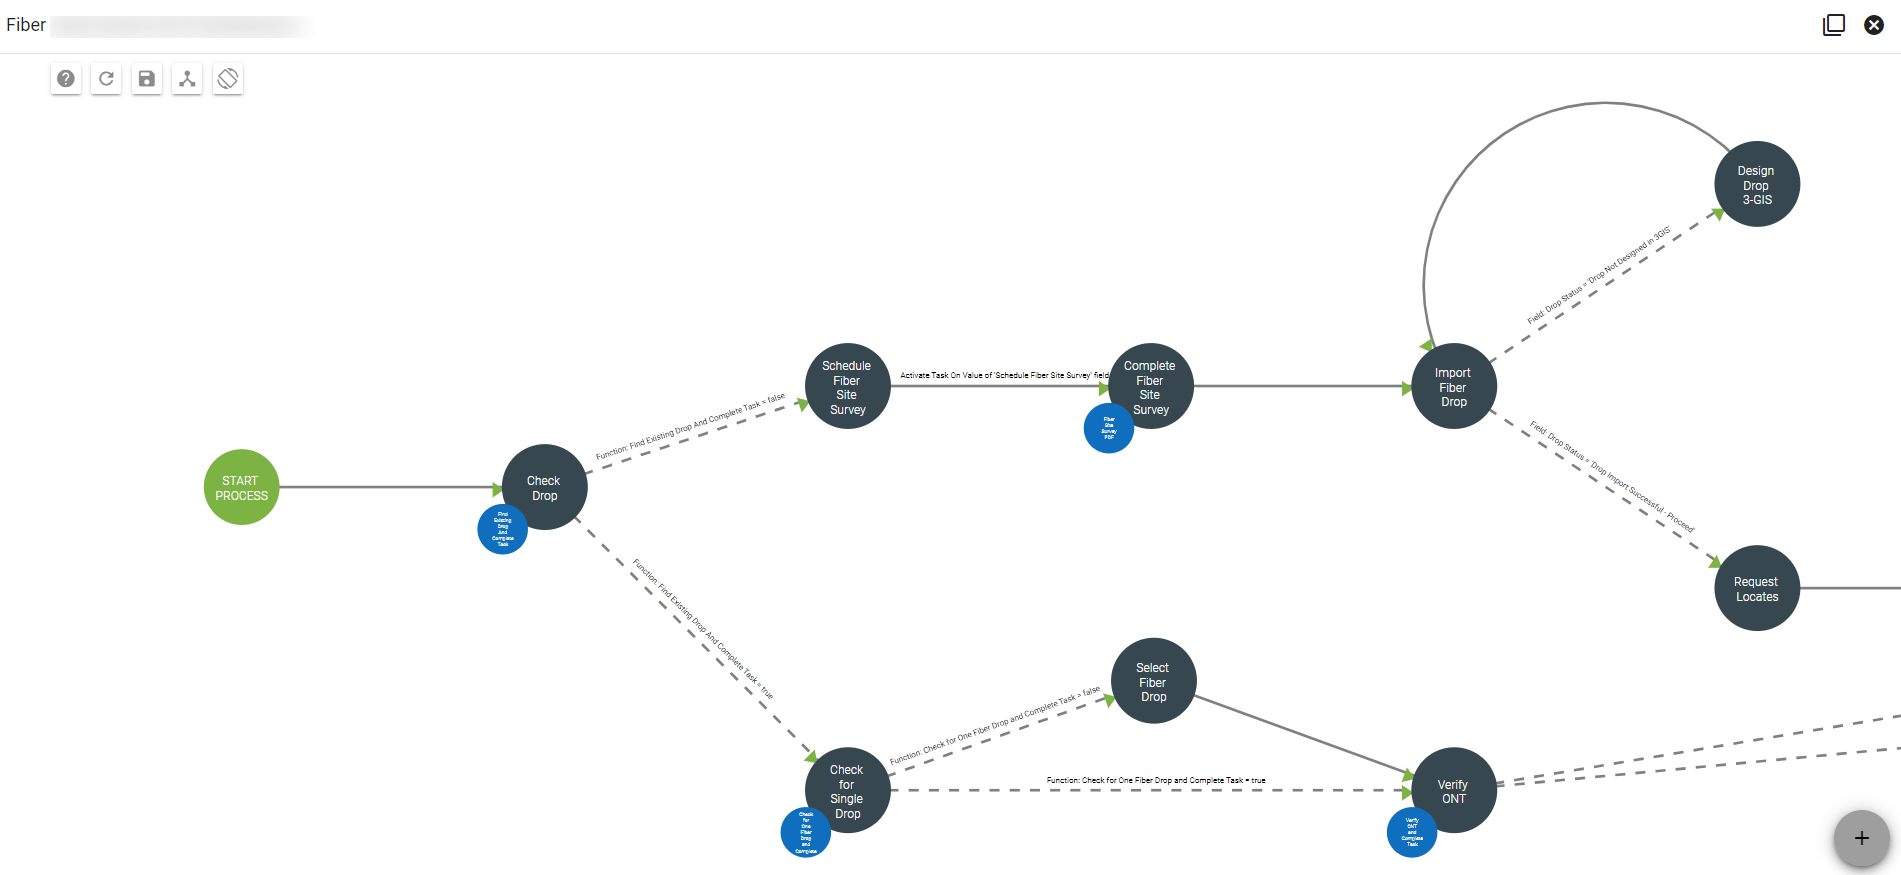
View a Sample Fiber Workflow below.
1. Construction / 3-GIS / Planning
In the first phase you are checking the drop and importing the 3-GIS design drop data. Here the workflow can help manage the quote and invoicing for non-traditional drops or underground drops.
3-GIS designs help in ensuring connectivity and future automation. Our Vision clients have the opportunity to take advantage of the included 3-GIS seat or license. Using Fibersmith Engineering to design your fiber design in 3-GIS is also a great resource. In this phase we are also ensuring the circuit path is modeled out and monitored in Vision.
The workflow will include the scheduling of the ONT installation and the performing of request locates.
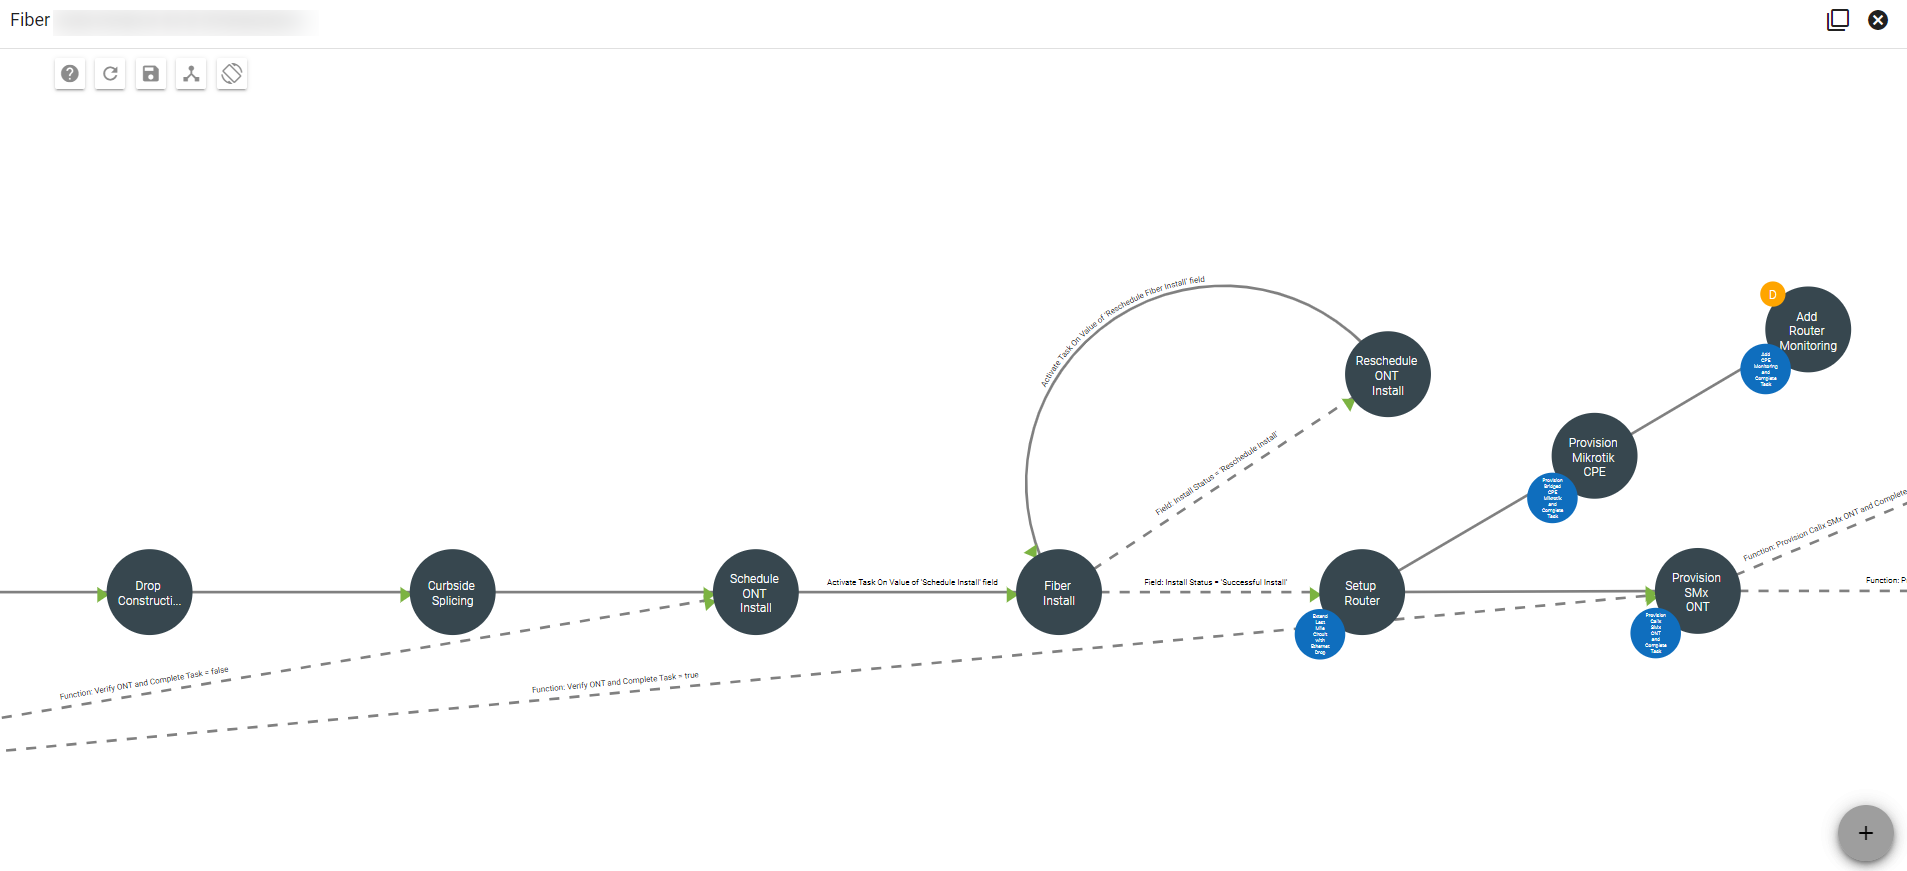
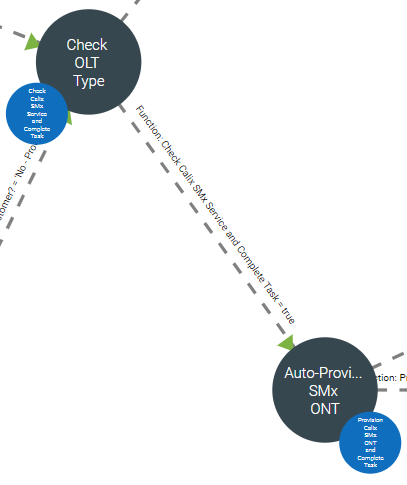
2. Auto-Provisioning / Inventory- Equipment
Vision interfaces with a variety of third-party systems, allowing the most important information to be all in one system. Learn more about our integrations here.
Check ONT type. Decide what Network Management Platform you are employing, such as Calix SMx ONT or DZS.
An important note is making sure to have the equipment modeled out in Vision beforehand. Once ready that equipment can be moved to the correct CO. Learn more about purchase orders and inventory here.
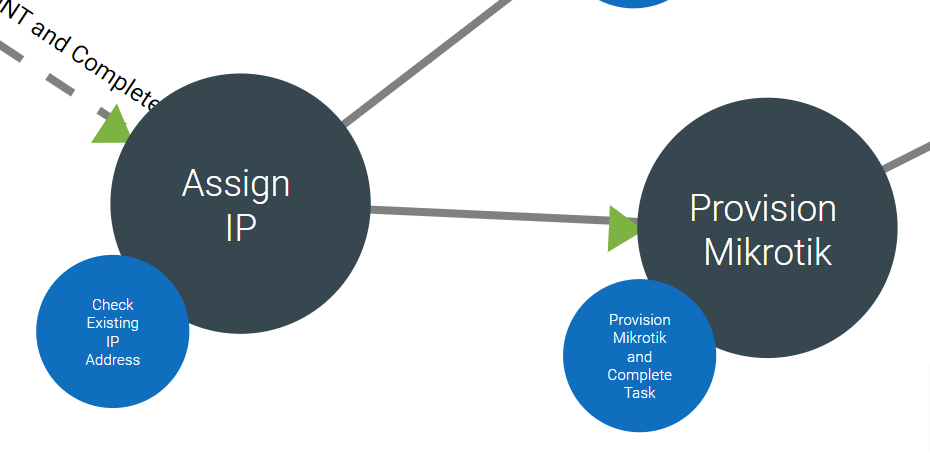
3. IP Assigning / Monitoring
At this phase you will need to make sure the IP assignments are correct. The IP pool management will be provisioned through the workflow. From a modeled pool in Vision is where you will manage IPs. In the workflow Vision will let you designate a point to assign the IP.
Vision will need API access and login credentials to help get implementation and monitoring established.
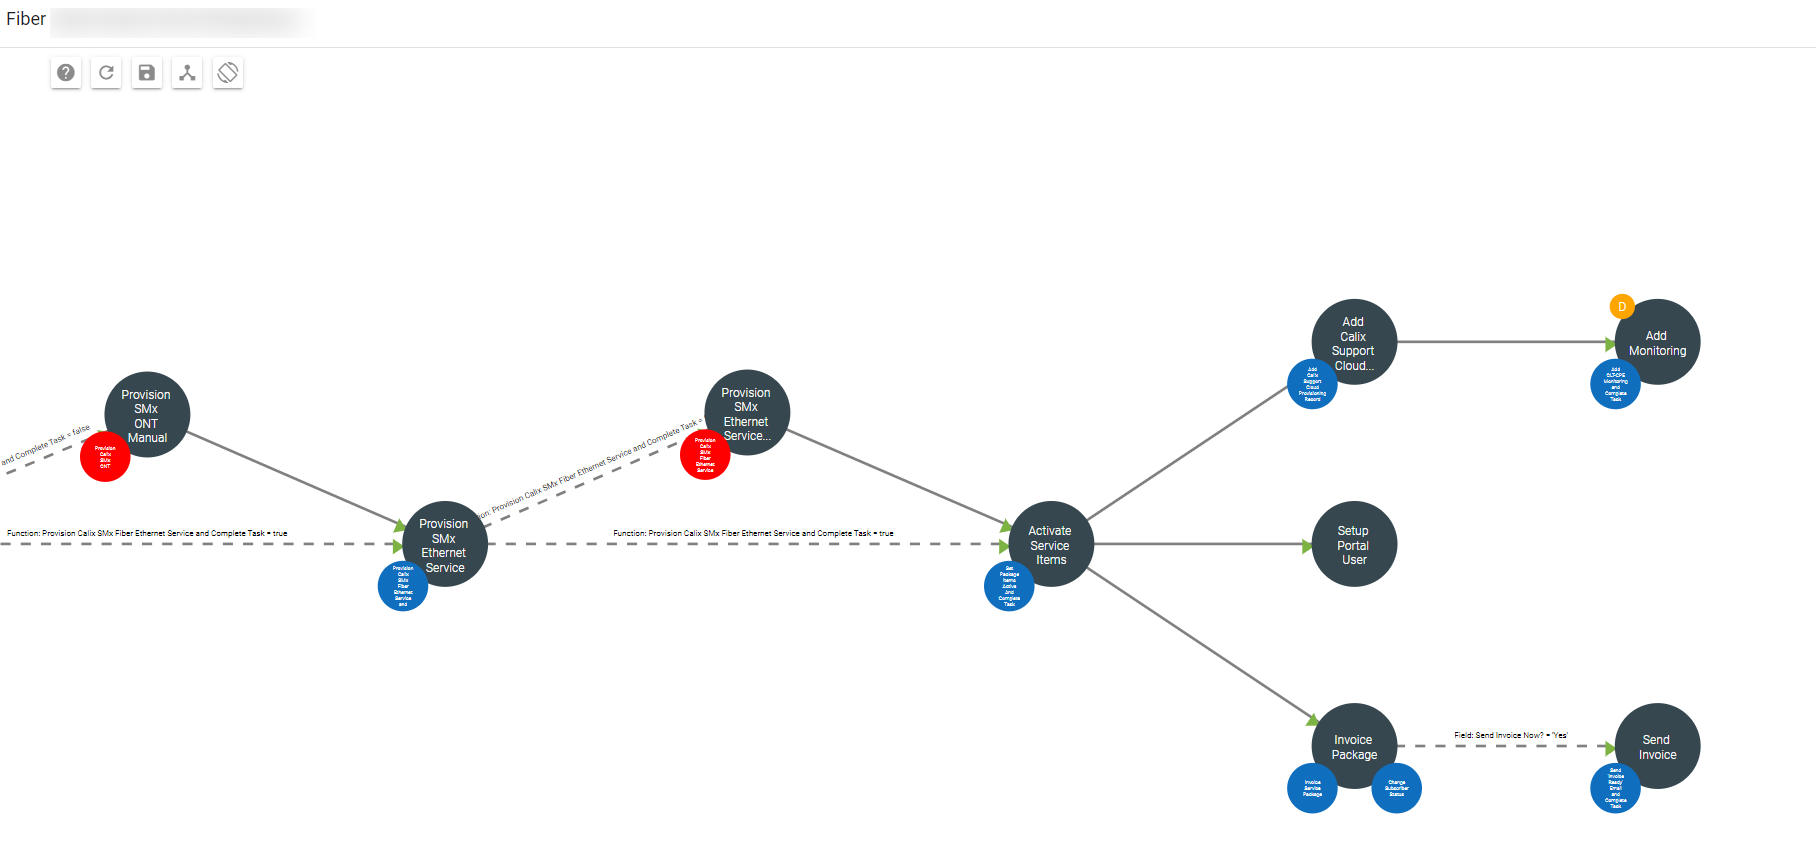
4. Service Activation / Billing
An important piece will be making sure that packages are tied to a service area before the installation happens. Early on in the process you will need to upload the KML shape file from 3-GIS into Vision. Completing your designs in 3-GIS makes mapping your fiber service areas in Vision very clear.
Service activation will lead to the invoicing of the package and the subscriber status changing to current.
These steps are all must haves in your fiber install workflows. Remember to think about the order of operations and that you cannot install equipment before that inventory has been added into the system.
Where to start can feel like a heavy lift, but remember you need to start at the beginning and work forward. Think about these four basic sections in the workflow and put the workflow into production. Workflows can change and evolve into new versions over time.
Why go through all of this behind-the-scenes work or why go through all the provisioning? Simply put, you are setting in place the processes for your 2nd fiber turn up and all future builds. The end goal is to achieve quick, clean turn ups!