Email Templates and Drafts
Admin Permission Area
The Email Templates section within Admin Utilities allows the administrator to create and edit the Support Emails sent to your subscribers. Emails can be designed using our text editor to allows for rich formatting including the use of images and videos.
- Dynamic Variables in Templates
- Email Templates
- Notification Templates
- Notification Template Categories
- Footer Templates
- Email Drafts
- Designing HTML Emails
Templates make it easy for support employees to respond quickly to customers with a consistent and unified message.
Templates can be filtered and sorted to display the Template Name, Subject, Message, and Category. You can subcategorize Support Email Templates into the category of Ticket, Network Event, or Marketing Campaigns.

Dynamic Variables
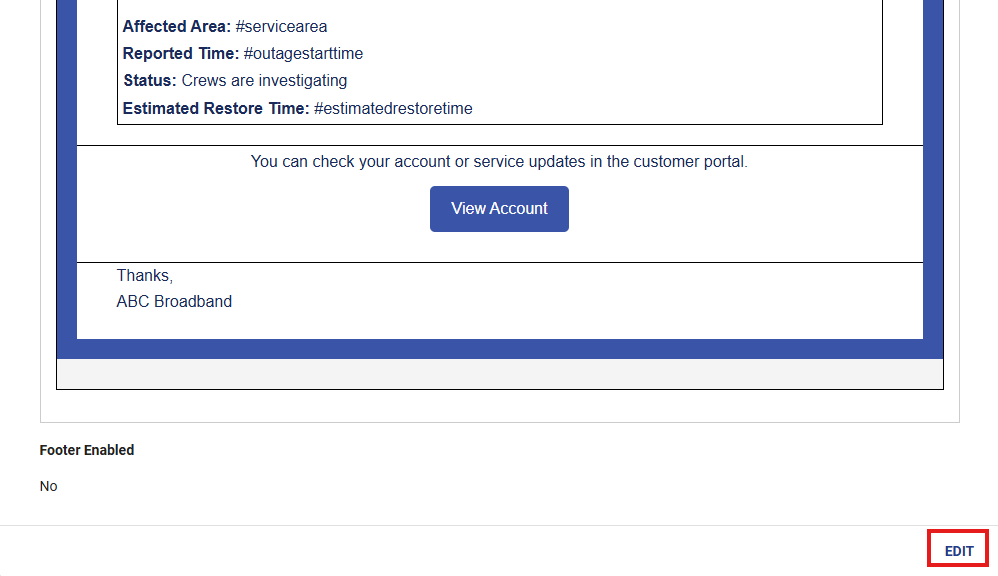
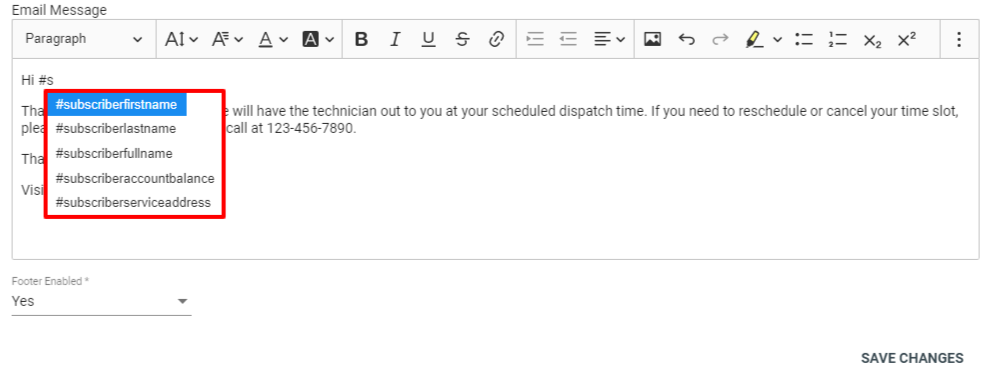
Dynamic variables are a powerful tool in email templates. To use them, simply type a # and a list of variables available to you will show up. The variables will be replaced with the item they refer to when the email template is sent. An example of this would be the variable #subscriberid this will be replaced by the ID of the subscriber that the email gets sent to.
Not all variables are available from all template types, to see what variables are available where, check out this page.
Note: Variables are case and spelling sensitive, anything that follows a # will be treated as a variable. This is different from sending variables in a ticket email where you can use a # without using a variable.
View Email Template
Click on a template to view the category, subject, and message.
Click EDIT to make changes.
Edit Email Template
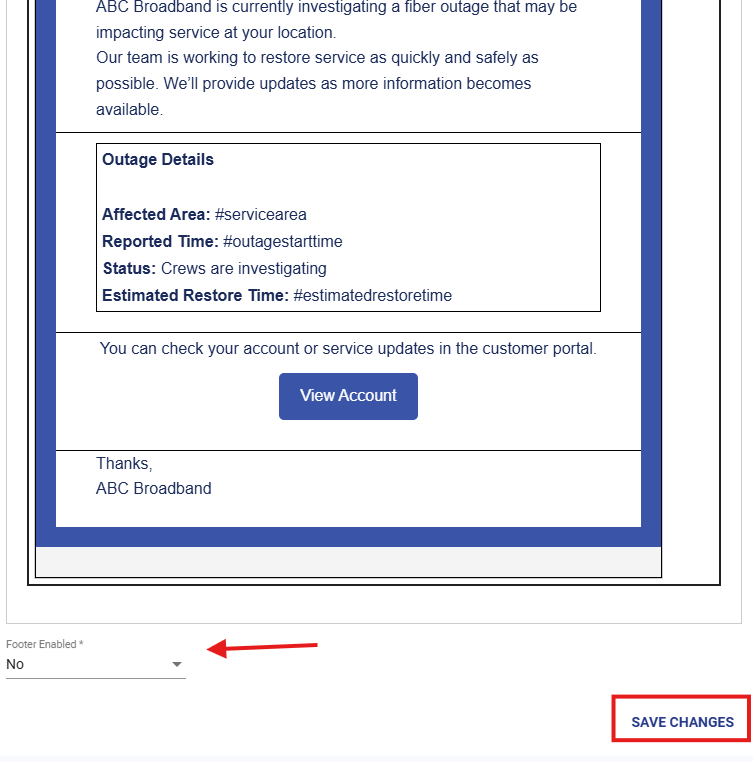
Each Email Template can be edited by its name, category, subject line, and message. Use the text editor to style and format your email. When finished, click SAVE CHANGES.
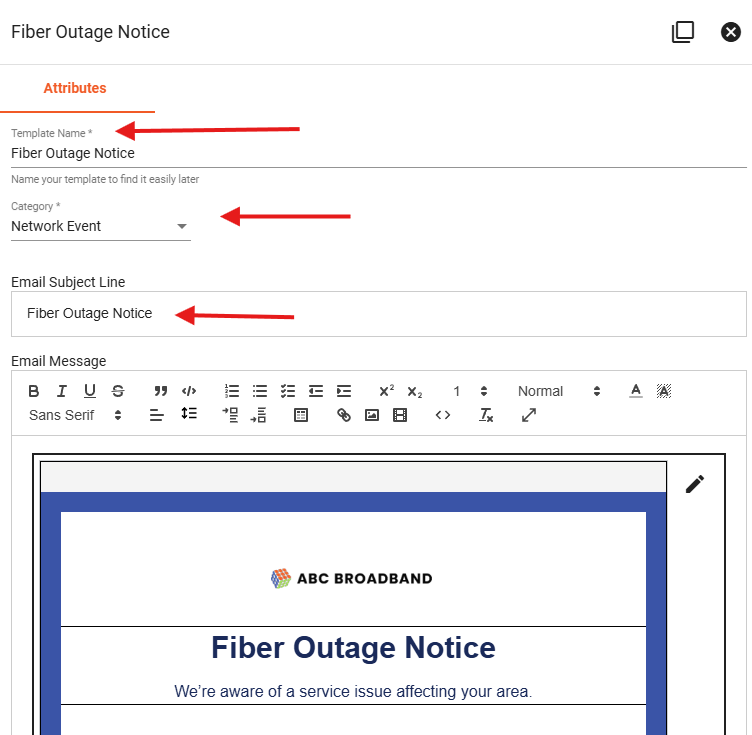
An email template to be sent to subscriber's who are involved in a fiber outage.
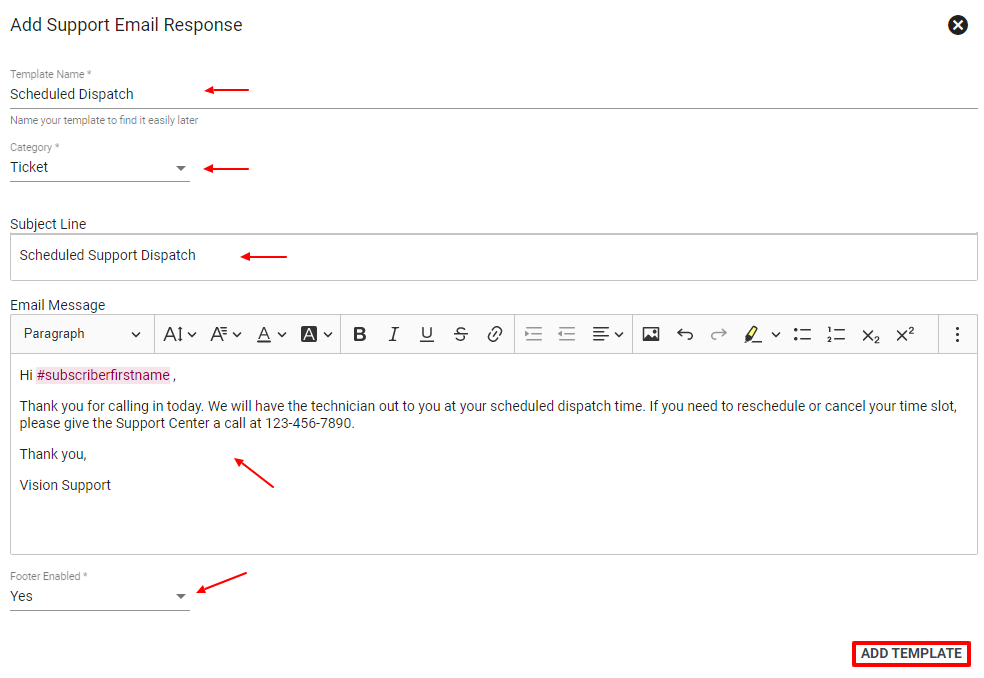
Add Email Template
To create a new Email Template, click the Floating Action Button 
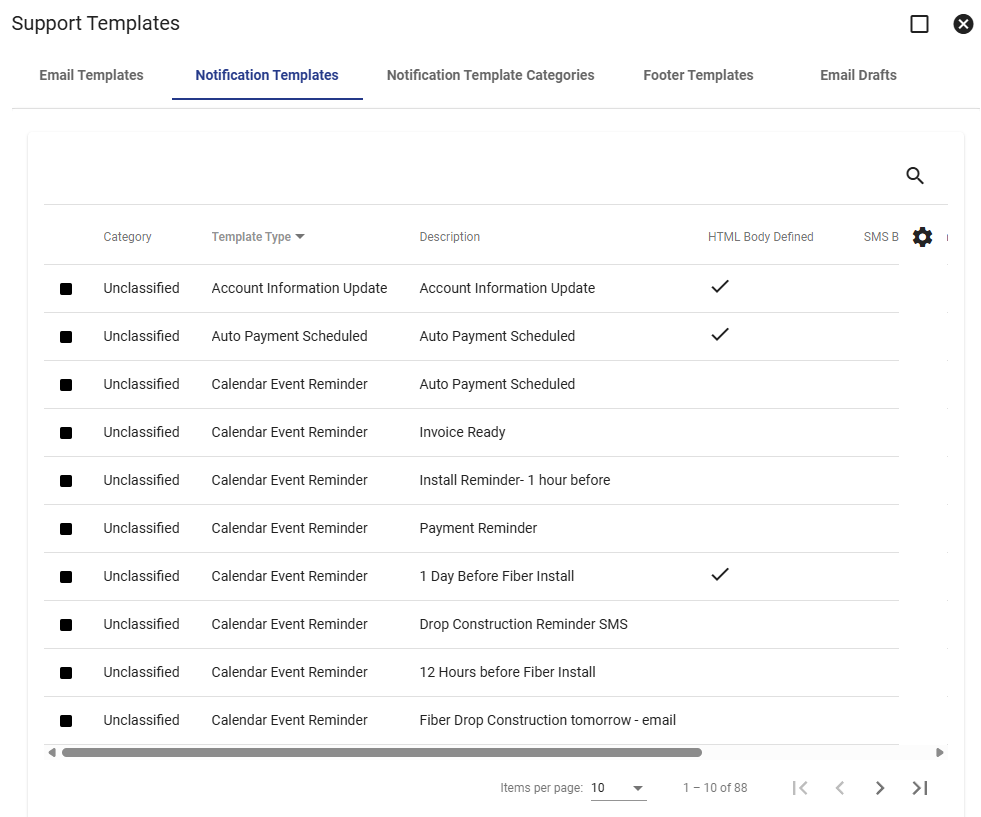
Batch Notification manages and tracks email and SMS templates used by the system to communicate with Subscribers. These can be triggered when starting a Workflow, sent automatically by the system when billing a Subscriber or sent manually.
Add Notification Templates
To add more templates, go to the floating action button where you can make more Calendar Event Reminder emails and Generic Communications templates.
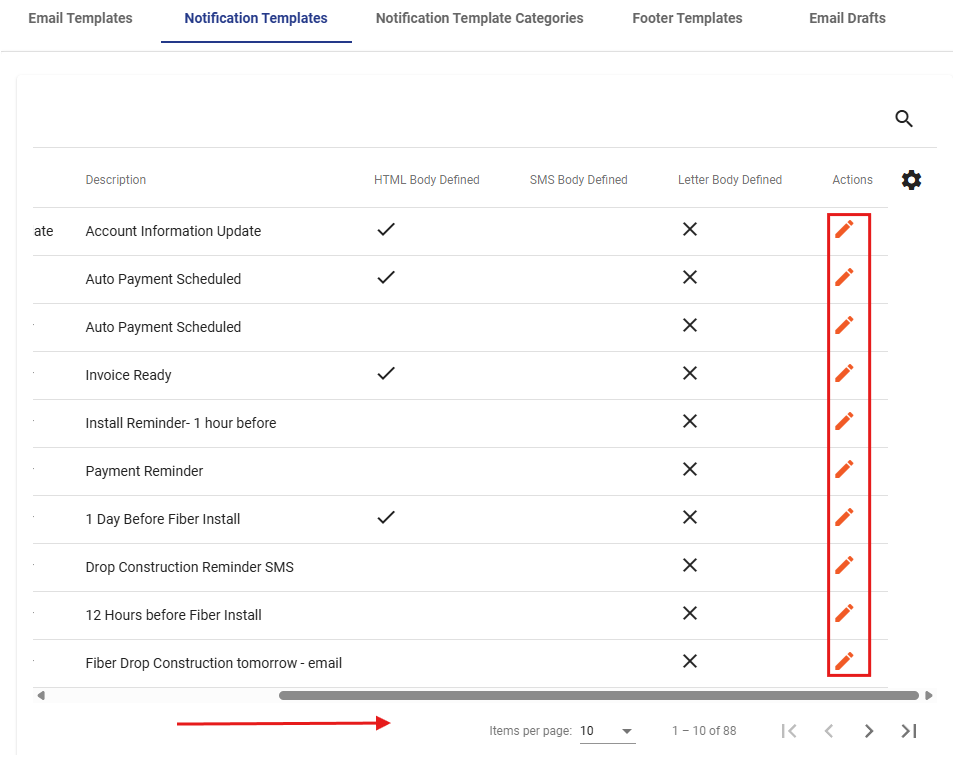
Edit Notification Templates
To edit a notification template, simply scroll to the right edge of the template list and click the pencil icon for the template you would like to edit.
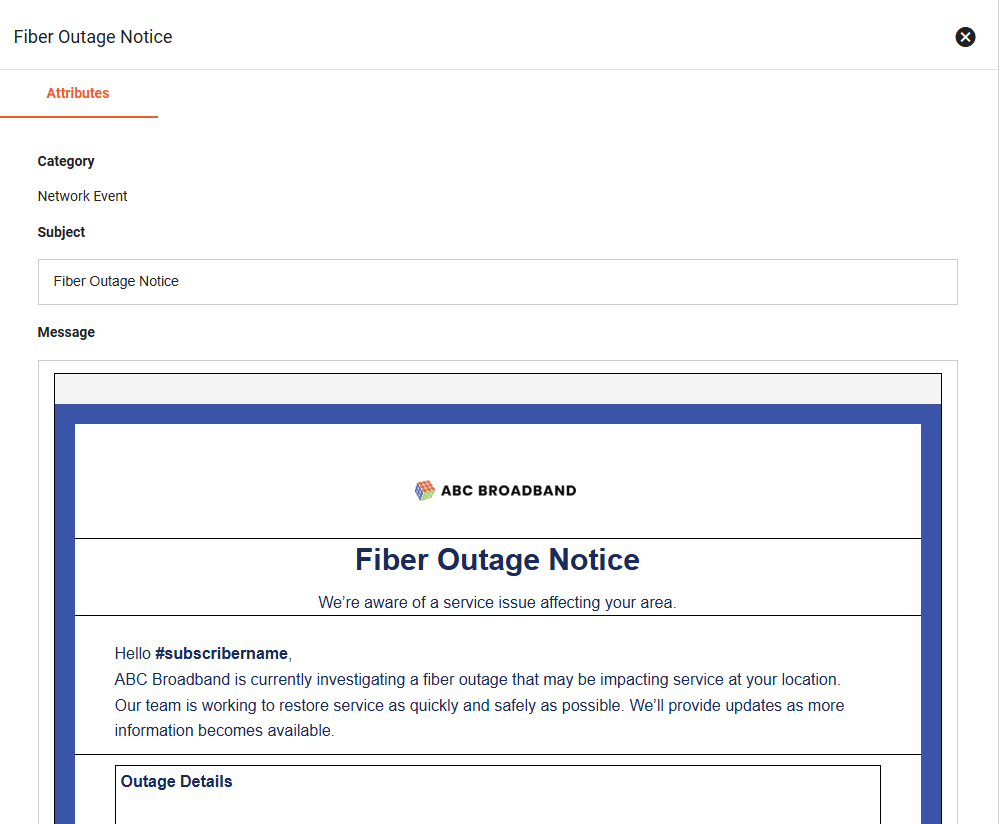
Attributes Tab
On the edit page, there are many attributes you are able to edit. These include the template description, category, sender, sender name, email subject, email body, sms text body, and letter body.
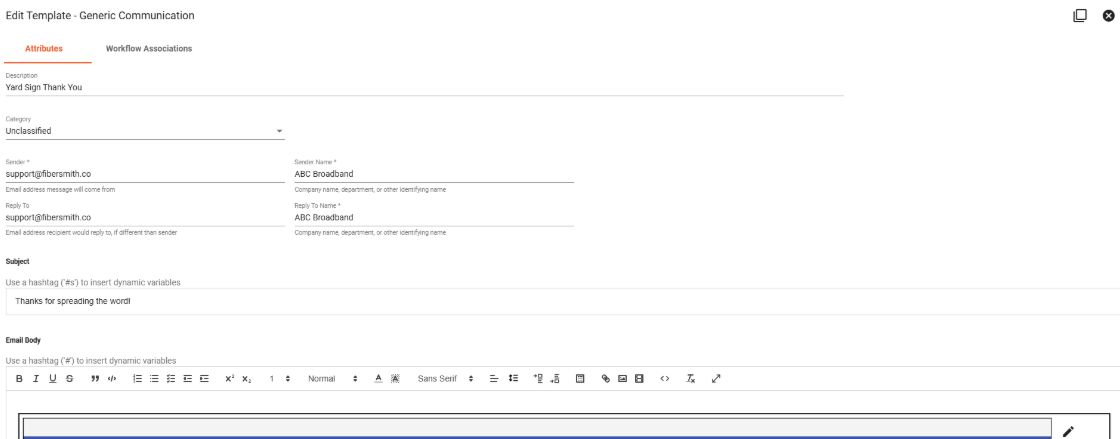

Each notification type is optional so for example, you do not have to have an SMS message or Letter for every email.
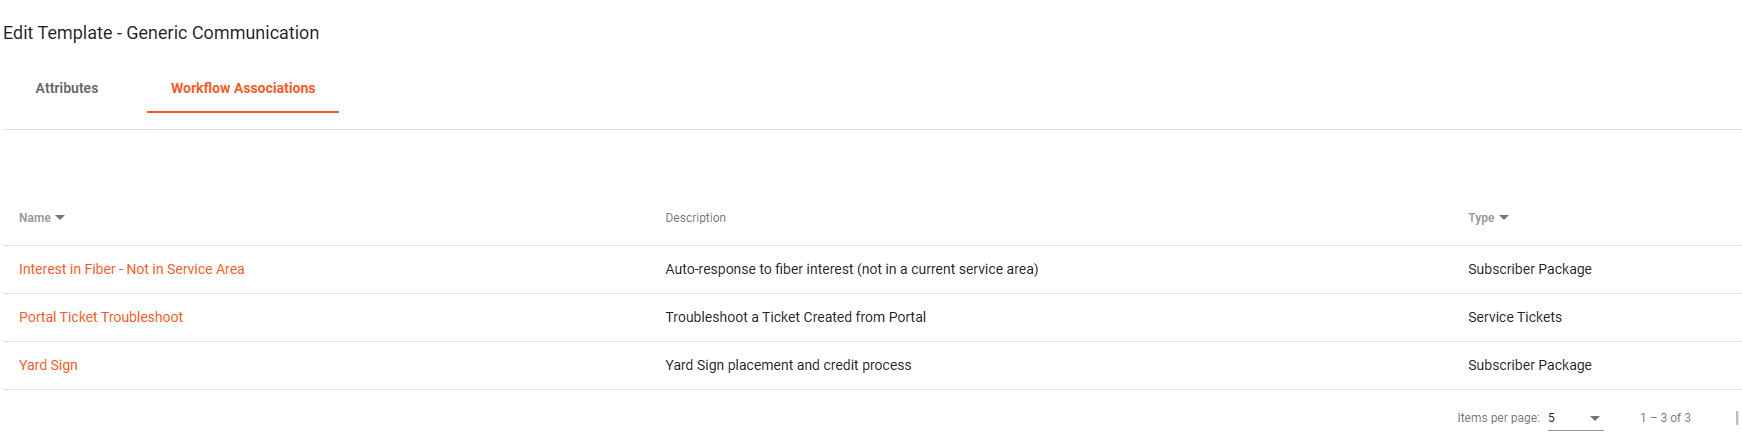
Workflow Associations Tab
This tab allows you to view all workflows that the notification type are actively being used in and can directly link you to those workflows.
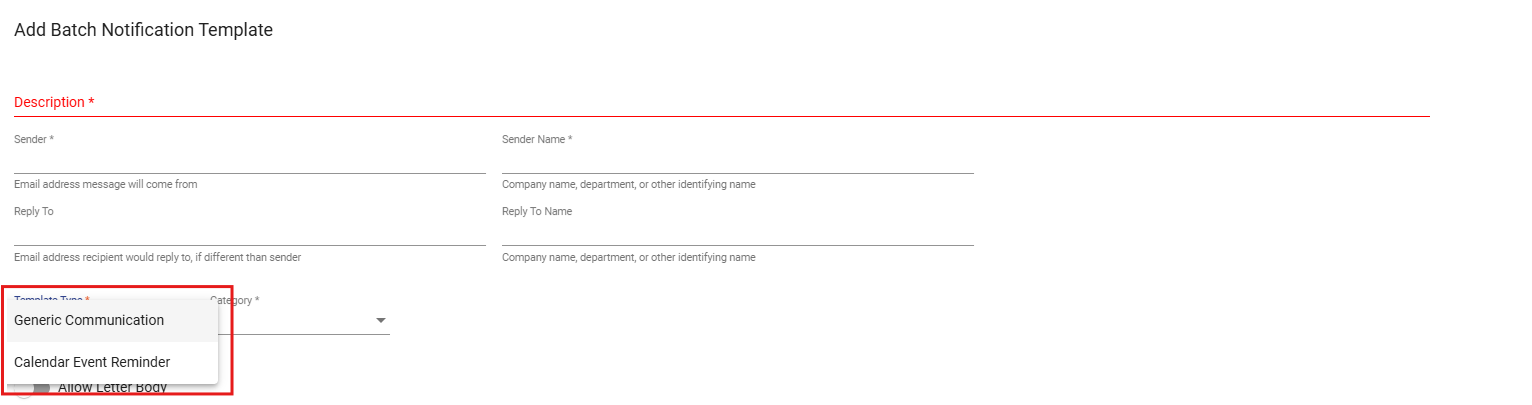
Notification Template Types
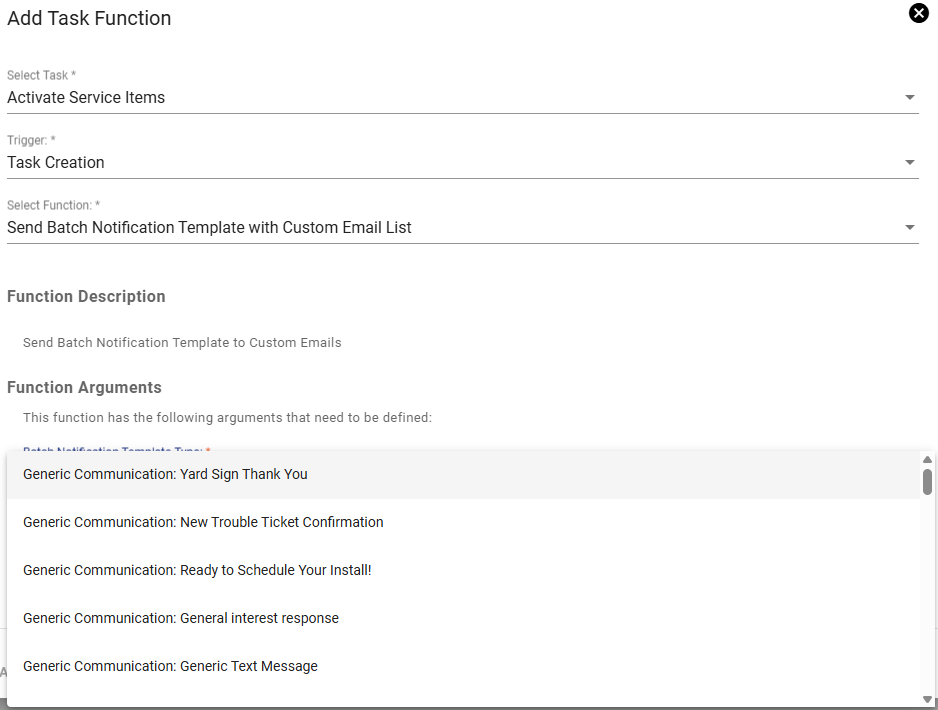
A notification template is used inside a workflow. It is triggered when a workflow reaches a specific step or event. There are different types of notification templates: Generic Communications, and Prebuilt Templates.
Generic Communications
These are your base templates that you use for your own custom needs that don't fit with the prebuilt templates. These have a standardized list of dynamic variables that would be accessible anywhere such as subscriber name, balance, address, etc. as opposed to more specialized information that would be for invoices or installs. Similar to the Calendar Event Reminders, you can make as many of these templates as you would like by using the Floating Action Button. To attach these to a workflow, you use the send batch notification function and select which of the options you want.
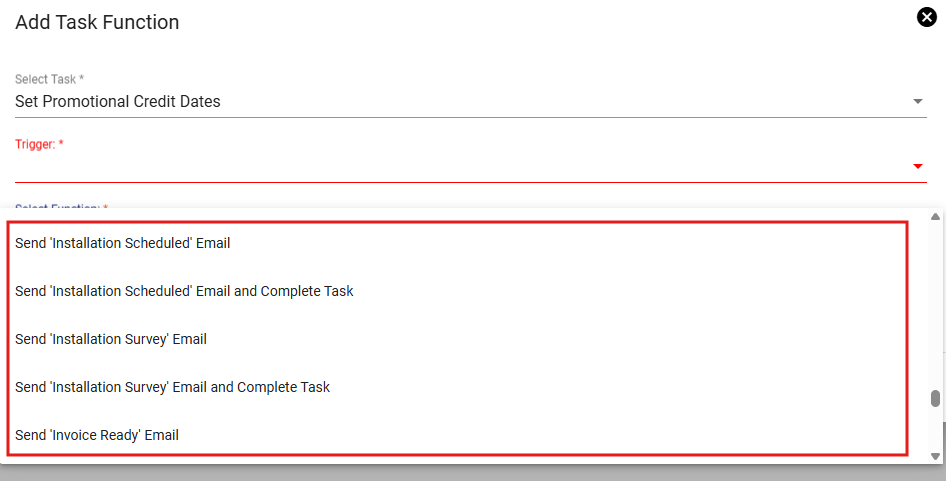
Prebuilt Templates
When your tenant is set up, it comes with many default templates for common situations like account information updates, invoice ready notifications, referrer codes, past due reminders, and more. These prebuilt templates are not generic communications. They are designed for specific system actions and often include their own custom set of dynamic variables so the email can pull the information relevant to that specific situation.
For example, the invoice ready email can send a copy of the customer’s invoice, while the referrer code template can access the subscriber’s personal referral code and referral link. To see which variables are accessible in each template, you can refer to this page.
Most specialized prebuilt templates have their own unique workflow function to accommodate the specific information they pull. These templates do not use the normal send function. Some prebuilt templates, such as past due reminders, may still use the normal send function, but they are still considered prebuilt templates because they are tied to a specific system communication rather than a generic message.
Note- there are only one of each specialized prebuilt template.
Calendar Event Reminders
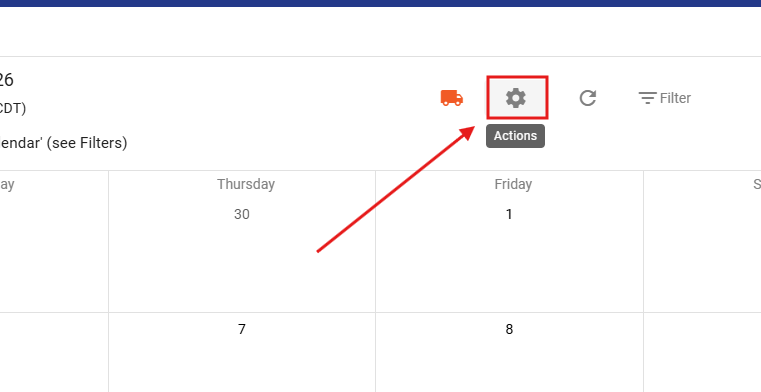
A calendar event reminder is used for scheduled calendar events. It sends a reminder before the event takes place. These notifications are not sent from workflows but set up through the calendar. To attach these to an event type, go to Admin Utilities>Calendar and click the actions gear.
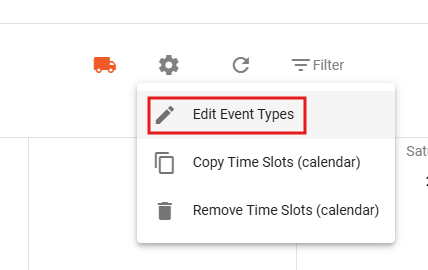
Then click "Edit Event Types".
There is a column with event bells for each event type.
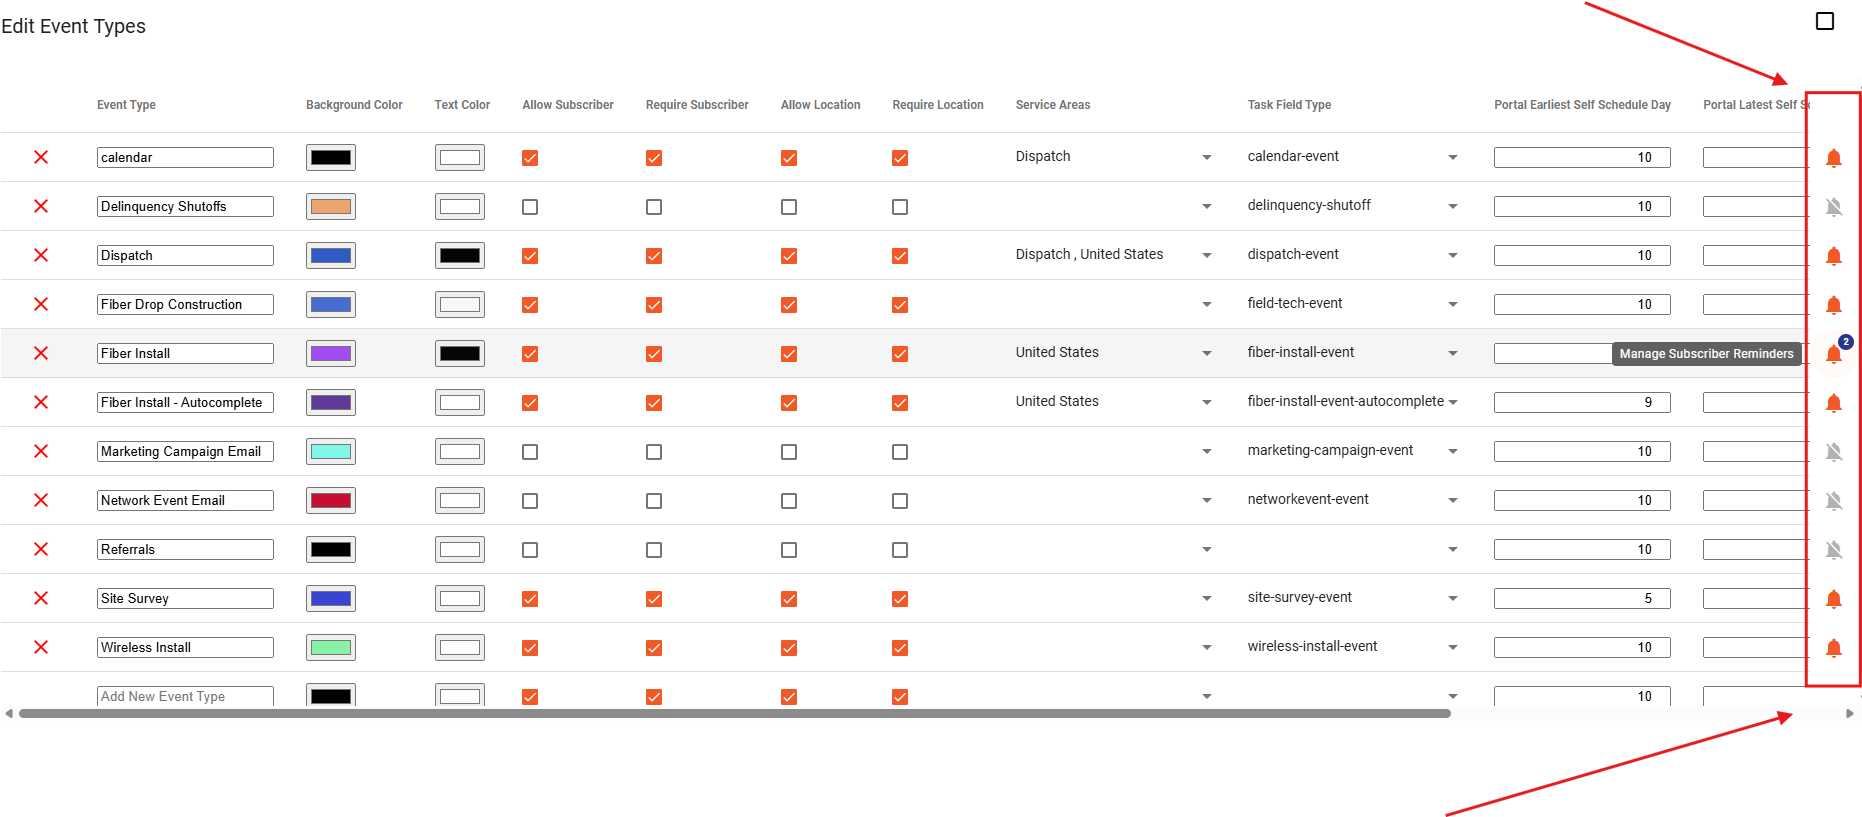
Go to your desired event type and click the bell-- this is where you can enable or disable reminders for that event.
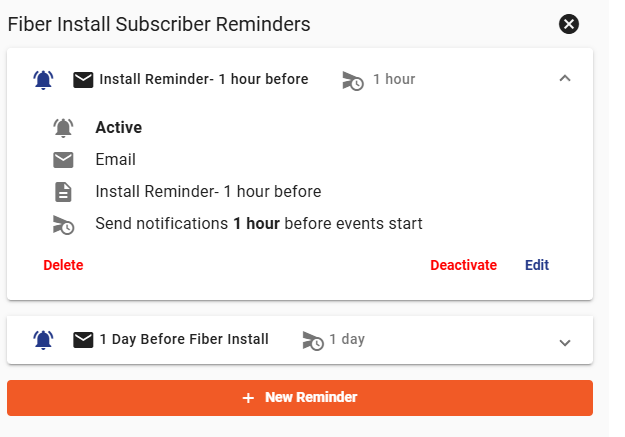
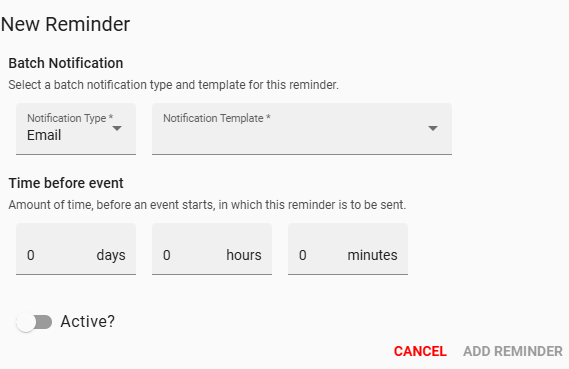
To attach your event reminder email, simply click to add reminder and select your template in the "Notification Template" box.
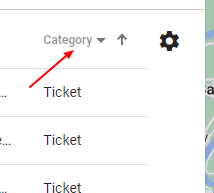
When it comes to batch notifications, there the number of emails can easily pile up. To make life easier, you can sort your notification templates into custom categories in the "Notification Template Categories" tab.
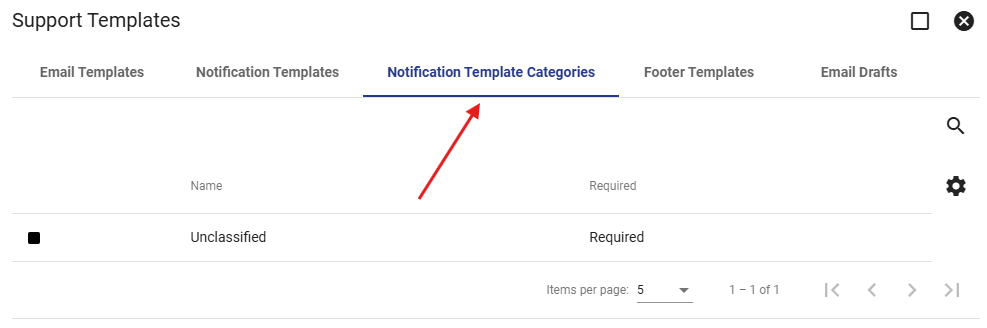
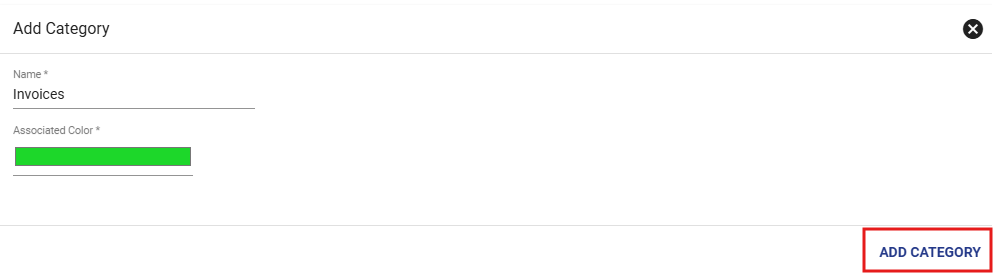
Select the Notification Template Categories tab to view all custom notification categories. To add a new category, click the Floating Action Button in the bottom right. This will open a popup window where you can choose a name and color for your category.
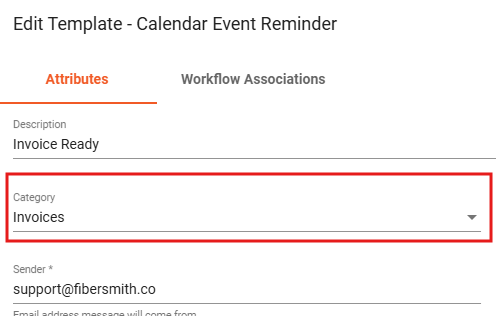
By default, your templates will be deemed "unclassified". To change the classification of a template, go to the Notification Template tab and click into your desired template. Click edit template and click on the category selector; finally, choose your desired category.
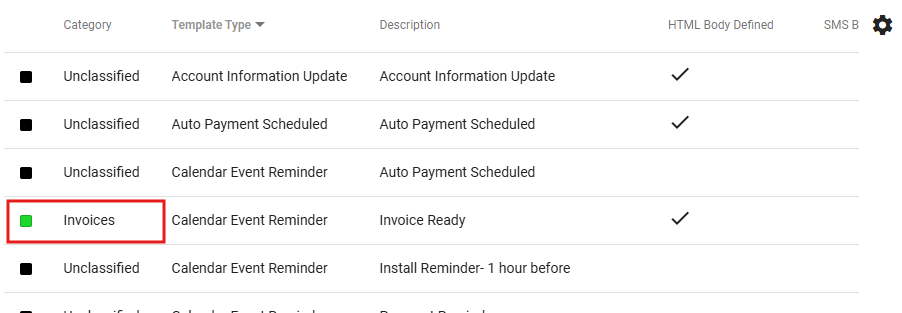
Now you can sort your list of notification templates by category types.
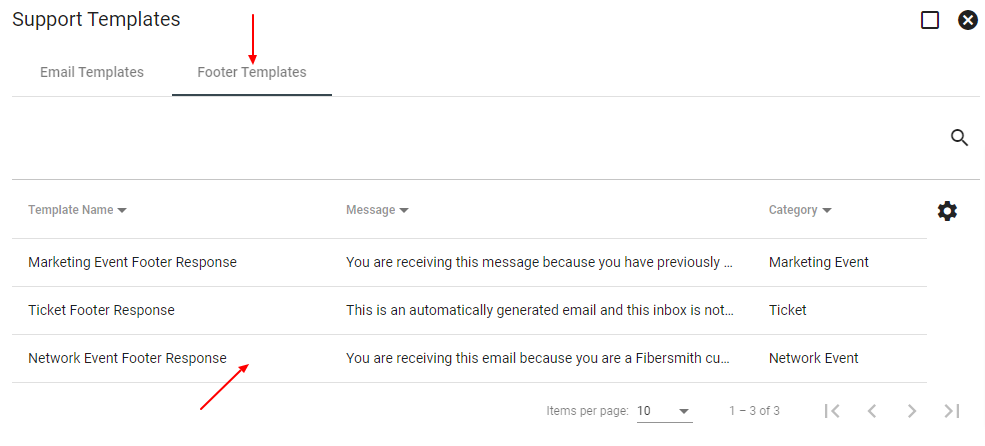
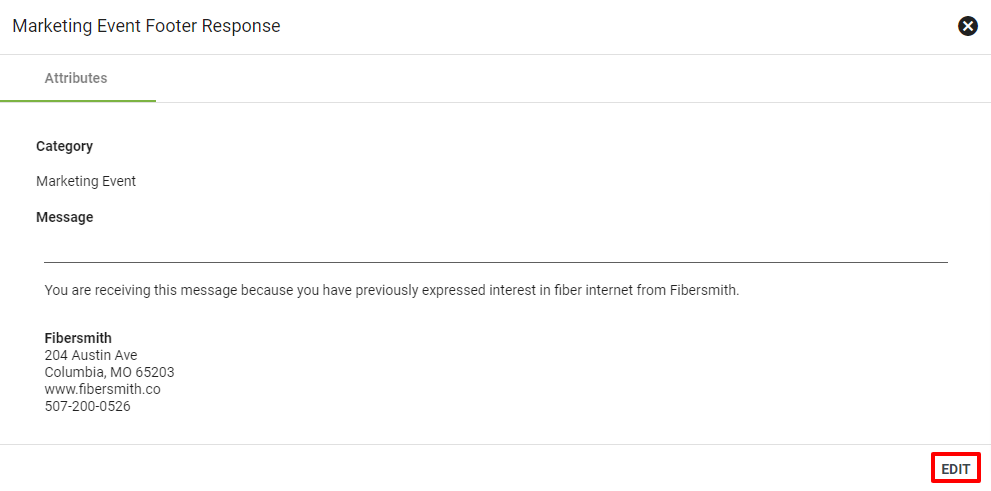
Select the Footer Templates tab to view all. Click on a template name to view more details of the footer template. You can view the template name, category, and footer message.
Select EDIT to start editing.
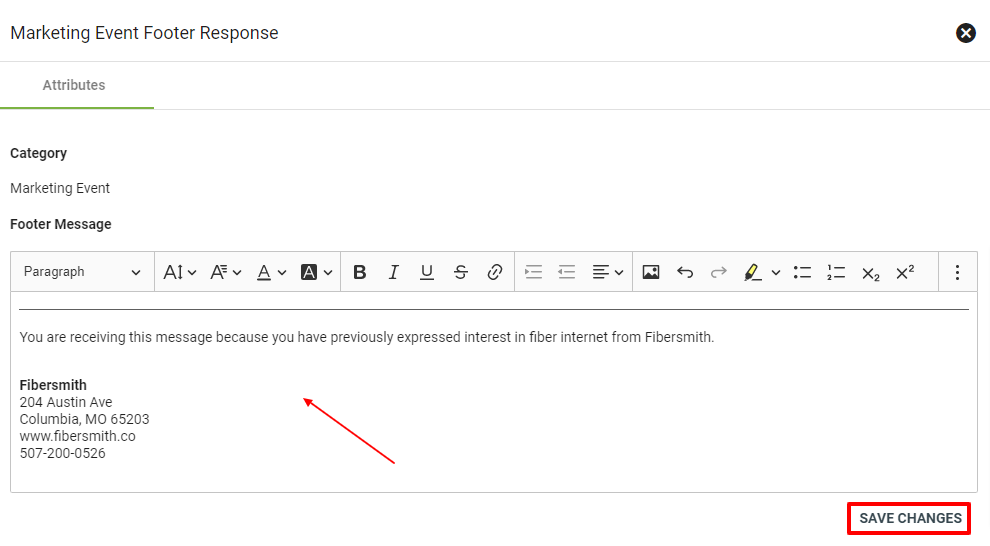
You can edit the footer message using the text editor. When finished, click SAVE CHANGES.
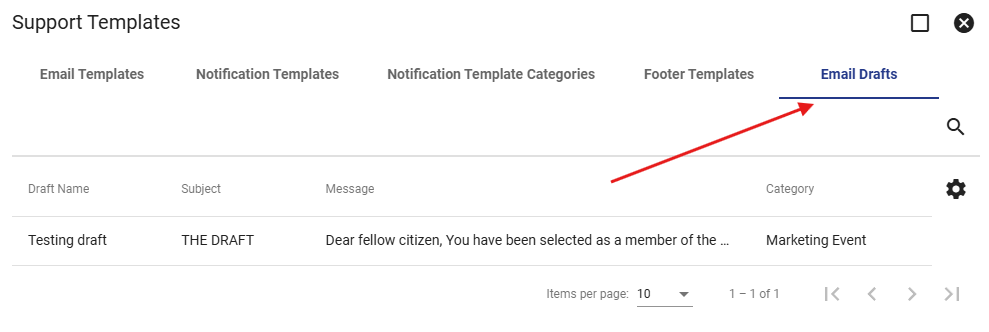
View Email Drafts
Select the Email Drafts tab to see all current drafts in Vision. Email drafts can be saved in Vision through marketing events, network events, and tickets.
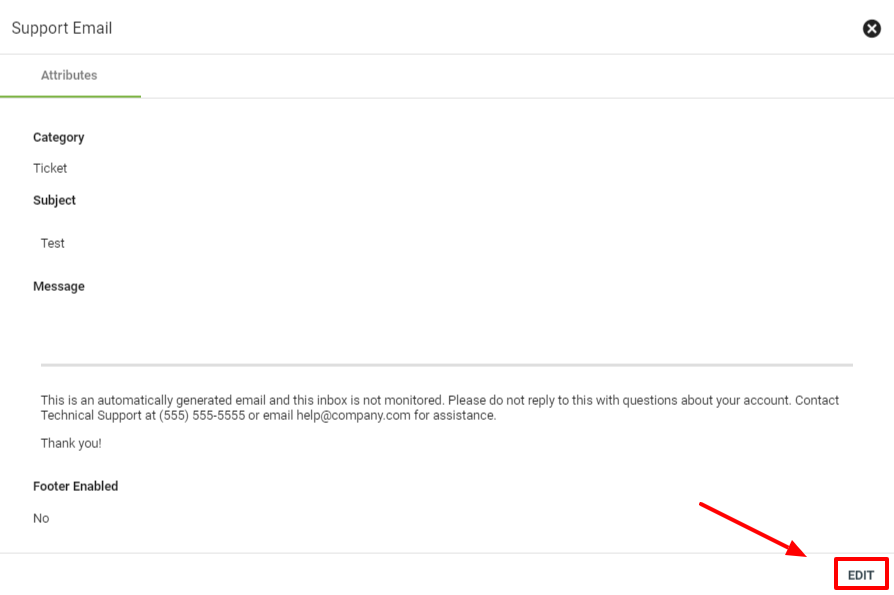
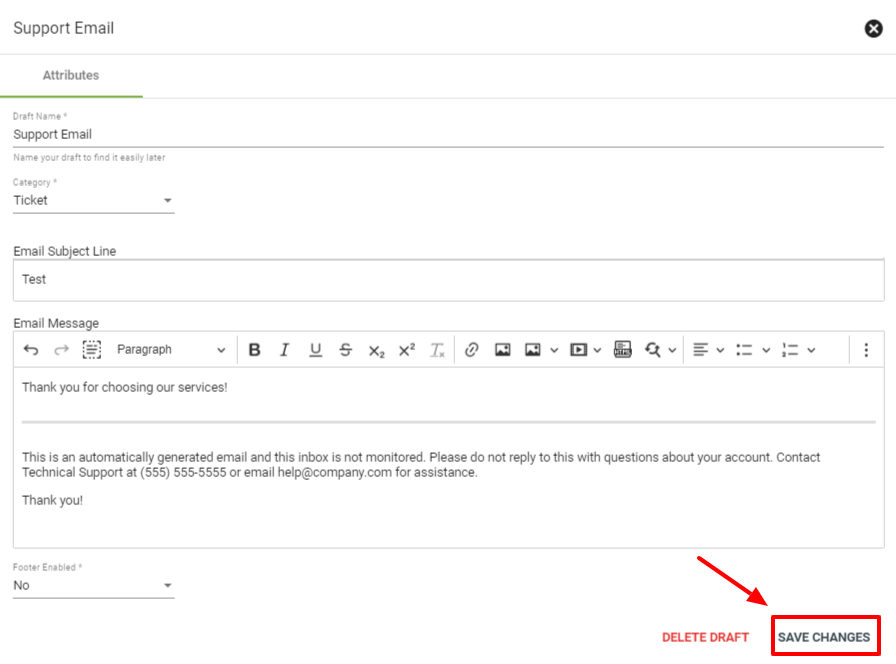
Edit Email Drafts
To edit an email draft select the draft that needs changing, then click EDIT The changes that can be made here are changes to the message in the email or to the footer that will be displayed below the message of the email.
Once the changes have been made to the email make sure to click SAVE CHANGES to confirm the changes to the email draft.
Designing HTML Emails
For more info on designing stylized emails with HTML in Vision, check out our page on HTML emails.