Subscriber - Services
The Services tab on the Subscriber Account Page shows all current and past services associated with the Location. From here you can view, add, edit, and cancel services as well as Invoice the subscriber.
Learn more about Network Hardware.

Select the Services tab to view all associated services with the account. Click into a service to view a breakdown of information.
The Services tab with an example of a wireless data package
Click each tab for a specific type of Service below.
In the Service Tab you are able to see if the subscriber has signed their contract or not.

Tie Service
Click on the
Only hardware options that are available at the subscriber location will display. Click on a piece of hardware to tie it to the service item.
Learn How to add hardware locations and tie to service items on the Support blog
The
Invoicing
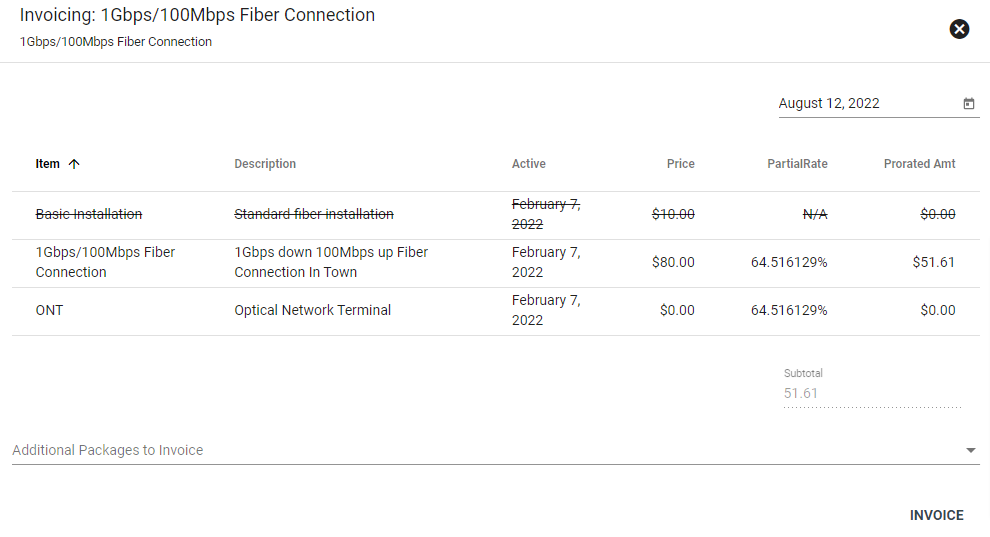
Click INVOICE in the lower right to generate an Invoice for a Subscriber.
The icon in the top righthand side of the page will indicate whether the account is invoiced by mail, email or both. The mailbox icon 
Edit Invoicing
Click on the appropriate service that corresponds to the Invoice that you want to edit. Then, click on the EDIT INVOICING
Select MAILED INVOICE if the subscriber wants to receive a paper copy of the Invoice rather than an electronic copy.
To deactivate invoicing for this subscriber, toggle the ACTIVE button to DEACTIVATE.
Click the dropdown menu to add an additional email address or to change the email address on file. When finished, select CONFIRM to save changes.
Add a New Service
To add a new service to the subscriber's account first click
At any point during this process you can click ![]() to use the Line of Sight tool in the upper right.
to use the Line of Sight tool in the upper right.
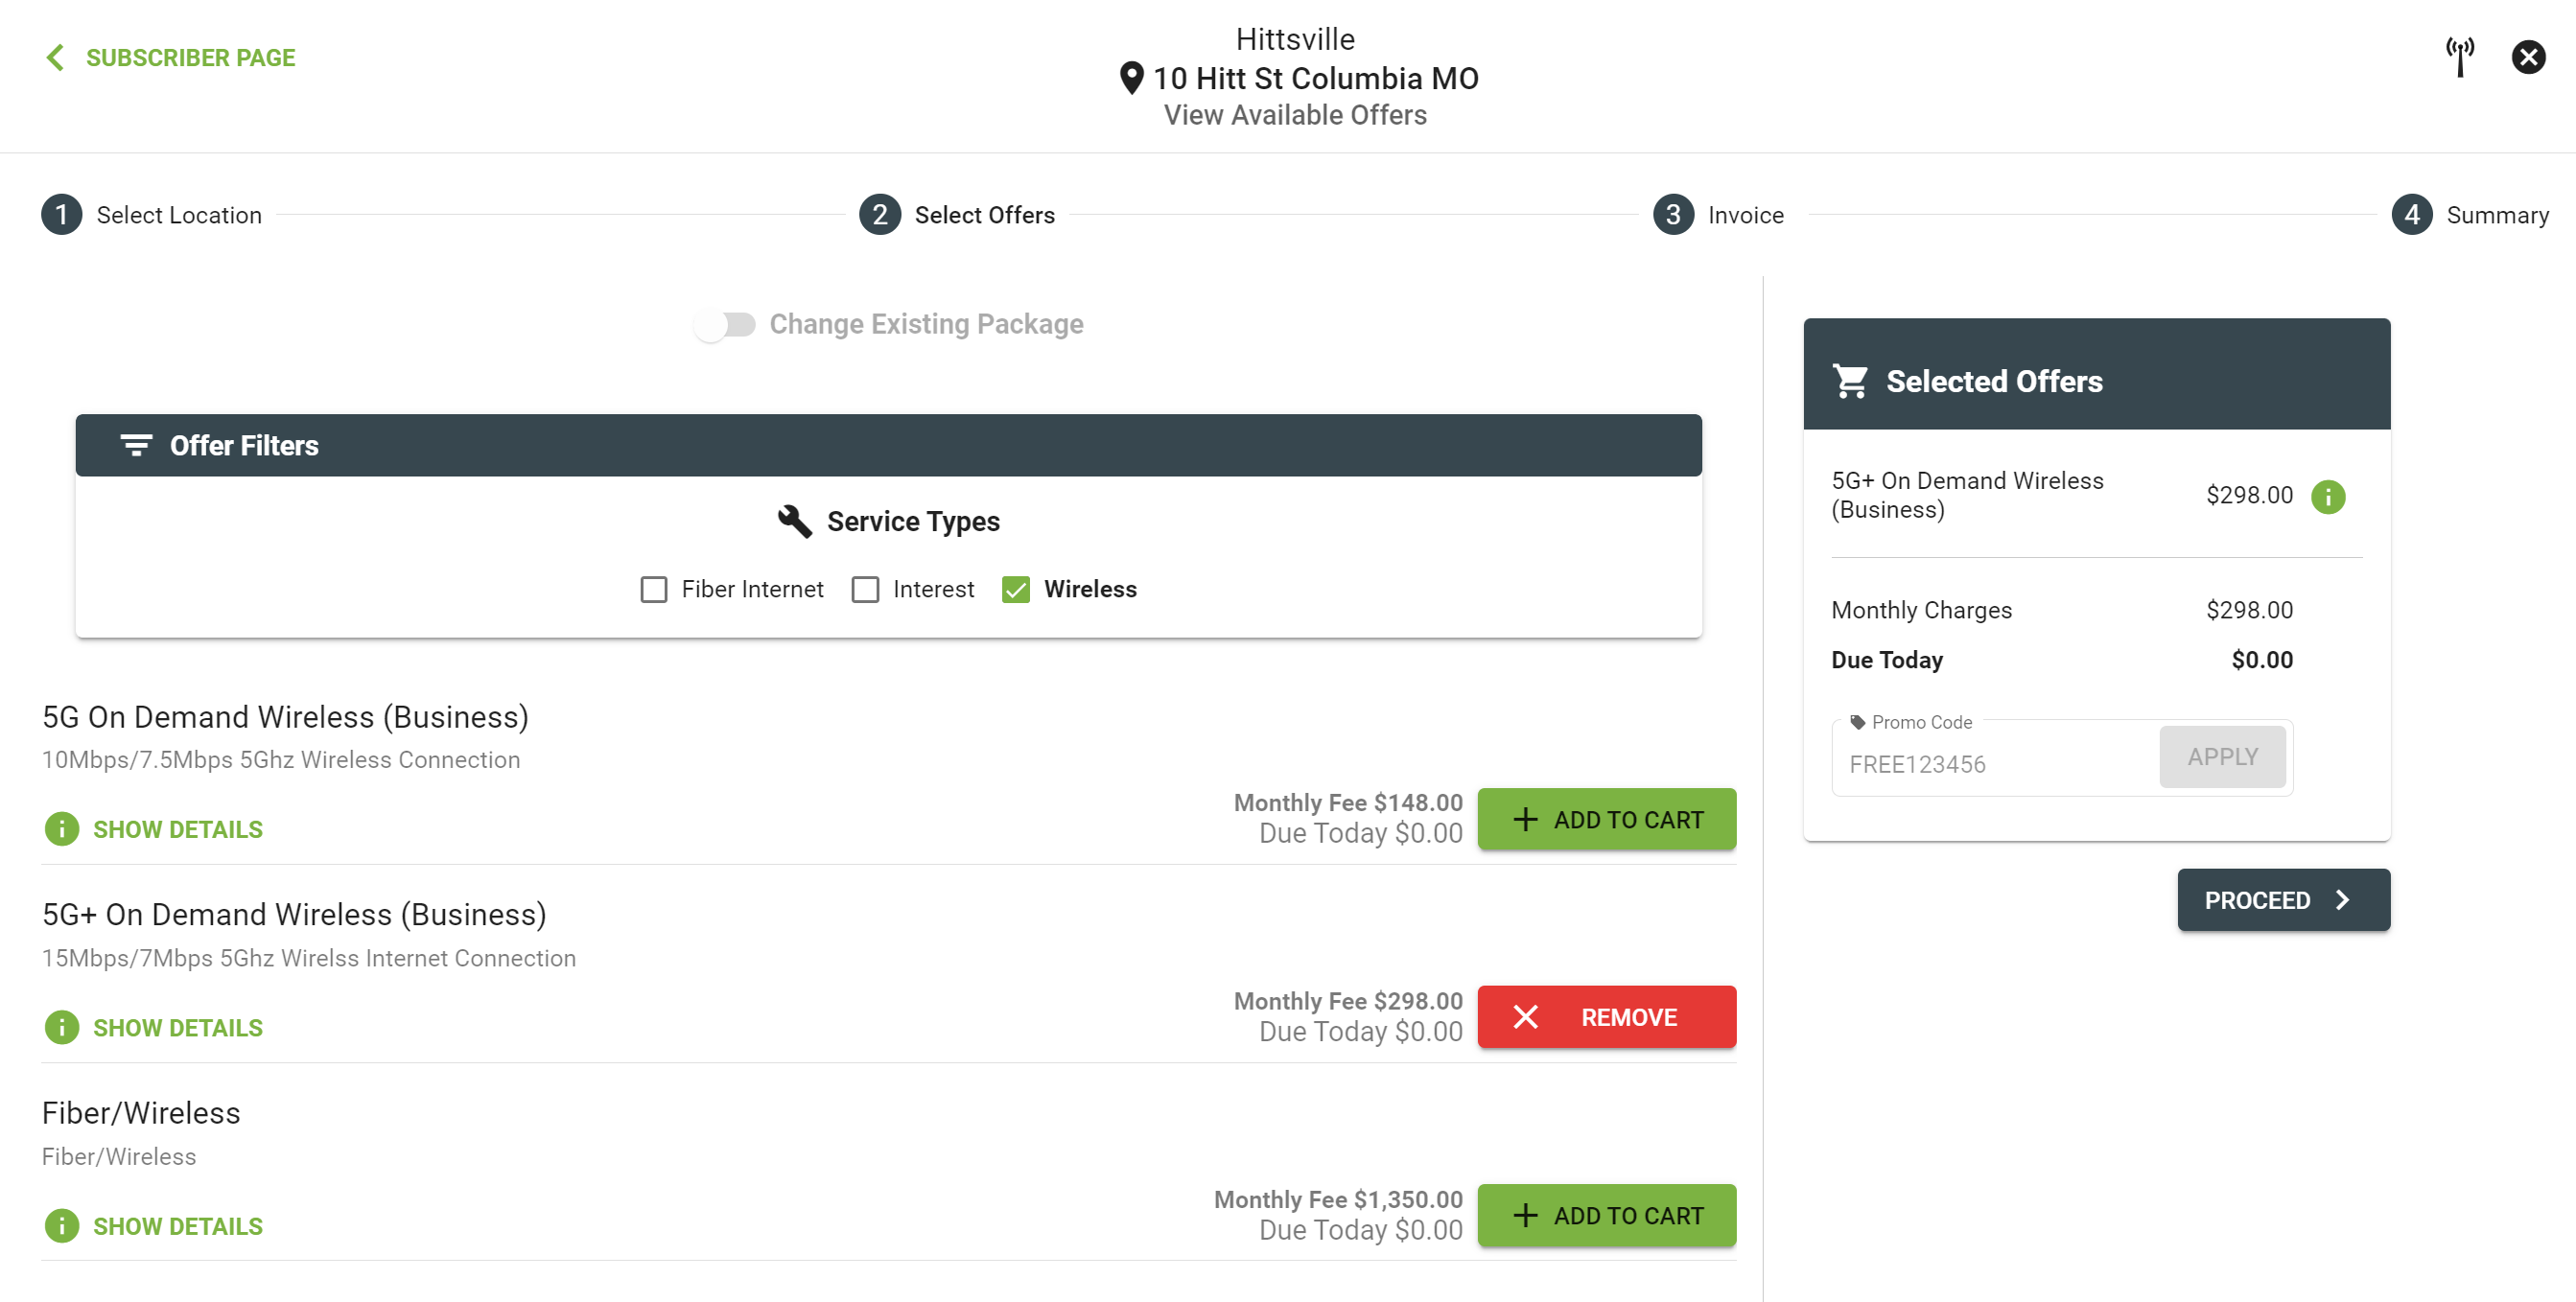
Sort through available Service Offers using the checkboxes to the left.
To change an existing Service Package click ![]() jump to editing a service for more.
jump to editing a service for more.
When ready click CONFIRM OFFER SELECTION.
Here we've selected a wireless offer for a business account. Click "show packages" to view more information.
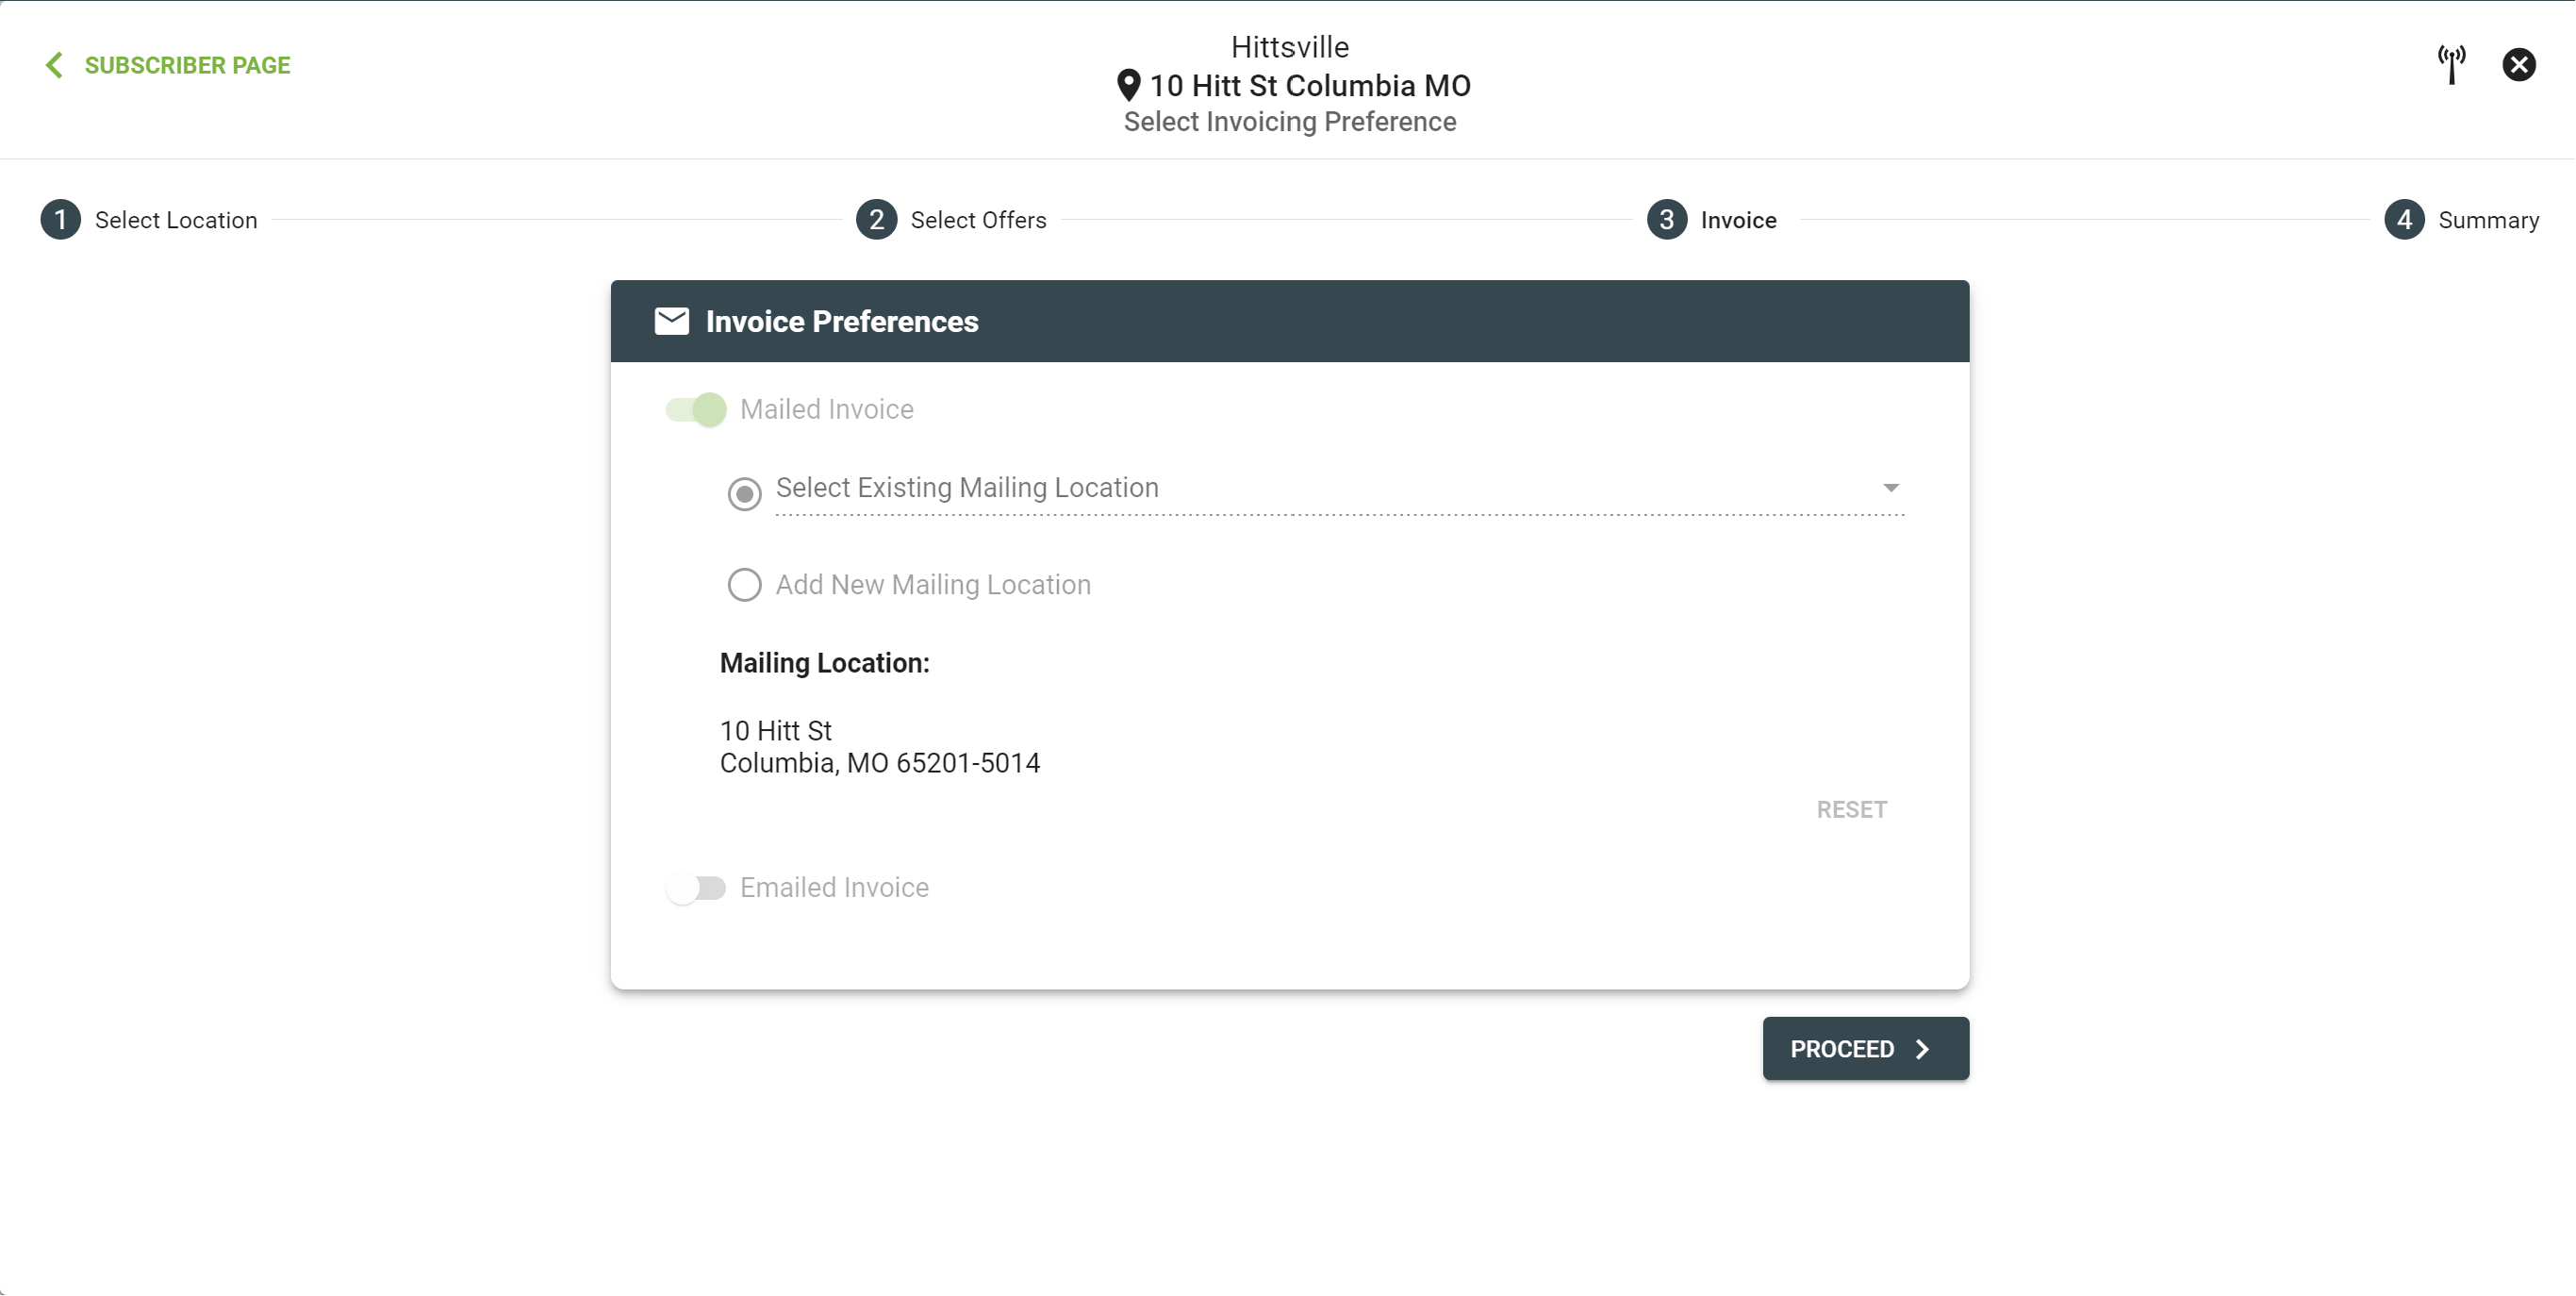
Previously selected Invoice options will be selected by default. Go to Edit Invoicing to change invoicing options. Click CONTINUE.
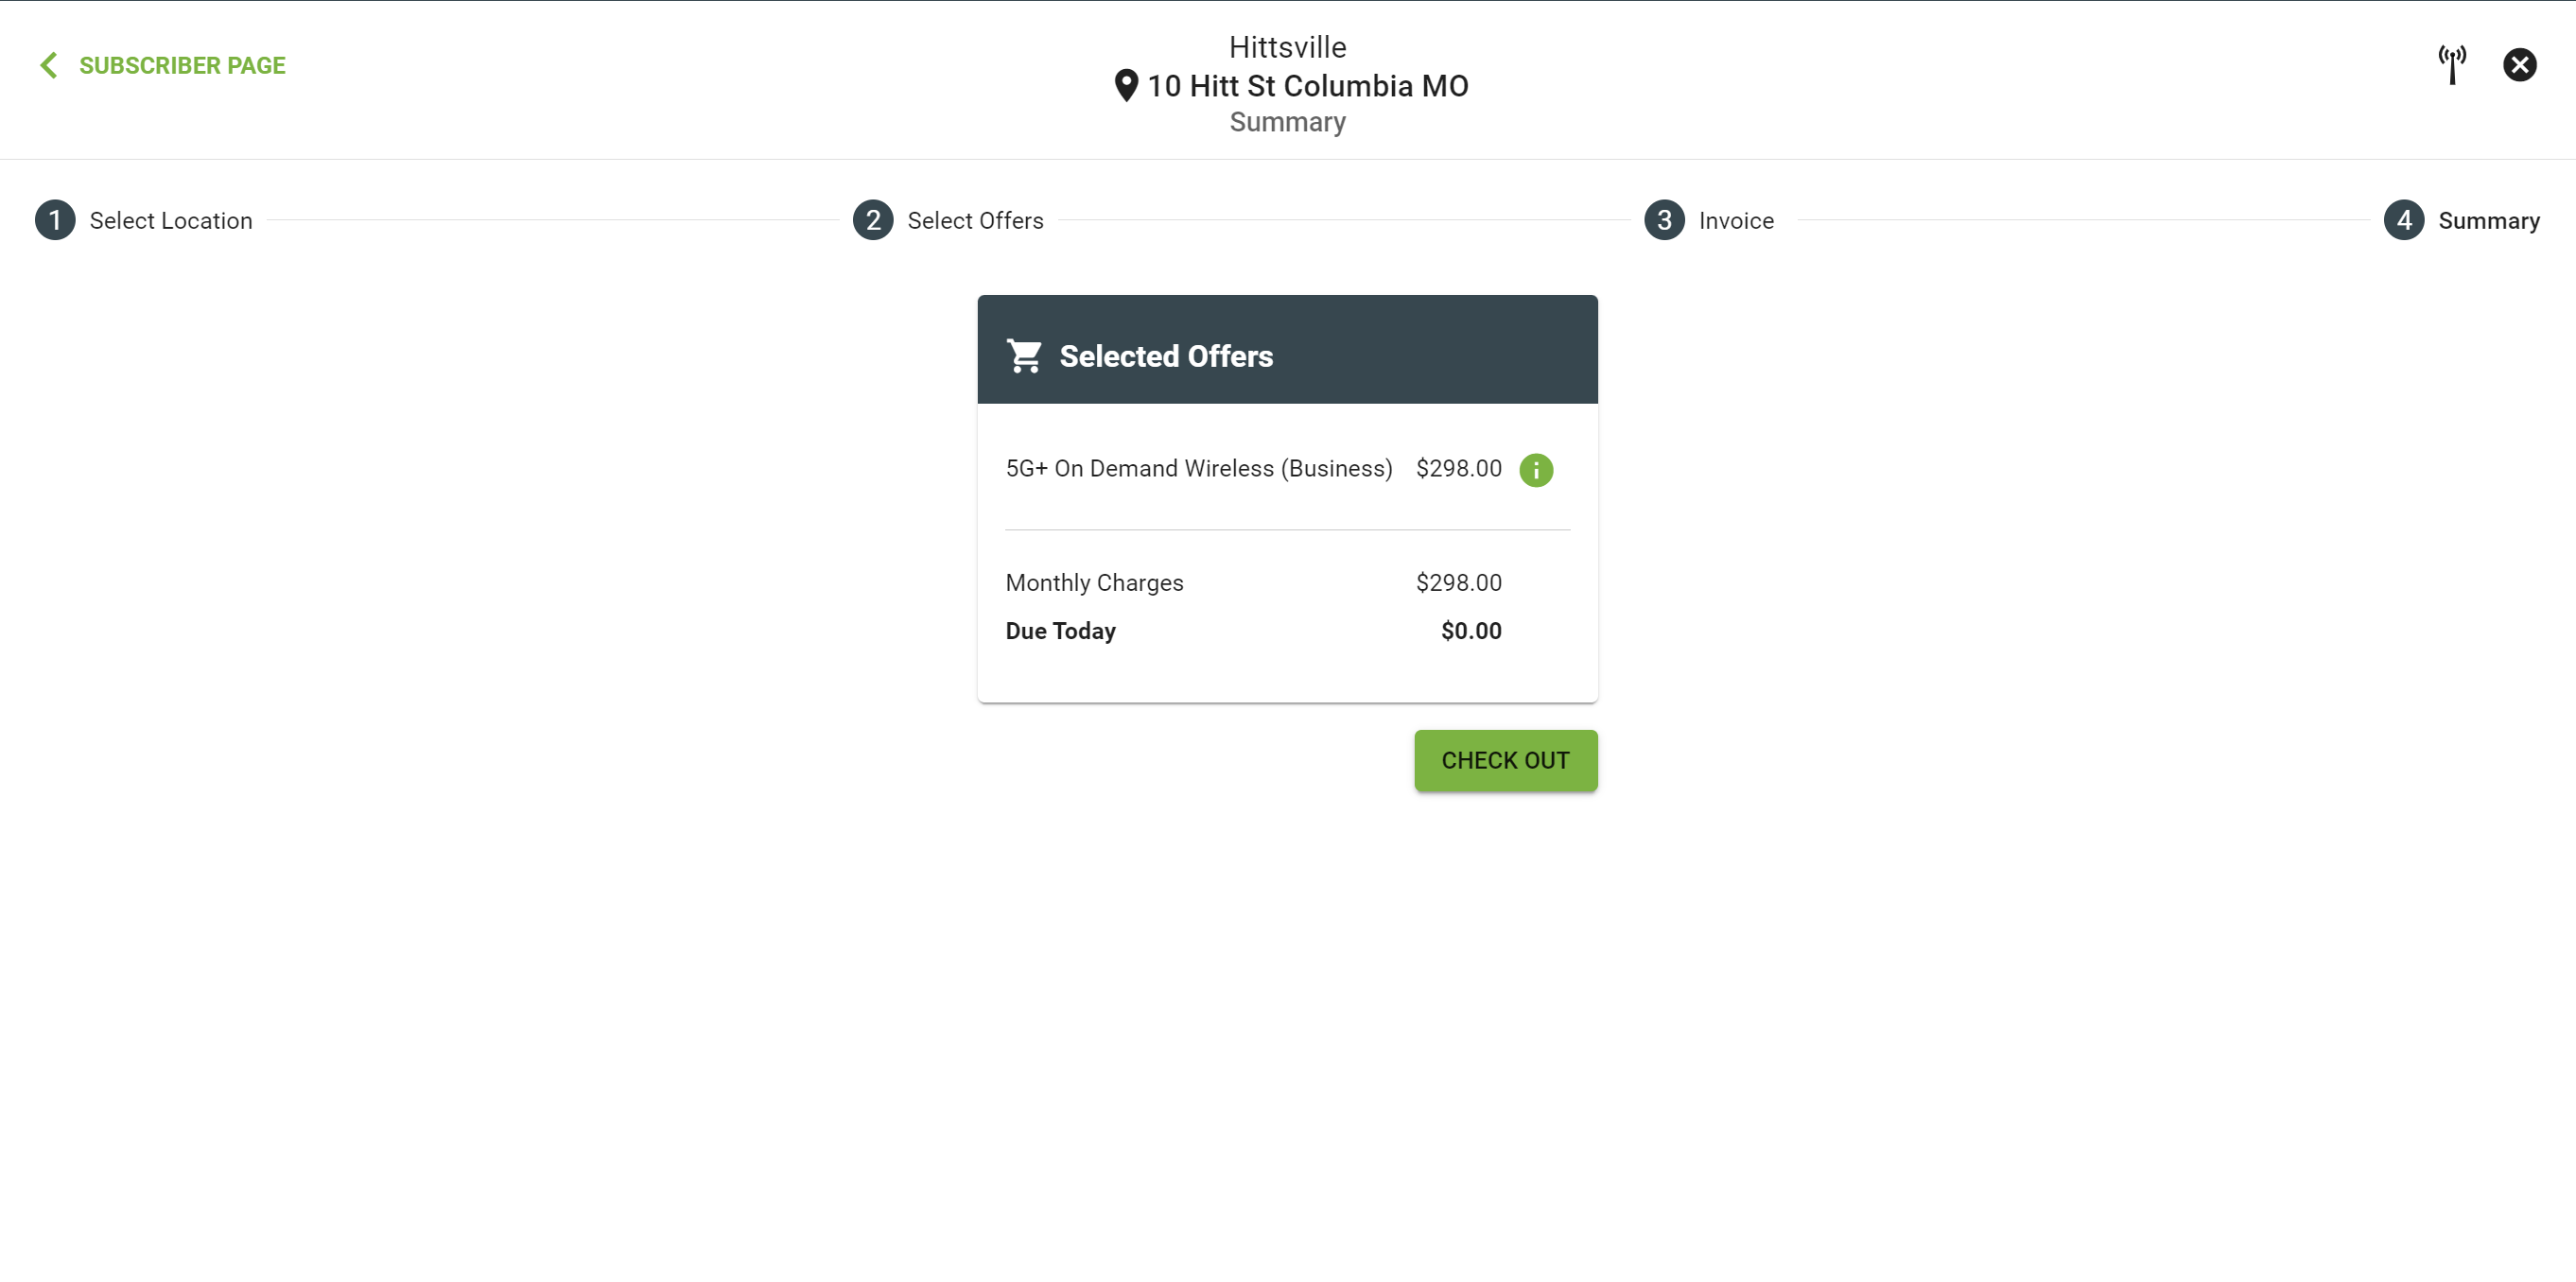
Review the summary of the services to add then click CHECK OUT.
Edit a Service
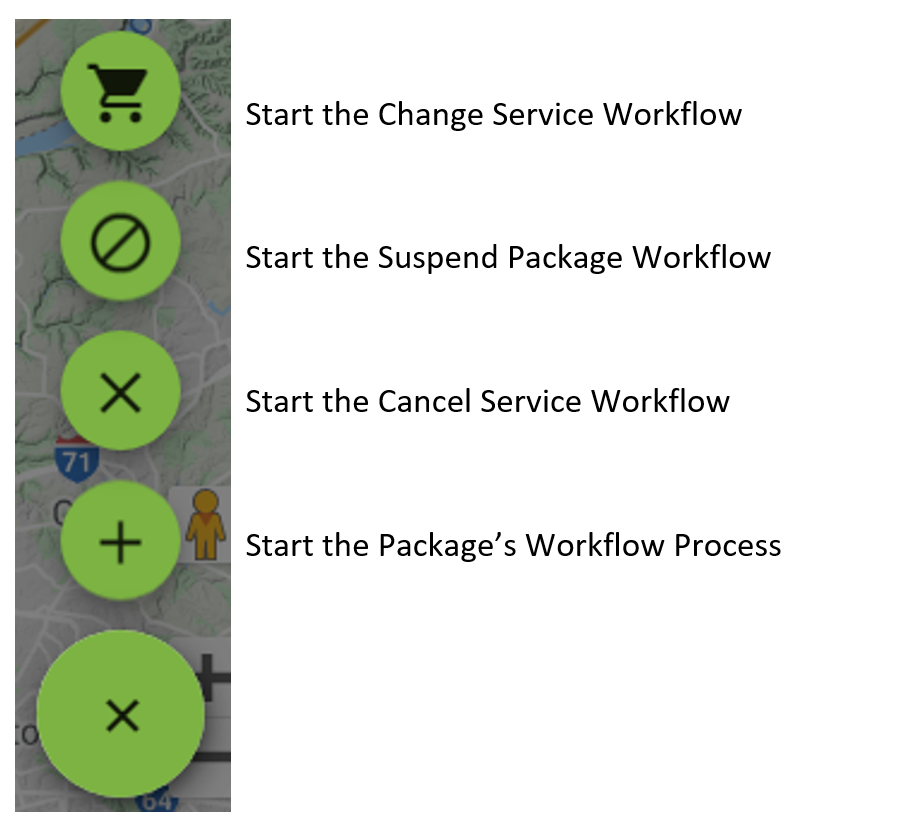
Click
Click
Not all workflows will display these options. View the specific workflow to see the available options, or reach out to your support team representative for assistance.
Changing a Service
Click the
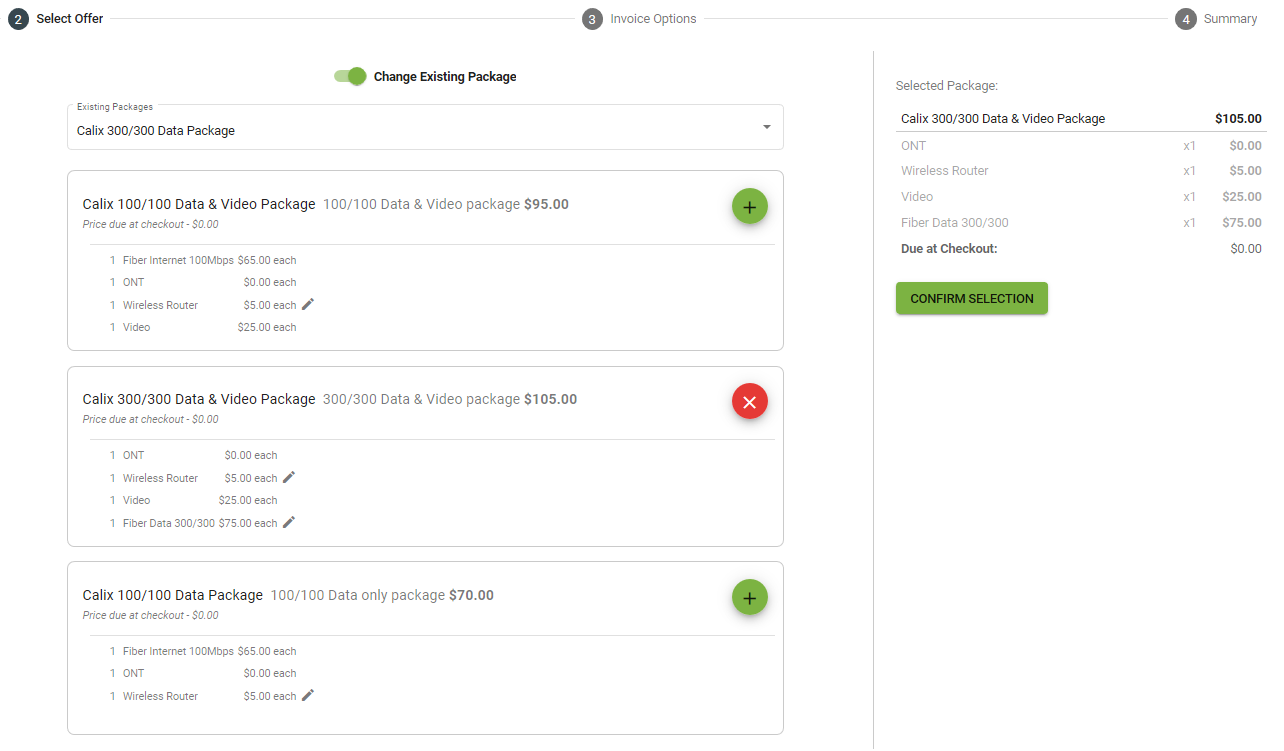
Now select a new package to replace the existing package with. Then click CONFIRM SELECTION.
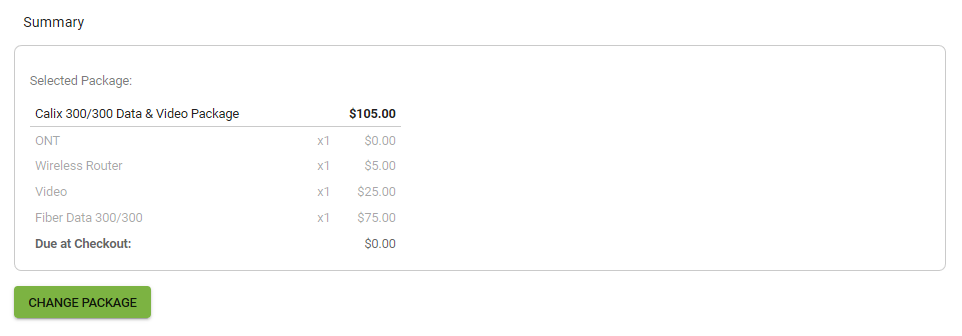
Now click CHANGE PACKAGE to start the Change Package Workflow.
Cancel a Service
To cancel a service, click the
Click
Select START PROCESS to begin the cancellation of the service.

